2015 CHEVROLET MALIBU start stop button
[x] Cancel search: start stop buttonPage 26 of 399
Black plate (19,1)Chevrolet Malibu Owner Manual (GMNA-Localizing-U.S./Canada/Mexico-
7575972) - 2015 - crc - 4/1/14
In Brief 1-19
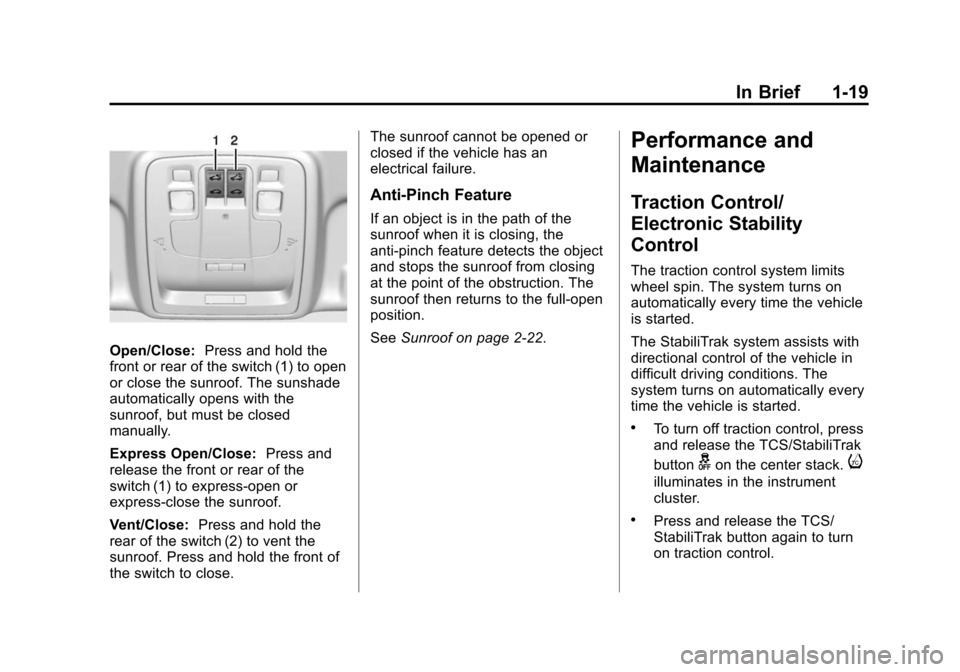
Open/Close:Press and hold the
front or rear of the switch (1) to open
or close the sunroof. The sunshade
automatically opens with the
sunroof, but must be closed
manually.
Express Open/Close: Press and
release the front or rear of the
switch (1) to express-open or
express-close the sunroof.
Vent/Close: Press and hold the
rear of the switch (2) to vent the
sunroof. Press and hold the front of
the switch to close. The sunroof cannot be opened or
closed if the vehicle has an
electrical failure.
Anti-Pinch Feature
If an object is in the path of the
sunroof when it is closing, the
anti-pinch feature detects the object
and stops the sunroof from closing
at the point of the obstruction. The
sunroof then returns to the full-open
position.
See
Sunroof on page 2-22.
Performance and
Maintenance
Traction Control/
Electronic Stability
Control
The traction control system limits
wheel spin. The system turns on
automatically every time the vehicle
is started.
The StabiliTrak system assists with
directional control of the vehicle in
difficult driving conditions. The
system turns on automatically every
time the vehicle is started.
.To turn off traction control, press
and release the TCS/StabiliTrak
button
gon the center stack.i
illuminates in the instrument
cluster.
.Press and release the TCS/
StabiliTrak button again to turn
on traction control.
Page 27 of 399
Black plate (20,1)Chevrolet Malibu Owner Manual (GMNA-Localizing-U.S./Canada/Mexico-
7575972) - 2015 - crc - 4/1/14
1-20 In Brief
.To turn off both traction control
and StabiliTrak, press and hold
the TCS/StabiliTrak button
gon
the center stack, until
iandg
illuminate in the instrument
cluster.
.Press and release the TCS/
StabiliTrak button again to turn
on both systems.
See Traction Control/Electronic
Stability Control on page 9-29.
Tire Pressure Monitor
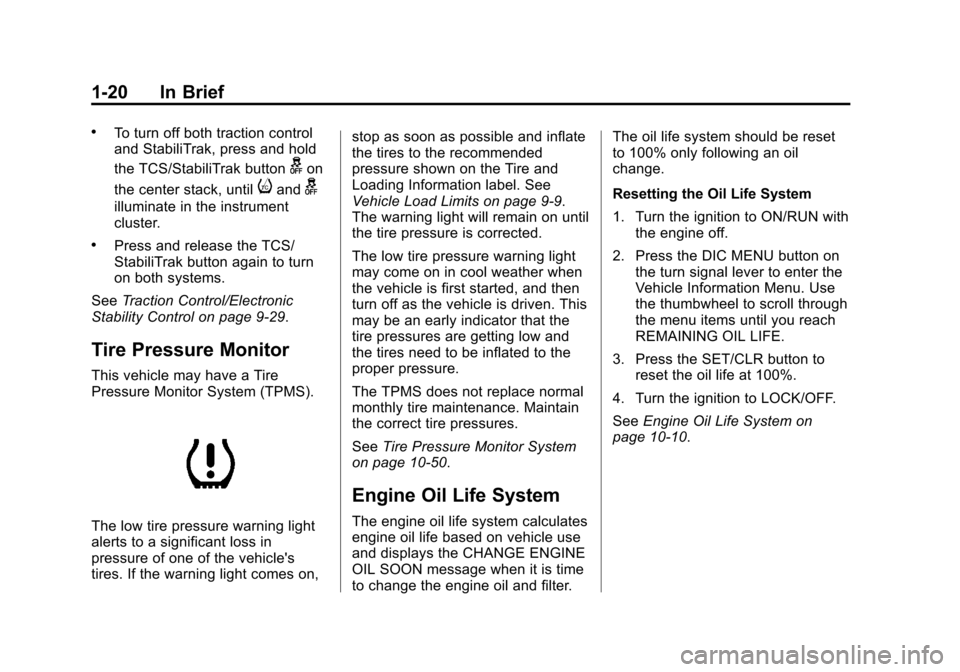
This vehicle may have a Tire
Pressure Monitor System (TPMS).
The low tire pressure warning light
alerts to a significant loss in
pressure of one of the vehicle's
tires. If the warning light comes on, stop as soon as possible and inflate
the tires to the recommended
pressure shown on the Tire and
Loading Information label. See
Vehicle Load Limits on page 9-9.
The warning light will remain on until
the tire pressure is corrected.
The low tire pressure warning light
may come on in cool weather when
the vehicle is first started, and then
turn off as the vehicle is driven. This
may be an early indicator that the
tire pressures are getting low and
the tires need to be inflated to the
proper pressure.
The TPMS does not replace normal
monthly tire maintenance. Maintain
the correct tire pressures.
See
Tire Pressure Monitor System
on page 10-50.
Engine Oil Life System
The engine oil life system calculates
engine oil life based on vehicle use
and displays the CHANGE ENGINE
OIL SOON message when it is time
to change the engine oil and filter. The oil life system should be reset
to 100% only following an oil
change.
Resetting the Oil Life System
1. Turn the ignition to ON/RUN with
the engine off.
2. Press the DIC MENU button on the turn signal lever to enter the
Vehicle Information Menu. Use
the thumbwheel to scroll through
the menu items until you reach
REMAINING OIL LIFE.
3. Press the SET/CLR button to reset the oil life at 100%.
4. Turn the ignition to LOCK/OFF.
See Engine Oil Life System on
page 10-10.
Page 36 of 399
Black plate (7,1)Chevrolet Malibu Owner Manual (GMNA-Localizing-U.S./Canada/Mexico-
7575972) - 2015 - crc - 4/1/14
Keys, Doors, and Windows 2-7
2. Insert the vehicle key of the newtransmitter into the key lock
cylinder on the outside of the
driver door and turn the key to
the unlock position five times
within 10 seconds.
The Driver Information Center
(DIC) displays READY FOR
REMOTE #2, 3, 4 or 5.
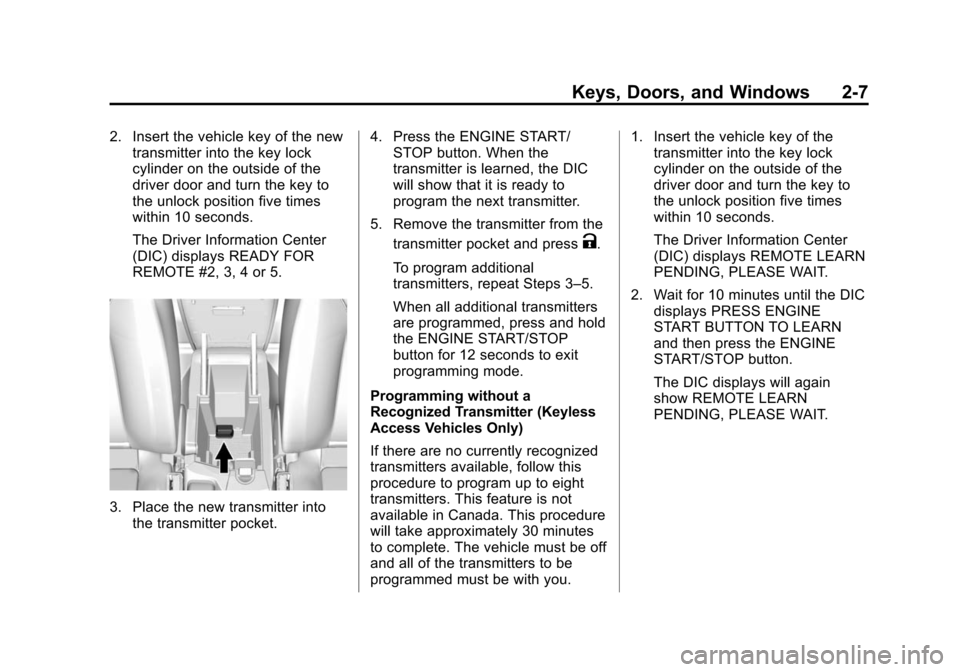
3. Place the new transmitter into
the transmitter pocket. 4. Press the ENGINE START/
STOP button. When the
transmitter is learned, the DIC
will show that it is ready to
program the next transmitter.
5. Remove the transmitter from the transmitter pocket and press
K.
To program additional
transmitters, repeat Steps 3–5.
When all additional transmitters
are programmed, press and hold
the ENGINE START/STOP
button for 12 seconds to exit
programming mode.
Programming without a
Recognized Transmitter (Keyless
Access Vehicles Only)
If there are no currently recognized
transmitters available, follow this
procedure to program up to eight
transmitters. This feature is not
available in Canada. This procedure
will take approximately 30 minutes
to complete. The vehicle must be off
and all of the transmitters to be
programmed must be with you. 1. Insert the vehicle key of the
transmitter into the key lock
cylinder on the outside of the
driver door and turn the key to
the unlock position five times
within 10 seconds.
The Driver Information Center
(DIC) displays REMOTE LEARN
PENDING, PLEASE WAIT.
2. Wait for 10 minutes until the DIC displays PRESS ENGINE
START BUTTON TO LEARN
and then press the ENGINE
START/STOP button.
The DIC displays will again
show REMOTE LEARN
PENDING, PLEASE WAIT.
Page 37 of 399
Black plate (8,1)Chevrolet Malibu Owner Manual (GMNA-Localizing-U.S./Canada/Mexico-
7575972) - 2015 - crc - 4/1/14
2-8 Keys, Doors, and Windows
3. Repeat Step 2 two additionaltimes. After the third time, all
previously known transmitters
will no longer work with the
vehicle. Remaining transmitters
can be relearned during the next
steps.
The DIC display should now
show READY FOR REMOTE
# 1.
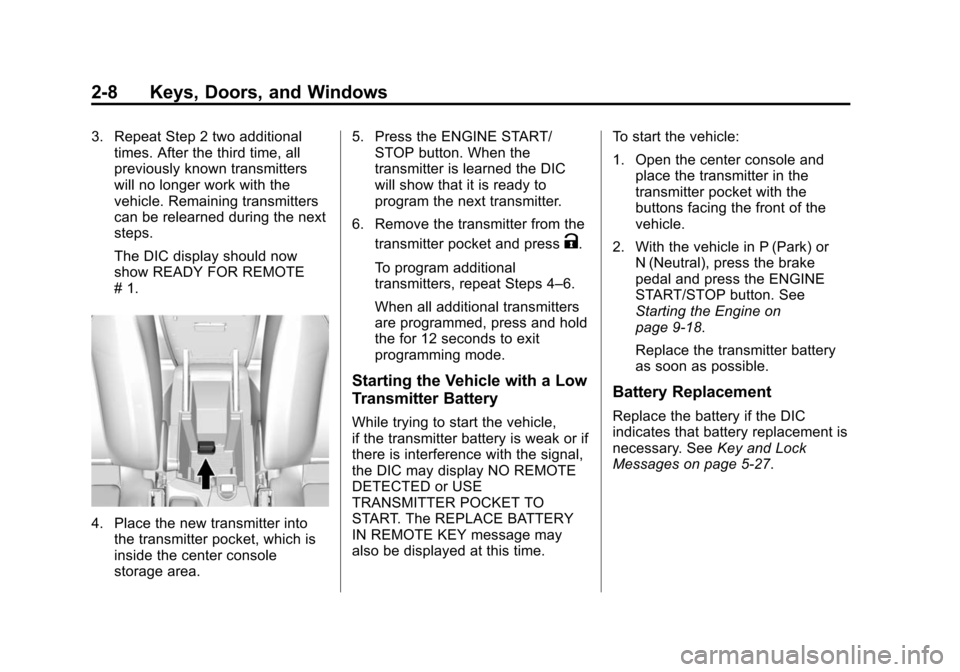
4. Place the new transmitter intothe transmitter pocket, which is
inside the center console
storage area. 5. Press the ENGINE START/
STOP button. When the
transmitter is learned the DIC
will show that it is ready to
program the next transmitter.
6. Remove the transmitter from the transmitter pocket and press
K.
To program additional
transmitters, repeat Steps 4–6.
When all additional transmitters
are programmed, press and hold
the for 12 seconds to exit
programming mode.
Starting the Vehicle with a Low
Transmitter Battery
While trying to start the vehicle,
if the transmitter battery is weak or if
there is interference with the signal,
the DIC may display NO REMOTE
DETECTED or USE
TRANSMITTER POCKET TO
START. The REPLACE BATTERY
IN REMOTE KEY message may
also be displayed at this time. To start the vehicle:
1. Open the center console and
place the transmitter in the
transmitter pocket with the
buttons facing the front of the
vehicle.
2. With the vehicle in P (Park) or N (Neutral), press the brake
pedal and press the ENGINE
START/STOP button. See
Starting the Engine on
page 9-18.
Replace the transmitter battery
as soon as possible.
Battery Replacement
Replace the battery if the DIC
indicates that battery replacement is
necessary. See Key and Lock
Messages on page 5-27.
Page 59 of 399
Black plate (6,1)Chevrolet Malibu Owner Manual (GMNA-Localizing-U.S./Canada/Mexico-
7575972) - 2015 - crc - 4/1/14
3-6 Seats and Restraints
Memory Seats
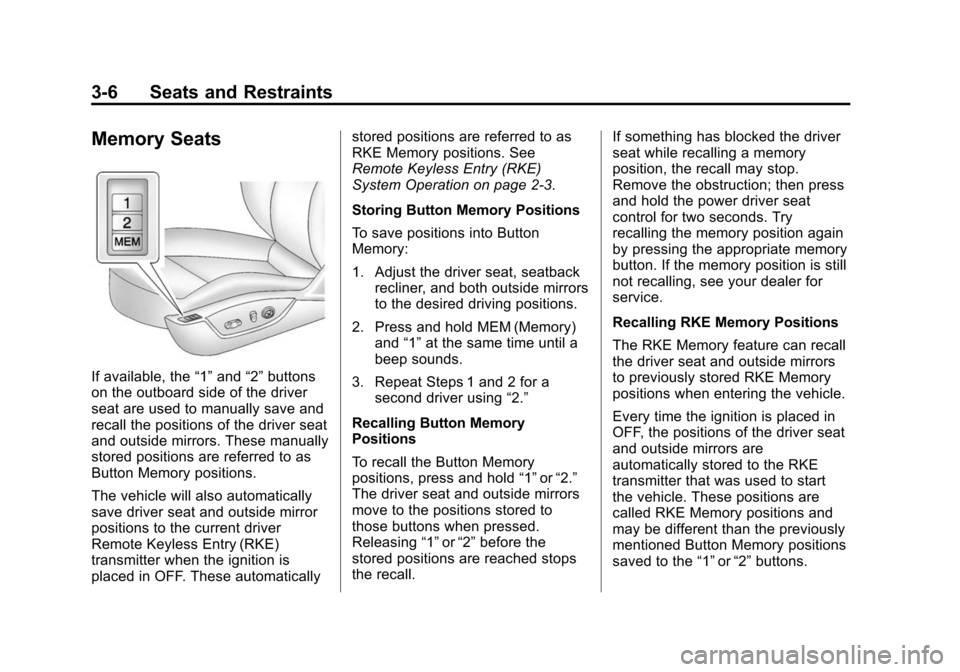
If available, the“1”and “2”buttons
on the outboard side of the driver
seat are used to manually save and
recall the positions of the driver seat
and outside mirrors. These manually
stored positions are referred to as
Button Memory positions.
The vehicle will also automatically
save driver seat and outside mirror
positions to the current driver
Remote Keyless Entry (RKE)
transmitter when the ignition is
placed in OFF. These automatically stored positions are referred to as
RKE Memory positions. See
Remote Keyless Entry (RKE)
System Operation on page 2-3.
Storing Button Memory Positions
To save positions into Button
Memory:
1. Adjust the driver seat, seatback
recliner, and both outside mirrors
to the desired driving positions.
2. Press and hold MEM (Memory) and “1”at the same time until a
beep sounds.
3. Repeat Steps 1 and 2 for a second driver using “2.”
Recalling Button Memory
Positions
To recall the Button Memory
positions, press and hold “1”or“2.”
The driver seat and outside mirrors
move to the positions stored to
those buttons when pressed.
Releasing “1”or“2” before the
stored positions are reached stops
the recall. If something has blocked the driver
seat while recalling a memory
position, the recall may stop.
Remove the obstruction; then press
and hold the power driver seat
control for two seconds. Try
recalling the memory position again
by pressing the appropriate memory
button. If the memory position is still
not recalling, see your dealer for
service.
Recalling RKE Memory Positions
The RKE Memory feature can recall
the driver seat and outside mirrors
to previously stored RKE Memory
positions when entering the vehicle.
Every time the ignition is placed in
OFF, the positions of the driver seat
and outside mirrors are
automatically stored to the RKE
transmitter that was used to start
the vehicle. These positions are
called RKE Memory positions and
may be different than the previously
mentioned Button Memory positions
saved to the
“1”or“2” buttons.
Page 111 of 399
Black plate (4,1)Chevrolet Malibu Owner Manual (GMNA-Localizing-U.S./Canada/Mexico-
7575972) - 2015 - crc - 4/1/14
5-4 Instruments and Controls
Wiper Parking
If the ignition is put in OFF while the
wipers are on LO, HI, or INT, they
will immediately stop.
If the windshield wiper lever is then
moved to OFF before the driver
door is opened or within 10 minutes,
the wipers will restart and move to
the base of the windshield.
If the ignition is put in OFF while the
wipers are performing wipes due to
windshield washing, the wipers
continue to run until they reach the
base of the windshield.
nL(Windshield Washer): Pull
the windshield wiper lever toward
you to spray washer fluid and
activate the wipers. The wipers will
continue until the lever is released
or the maximum wash time is
reached. When the lever is
released, additional wipes may
occur depending on how long the
windshield washer had been
activated. See
Washer Fluid on page 10-18 for
information on filling the windshield
washer fluid reservoir.
{Warning
In freezing weather, do not use
the washer until the windshield is
warmed. Otherwise the washer
fluid can form ice on the
windshield, blocking your vision.
Compass
The vehicle may have a compass
display on the center stack. The
compass receives its heading and
other information from the Global
Positioning System (GPS) antenna,
StabiliTrak
®, and vehicle speed
information.
The compass system is designed to
operate for a certain number of
miles or degrees of turn before
needing a signal from the GPS
satellites. When the compass
display shows CAL, drive the
vehicle for a short distance in an open area where it can receive a
GPS signal. The compass system
will automatically determine when a
GPS signal is restored and provide
a heading again. See
Compass
Messages on page 5-25 for the
messages that may be displayed for
the compass.
Clock
The infotainment system controls
are used to access the time and
date settings through the menu
system. The clock menu can only
be used with the radio on while in
ON/RUN or ACC/ACCESSORY.
See Overview on page 7-2 for
information about how to use the
menu system. For vehicles with a
navigation system, see the
navigation manual.
Setting the Clock (Radio
with CD)
To set the time:
1. Press the CONFIG button and select Time Settings.
Page 190 of 399
Black plate (3,1)Chevrolet Malibu Owner Manual (GMNA-Localizing-U.S./Canada/Mexico-
7575972) - 2015 - crc - 4/1/14
Climate Controls 8-3
higher humidity inside the vehicle
and window fogging before the
engine restarts.
Pressing the
0button during an
auto stop will restart the engine to
prevent window fogging. To reach
comfort levels quickly during an
auto stop, the engine will restart if
the air conditioner is off and AUTO
or
#is selected.
For comfort a/c, press
#again.
The indicator will turn amber.
When the indicator light is on, the
air conditioner runs automatically to
cool the air inside the vehicle or to
dry the air needed to defog the
windshield faster.
h(Recirculation): Press to turn
on recirculation. An indicator light
comes on. Air is recirculated to
quickly cool the inside of the vehicle
or prevent outside air and odors
from entering.
MorL(Heated Seats, If
Equipped): Press to turn the
heated seats on or off. See Heated
Front Seats on page 3-7.
Rear Window Defogger
=(Rear Window Defogger):
Press to turn the rear window
defogger on or off.
The rear window defogger turns off
automatically after about
10 minutes. If turned on again, it
runs for about five minutes before
turning off. At higher speeds, the
rear window defogger may stay on
continuously.
If equipped with heated outside
rearview mirrors, they turn on with
the rear window defogger and help
to clear fog or frost from the surface
of the mirror. See Heated Mirrors on
page 2-19.
{Caution
Using a razor blade or sharp
object on the inside rear window
can damage the antenna or
defogger. Repairs would not be
covered by the vehicle warranty.
Do not stick anything to the rear
window.
Sensors
The solar sensor on top of the
instrument panel near the
windshield monitors the solar heat.
The climate control system uses the
sensor information to adjust the
temperature, fan speed,
recirculation, and air delivery mode
for best comfort.
If the sensor is covered, the
automatic climate control system
may not work properly.
Page 193 of 399

Black plate (6,1)Chevrolet Malibu Owner Manual (GMNA-Localizing-U.S./Canada/Mexico-
7575972) - 2015 - crc - 4/1/14
8-6 Climate Controls
-(Defog):Air is directed to the
windshield and floor outlets to clear
the windows of fog or moisture.
0(Defrost): Press to clear the
windshield of fog or frost more
quickly. Air is directed to the
windshield and side window outlets.
For best results, clear all snow and
ice from the windshield before
defrosting.
#(Air Conditioning (For
Non-Stop/Start Vehicles)): Press
to turn the air conditioning on or off.
If the fan is turned off or the outside
temperature falls below freezing, the
air conditioner will not run and the
indicator light turns off.
Press AUTO to return to automatic
operation and the air conditioner
runs as needed. When the indicator
light is on, the air conditioner runs
automatically to cool the air inside
the vehicle or to dry the air needed
to defog the windshield faster.
#(Comfort/Eco Air Conditioning
(For Stop/Start Vehicles)): Press
to cycle between the off, comfort,
and eco (economy) air conditioning
modes. The indicator will be lit in
comfort and eco modes and turns
off when there is no A/C function.
If the fan is turned off or the outside
temperature falls below freezing, the
air conditioner will not run and the
indicator light turns off.
For eco a/c, press
#. The indicator
will turn green. This setting
balances fuel economy and air
conditioning comfort. In warm
weather conditions, auto stops may
occur more frequently and the
vehicle interior may be warmer as
compared to the comfort air
conditioning. This setting allows
higher humidity inside the vehicle
and window fogging before the
engine restarts.
Pressing the
0button during an
auto stop will restart the engine to
prevent window fogging. To reach
comfort levels quickly during an auto stop, the engine will restart if
the air conditioner is off and AUTO
or
#is selected.
If temperature controls are adjusted
cooler by more than 1°C (1°F)
during an auto stop, the engine will
restart to ensure that comfort is
reached.
For comfort a/c, press
#again.
The indicator will turn amber.
Pressing
#again cancels
automatic air conditioning and turns
off the air conditioner. Press AUTO
to return to automatic operation and
the air conditioner runs
automatically as needed. When the
indicator light is on, the air
conditioner runs automatically to
cool the air inside the vehicle or to
dry the air needed to defog the
windshield faster.
h(Recirculation): Press to turn
on recirculation. An indicator light
comes on. Air is recirculated to