2015 CHEVROLET EQUINOX stop start
[x] Cancel search: stop startPage 231 of 391
Black plate (34,1)Chevrolet Equinox Owner Manual (GMNA-Localizing-U.S./Canada-
7707483) - 2015 - crc - 9/29/14
9-34 Driving and Operating
Ifdcomes on and stays on:
1. Stop the vehicle.
2. Turn the engine off and wait 15 seconds.
3. Start the engine.
Drive the vehicle. If
dcomes on
and stays on, the vehicle may need
more time to diagnose the problem.
If the condition persists, see your
dealer.
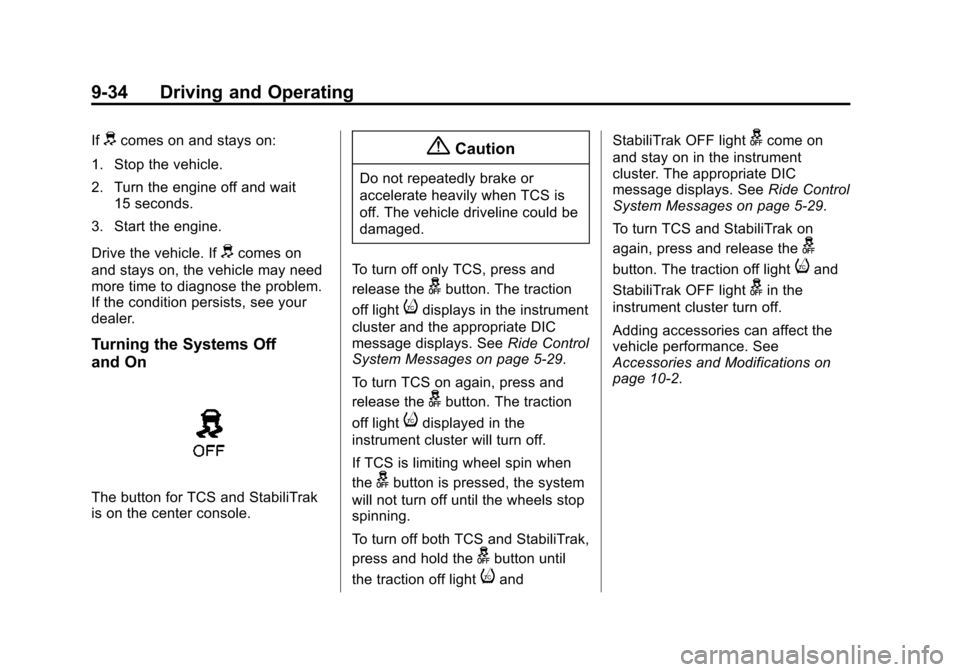
Turning the Systems Off
and On
The button for TCS and StabiliTrak
is on the center console.
{Caution
Do not repeatedly brake or
accelerate heavily when TCS is
off. The vehicle driveline could be
damaged.
To turn off only TCS, press and
release the
gbutton. The traction
off light
idisplays in the instrument
cluster and the appropriate DIC
message displays. See Ride Control
System Messages on page 5-29.
To turn TCS on again, press and
release the
gbutton. The traction
off light
idisplayed in the
instrument cluster will turn off.
If TCS is limiting wheel spin when
the
gbutton is pressed, the system
will not turn off until the wheels stop
spinning.
To turn off both TCS and StabiliTrak,
press and hold the
gbutton until
the traction off light
iand StabiliTrak OFF light
gcome on
and stay on in the instrument
cluster. The appropriate DIC
message displays. See Ride Control
System Messages on page 5-29.
To turn TCS and StabiliTrak on
again, press and release the
g
button. The traction off lightiand
StabiliTrak OFF light
gin the
instrument cluster turn off.
Adding accessories can affect the
vehicle performance. See
Accessories and Modifications on
page 10-2.
Page 248 of 391
Black plate (51,1)Chevrolet Equinox Owner Manual (GMNA-Localizing-U.S./Canada-
7707483) - 2015 - crc - 9/29/14
Driving and Operating 9-51
lamps also flash, telling other
drivers the vehicle is turning,
changing lanes or stopping.
When towing a trailer, the arrows on
the instrument panel flash for turns
even if the bulbs on the trailer are
burned out. Check occasionally to
be sure the trailer bulbs are still
working.
Driving on Grades
Reduce speed and shift to a lower
gear before starting down a long or
steep downgrade. If the
transmission is not shifted down, the
brakes might have to be used so
much that they would get hot and no
longer work well.
The vehicle can tow in D (Drive).
Use a lower gear if the transmission
shifts too often.
When towing at high altitude on
steep uphill grades, engine coolant
boils at a lower temperature than at
normal altitudes. If the engine is
turned off immediately after towing
at high altitude on steep uphillgrades, the vehicle could show
signs similar to engine overheating.
To avoid this, let the engine run
while parked, preferably on level
ground, with the transmission in
P (Park) for a few minutes before
turning the engine off. If the
overheat warning comes on, see
Engine Overheating on page 10-18.
Parking on Hills
{Warning
Parking the vehicle on a hill with
the trailer attached can be
dangerous. If something goes
wrong, the rig could start to move.
People can be injured, and both
the vehicle and the trailer can be
damaged. When possible, always
park the rig on a flat surface.
If parking the rig on a hill:
1. Press the brake pedal, but do
not shift into P (Park) yet. Turn
the wheels into the curb if facing
downhill or into traffic if facing
uphill.
2. Have someone place chocks under the trailer wheels.
3. When the wheel chocks are in place, release the brake pedal
until the chocks absorb the load.
4. Reapply the brake pedal. Then apply the parking brake and shift
into P (Park).
5. Release the brake pedal.
Leaving After Parking on a Hill
1. Apply and hold the brake pedal while you:
.Start the engine.
.Shift into a gear.
.Release the parking brake.
2. Let up on the brake pedal.
Page 254 of 391

Black plate (1,1)Chevrolet Equinox Owner Manual (GMNA-Localizing-U.S./Canada-
7707483) - 2015 - crc - 9/29/14
Vehicle Care 10-1
Vehicle Care
General Information
General Information . . . . . . . . . . 10-2
California Proposition65 Warning . . . . . . . . . . . . . . . . . 10-2
California Perchlorate Materials Requirements . . . . 10-2
Accessories and Modifications . . . . . . . . . . . . . . . 10-2
Vehicle Checks
Doing Your OwnService Work . . . . . . . . . . . . . . . 10-3
Hood . . . . . . . . . . . . . . . . . . . . . . . . 10-4
Engine Compartment Overview . . . . . . . . . . . . . . . . . . . 10-5
Engine Cover . . . . . . . . . . . . . . . . 10-8
Engine Oil . . . . . . . . . . . . . . . . . . . 10-8
Engine Oil Life System . . . . . 10-11
Automatic Transmission Fluid . . . . . . . . . . . . . . . . . . . . . . 10-12
Engine Air Cleaner/Filter . . . . 10-12
Cooling System . . . . . . . . . . . . 10-14
Engine Coolant . . . . . . . . . . . . . 10-15
Engine Overheating . . . . . . . . 10-18
Power Steering Fluid (2.4L L4 Engine) . . . . . . . . . . . . . . . . 10-20 Power Steering Fluid (3.6L
V6 Engine) . . . . . . . . . . . . . . . . 10-20
Washer Fluid . . . . . . . . . . . . . . . 10-20
Brakes . . . . . . . . . . . . . . . . . . . . . 10-21
Brake Fluid . . . . . . . . . . . . . . . . . 10-22
Battery . . . . . . . . . . . . . . . . . . . . . 10-23
All-Wheel Drive . . . . . . . . . . . . . 10-24
Starter Switch Check . . . . . . . 10-24
Automatic Transmission Shift Lock Control Function
Check . . . . . . . . . . . . . . . . . . . . . 10-24
Ignition Transmission Lock Check . . . . . . . . . . . . . . . . . . . . . 10-25
Park Brake and P (Park) Mechanism Check . . . . . . . . 10-25
Wiper Blade Replacement . . . . . . . . . . . . . . 10-25
Headlamp Aiming
Headlamp Aiming . . . . . . . . . . 10-27
Bulb Replacement
Bulb Replacement . . . . . . . . . . 10-27
Halogen Bulbs . . . . . . . . . . . . . . 10-27
Fog Lamps . . . . . . . . . . . . . . . . . 10-28 Taillamps, Turn Signal,
Sidemarker, Stoplamps,
and Back-Up Lamps . . . . . . 10-28
License Plate Lamp . . . . . . . . 10-29
Replacement Bulbs . . . . . . . . . 10-30
Electrical System
Fuses . . . . . . . . . . . . . . . . . . . . . . 10-30
Engine Compartment Fuse Block . . . . . . . . . . . . . . . . . . . . . 10-30
Instrument Panel Fuse Block . . . . . . . . . . . . . . . . . . . . . 10-34
Wheels and Tires
Tires . . . . . . . . . . . . . . . . . . . . . . . . 10-36
All-Season Tires . . . . . . . . . . . . 10-37
Winter Tires . . . . . . . . . . . . . . . . 10-37
Summer Tires . . . . . . . . . . . . . . 10-38
Tire Sidewall Labeling . . . . . . 10-38
Tire Designations . . . . . . . . . . . 10-40
Tire Terminology andDefinitions . . . . . . . . . . . . . . . . 10-41
Tire Pressure . . . . . . . . . . . . . . . 10-44
Tire Pressure Monitor System . . . . . . . . . . . . . . . . . . . 10-45
Tire Pressure Monitor Operation . . . . . . . . . . . . . . . . . 10-46
Tire Inspection . . . . . . . . . . . . . . 10-49
Tire Rotation . . . . . . . . . . . . . . . 10-49
Page 299 of 391
Black plate (46,1)Chevrolet Equinox Owner Manual (GMNA-Localizing-U.S./Canada-
7707483) - 2015 - crc - 9/29/14
10-46 Vehicle Care
The TPMS malfunction indicator is
combined with the low tire pressure
telltale. When the system detects a
malfunction, the telltale will flash for
approximately one minute and then
remain continuously illuminated.
This sequence will continue upon
subsequent vehicle start-ups as
long as the malfunction exists.
When the malfunction indicator is
illuminated, the system may not be
able to detect or signal low tire
pressure as intended. TPMS
malfunctions may occur for a variety
of reasons, including the installation
of replacement or alternate tires or
wheels on the vehicle that prevent
the TPMS from functioning properly.
Always check the TPMS malfunction
telltale after replacing one or more
tires or wheels on your vehicle to
ensure that the replacement or
alternate tires and wheels allow the
TPMS to continue to function
properly.
SeeTire Pressure Monitor
Operation on page 10-46. See
Radio Frequency Statement on
page 13-12.
Tire Pressure Monitor
Operation
This vehicle may have a Tire
Pressure Monitor System (TPMS).
The TPMS is designed to warn the
driver when a low tire pressure
condition exists. TPMS sensors are
mounted onto each tire and wheel
assembly, excluding the spare tire
and wheel assembly. The TPMS
sensors monitor the air pressure in
the tires and transmits the tire
pressure readings to a receiver
located in the vehicle.
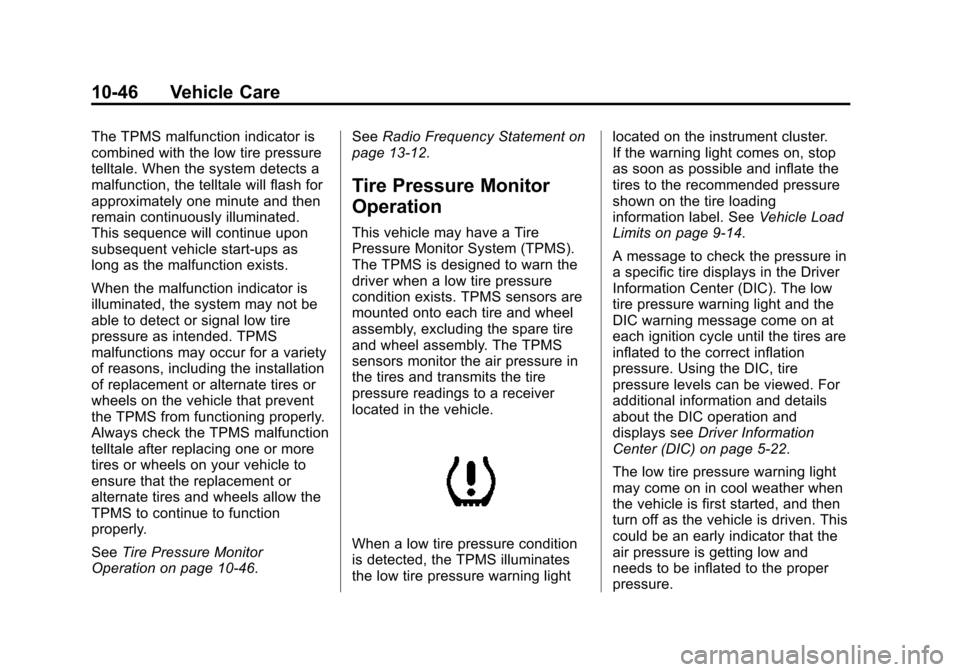
When a low tire pressure condition
is detected, the TPMS illuminates
the low tire pressure warning light located on the instrument cluster.
If the warning light comes on, stop
as soon as possible and inflate the
tires to the recommended pressure
shown on the tire loading
information label. See
Vehicle Load
Limits on page 9-14.
A message to check the pressure in
a specific tire displays in the Driver
Information Center (DIC). The low
tire pressure warning light and the
DIC warning message come on at
each ignition cycle until the tires are
inflated to the correct inflation
pressure. Using the DIC, tire
pressure levels can be viewed. For
additional information and details
about the DIC operation and
displays see Driver Information
Center (DIC) on page 5-22.
The low tire pressure warning light
may come on in cool weather when
the vehicle is first started, and then
turn off as the vehicle is driven. This
could be an early indicator that the
air pressure is getting low and
needs to be inflated to the proper
pressure.
Page 301 of 391
Black plate (48,1)Chevrolet Equinox Owner Manual (GMNA-Localizing-U.S./Canada-
7707483) - 2015 - crc - 9/29/14
10-48 Vehicle Care
.Replacement tires or wheels do
not match the original equipment
tires or wheels. Tires and wheels
other than those recommended
could prevent the TPMS from
functioning properly. SeeBuying
New Tires on page 10-51.
.Operating electronic devices or
being near facilities using radio
wave frequencies similar to the
TPMS could cause the TPMS
sensors to malfunction.
If the TPMS is not functioning
properly, it cannot detect or signal a
low tire condition. See your dealer
for service if the TPMS malfunction
light and DIC message comes on
and stays on.
TPMS Sensor Matching
Process
Each TPMS sensor has a unique
identification code. The identification
code needs to be matched to a new
tire/wheel position after rotating the
tires or replacing one or more of the
TPMS sensors. The TPMS sensor
matching process should also be performed after replacing a spare
tire with a road tire containing the
TPMS sensor. The malfunction light
and the DIC message should go off
at the next ignition cycle. The
sensors are matched to the tire/
wheel positions, using a TPMS
relearn tool, in the following order:
driver side front tire, passenger side
front tire, passenger side rear tire,
and driver side rear. See your
dealer for service or to purchase a
relearn tool. A TPMS relearn tool
can also be purchased. See Tire
Pressure Monitor Sensor Activation
Tool at
www.gmtoolsandequipment.com or
call 1-800-GM TOOLS
(1-800-468-6657).
There are two minutes to match the
first tire/wheel position, and
five minutes overall to match all four
tire/wheel positions. If it takes
longer, the matching process stops
and must be restarted.
The TPMS sensor matching
process is:
1. Set the parking brake.
2. Turn the ignition to ON/RUN with
the engine off.
3. Use the MENU button to select the Vehicle Information Menu in
the Driver Information Center
(DIC). Use the arrow keys to
scroll to the Tire Pressure
screen.
4. Press the SET/CLR button to begin the sensor matching
process.
A message requesting
acceptance of the process
should display.
5. Press the SET/CLR button again to confirm the selection.
The horn sounds twice to signal
the receiver is in relearn mode
and the TIRE LEARNING
ACTIVE message displays on
the DIC screen.
Page 342 of 391
Black plate (9,1)Chevrolet Equinox Owner Manual (GMNA-Localizing-U.S./Canada-
7707483) - 2015 - crc - 9/29/14
Service and Maintenance 11-9
Additional
Maintenance and Care
Your vehicle is an important
investment and caring for it properly
may help to avoid future costly
repairs. To maintain vehicle
performance, additional
maintenance services may be
required.
It is recommended that your dealer
perform these services—their
trained dealer technicians know
your vehicle best. Your dealer can
also perform a thorough
assessment with a multi-point
inspection to recommend when your
vehicle may need attention.
The following list is intended to
explain the services and conditions
to look for that may indicate
services are required. Battery
The battery supplies power to start
the engine and operate any
additional electrical accessories.
.To avoid break-down or failure to
start the vehicle, maintain a
battery with full cranking power.
.Trained dealer technicians have
the diagnostic equipment to test
the battery and ensure that the
connections and cables are
corrosion-free.
Belts
.Belts may need replacing if they
squeak or show signs of
cracking or splitting.
.Trained dealer technicians have
access to tools and equipment
to inspect the belts and
recommend adjustment or
replacement when necessary. Brakes
Brakes stop the vehicle and are
crucial to safe driving.
.Signs of brake wear may include
chirping, grinding, or squealing
noises, or difficulty stopping.
.Trained dealer technicians have
access to tools and equipment
to inspect the brakes and
recommend quality parts
engineered for the vehicle.
Fluids
Proper fluid levels and approved
fluids protect the vehicle’s systems
and components. See
Recommended Fluids and
Lubricants on page 11-12 for GM
approved fluids.
.Engine oil and windshield
washer fluid levels should be
checked at every fuel fill.
.Instrument cluster lights may
come on to indicate that fluids
may be low and need to be
filled.
Page 381 of 391

Black plate (2,1)Chevrolet Equinox Owner Manual (GMNA-Localizing-U.S./Canada-
7707483) - 2015 - crc - 9/29/14
i-2 INDEX
B
Battery . . . . . . . . . . . . . . . . . . . . . . . 10-23Jump Starting . . . . . . . . . . . . . . . 10-65
Load Management . . . . . . . . . . . . . 6-5
Voltage and ChargingMessages . . . . . . . . . . . . . . . . . . . 5-25
Blade Replacement, Wiper . . . 10-25
Bluetooth
Overview . . . . . . . . . 7-21, 7-22, 7-26
Brake System Warning Light . . . . . . . . 5-16
Brakes . . . . . . . . . . . . . . . . . . . . . . . . 10-21 Antilock . . . . . . . . . . . . . . . . . . . . . . . 9-30
Assist . . . . . . . . . . . . . . . . . . . . . . . . . 9-32
Fluid . . . . . . . . . . . . . . . . . . . . . . . . 10-22
Parking . . . . . . . . . . . . . . . . . . . . . . . 9-31
System Messages . . . . . . . . . . . . 5-26
Braking . . . . . . . . . . . . . . . . . . . . . . . . . 9-3
Break-In, New Vehicle . . . . . . . . . 9-19 Bulb Replacement . . . . . . . . . . . . 10-30
Halogen Bulbs . . . . . . . . . . . . . . 10-27
Headlamp Aiming . . . . . . . . . . . 10-27
Headlamps . . . . . . . . . . . . . . . . . 10-27
License Plate Lamps . . . . . . . 10-29
Taillamps, Turn Signal,Sidemarker, Stoplamps,
and Backup Lamps . . . . . . . . 10-28
Buying New Tires . . . . . . . . . . . . . 10-51
C
Calibration . . . . . . . . . . . . . . . . . . . . . . 5-4
California Fuel Requirements . . . . . . . . . . . 9-45
Perchlorate MaterialsRequirements . . . . . . . . . . . . . . . 10-2
Warning . . . . . . . . . . . . . . . . . . . . . . 10-2
Camera
Rear Vision (RVC) . . . . . . . . . . . . 9-41
Canadian Vehicle Owners . . . . . . . . iii
Capacities and Specifications . . . . . . . . . . . . . . . . 12-2
Carbon Monoxide
Engine Exhaust . . . . . . . . . . . . . . . 9-26
Liftgate . . . . . . . . . . . . . . . . . . . . . . . . 2-9
Winter Driving . . . . . . . . . . . . . . . . 9-12 Cargo
Cover . . . . . . . . . . . . . . . . . . . . . . . . . . 4-2
Tie-Downs . . . . . . . . . . . . . . . . . . . . . 4-2
Cautions, Danger, and Warnings . . . . . . . . . . . . . . . . . . . . . . . . iv
CD Player . . . . . . . . . . . . . . . . . . . . . 7-12
Center Console Storage . . . . . . . . 4-2
Chains, Tire . . . . . . . . . . . . . . . . . . 10-56
Charging System Light . . . . . . . . 5-13
Check Engine Light . . . . . . . . . . . . . . . . . . 5-13
Ignition
Transmission Lock . . . . . . . . 10-25
Child Restraints Infants and YoungChildren . . . . . . . . . . . . . . . . . . . . . 3-34
Lower Anchors and Tethers for Children . . . . . . . . . 3-40
Older Children . . . . . . . . . . . . . . . . 3-32
Securing . . . . . . . . . . . . . . . . 3-46, 3-48
Systems . . . . . . . . . . . . . . . . . . . . . . 3-37
Cleaning Exterior Care . . . . . . . . . . . . . . . 10-71
Interior Care . . . . . . . . . . . . . . . . 10-76
Page 389 of 391

Black plate (10,1)Chevrolet Equinox Owner Manual (GMNA-Localizing-U.S./Canada-
7707483) - 2015 - crc - 9/29/14
i-10 INDEX
SeatsAdjustment, Front . . . . . . . . . . . . . . 3-3
Head Restraints . . . . . . . . . . . . . . . 3-2
Heated Front . . . . . . . . . . . . . . . . . . 3-8
Lumbar Adjustment, Front . . . . . 3-5
Memory . . . . . . . . . . . . . . . . . . . . . . . . 3-6
Power Adjustment, Front . . . . . . 3-4
Rear . . . . . . . . . . . . . . . . . . . . . . . . . . . 3-9
Reclining Seatbacks . . . . . . . . . . . 3-5
Securing Child Restraints . . . . . . . . . . . . . . 3-46, 3-48
Security Light . . . . . . . . . . . . . . . . . . . . . . . . . . 5-20
Messages . . . . . . . . . . . . . . . . . . . . 5-30
OnStar
®. . . . . . . . . . . . . . . . . . . . . . 14-3
Vehicle . . . . . . . . . . . . . . . . . . . . . . . 2-13
Vehicle Alarm . . . . . . . . . . . . . . . . . 2-13
Service Accessories andModifications . . . . . . . . . . . . . . . . 10-2
Doing Your Own Work . . . . . . . . 10-3
Engine Soon Light . . . . . . . . . . . . 5-13
Maintenance Records . . . . . . .11-15
Maintenance, General Information . . . . . . . . . . . . . . . . . . 11-1
Parts Identification Label . . . . . 12-1 Service (cont'd)
Publications Ordering
Information . . . . . . . . . . . . . . . . .13-11
Scheduling Appointments . . . . . 13-7
Vehicle Messages . . . . . . . . . . . . 5-30
Services Special Application . . . . . . . . . . . 11-8
Servicing the Airbag . . . . . . . . . . . 3-30
Shift Lock Control Function Check, Automatic
Transmission . . . . . . . . . . . . . . . . 10-24
Shifting Into Park . . . . . . . . . . . . . . . . . . . . . . 9-24
Out of Park . . . . . . . . . . . . . . . . . . . 9-25
Sidemarker Bulb Replacement . . . . . . . . . . 10-28
Signals, Turn and Lane-Change . . . . . . . . . . . . . . . . . 6-3
Spare Tire Compact . . . . . . . . . . . . . . . . . . . . 10-64
Special Application Services . . . 11-8
Specifications and Capacities . . . . . . . . . . . . . . . . . . . . 12-2
Speedometer . . . . . . . . . . . . . . . . . . . 5-9
StabiliTrak OFF Light . . . . . . . . . . . . . . . . . . . . . 5-18
Start Assist, Hills . . . . . . . . . . . . . . 9-32 Start Vehicle, Remote . . . . . . . . . . 2-5
Starter Switch Check . . . . . . . . . 10-24
Starting the Engine . . . . . . . . . . . . 9-21
Steering . . . . . . . . . . . . . . . . . . . . . . . . 9-4
Fluid, Power . . . . . . . . . . . . . . . . 10-20
Wheel Adjustment . . . . . . . . . . . . . 5-2
Wheel Controls . . . . . . . . . . . . . . . . 5-2
Stoplamps and Back-Up Lamps Bulb Replacement . . . . . . . . . . 10-28
Storage Areas Cargo Cover . . . . . . . . . . . . . . . . . . . 4-2
Center Console . . . . . . . . . . . . . . . . 4-2
Convenience Net . . . . . . . . . . . . . . 4-2
Glove Box . . . . . . . . . . . . . . . . . . . . . 4-1
Instrument Panel . . . . . . . . . . . . . . 4-1
Roof Rack System . . . . . . . . . . . . . 4-3
Storage Compartments . . . . . . . . . 4-1
Stuck Vehicle . . . . . . . . . . . . . . . . . . 9-13
Summer Tires . . . . . . . . . . . . . . . . 10-38
Sun Visors . . . . . . . . . . . . . . . . . . . . . 2-19
Sunroof . . . . . . . . . . . . . . . . . . . . . . . . 2-19
Symbols . . . . . . . . . . . . . . . . . . . . . . . . . . iv