2015 CHEVROLET CORVETTE change time
[x] Cancel search: change timePage 165 of 393
Black plate (4,1)Chevrolet Corvette Owner Manual (GMNA-Localizing-U.S./Canada/Mexico-
7576293) - 2015 - crc - 10/31/14
6-4 Lighting
If the vehicle is started in a dark
garage, the automatic headlamp
system comes on immediately. If it
is light outside when the vehicle
leaves the garage, there is a slight
delay before the automatic
headlamp system changes to the
DRL. During that delay, the
instrument cluster may not be as
bright as usual. Make sure the
instrument panel brightness control
is in the full bright position. See
Instrument Panel Illumination
Control on page 6-5.
When it is bright enough outside,
the headlamps and parking lamps
will turn off or may change to
Daytime Running Lamps (DRL).
The automatic headlamp system
turns off when the exterior lamp
control is turned to
Oor the ignition
is off.
To turn automatic headlamp system
back on, turn the band to
Oagain,
then release it. If the automatic headlamp system
has the headlamps turned on and
you turn the ignition off, the
headlamps will turn off. When the
driver door is opened the
headlamps and parking lamps will
illuminate for a period of time.
The length of the delayed
illumination period can be changed.
See
“Exit Lighting” underVehicle
Personalization on page 5-45.
The regular headlamp system
should be turned on when needed.
Lights On with Wipers
If the windshield wipers are
activated in daylight with the engine
on and the exterior lamp control is in
AUTO, the headlamps, parking
lamps, and other exterior lamps will
come on. The time it takes for the
lamps to turn on depends on the
wiper speed. When the wipers are
turned off, the lamps turn off. To
disable, move the exterior lamp
control to
Oor;.
Hazard Warning Flashers
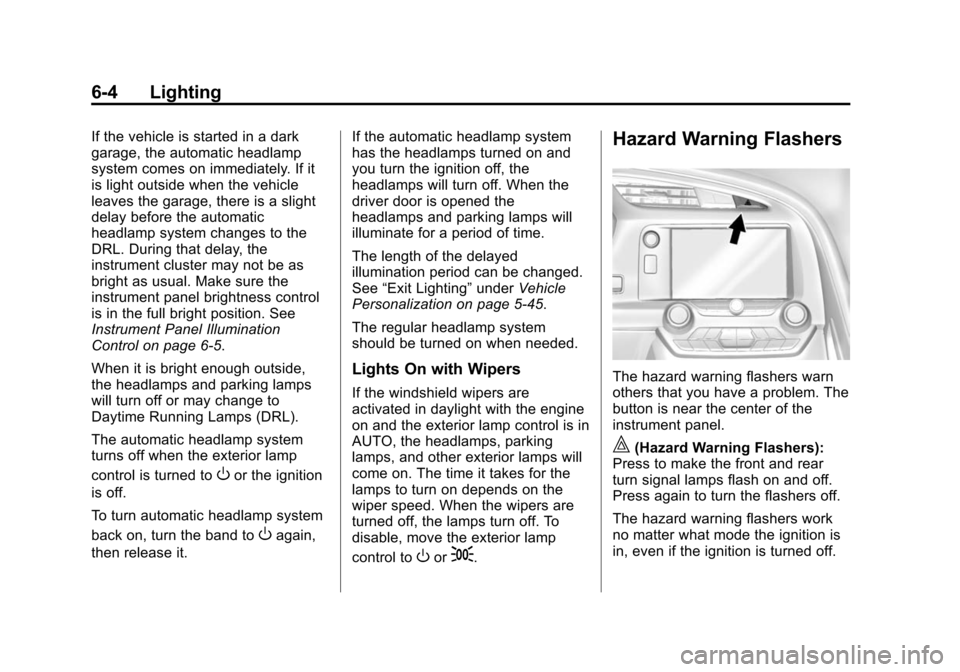
The hazard warning flashers warn
others that you have a problem. The
button is near the center of the
instrument panel.
|(Hazard Warning Flashers):
Press to make the front and rear
turn signal lamps flash on and off.
Press again to turn the flashers off.
The hazard warning flashers work
no matter what mode the ignition is
in, even if the ignition is turned off.
Page 166 of 393
Black plate (5,1)Chevrolet Corvette Owner Manual (GMNA-Localizing-U.S./Canada/Mexico-
7576293) - 2015 - crc - 10/31/14
Lighting 6-5
When the hazard warning flashers
are on, the turn signals will
not work.
Turn and Lane-Change
Signals
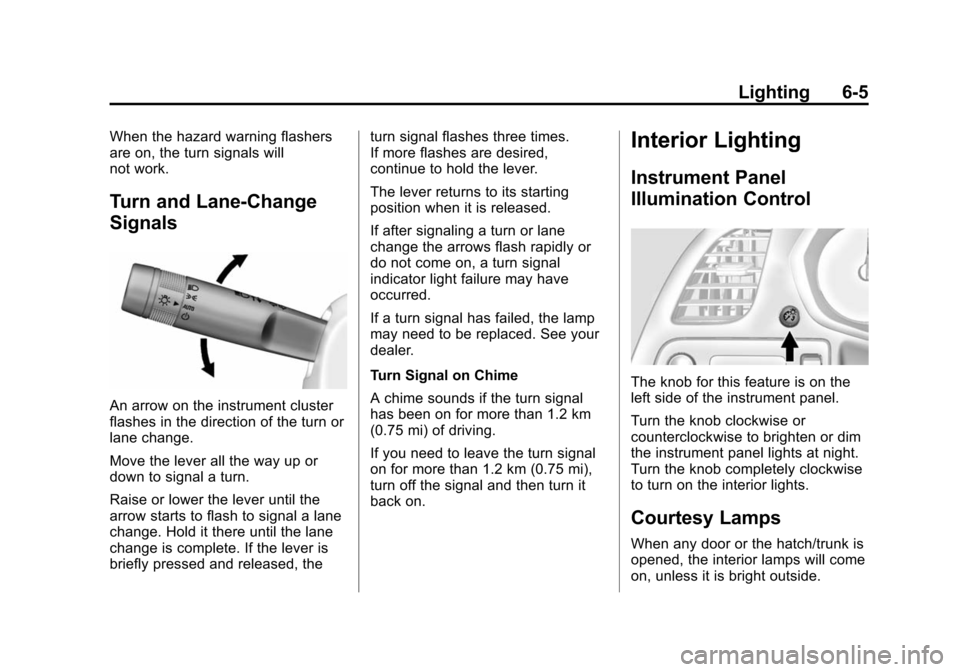
An arrow on the instrument cluster
flashes in the direction of the turn or
lane change.
Move the lever all the way up or
down to signal a turn.
Raise or lower the lever until the
arrow starts to flash to signal a lane
change. Hold it there until the lane
change is complete. If the lever is
briefly pressed and released, theturn signal flashes three times.
If more flashes are desired,
continue to hold the lever.
The lever returns to its starting
position when it is released.
If after signaling a turn or lane
change the arrows flash rapidly or
do not come on, a turn signal
indicator light failure may have
occurred.
If a turn signal has failed, the lamp
may need to be replaced. See your
dealer.
Turn Signal on Chime
A chime sounds if the turn signal
has been on for more than 1.2 km
(0.75 mi) of driving.
If you need to leave the turn signal
on for more than 1.2 km (0.75 mi),
turn off the signal and then turn it
back on.
Interior Lighting
Instrument Panel
Illumination Control
The knob for this feature is on the
left side of the instrument panel.
Turn the knob clockwise or
counterclockwise to brighten or dim
the instrument panel lights at night.
Turn the knob completely clockwise
to turn on the interior lights.
Courtesy Lamps
When any door or the hatch/trunk is
opened, the interior lamps will come
on, unless it is bright outside.
Page 167 of 393
Black plate (6,1)Chevrolet Corvette Owner Manual (GMNA-Localizing-U.S./Canada/Mexico-
7576293) - 2015 - crc - 10/31/14
6-6 Lighting
The rear compartment lights only
come on when the rear
compartment is opened.
To turn the courtesy lamps on or off,
turn the instrument panel brightness
knob completely clockwise or
counterclockwise.
Reading Lamps
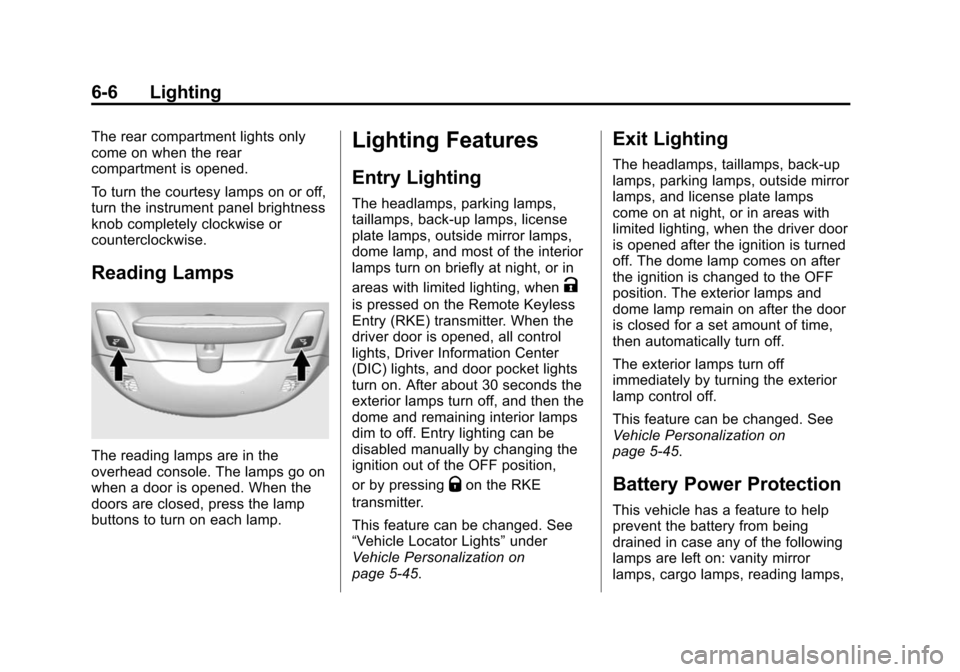
The reading lamps are in the
overhead console. The lamps go on
when a door is opened. When the
doors are closed, press the lamp
buttons to turn on each lamp.
Lighting Features
Entry Lighting
The headlamps, parking lamps,
taillamps, back-up lamps, license
plate lamps, outside mirror lamps,
dome lamp, and most of the interior
lamps turn on briefly at night, or in
areas with limited lighting, when
K
is pressed on the Remote Keyless
Entry (RKE) transmitter. When the
driver door is opened, all control
lights, Driver Information Center
(DIC) lights, and door pocket lights
turn on. After about 30 seconds the
exterior lamps turn off, and then the
dome and remaining interior lamps
dim to off. Entry lighting can be
disabled manually by changing the
ignition out of the OFF position,
or by pressing
Qon the RKE
transmitter.
This feature can be changed. See
“Vehicle Locator Lights” under
Vehicle Personalization on
page 5-45.
Exit Lighting
The headlamps, taillamps, back-up
lamps, parking lamps, outside mirror
lamps, and license plate lamps
come on at night, or in areas with
limited lighting, when the driver door
is opened after the ignition is turned
off. The dome lamp comes on after
the ignition is changed to the OFF
position. The exterior lamps and
dome lamp remain on after the door
is closed for a set amount of time,
then automatically turn off.
The exterior lamps turn off
immediately by turning the exterior
lamp control off.
This feature can be changed. See
Vehicle Personalization on
page 5-45.
Battery Power Protection
This vehicle has a feature to help
prevent the battery from being
drained in case any of the following
lamps are left on: vanity mirror
lamps, cargo lamps, reading lamps,
Page 171 of 393
Black plate (2,1)Chevrolet Corvette Owner Manual (GMNA-Localizing-U.S./Canada/Mexico-
7576293) - 2015 - crc - 10/31/14
7-2 Infotainment System
Press the PDR icon to access the
PDR menu. The options
displayed are:
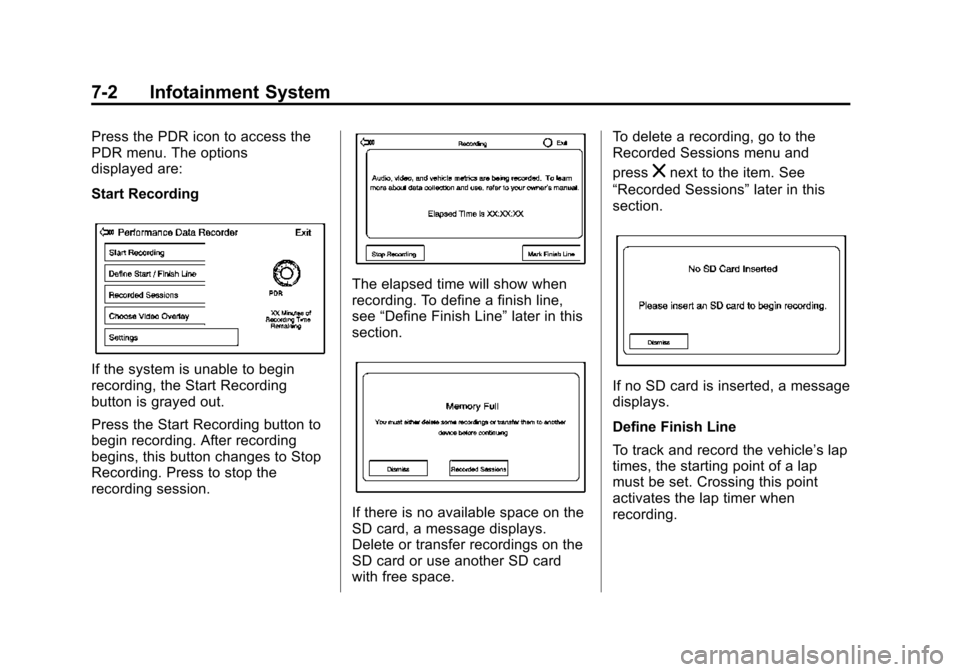
Start Recording
If the system is unable to begin
recording, the Start Recording
button is grayed out.
Press the Start Recording button to
begin recording. After recording
begins, this button changes to Stop
Recording. Press to stop the
recording session.
The elapsed time will show when
recording. To define a finish line,
see“Define Finish Line” later in this
section.
If there is no available space on the
SD card, a message displays.
Delete or transfer recordings on the
SD card or use another SD card
with free space. To delete a recording, go to the
Recorded Sessions menu and
press
znext to the item. See
“Recorded Sessions” later in this
section.
If no SD card is inserted, a message
displays.
Define Finish Line
To track and record the vehicle’s lap
times, the starting point of a lap
must be set. Crossing this point
activates the lap timer when
recording.
Page 172 of 393

Black plate (3,1)Chevrolet Corvette Owner Manual (GMNA-Localizing-U.S./Canada/Mexico-
7576293) - 2015 - crc - 10/31/14
Infotainment System 7-3
To set the finish line, position the
vehicle with the front bumper at the
start/finish point. From the PDR
menu, press Define Finish Line and
then press Mark Finish Line. This
can be done with the vehicle
moving.
Recorded Sessions
To view recorded videos, press
Recorded Sessions.A list of recordings displays.
Select the recording to start
playback.
Press
znext to an item to delete
that recording, Press Yes to delete
or No to cancel on the confirmation
screen. Press Dismiss to exit.
Video playback is not allowed while
the vehicle is in motion.
Tap on the screen while the video is
playing to display the video controls:
Video Scrubber: Changes the
position and playback. The length of
the bar corresponds to the time of
the video. Advance or rewind the
video by dragging along the bar.
Delete Recording: Press to delete
the video. A confirmation screen
displays. Press Yes to delete or No
to cancel.
Pause/Play: Press to play or
pause the video. The button will
change when pressed.
Back: Press to display the previous
screen.
Exit: Press to exit the current
display.
Page 177 of 393
Black plate (2,1)Chevrolet Corvette Owner Manual (GMNA-Localizing-U.S./Canada/Mexico-
7576293) - 2015 - crc - 10/31/14
8-2 Climate Controls
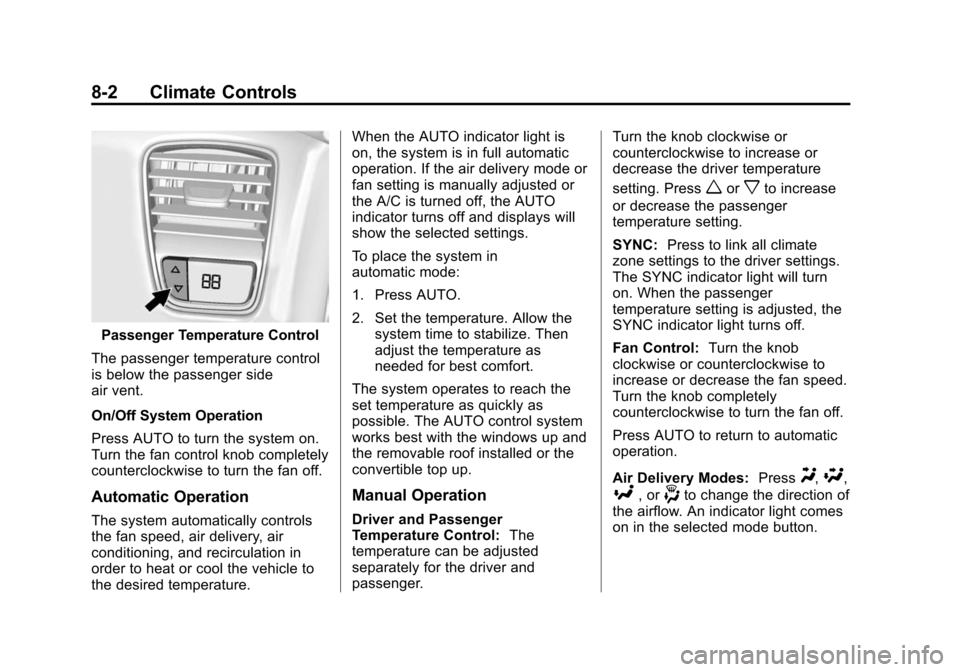
Passenger Temperature Control
The passenger temperature control
is below the passenger side
air vent.
On/Off System Operation
Press AUTO to turn the system on.
Turn the fan control knob completely
counterclockwise to turn the fan off.
Automatic Operation
The system automatically controls
the fan speed, air delivery, air
conditioning, and recirculation in
order to heat or cool the vehicle to
the desired temperature. When the AUTO indicator light is
on, the system is in full automatic
operation. If the air delivery mode or
fan setting is manually adjusted or
the A/C is turned off, the AUTO
indicator turns off and displays will
show the selected settings.
To place the system in
automatic mode:
1. Press AUTO.
2. Set the temperature. Allow the
system time to stabilize. Then
adjust the temperature as
needed for best comfort.
The system operates to reach the
set temperature as quickly as
possible. The AUTO control system
works best with the windows up and
the removable roof installed or the
convertible top up.
Manual Operation
Driver and Passenger
Temperature Control: The
temperature can be adjusted
separately for the driver and
passenger. Turn the knob clockwise or
counterclockwise to increase or
decrease the driver temperature
setting. Press
worxto increase
or decrease the passenger
temperature setting.
SYNC: Press to link all climate
zone settings to the driver settings.
The SYNC indicator light will turn
on. When the passenger
temperature setting is adjusted, the
SYNC indicator light turns off.
Fan Control: Turn the knob
clockwise or counterclockwise to
increase or decrease the fan speed.
Turn the knob completely
counterclockwise to turn the fan off.
Press AUTO to return to automatic
operation.
Air Delivery Modes: Press
Y,\,
[, or-to change the direction of
the airflow. An indicator light comes
on in the selected mode button.
Page 200 of 393
Black plate (19,1)Chevrolet Corvette Owner Manual (GMNA-Localizing-U.S./Canada/Mexico-
7576293) - 2015 - crc - 10/31/14
Driving and Operating 9-19
Warning (Continued)
.Put things in the rear area
of your vehicle. Try to
spread the weight evenly.
.Never stack heavier
things, like suitcases,
inside the vehicle so that
some of them are above
the tops of the seats.
.Do not leave an
unsecured child restraint
in your vehicle.
.When you carry something
inside the vehicle, secure
it whenever you can.
Starting and
Operating
New Vehicle Break-In
Follow these recommended
guidelines during the first 2 414 km
(1,500 mi) of driving this vehicle.
Parts have a break-in period and
performance will be better in the
long run.
For the first 322 km (200 mi):
.To break in new tires, drive at
moderate speeds and avoid hard
cornering for the first 322 km
(200 mi).
.New brake linings also need a
break- in period. Avoid making
hard stops during the first
322 km (200 mi). This is
recommended every time brake
linings are replaced.
For the first 800 km (500 mi):
.Avoid full throttle starts and
abrupt stops.
.Do not exceed 4000 rpm.
.Avoid driving at any one
constant speed, fast or slow,
including the use of cruise
control.
.Avoid downshifting to brake or
slow the vehicle when the
engine speed will exceed
4000 rpm.
.Do not let the engine labor.
Never lug the engine. With a
manual transmission, shift to the
next lower gear. This rule
applies at all times, not just
during the break-in period.
.After the first 500 miles, change
the engine oil on vehicles with
the LT1 engine and Z51
package, or the LT4 engine.
For the first 2 414 km (1,500 mi):
.Do not participate in track
events, sport driving schools,
or similar activities during the
first 2 414 km (1,500 mi).
Page 203 of 393
Black plate (22,1)Chevrolet Corvette Owner Manual (GMNA-Localizing-U.S./Canada/Mexico-
7576293) - 2015 - crc - 10/31/14
9-22 Driving and Operating
ACC/ACCESSORY (Amber
Indicator Light):This mode allows
the use of some electrical
accessories when the engine is off.
With the ignition off, pressing the
button one time without the brake
pedal applied will place the ignition
system in ACC/ACCESSORY.
The ignition will switch from ACC/
ACCESSORY to OFF after
five minutes to prevent battery
rundown.
ON/RUN/START (Green Indicator
Light): This mode is for driving and
starting. With the ignition off, and
the brake pedal applied, pressing
the button once will place the
ignition system in ON/RUN/START.
Once engine cranking begins,
release the button. Engine cranking
will continue until the engine starts.
See Starting the Engine on
page 9-22. The ignition will then
remain in ON/RUN. Service Only Mode
This power mode is available for
service and diagnostics, and to
verify the proper operation of the
malfunction indicator lamp as may
be required for emission inspection
purposes. With the vehicle off, and
the brake pedal not applied,
pressing and holding the button for
more than five seconds will place
the vehicle in Service Only Mode.
The instruments and audio systems
will operate as they do in ON/RUN,
but the vehicle will not be able to be
driven. The engine will not start in
Service Only Mode. Press the
button again to turn the vehicle off.
Starting the Engine
Place the transmission in the
proper gear.
{Caution
If you add electrical parts or
accessories, you could change
the way the engine operates. Any
resulting damage would not be
covered by the vehicle warranty.
See
Add-On Electrical Equipment
on page 9-58.
Automatic Transmission
Move the shift lever to P (Park) or
N (Neutral). To restart the vehicle
when it is already moving, use
N (Neutral) only.
{Caution
Do not try to shift to P (Park) if the
vehicle is moving. If you do, you
could damage the transmission.
Shift to P (Park) only when the
vehicle is stopped.