2015 CHEVROLET CORVETTE GRAND SPORT length
[x] Cancel search: lengthPage 90 of 391
Black plate (27,1)Chevrolet Corvette Owner Manual (GMNA-Localizing-U.S./Canada/Mexico-
7576293) - 2015 - crc - 6/17/14
Seats and Restraints 3-27
The manufacturer instructions that
come with the booster seat state the
weight and height limitations for that
booster. Use a booster seat with a
lap-shoulder belt until the child
passes the fit test below:
.Sit all the way back on the seat.
Do the knees bend at the seat
edge? If yes, continue. If no,
return to the booster seat.
.Buckle the lap-shoulder belt.
Does the shoulder belt rest on
the shoulder? If yes, continue.
If no, return to the booster seat.
.Does the lap belt fit low and
snug on the hips, touching the
thighs? If yes, continue. If no,
return to the booster seat.
.Can proper safety belt fit be
maintained for the length of the
trip? If yes, continue. If no,
return to the booster seat.Q: What is the proper way to
wear safety belts?
A: An older child should wear a
lap-shoulder belt and get the
additional restraint a shoulder
belt can provide. The shoulder
belt should not cross the face or
neck. The lap belt should fit
snugly below the hips, just
touching the top of the thighs.
This applies belt force to the
child's pelvic bones in a crash.
It should never be worn over the
abdomen, which could cause
severe or even fatal internal
injuries in a crash.
According to accident statistics,
children are safer when properly
restrained in a rear seating position.
In a crash, children who are not
buckled up can strike other people
who are buckled up, or can be
thrown out of the vehicle. Older
children need to use safety belts
properly.
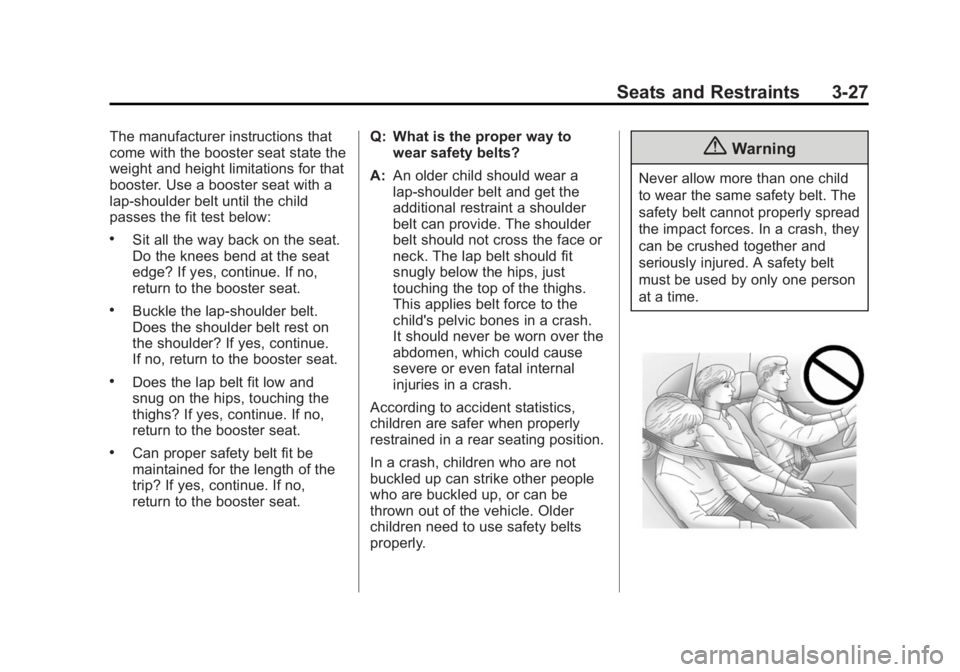
{Warning
Never allow more than one child
to wear the same safety belt. The
safety belt cannot properly spread
the impact forces. In a crash, they
can be crushed together and
seriously injured. A safety belt
must be used by only one person
at a time.
Page 156 of 391
Black plate (51,1)Chevrolet Corvette Owner Manual (GMNA-Localizing-U.S./Canada/Mexico-
7576293) - 2015 - crc - 6/17/14
Instruments and Controls 5-51
Ringtones
Press to change the ring tone for
the specific phone. The phone does
not need to be connected to change
the ring.
Voice Mail Numbers
This feature displays the voice mail
number for all connected phones.
To change the voice mail number,
select EDIT or press the EDIT
button. Type a new number, then
select SAVE or press the SAVE
button.
Voice
Select and the following may
display:
.Confidence Threshold
.Prompt Length
.Audio Feedback Speed
Confidence Threshold
This feature allows the adjustment
of the sensitivity of the speech
recognition system. Select Confirm More or
Confirm Less.
Prompt Length
This feature adjusts the voice
prompt length.
Select Short or Long.
Audio Feedback Speed
This feature adjusts the audio
feedback speed.
Select Slow, Medium, or Fast.
Display
Select and the following may
display:
.Mode
.Calibrate Touchscreen
.Turn Display Off
Mode
Select to change the display screen
for day or night driving.
Select Auto, Day, or Night. Calibrate Touchscreen
Select to calibrate the touchscreen,
then follow the prompts.
Turn Display Off
Select to turn the display off. Press
anywhere on the display area or any
faceplate button to turn the
display on.
Rear Camera
Select and the following may
display:
.Guidance Lines
Guidance Lines
Select to turn Off or On. See
“Guidance Lines” inRear Vision
Camera (RVC) on page 9-51.
Return to Factory Settings
Select and the following may
display:
.Restore Vehicle Settings
.Clear All Private Data
.Restore Radio Settings
Page 165 of 391
Black plate (4,1)Chevrolet Corvette Owner Manual (GMNA-Localizing-U.S./Canada/Mexico-
7576293) - 2015 - crc - 6/17/14
6-4 Lighting
If the vehicle is started in a dark
garage, the automatic headlamp
system comes on immediately. If it
is light outside when the vehicle
leaves the garage, there is a slight
delay before the automatic
headlamp system changes to the
DRL. During that delay, the
instrument cluster may not be as
bright as usual. Make sure the
instrument panel brightness control
is in the full bright position. See
Instrument Panel Illumination
Control on page 6-5.
When it is bright enough outside,
the headlamps and parking lamps
will turn off or may change to
Daytime Running Lamps (DRL).
The automatic headlamp system
turns off when the exterior lamp
control is turned to
Oor the ignition
is off.
To turn automatic headlamp system
back on, turn the band to
Oagain,
then release it. If the automatic headlamp system
has the headlamps turned on and
you turn the ignition off, the
headlamps will turn off. When the
driver door is opened the
headlamps and parking lamps will
illuminate for a period of time.
The length of the delayed
illumination period can be changed.
See
“Exit Lighting” underVehicle
Personalization on page 5-45.
The regular headlamp system
should be turned on when needed.
Lights On with Wipers
If the windshield wipers are
activated in daylight with the engine
on and the exterior lamp control is in
AUTO, the headlamps, parking
lamps, and other exterior lamps will
come on. The time it takes for the
lamps to turn on depends on the
wiper speed. When the wipers are
turned off, the lamps turn off. To
disable, move the exterior lamp
control to
Oor;.
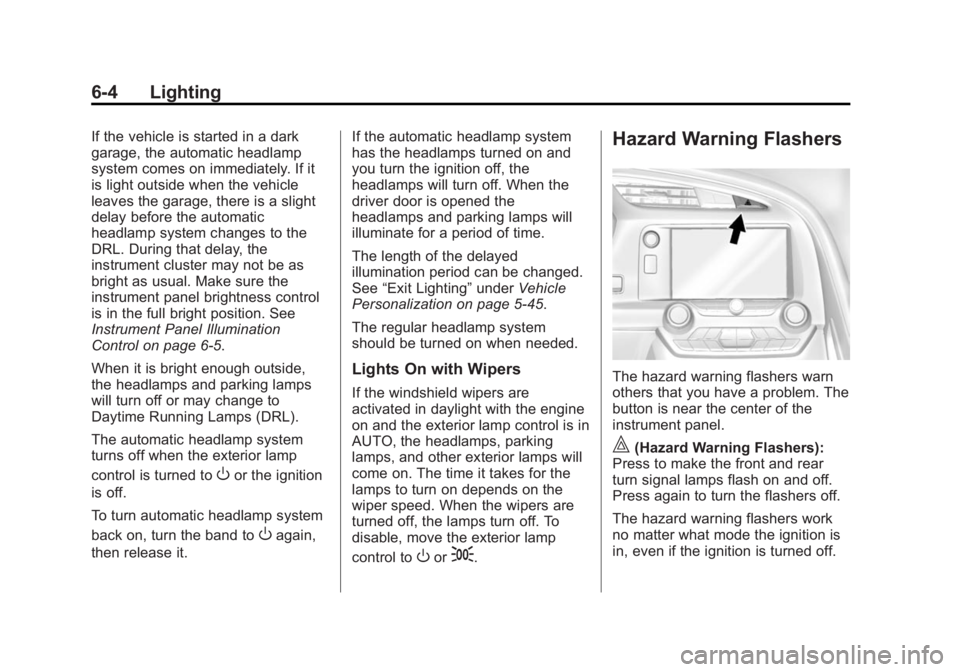
Hazard Warning Flashers
The hazard warning flashers warn
others that you have a problem. The
button is near the center of the
instrument panel.
|(Hazard Warning Flashers):
Press to make the front and rear
turn signal lamps flash on and off.
Press again to turn the flashers off.
The hazard warning flashers work
no matter what mode the ignition is
in, even if the ignition is turned off.
Page 172 of 391
Black plate (3,1)Chevrolet Corvette Owner Manual (GMNA-Localizing-U.S./Canada/Mexico-
7576293) - 2015 - crc - 6/17/14
Infotainment System 7-3
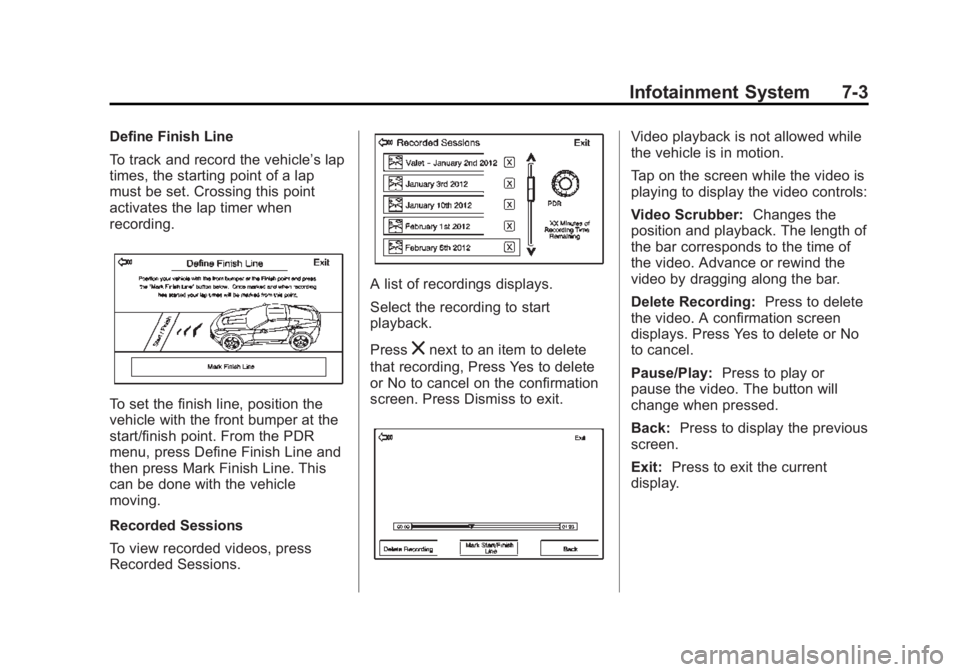
Define Finish Line
To track and record the vehicle’s lap
times, the starting point of a lap
must be set. Crossing this point
activates the lap timer when
recording.
To set the finish line, position the
vehicle with the front bumper at the
start/finish point. From the PDR
menu, press Define Finish Line and
then press Mark Finish Line. This
can be done with the vehicle
moving.
Recorded Sessions
To view recorded videos, press
Recorded Sessions.
A list of recordings displays.
Select the recording to start
playback.
Press
znext to an item to delete
that recording, Press Yes to delete
or No to cancel on the confirmation
screen. Press Dismiss to exit.
Video playback is not allowed while
the vehicle is in motion.
Tap on the screen while the video is
playing to display the video controls:
Video Scrubber: Changes the
position and playback. The length of
the bar corresponds to the time of
the video. Advance or rewind the
video by dragging along the bar.
Delete Recording: Press to delete
the video. A confirmation screen
displays. Press Yes to delete or No
to cancel.
Pause/Play: Press to play or
pause the video. The button will
change when pressed.
Back: Press to display the previous
screen.
Exit: Press to exit the current
display.
Page 174 of 391
Black plate (5,1)Chevrolet Corvette Owner Manual (GMNA-Localizing-U.S./Canada/Mexico-
7576293) - 2015 - crc - 6/17/14
Infotainment System 7-5
.Engine Rotations Per Minute
(RPMs): The vertical line and
triangle indicate current RPMs.
As the RPMs increase, the
orange backfill follows.
.Transmission State (Current
Gear): Same as Sport.
.Friction Bubble Graphic: Lateral
and longitudinal G-Forces are
displayed as a dot within a
bubble. A red dot displays when
the vehicle starts braking and
turns green when the vehicle
accelerates. The dot is white
when the vehicle is not moving.
A white dot is the default.
.Brake and Throttle Graphic:
Displays the percentage value of
brake and throttle pedal position
from 0–100%.
.Steering Angle: The graphic fills
from the center to the left or right
depending on the direction of
steering. The numerical steering
angle displays below the
graphic.
.Active Handling Active Indicator:
The graphic only displays if the
active handling systems are
activated.
.Performance Traction
Management (PTM) Mode:
Displays the current PTM mode.
The options are Wet, Dry, Sport
1, Sport 2, or Race.
.Current Lap Time: Displays the
elapsed lap time if the finish line
is defined and the vehicle has
crossed the defined finish line at
least once.
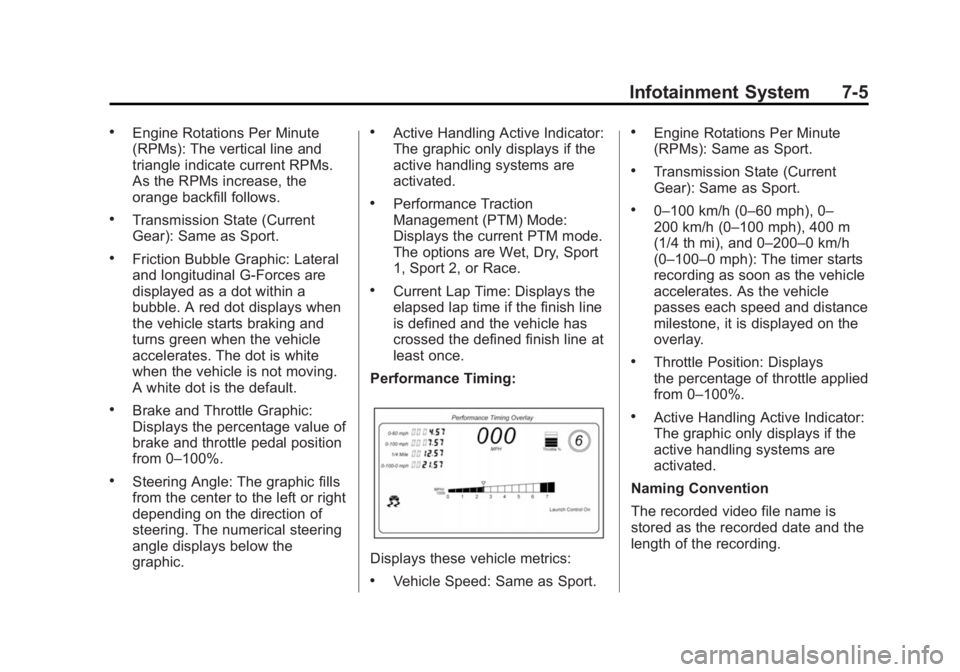
Performance Timing:
Displays these vehicle metrics:
.Vehicle Speed: Same as Sport.
.Engine Rotations Per Minute
(RPMs): Same as Sport.
.Transmission State (Current
Gear): Same as Sport.
.0–100 km/h (0–60 mph), 0–
200 km/h (0–100 mph), 400 m
(1/4 th mi), and 0–200–0 km/h
(0–100–0 mph): The timer starts
recording as soon as the vehicle
accelerates. As the vehicle
passes each speed and distance
milestone, it is displayed on the
overlay.
.Throttle Position: Displays
the percentage of throttle applied
from 0–100%.
.Active Handling Active Indicator:
The graphic only displays if the
active handling systems are
activated.
Naming Convention
The recorded video file name is
stored as the recorded date and the
length of the recording.
Page 175 of 391
Black plate (6,1)Chevrolet Corvette Owner Manual (GMNA-Localizing-U.S./Canada/Mexico-
7576293) - 2015 - crc - 6/17/14
7-6 Infotainment System
If the recorded session was
recorded while the system was in
Valet or Teen Mode, the file name
will display the mode, date, and
length of time.
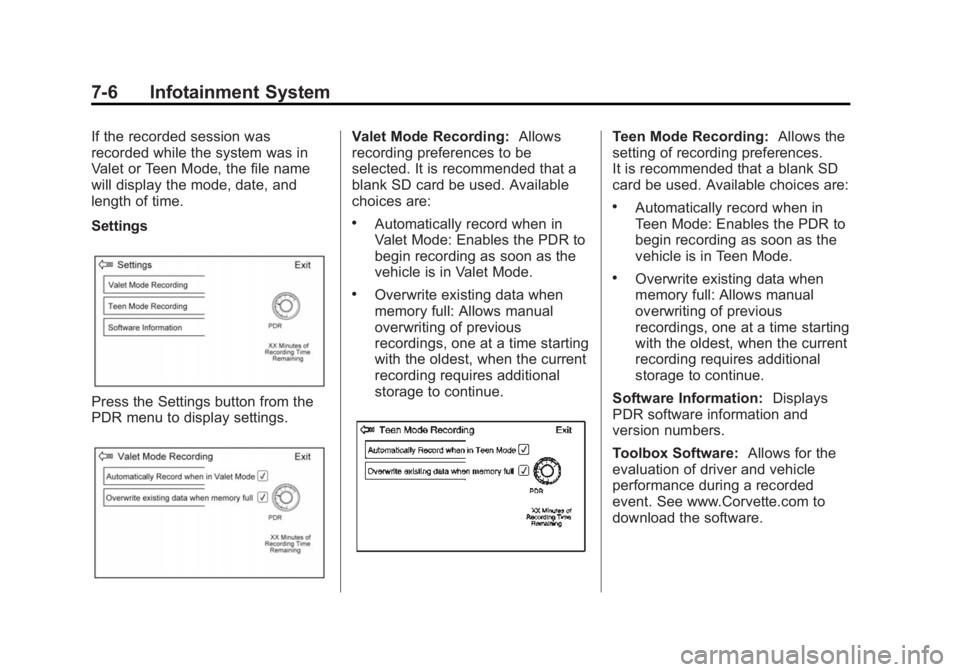
Settings
Press the Settings button from the
PDR menu to display settings.
Valet Mode Recording:Allows
recording preferences to be
selected. It is recommended that a
blank SD card be used. Available
choices are:
.Automatically record when in
Valet Mode: Enables the PDR to
begin recording as soon as the
vehicle is in Valet Mode.
.Overwrite existing data when
memory full: Allows manual
overwriting of previous
recordings, one at a time starting
with the oldest, when the current
recording requires additional
storage to continue.
Teen Mode Recording: Allows the
setting of recording preferences.
It is recommended that a blank SD
card be used. Available choices are:
.Automatically record when in
Teen Mode: Enables the PDR to
begin recording as soon as the
vehicle is in Teen Mode.
.Overwrite existing data when
memory full: Allows manual
overwriting of previous
recordings, one at a time starting
with the oldest, when the current
recording requires additional
storage to continue.
Software Information: Displays
PDR software information and
version numbers.
Toolbox Software: Allows for the
evaluation of driver and vehicle
performance during a recorded
event. See www.Corvette.com to
download the software.
Page 188 of 391
Black plate (7,1)Chevrolet Corvette Owner Manual (GMNA-Localizing-U.S./Canada/Mexico-
7576293) - 2015 - crc - 6/17/14
Driving and Operating 9-7
.Camber: -2.0 degrees
.Toe: 0.05 degrees toe in
Rear (per corner)
.Caster: 0 degrees
.Camber: -2.0 degrees
.Toe: 0.05 degrees toe in
Thrust Angle: 0 degrees
Rear Axle Fluid
{Caution
During a first time track or racing
event, high rear axle
temperatures can occur. Damage
could be caused to the rear axle
and would not be covered by the
vehicle warranty. Do not drive as
long or as fast the first time the
vehicle is driven on the track or
raced.
The rear axle fluid temperatures
may be higher than when driving in
severe conditions. Drain and refill
with new fluid after the first racing or competitive driving event, and then
after every 24 hours of racing or
competitive driving. See
Recommended Fluids and
Lubricants on page 11-12.
General Information
If reduced performance is
experienced during track events or
competitive driving, turning off the
A/C will help to improve engine
performance.
Maintain a mixture of 40%
DEX-COOL coolant and 60% clean,
drinkable water to optimize engine
performance.
The front license plate bracket or
aero panel should be removed for
track events and competitive driving
to improve engine performance.
Rotor Cooling Ring
The following installation procedure
is for Z51, and only if the vehicle is
equipped with front dual cast brake
rotors along with the supplied brake
cooling ring kit. See your dealer for
information.
If the vehicle is a Z51 and equipped
with a one piece brake rotor a
cooling ring is not required.
{Caution
Do not leave rotor cooling rings
installed after a track event, as
this can cause corrosion with
long-term use. Rotor cooling rings
are for track use only. Track
driving without the rotor cooling
rings may result in brake
pedal fade.
Installation:
1. Remove the front wheels.
2. Cut three 150 mm (6 in) lengths of safety wire specified to T304
Stainless Steel, 0.041 in nominal
diameter, not included.
3. Form each into a U shape with a 20 mm (0.75 in) flat area in the
center of the wire.
Page 275 of 391
Black plate (36,1)Chevrolet Corvette Owner Manual (GMNA-Localizing-U.S./Canada/Mexico-
7576293) - 2015 - crc - 6/17/14
10-36 Vehicle Care
shift lever out of P (Park) with
normal effort. If the shift lever
moves out of P (Park), contact
your dealer for service.
Park Brake and P (Park)
Mechanism Check
{Warning
When you are doing this check,
the vehicle could begin to move.
You or others could be injured
and property could be damaged.
Make sure there is room in front
of the vehicle in case it begins to
roll. Be ready to apply the regular
brake at once should the vehicle
begin to move.
Park on a fairly steep hill, with the
vehicle facing downhill. Keeping
your foot on the regular brake, set
the parking brake.
.To check the parking brake's
holding ability: With the engine
running and the transmission in N (Neutral), slowly remove foot
pressure from the regular brake
pedal. Do this until the vehicle is
held by the parking brake only.
.To check the P (Park)
mechanism's holding ability:
With the engine running, shift to
P (Park). Then release the
parking brake followed by the
regular brake.
Contact your dealer if service is
required.
Wiper Blade Replacement
Windshield wiper blades should be
inspected for wear and cracking.
Replacement blades come in
different types and are removed in
different ways. For proper type and
length, see Maintenance
Replacement Parts on page 11-13.
To replace the windshield wiper
blade:
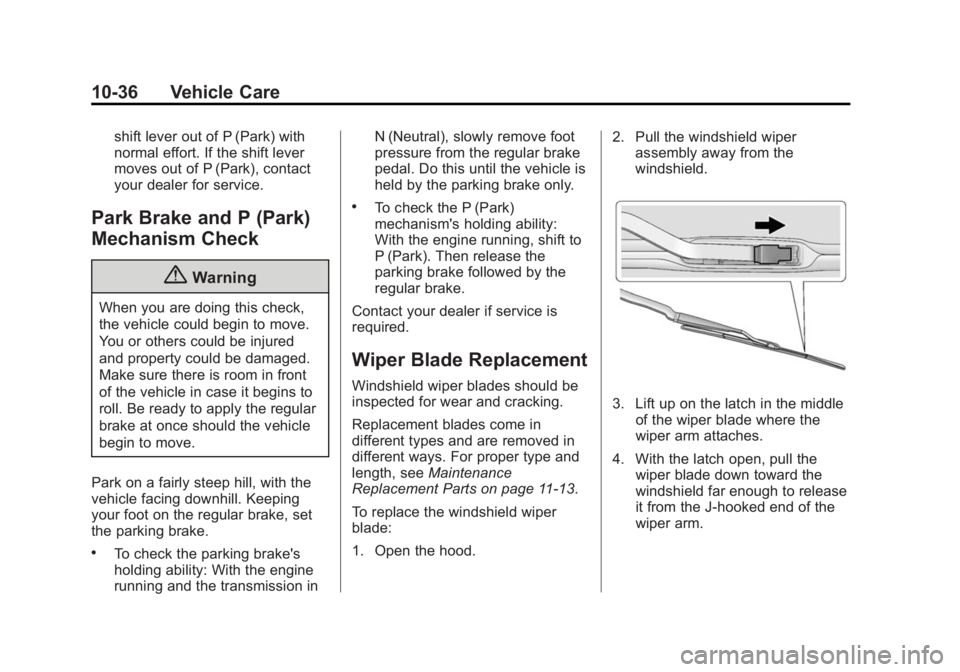
1. Open the hood. 2. Pull the windshield wiper
assembly away from the
windshield.
3. Lift up on the latch in the middle
of the wiper blade where the
wiper arm attaches.
4. With the latch open, pull the wiper blade down toward the
windshield far enough to release
it from the J-hooked end of the
wiper arm.