2015 CHEVROLET CORVETTE GRAND SPORT warning light
[x] Cancel search: warning lightPage 217 of 391
Black plate (36,1)Chevrolet Corvette Owner Manual (GMNA-Localizing-U.S./Canada/Mexico-
7576293) - 2015 - crc - 6/17/14
9-36 Driving and Operating
normal, and is done to periodically
check the correct operation of the
EPB system.
If the EPB fails to apply, the rear
wheels should be blocked to
prevent vehicle movement.
EPB Release
To release the EPB:
1. Place the ignition in the ACC/ACCESSORY or ON/RUN
position.
2. Apply and hold the brake pedal.
3. Push down momentarily on the EPB switch.
The EPB is released when the red
parking brake status light is off.
If the amber parking brake warning
light is on, release the EPB by
pushing down on the EPB switch
and holding it down. Continue to
hold the switch until the red parking
brake status light is off. If either light
stays on after release is attempted,
see your dealer.
{Caution
Driving with the parking brake on
can overheat the brake system
and cause premature wear or
damage to brake system parts.
Make sure that the parking brake
is fully released and the brake
warning light is off before driving.
Automatic EPB Release
The EPB will automatically release if
the vehicle is running, placed into
gear, and an attempt is made to
drive away. Avoid rapid acceleration
when the EPB is applied, to
preserve parking brake lining life.
The EPB can also be used to
prevent roll back for vehicles with a
manual transmission taking off on a
hill. When no roll back is desired, an
applied EPB will allow both feet to
be used for the clutch and
accelerator pedals in preparation for
starting the vehicle moving in the intended direction. In this case,
there is no need to push the switch
to release the EPB.
Brake Assist
The Brake Assist feature is
designed to assist the driver in
stopping or decreasing vehicle
speed in emergency driving
conditions. This feature uses the
stability system hydraulic brake
control module to supplement the
power brake system under
conditions where the driver has
quickly and forcefully applied the
brake pedal in an attempt to quickly
stop or slow down the vehicle. The
stability system hydraulic brake
control module increases brake
pressure at each corner of the
vehicle until the ABS activates.
Minor brake pedal pulsation or
pedal movement during this time is
normal and the driver should
continue to apply the brake pedal as
the driving situation dictates. The
Brake Assist feature will
automatically disengage when the
Page 232 of 391
Black plate (51,1)Chevrolet Corvette Owner Manual (GMNA-Localizing-U.S./Canada/Mexico-
7576293) - 2015 - crc - 6/17/14
Driving and Operating 9-51
Driver Assistance
Systems
Rear Vision
Camera (RVC)
The RVC system can assist the
driver when backing up by
displaying a view of the area behind
the vehicle.
{Warning
The RVC system does not display
children, pedestrians, bicyclists,
crossing traffic, animals, or any
other object located outside the
camera's field of view, below the
bumper, or under the vehicle.
Perceived distances may be
different from actual distances.
Do not back the vehicle using
only the RVC screen. Failure to
use proper care before backing
may result in injury, death,(Continued)
Warning (Continued)
or vehicle damage. Always check
behind and around the vehicle
before backing.
An image appears on the
infotainment screen when the
vehicle is shifted into R (Reverse).
The infotainment screen goes to the
previous screen after approximately
10 seconds once the vehicle is
shifted out of R (Reverse).
To return to the previous screen
sooner, do one of the following:
.Press a hard key on the
infotainment system.
.Shift into P (Park), for an
automatic transmission.
.Reach a vehicle speed of
8 km/h (5 mph). Guidance Lines
The RVC system may have a
guidance line overlay that can help
the driver align the vehicle when
backing into a parking spot.
To turn the guidance lines on or off:
1. On the infotainment system,
press the Settings screen
button, or turn the MENU knob
to highlight Settings and
press MENU.
2. Select Rear Camera.
3. Select Guidance Lines and then select Off or On.
Rear Vision Camera Error
Messages
SERVICE REAR VISION CAMERA
SYSTEM: This message can
display when the system is not
operating properly.
If any other problem occurs or if a
problem persists, see your dealer.
Page 238 of 391
Black plate (57,1)Chevrolet Corvette Owner Manual (GMNA-Localizing-U.S./Canada/Mexico-
7576293) - 2015 - crc - 6/17/14
Driving and Operating 9-57
Warning (Continued)
.Place the nozzle inside the fill
opening of the container
before dispensing fuel, and
keep it in contact with the fill
opening until filling is
complete.
.Fill the container no more
than 95% full to allow for
expansion.
.Do not smoke, light matches,
or use lighters while
pumping fuel.
.Avoid using cell phones or
other electronic devices.
Trailer Towing
General Towing
Information
The vehicle is neither designed nor
intended to tow a trailer.
Conversions and
Add-Ons
Add-On Electrical
Equipment
{Caution
Some electrical equipment can
damage the vehicle or cause
components to not work and
would not be covered by the
warranty. Always check with your
dealer before adding electrical
equipment.
Add-on equipment can drain the
vehicle's 12-volt battery, even if the
vehicle is not operating.
The vehicle has an airbag system.
Before attempting to add anything
electrical to the vehicle, see
Servicing the Airbag-Equipped
Vehicle on page 3-24 andAdding
Equipment to the Airbag-Equipped
Vehicle on page 3-25.
Page 240 of 391
Black plate (1,1)Chevrolet Corvette Owner Manual (GMNA-Localizing-U.S./Canada/Mexico-
7576293) - 2015 - crc - 6/17/14
Vehicle Care 10-1
Vehicle Care
General Information
General Information . . . . . . . . . . 10-2
California Proposition65 Warning . . . . . . . . . . . . . . . . . 10-2
California Perchlorate Materials Requirements . . . . 10-2
Accessories and Modifications . . . . . . . . . . . . . . . 10-2
Lifting the Vehicle . . . . . . . . . . . . 10-3
Vehicle Checks
Doing Your Own Service Work . . . . . . . . . . . . . . . 10-5
Hood . . . . . . . . . . . . . . . . . . . . . . . . 10-6
Engine Compartment Overview . . . . . . . . . . . . . . . . . . . 10-7
Engine Oil . . . . . . . . . . . . . . . . . . 10-12
Engine Oil Life System . . . . . 10-18
Automatic Transmission Fluid . . . . . . . . . . . . . . . . . . . . . . 10-19
Manual Transmission Fluid . . . . . . . . . . . . . . . . . . . . . . 10-19
Hydraulic Clutch . . . . . . . . . . . . 10-19
Engine Air Cleaner/Filter . . . . 10-20
Cooling System (Engine) . . . 10-22 Cooling System (Aero
Panel) . . . . . . . . . . . . . . . . . . . . . 10-23
Engine Coolant . . . . . . . . . . . . . 10-24
Engine Overheating . . . . . . . . 10-27
Washer Fluid . . . . . . . . . . . . . . . 10-28
Brakes . . . . . . . . . . . . . . . . . . . . . 10-29
Brake Fluid . . . . . . . . . . . . . . . . . 10-32
Battery . . . . . . . . . . . . . . . . . . . . . 10-33
Rear Axle . . . . . . . . . . . . . . . . . . 10-34
Starter Switch Check . . . . . . . 10-35
Automatic Transmission Shift Lock Control Function
Check . . . . . . . . . . . . . . . . . . . . . 10-35
Park Brake and P (Park) Mechanism Check . . . . . . . . 10-36
Wiper Blade Replacement . . . . . . . . . . . . . . 10-36
Windshield Replacement . . . 10-37
Headlamp Aiming
Headlamp Aiming . . . . . . . . . . 10-37
Bulb Replacement
Bulb Replacement . . . . . . . . . . 10-37
High Intensity Discharge (HID) Lighting . . . . . . . . . . . . . 10-37
LED Lighting . . . . . . . . . . . . . . . 10-38
License Plate Lamp . . . . . . . . 10-38
Replacement Bulbs . . . . . . . . . 10-38
Electrical System
Electrical System Overload . . . . . . . . . . . . . . . . . . 10-39
Fuses . . . . . . . . . . . . . . . . . . . . . . 10-39
Engine Compartment Fuse Block . . . . . . . . . . . . . . . . . . . . . 10-39
Rear Compartment Fuse Block . . . . . . . . . . . . . . . . . . . . . 10-43
Wheels and Tires
Tires . . . . . . . . . . . . . . . . . . . . . . . . 10-46
Winter Tires . . . . . . . . . . . . . . . . 10-47
Run-Flat Tires . . . . . . . . . . . . . . 10-48
Low-Profile Tires . . . . . . . . . . . 10-49
Competition OrientedTires . . . . . . . . . . . . . . . . . . . . . . 10-49
Summer Tires . . . . . . . . . . . . . . 10-50
Tire Sidewall Labeling . . . . . . 10-51
Tire Designations . . . . . . . . . . . 10-52
Tire Terminology and Definitions . . . . . . . . . . . . . . . . 10-53
Tire Pressure . . . . . . . . . . . . . . . 10-55
Tire Pressure for High-Speed Operation . . . . . . . . . . . . . . . . . 10-57
Tire Pressure Monitor System . . . . . . . . . . . . . . . . . . . 10-57
Tire Pressure Monitor Operation . . . . . . . . . . . . . . . . . 10-58
Tire Inspection . . . . . . . . . . . . . . 10-61
Page 256 of 391
Black plate (17,1)Chevrolet Corvette Owner Manual (GMNA-Localizing-U.S./Canada/Mexico-
7576293) - 2015 - crc - 6/17/14
Vehicle Care 10-17
GM recommends Mobil 1®engine
oils that show the dexos1 approved
logo for its dry sump equipped
engines.
{Caution
Failure to use the recommended
engine oil can result in engine
damage not covered by the
vehicle warranty. Check with your
dealer or service provider on
whether the oil is approved to the
dexos1 specification.
Viscosity Grade
Use SAE 5W-30 viscosity grade
engine oil. Cold Temperature Operation: In an
area of extreme cold, where the
temperature falls below
−29°C (−20°
F), an SAE 0W-30 oil may be used.
An oil of this viscosity grade will
provide easier cold starting for the
engine at extremely low
temperatures. When selecting an oil
of the appropriate viscosity grade,
always select an oil of the correct
specification. See “Specification”
earlier in this section for more
information.
For track events or competitive
driving, use Mobil 1®15W-50 engine
oil. An instrument cluster warning
light will be illuminated at high oil
temperatures. See Driver
Information Center (DIC) on
page 5-26.
Engine Oil Additives/Engine
Oil Flushes
Do not add anything to the oil. The
recommended oils meeting the
dexos1™ specification are all that is
needed for good performance and
engine protection. Engine oil system flushes are not
recommended and could cause
engine damage not covered by the
vehicle warranty.
What to Do with Used Oil
Used engine oil contains certain
elements that can be unhealthy for
your skin and could even cause
cancer. Do not let used oil stay on
your skin for very long. Clean your
skin and nails with soap and water,
or a good hand cleaner. Wash or
properly dispose of clothing or rags
containing used engine oil. See the
manufacturer's warnings about the
use and disposal of oil products.
Used oil can be a threat to the
environment. If you change your
own oil, be sure to drain all the oil
from the filter before disposal. Never
dispose of oil by putting it in the
trash or pouring it on the ground,
into sewers, or into streams or
bodies of water. Recycle it by taking
it to a place that collects used oil.
Page 276 of 391
Black plate (37,1)Chevrolet Corvette Owner Manual (GMNA-Localizing-U.S./Canada/Mexico-
7576293) - 2015 - crc - 6/17/14
Vehicle Care 10-37
5. Remove the wiper blade.Allowing the wiper blade arm to
touch the windshield when no
wiper blade is installed could
damage the windshield. Any
damage that occurs would not
be covered by the vehicle
warranty. Do not allow the wiper
blade arm to touch the
windshield.
6. Reverse Steps 1–3 for wiper blade replacement.
Windshield Replacement
The windshield is part of the HUD
system. If the vehicle has to have
the windshield replaced, get one
that is designed for HUD or the
HUD image may look out of focus.
Headlamp Aiming
Headlamp aim has been preset and
should need no further adjustment.
If the vehicle is damaged in a crash,
the headlamp aim may be affected.
If adjustment to the headlamps is
necessary, see your dealer.
Bulb Replacement
For the proper type of replacement
bulbs, see Replacement Bulbs on
page 10-38.
For any bulb‐changing procedure
not listed in this section, contact
your dealer.
High Intensity Discharge
(HID) Lighting
{Warning
The high intensity discharge
lighting system operates at a very
high voltage. If you try to service
any of the system components,
you could be seriously injured.
Have your dealer or a qualified
technician service them.
After an HID headlamp bulb has
been replaced, the beam might be a
slightly different shade than it was
originally. This is normal.
Page 287 of 391
Black plate (48,1)Chevrolet Corvette Owner Manual (GMNA-Localizing-U.S./Canada/Mexico-
7576293) - 2015 - crc - 6/17/14
10-48 Vehicle Care
If using winter tires:
.Use tires of the same brand and
tread type on all four wheel
positions.
.Use only radial ply tires of the
same size, load range, and
speed rating as the original
equipment tires.
Winter tires with the same speed
rating as the original equipment tires
may not be available for H, V, W, Y,
and ZR speed rated tires. If winter
tires with a lower speed rating are
chosen, never exceed the tire's
maximum speed capability.
Run-Flat Tires
This vehicle, when new, had run-flat
tires. There is no spare tire, no tire
changing equipment, and no place
to store a tire in the vehicle.
The vehicle also has a Tire
Pressure Monitor System (TPMS)
that indicates a loss of tire pressure
in any of the tires.
{Warning
If the low tire warning light
displays on the instrument cluster,
the handling capabilities will be
reduced during severe
maneuvers. Driving too fast could
cause loss of control and you or
others could be injured. Do not
drive over 80 km/h (50 mph) when
the low tire warning light is
displayed. Drive cautiously and
check the tire pressures as soon
as possible.
Run-flat tires can be driven on with
no air pressure. There is no need to
stop on the side of the road to
change the tire. Continue driving;
however, do not drive too far or too
fast. Driving on the tire may not be
possible if there is permanent
damage. To prevent permanent
damage, the tire can be driven with
no air pressure for up to 80 km
(50 mi) at speeds slower than
80 km/h (50 mph). As soon as possible, contact the nearest
authorized GM or run-flat servicing
facility for inspection and repair or
replacement.
When driving on a deflated run-flat
tire, avoid potholes and other road
hazards that could damage the tire
and/or wheel beyond repair. When a
tire has been damaged, or if driven
any distance while deflated, check
with an authorized run-flat tire
service center to determine whether
the tire can be repaired or should be
replaced. To maintain the run-flat
feature, all replacement tires must
be run-flat tires.
To locate the nearest GM or run-flat
servicing facility, call Customer
Assistance.
The valve stems on run-flat tires
have sensors that are part of the
TPMS. See
Tire Pressure Monitor
System on page 10-57. These
sensors contain batteries that are
designed to last for 10 years under
Page 298 of 391
Black plate (59,1)Chevrolet Corvette Owner Manual (GMNA-Localizing-U.S./Canada/Mexico-
7576293) - 2015 - crc - 6/17/14
Vehicle Care 10-59
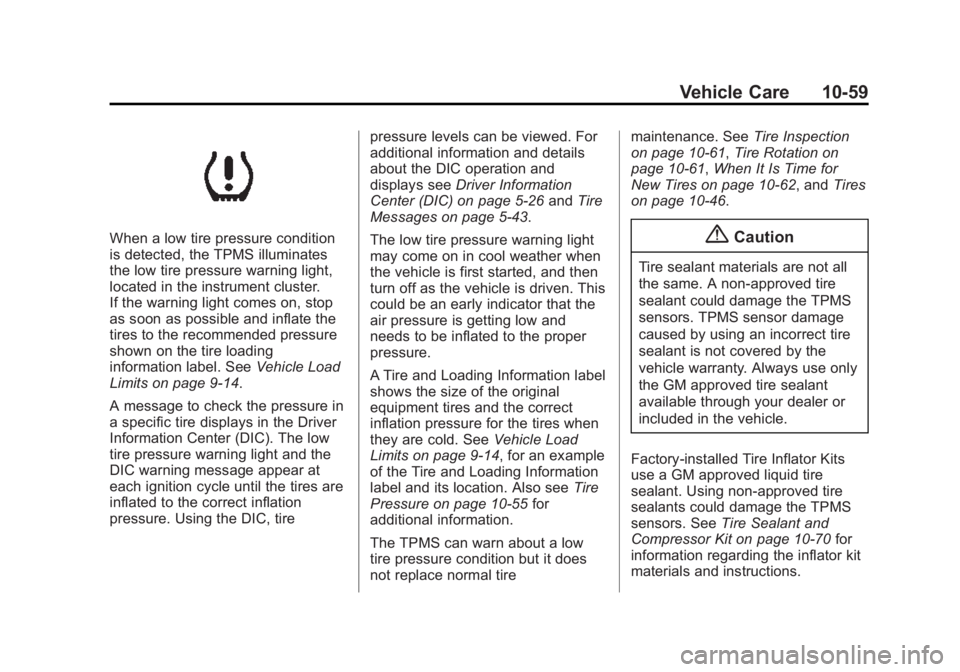
When a low tire pressure condition
is detected, the TPMS illuminates
the low tire pressure warning light,
located in the instrument cluster.
If the warning light comes on, stop
as soon as possible and inflate the
tires to the recommended pressure
shown on the tire loading
information label. SeeVehicle Load
Limits on page 9-14.
A message to check the pressure in
a specific tire displays in the Driver
Information Center (DIC). The low
tire pressure warning light and the
DIC warning message appear at
each ignition cycle until the tires are
inflated to the correct inflation
pressure. Using the DIC, tire pressure levels can be viewed. For
additional information and details
about the DIC operation and
displays see
Driver Information
Center (DIC) on page 5-26 andTire
Messages on page 5-43.
The low tire pressure warning light
may come on in cool weather when
the vehicle is first started, and then
turn off as the vehicle is driven. This
could be an early indicator that the
air pressure is getting low and
needs to be inflated to the proper
pressure.
A Tire and Loading Information label
shows the size of the original
equipment tires and the correct
inflation pressure for the tires when
they are cold. See Vehicle Load
Limits on page 9-14, for an example
of the Tire and Loading Information
label and its location. Also see Tire
Pressure on page 10-55 for
additional information.
The TPMS can warn about a low
tire pressure condition but it does
not replace normal tire maintenance. See
Tire Inspection
on page 10-61, Tire Rotation on
page 10-61, When It Is Time for
New Tires on page 10-62, and Tires
on page 10-46.{Caution
Tire sealant materials are not all
the same. A non-approved tire
sealant could damage the TPMS
sensors. TPMS sensor damage
caused by using an incorrect tire
sealant is not covered by the
vehicle warranty. Always use only
the GM approved tire sealant
available through your dealer or
included in the vehicle.
Factory-installed Tire Inflator Kits
use a GM approved liquid tire
sealant. Using non-approved tire
sealants could damage the TPMS
sensors. See Tire Sealant and
Compressor Kit on page 10-70 for
information regarding the inflator kit
materials and instructions.