2015 CHEVROLET CORVETTE GRAND SPORT change time
[x] Cancel search: change timePage 166 of 391
Black plate (5,1)Chevrolet Corvette Owner Manual (GMNA-Localizing-U.S./Canada/Mexico-
7576293) - 2015 - crc - 6/17/14
Lighting 6-5
When the hazard warning flashers
are on, the turn signals will
not work.
Turn and Lane-Change
Signals
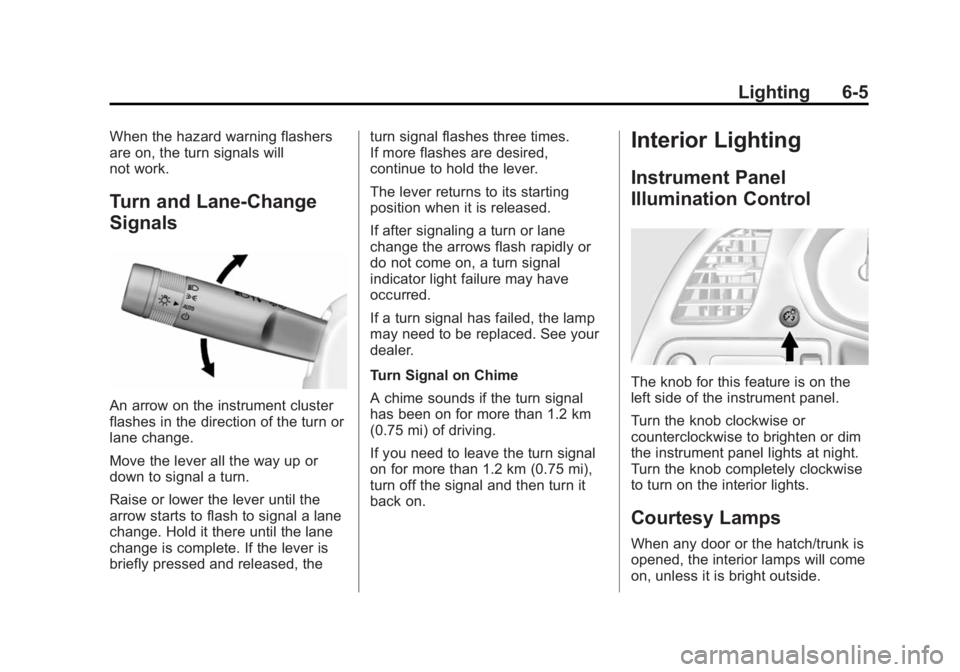
An arrow on the instrument cluster
flashes in the direction of the turn or
lane change.
Move the lever all the way up or
down to signal a turn.
Raise or lower the lever until the
arrow starts to flash to signal a lane
change. Hold it there until the lane
change is complete. If the lever is
briefly pressed and released, theturn signal flashes three times.
If more flashes are desired,
continue to hold the lever.
The lever returns to its starting
position when it is released.
If after signaling a turn or lane
change the arrows flash rapidly or
do not come on, a turn signal
indicator light failure may have
occurred.
If a turn signal has failed, the lamp
may need to be replaced. See your
dealer.
Turn Signal on Chime
A chime sounds if the turn signal
has been on for more than 1.2 km
(0.75 mi) of driving.
If you need to leave the turn signal
on for more than 1.2 km (0.75 mi),
turn off the signal and then turn it
back on.
Interior Lighting
Instrument Panel
Illumination Control
The knob for this feature is on the
left side of the instrument panel.
Turn the knob clockwise or
counterclockwise to brighten or dim
the instrument panel lights at night.
Turn the knob completely clockwise
to turn on the interior lights.
Courtesy Lamps
When any door or the hatch/trunk is
opened, the interior lamps will come
on, unless it is bright outside.
Page 167 of 391
Black plate (6,1)Chevrolet Corvette Owner Manual (GMNA-Localizing-U.S./Canada/Mexico-
7576293) - 2015 - crc - 6/17/14
6-6 Lighting
The rear compartment lights only
come on when the rear
compartment is opened.
To adjust the brightness of the
courtesy lamps, turn the instrument
panel brightness knob clockwise or
counterclockwise.
Reading Lamps
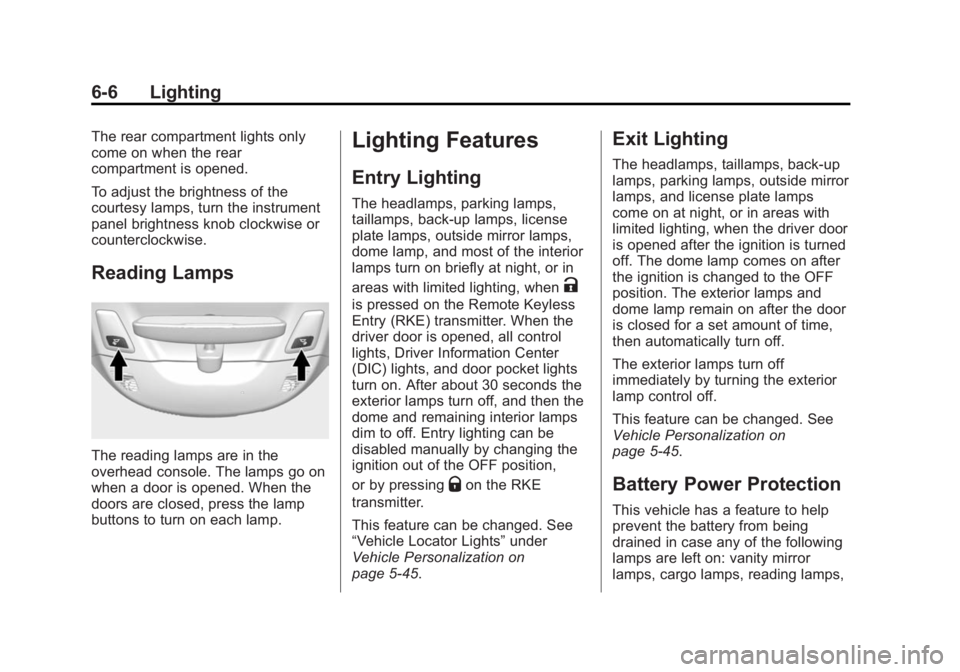
The reading lamps are in the
overhead console. The lamps go on
when a door is opened. When the
doors are closed, press the lamp
buttons to turn on each lamp.
Lighting Features
Entry Lighting
The headlamps, parking lamps,
taillamps, back-up lamps, license
plate lamps, outside mirror lamps,
dome lamp, and most of the interior
lamps turn on briefly at night, or in
areas with limited lighting, when
K
is pressed on the Remote Keyless
Entry (RKE) transmitter. When the
driver door is opened, all control
lights, Driver Information Center
(DIC) lights, and door pocket lights
turn on. After about 30 seconds the
exterior lamps turn off, and then the
dome and remaining interior lamps
dim to off. Entry lighting can be
disabled manually by changing the
ignition out of the OFF position,
or by pressing
Qon the RKE
transmitter.
This feature can be changed. See
“Vehicle Locator Lights” under
Vehicle Personalization on
page 5-45.
Exit Lighting
The headlamps, taillamps, back-up
lamps, parking lamps, outside mirror
lamps, and license plate lamps
come on at night, or in areas with
limited lighting, when the driver door
is opened after the ignition is turned
off. The dome lamp comes on after
the ignition is changed to the OFF
position. The exterior lamps and
dome lamp remain on after the door
is closed for a set amount of time,
then automatically turn off.
The exterior lamps turn off
immediately by turning the exterior
lamp control off.
This feature can be changed. See
Vehicle Personalization on
page 5-45.
Battery Power Protection
This vehicle has a feature to help
prevent the battery from being
drained in case any of the following
lamps are left on: vanity mirror
lamps, cargo lamps, reading lamps,
Page 171 of 391
Black plate (2,1)Chevrolet Corvette Owner Manual (GMNA-Localizing-U.S./Canada/Mexico-
7576293) - 2015 - crc - 6/17/14
7-2 Infotainment System
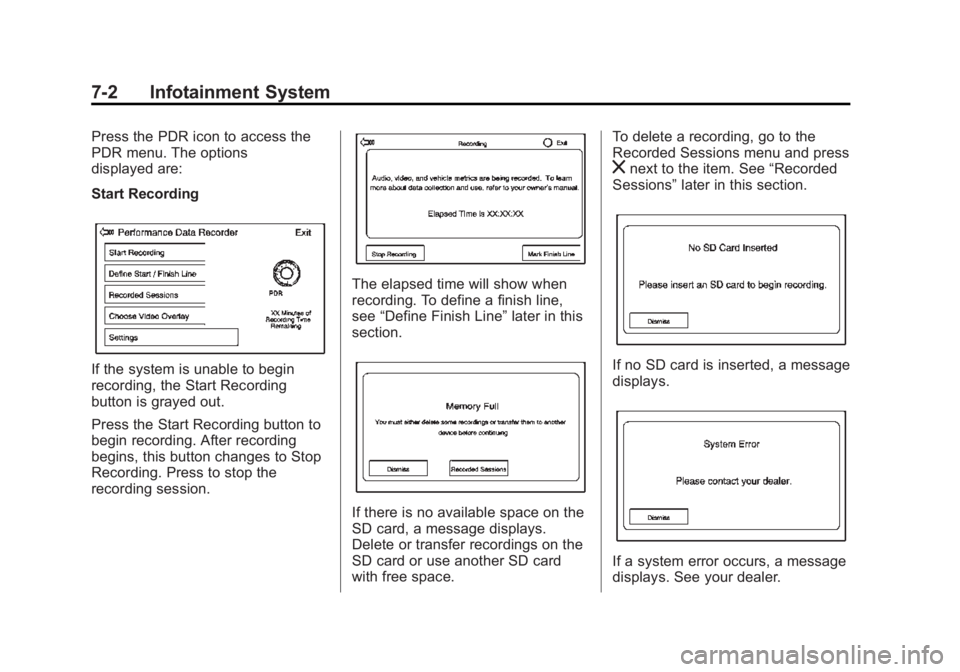
Press the PDR icon to access the
PDR menu. The options
displayed are:
Start Recording
If the system is unable to begin
recording, the Start Recording
button is grayed out.
Press the Start Recording button to
begin recording. After recording
begins, this button changes to Stop
Recording. Press to stop the
recording session.
The elapsed time will show when
recording. To define a finish line,
see“Define Finish Line” later in this
section.
If there is no available space on the
SD card, a message displays.
Delete or transfer recordings on the
SD card or use another SD card
with free space. To delete a recording, go to the
Recorded Sessions menu and press
znext to the item. See
“Recorded
Sessions” later in this section.
If no SD card is inserted, a message
displays.
If a system error occurs, a message
displays. See your dealer.
Page 172 of 391
Black plate (3,1)Chevrolet Corvette Owner Manual (GMNA-Localizing-U.S./Canada/Mexico-
7576293) - 2015 - crc - 6/17/14
Infotainment System 7-3
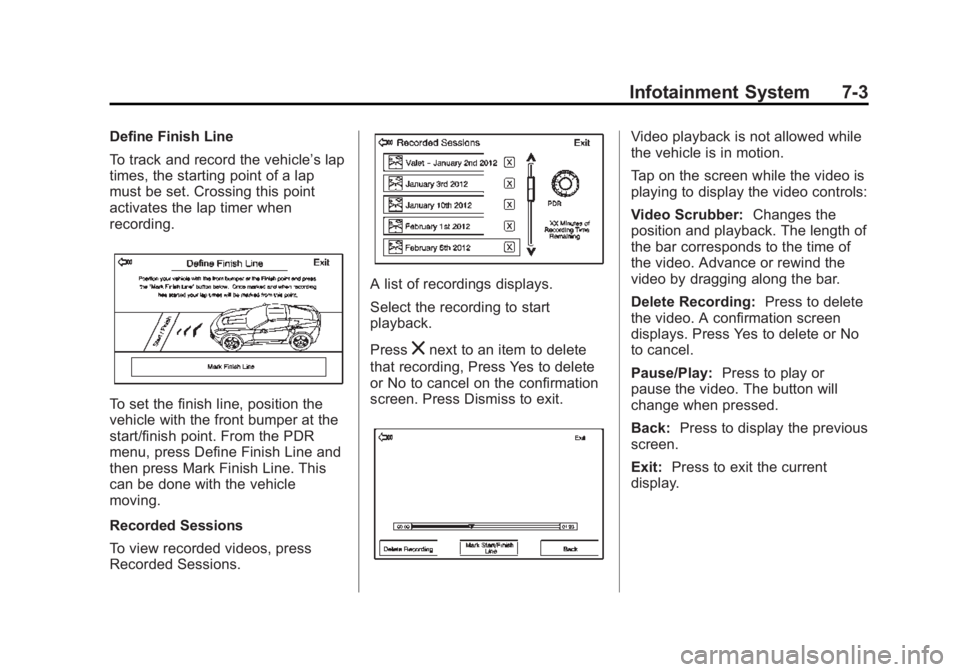
Define Finish Line
To track and record the vehicle’s lap
times, the starting point of a lap
must be set. Crossing this point
activates the lap timer when
recording.
To set the finish line, position the
vehicle with the front bumper at the
start/finish point. From the PDR
menu, press Define Finish Line and
then press Mark Finish Line. This
can be done with the vehicle
moving.
Recorded Sessions
To view recorded videos, press
Recorded Sessions.
A list of recordings displays.
Select the recording to start
playback.
Press
znext to an item to delete
that recording, Press Yes to delete
or No to cancel on the confirmation
screen. Press Dismiss to exit.
Video playback is not allowed while
the vehicle is in motion.
Tap on the screen while the video is
playing to display the video controls:
Video Scrubber: Changes the
position and playback. The length of
the bar corresponds to the time of
the video. Advance or rewind the
video by dragging along the bar.
Delete Recording: Press to delete
the video. A confirmation screen
displays. Press Yes to delete or No
to cancel.
Pause/Play: Press to play or
pause the video. The button will
change when pressed.
Back: Press to display the previous
screen.
Exit: Press to exit the current
display.
Page 177 of 391
Black plate (2,1)Chevrolet Corvette Owner Manual (GMNA-Localizing-U.S./Canada/Mexico-
7576293) - 2015 - crc - 6/17/14
8-2 Climate Controls
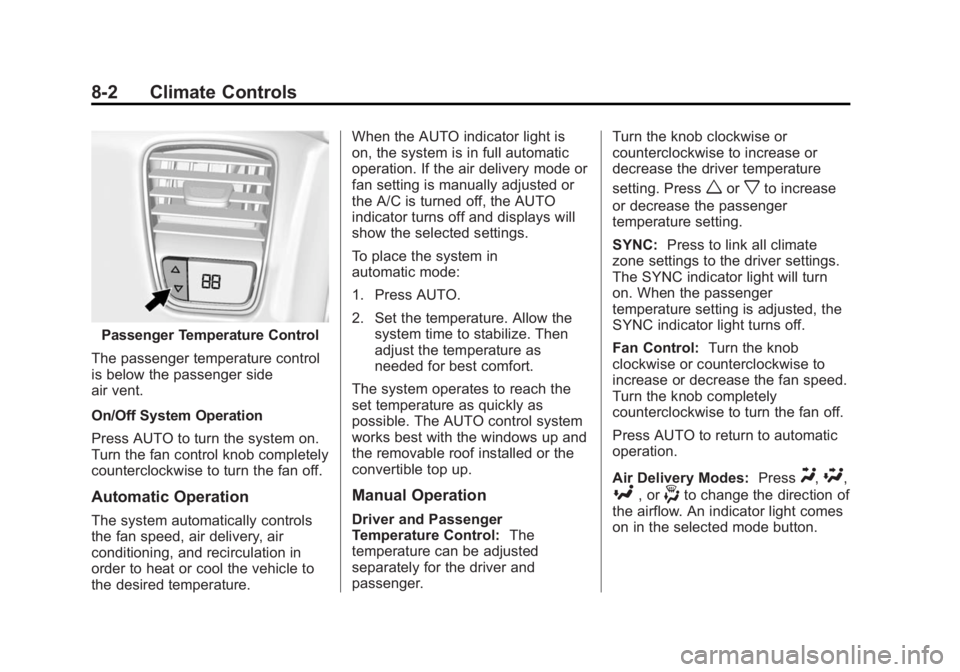
Passenger Temperature Control
The passenger temperature control
is below the passenger side
air vent.
On/Off System Operation
Press AUTO to turn the system on.
Turn the fan control knob completely
counterclockwise to turn the fan off.
Automatic Operation
The system automatically controls
the fan speed, air delivery, air
conditioning, and recirculation in
order to heat or cool the vehicle to
the desired temperature. When the AUTO indicator light is
on, the system is in full automatic
operation. If the air delivery mode or
fan setting is manually adjusted or
the A/C is turned off, the AUTO
indicator turns off and displays will
show the selected settings.
To place the system in
automatic mode:
1. Press AUTO.
2. Set the temperature. Allow the
system time to stabilize. Then
adjust the temperature as
needed for best comfort.
The system operates to reach the
set temperature as quickly as
possible. The AUTO control system
works best with the windows up and
the removable roof installed or the
convertible top up.
Manual Operation
Driver and Passenger
Temperature Control: The
temperature can be adjusted
separately for the driver and
passenger. Turn the knob clockwise or
counterclockwise to increase or
decrease the driver temperature
setting. Press
worxto increase
or decrease the passenger
temperature setting.
SYNC: Press to link all climate
zone settings to the driver settings.
The SYNC indicator light will turn
on. When the passenger
temperature setting is adjusted, the
SYNC indicator light turns off.
Fan Control: Turn the knob
clockwise or counterclockwise to
increase or decrease the fan speed.
Turn the knob completely
counterclockwise to turn the fan off.
Press AUTO to return to automatic
operation.
Air Delivery Modes: Press
Y,\,
[, or-to change the direction of
the airflow. An indicator light comes
on in the selected mode button.
Page 215 of 391
Black plate (34,1)Chevrolet Corvette Owner Manual (GMNA-Localizing-U.S./Canada/Mexico-
7576293) - 2015 - crc - 6/17/14
9-34 Driving and Operating
Brakes
Antilock Brake
System (ABS)
This vehicle has ABS, an advanced
electronic braking system that helps
prevent a braking skid.
When the vehicle begins to drive
away, ABS checks itself.
A momentary motor or clicking noise
might be heard while this test is
going on, and it might even be
noticed that the brake pedal moves
a little. This is normal.
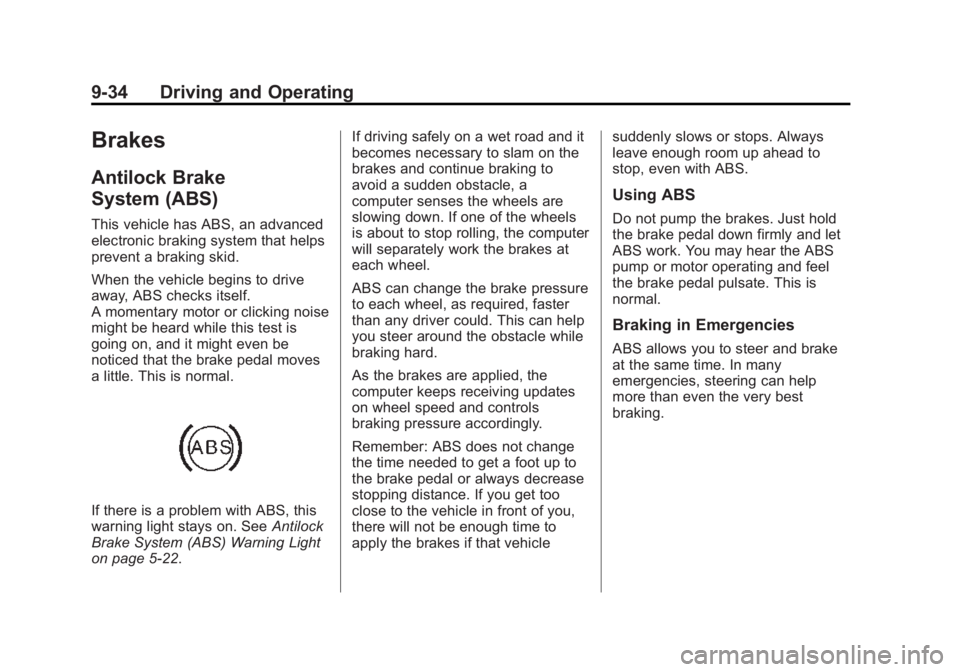
If there is a problem with ABS, this
warning light stays on. SeeAntilock
Brake System (ABS) Warning Light
on page 5-22. If driving safely on a wet road and it
becomes necessary to slam on the
brakes and continue braking to
avoid a sudden obstacle, a
computer senses the wheels are
slowing down. If one of the wheels
is about to stop rolling, the computer
will separately work the brakes at
each wheel.
ABS can change the brake pressure
to each wheel, as required, faster
than any driver could. This can help
you steer around the obstacle while
braking hard.
As the brakes are applied, the
computer keeps receiving updates
on wheel speed and controls
braking pressure accordingly.
Remember: ABS does not change
the time needed to get a foot up to
the brake pedal or always decrease
stopping distance. If you get too
close to the vehicle in front of you,
there will not be enough time to
apply the brakes if that vehicle
suddenly slows or stops. Always
leave enough room up ahead to
stop, even with ABS.
Using ABS
Do not pump the brakes. Just hold
the brake pedal down firmly and let
ABS work. You may hear the ABS
pump or motor operating and feel
the brake pedal pulsate. This is
normal.
Braking in Emergencies
ABS allows you to steer and brake
at the same time. In many
emergencies, steering can help
more than even the very best
braking.
Page 223 of 391
Black plate (42,1)Chevrolet Corvette Owner Manual (GMNA-Localizing-U.S./Canada/Mexico-
7576293) - 2015 - crc - 6/17/14
9-42 Driving and Operating
Driver Mode Selector Attributes
Affected
The Gauge Cluster Display is
configured for each mode when
linked (default):
.Tour: Modern theme which
features displays for audio and
navigation.
.Sport: Classic easy to read
Sports Car gauges.
.Track: Gauges design based on
Corvette Racing display with lap
timer.
Throttle Progression
Adjusts throttle sensitivity by
selecting how quick or slow the
throttle reacts to input.
Transmission Shift Mode −Paddle
Shift Automatic
.Adjusts to either a smoother or
firmer shift.
.Sport –Performance Algorithm
Liftfoot (PAL) recognizes
aggressive throttle maneuvers and holds lower gears for
greater engine braking and
enhanced vehicle control when
not using paddles. (Available in
Sport or Track mode.)
.Track
–Performance Algorithm
Shift (PAS) recognizes
aggressive cornering, heavy
braking, and high acceleration to
select and hold lower gears
when not using paddles.
Active Fuel Management (engine
cylinder shuts off)
4-Cylinder Mode
.Normal with automatic
transmission: The engine uses
8-cylinder mode when
accelerating, but changes to
4-cylinder mode when coasting.
.With manual transmission:
Active Fuel Management only
active in Eco mode.
.Off in Manual mode with
automatic transmission unless in
Eco mode.
.Eco keeps the engine in
4-cylinder mode unless heavy
acceleration is needed.
Exhaust (variable mode exhaust
system)
Changes when the variable exhaust
valves open.
Steering (Assist Effort)
Adjusts from a lighter steering feel
to reduced assist for more
steering feel.
Magnetic Ride Control (if
equipped)
Adjusts the shock dampening
firmness based on driving
conditions to improve comfort and
performance.
Launch Control
Available only in Track mode for
maximum “off–the–line” acceleration
when in Competitive or PTM modes.
Page 228 of 391
Black plate (47,1)Chevrolet Corvette Owner Manual (GMNA-Localizing-U.S./Canada/Mexico-
7576293) - 2015 - crc - 6/17/14
Driving and Operating 9-47
more firmly, and re-apply the
accelerator to wide open
throttle.)
The Launch Control feature will
initially limit engine speed as the
driver rapidly applies the accelerator
pedal to wide open throttle. Allow
the engine rpm to stabilize.
A smooth, quick release of the
brake pedal, while maintaining the
fully pressed accelerator pedal, will
manage wheel slip.
After the vehicle is launched, the
system continues in Competitive
Driving Mode (except Z51 and Z06
with Magnetic Ride Control) or
Performance Traction Management
(Z51 and Z06 with Magnetic Ride
Control).
Competitive Driving Mode, PTM,
and Launch Control are systems
designed for a closed course race
track and not intended for use on
public roads. The systems are not
intended to compensate for lack of
driver experience or familiarity with
the race track.Limited-Slip Differential
(Except Z51 and Z06)
If equipped, the mechanical
limited-slip differential can give more
traction on snow, mud, ice, sand,
or gravel. It works like a standard
axle most of the time, but when
traction is low, this feature allows
the drive wheel with the most
traction to move the vehicle. For
vehicles with limited slip differential,
driven under severe conditions, the
rear axle fluid should be changed.
See Competitive Driving Mode on
page 9-43 andMaintenance
Schedule on page 11-2.
Limited-Slip Differential
(Z51 and Z06 Only)
If equipped, the Electronic Limited
Slip Differential (ELSD) is
automatically activated. ELSD
actively monitors vehicle sensors
and driver inputs to determine the
amount of change for the
conditions. With ELSD, the
vehicle has:
.Enhanced high-speed control.
.Improved traction through
corners, allowing more
acceleration.
.More precise steering.
.Increased vehicle agility.
.Integration with StabiliTrak.
For vehicles with limited slip
differential, driven under severe
conditions, the rear axle fluid should
be changed. See Competitive
Driving Mode on page 9-43 and
Maintenance Schedule on
page 11-2.