2015 CHEVROLET CITY EXPRESS maintenance schedule
[x] Cancel search: maintenance schedulePage 3 of 297
Black plate (2,1)Chevrolet City Express Owner Manual (GMNA-Localizing-U.S./Canada-
7707496) - 2015 - CRC - 11/26/14
2015 Chevrolet City Express Owner Manual MTowing the Vehicle . . . . . . . . . . 10-59
Appearance Care . . . . . . . . . . . 10-61
Service and Maintenance . . . 11-1
General Information . . . . . . . . . . 11-1
Maintenance Schedule . . . . . . . 11-3
Special Application
Services . . . . . . . . . . . . . . . . . . . . 11-7
Additional Maintenance
and Care . . . . . . . . . . . . . . . . . . . . 11-7
Recommended Fluids . . . . . . . 11-11
Maintenance Records . . . . . . . 11-13
Technical Data . . . . . . . . . . . . . . . 12-1
Vehicle Identification . . . . . . . . . 12-1
Vehicle Data . . . . . . . . . . . . . . . . . . 12-2
Customer Information . . . . . . . 13-1
Customer Information . . . . . . . . 13-1
Reporting Safety Defects . . . . 13-13
Vehicle Data Recording and
Privacy . . . . . . . . . . . . . . . . . . . . 13-14
Index . . . . . . . . . . . . . . . . . . . . . i-1
Page 23 of 297
Black plate (16,1)Chevrolet City Express Owner Manual (GMNA-Localizing-U.S./Canada-
7707496) - 2015 - CRC - 11/26/14
1-16 In Brief .
Avoid idling the engine for long
periods of time. .
When road and weather
conditions are appropriate, use
cruise control. .
Always follow posted speed
limits or drive more slowly when
conditions require. .
Keep vehicle tires properly
inflated. .
Combine several trips into a
single trip. .
Replace the vehicle's tires with
the same size and type as the
originals. .
Follow recommended scheduled
maintenance. Roadside Assistance
Program U.S.: 1-800-243-8872
TTY Users (U.S. Only):
1-888-889-2438
Canada: 1-800-268-6800
New Chevrolet owners are
automatically enrolled in the
Roadside Assistance Program.
See Roadside Assistance Program
on page 13-5 .
Page 68 of 297
Black plate (29,1)Chevrolet City Express Owner Manual (GMNA-Localizing-U.S./Canada-
7707496) - 2015 - CRC - 11/26/14
Seats and Restraints 3-29Warning (Continued)proper service procedures, and
make sure the person performing
work for you is qualified to do so.
Adding Equipment to the
Airbag-Equipped Vehicle Adding accessories that change the
vehicle's frame, bumper system,
height, front end, or side sheet
metal, may keep the airbag system
from working properly. The
operation of the airbag system can
also be affected by changing or
moving any parts of the front seats,
safety belts, the airbag sensing and
diagnostic module, steering wheel,
instrument panel, any of the airbag
modules, ceiling or pillar garnish
trim, front sensors, side impact
sensors, or airbag wiring. Your dealer and the service manual
have information about the location
of the airbag sensors, sensing and
diagnostic module, and airbag
wiring.
In addition, the vehicle has a
passenger sensing system for the
front outboard passenger position,
which includes sensors that are part
of the passenger seat. The
passenger sensing system may not
operate properly if the original seat
trim is replaced with non-GM
covers, upholstery, or trim; or with
GM covers, upholstery, or trim
designed for a different vehicle. Any
object, such as an aftermarket seat
heater or a comfort-enhancing pad
or device, installed under or on top
of the seat fabric, could also
interfere with the operation of the
passenger sensing system. This
could either prevent proper
deployment of the passenger
airbag(s) or prevent the passenger
sensing system from properly turning off the passenger airbag(s).
See Passenger Sensing System on
page 3-22 .
If the vehicle has rollover roof-rail
airbags, see Different Size Tires
and Wheels on page 10-43 for
additional important information.
If you have to modify your vehicle
because you have a disability and
you have questions about whether
the modifications will affect the
vehicle's airbag system, or if you
have questions about whether the
airbag system will be affected if the
vehicle is modified for any other
reason, call Customer Assistance.
See Customer Assistance Offices
on page 13-3 .
Airbag System Check The airbag system does not need
regularly scheduled maintenance or
replacement. Make sure the airbag
readiness light is working. See
Airbag Readiness Light on
page 5-9 .
Page 105 of 297
Black plate (18,1)Chevrolet City Express Owner Manual (GMNA-Localizing-U.S./Canada-
7707496) - 2015 - CRC - 11/26/14
5-18 Instruments and Controls When the Light Flashes First and
Then Is On Steady
If the light flashes for about a minute
and then stays on, there may be a
problem with the TPMS. If the
problem is not corrected, the light
will come on at every ignition cycle.
See Tire Pressure Monitor
Operation on page 10-37 .
Engine Oil Pressure Light
{ CautionLack of proper engine oil
maintenance can damage the
engine. Driving with the engine oil
low can also damage the engine.
The repairs would not be covered
by the vehicle warranty. Check
the oil level as soon as possible.
Add oil if required, but if the oil
level is within the operating range
and the oil pressure is still low,
have the vehicle serviced. Always
follow the maintenance schedule
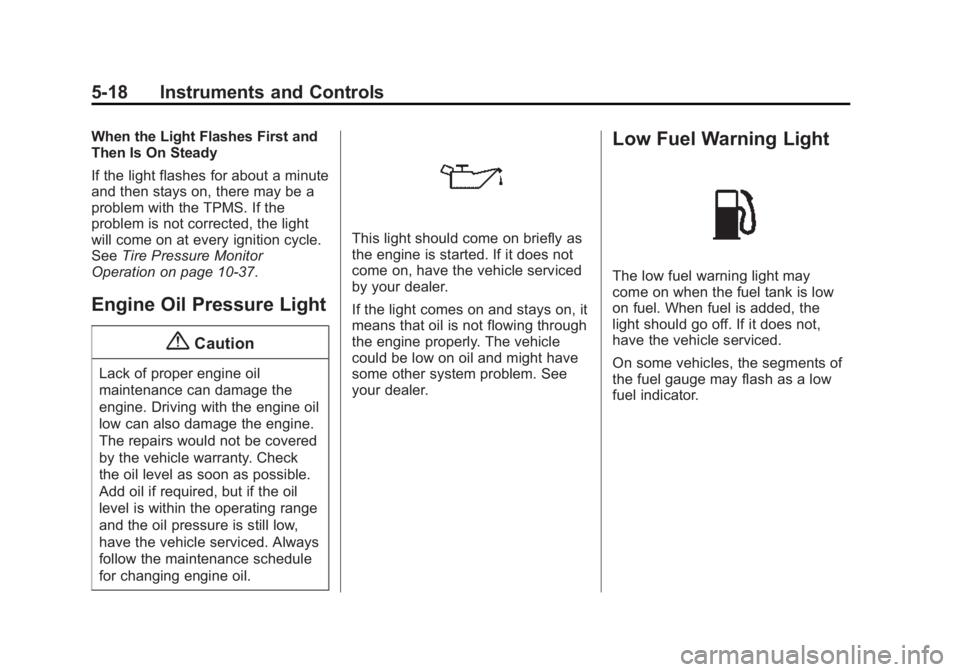
for changing engine oil. This light should come on briefly as
the engine is started. If it does not
come on, have the vehicle serviced
by your dealer.
If the light comes on and stays on, it
means that oil is not flowing through
the engine properly. The vehicle
could be low on oil and might have
some other system problem. See
your dealer. Low Fuel Warning Light
The low fuel warning light may
come on when the fuel tank is low
on fuel. When fuel is added, the
light should go off. If it does not,
have the vehicle serviced.
On some vehicles, the segments of
the fuel gauge may flash as a low
fuel indicator.
Page 191 of 297

Black plate (8,1)Chevrolet City Express Owner Manual (GMNA-Localizing-U.S./Canada-
7707496) - 2015 - CRC - 11/26/14
10-8 Vehicle Care 1. Coolant Recovery Tank. See
Cooling System on page 10-13 .
2. Engine Oil Fill Cap. See “ When
to Add Engine Oil ” under Engine
Oil on page 10-8 .
3. Brake Master Cylinder
Reservoir. See Brake Fluid on
page 10-19 .
4. Engine Air Cleaner/Filter on
page 10-11 .
5. Windshield Washer Fluid
Reservoir. See “ Adding Washer
Fluid ” under Washer Fluid on
page 10-18 .
6. Drive Belt.
7. Engine Oil Dipstick. See
“ Checking Engine Oil ” under
Engine Oil on page 10-8 .
8. Radiator Pressure Cap. See
Cooling System on page 10-13 .
9. Battery on page 10-21 .
10. Engine Compartment Fuse
Block on page 10-25 . Engine Oil To ensure proper engine
performance and long life, careful
attention must be paid to engine oil.
Following these simple, but
important steps will help protect
your investment: .
Always use engine oil approved
to the proper specification and of
the proper viscosity grade. See
“ Selecting the Right Engine Oil ”
in this section. .
Check the engine oil level
regularly and maintain the
proper oil level. See “ Checking
Engine Oil ” and “ When to Add
Engine Oil ” in this section. .
Change the engine oil at the
appropriate time. See
Maintenance Schedule on
page 11-3 . .
Always dispose of engine oil
properly. See “ What to Do with
Used Oil ” in this section. Checking Engine Oil It is a good idea to check the engine
oil level at each fuel fill. In order to
get an accurate reading, the vehicle
must be on level ground. The
engine oil dipstick handle is a loop.
See Engine Compartment Overview
on page 10-7 for the location of the
engine oil dipstick.
Obtaining an accurate oil level
reading is essential:
1. If the engine has been running
recently, turn off the engine and
allow several minutes for the oil
to drain back into the oil pan.
Checking the oil level too soon
after engine shutoff will not
provide an accurate oil level
reading.
{ Warning
The engine oil dipstick handle
may be hot; it could burn you.
Use a towel or glove to touch the
dipstick handle.
Page 194 of 297

Black plate (11,1)Chevrolet City Express Owner Manual (GMNA-Localizing-U.S./Canada-
7707496) - 2015 - CRC - 11/26/14
Vehicle Care 10-11
Continuously Variable
Transmission (CVT) Fluid
{ Caution .
GM recommends using
ACDelco CVT Fluid (Part No.
19260800, in
Canada 19299096) in CVT.
Do not mix with other fluids. .
Do not use Automatic
transmission fluid (AFT) or
Manual Transmission fluid in
a CVT, as it may damage the
CVT. Damage caused by the
use of fluids other than as
recommended is not covered
under the vehicle warranty. .
Using fluids that are not
equivalent to ACDelco CVT
Fluid (Part No. 19260800, in
Canada 19299096) may
damage the CVT. Damage
caused by the use of fluids
(Continued) Caution (Continued) other than as recommended
is not covered under the
vehicle warranty.
When checking or replacement of
CVT fluid is required, see your
dealer for servicing.
Engine Air Cleaner/Filter The engine air cleaner/filter is near
the rear of the engine compartment
on the driver side. See Engine
Compartment Overview on
page 10-7 .
When to Inspect the Engine Air
Cleaner/Filter
Inspect or replace the air cleaner/
filter at the scheduled maintenance
intervals. See Maintenance
Schedule on page 11-3 . If driving in
dusty/dirty conditions, inspect the
filter at each engine oil change. How to Inspect the Engine Air
Cleaner/Filter To inspect the air cleaner/filter,
remove the filter from the vehicle
and lightly shake it to release loose
dust and dirt. If the filter remains
covered with dirt, a new filter is
required. Never use compressed air
to clean the filter.
To inspect or replace the engine air
cleaner/filter:
1. Air Cleaner/Filter Cover
2. Air Cleaner/Filter Tabs (2)
Page 203 of 297
Black plate (20,1)Chevrolet City Express Owner Manual (GMNA-Localizing-U.S./Canada-
7707496) - 2015 - CRC - 11/26/14
10-20 Vehicle Care .
A fluid leak in the brake
hydraulic system can also cause
a low fluid level. Have the brake
hydraulic system fixed, since a
leak means that sooner or later
the brakes will not work well.
Do not top off the brake fluid.
Adding fluid does not correct a leak.
If fluid is added when the linings are
worn, there will be too much fluid
when new brake linings are
installed. Add or remove brake fluid,
as necessary, only when work is
done on the brake hydraulic system.
{ Warning
If too much brake fluid is added, it
can spill on the engine and burn,
if the engine is hot enough. You
or others could be burned, and
the vehicle could be damaged.
Add brake fluid only when work is
done on the brake hydraulic
system. See “ Checking Brake
Fluid ” in this section. Refer to the Maintenance Schedule
to determine when to check the
brake fluid. See Maintenance
Schedule on page 11-3 .
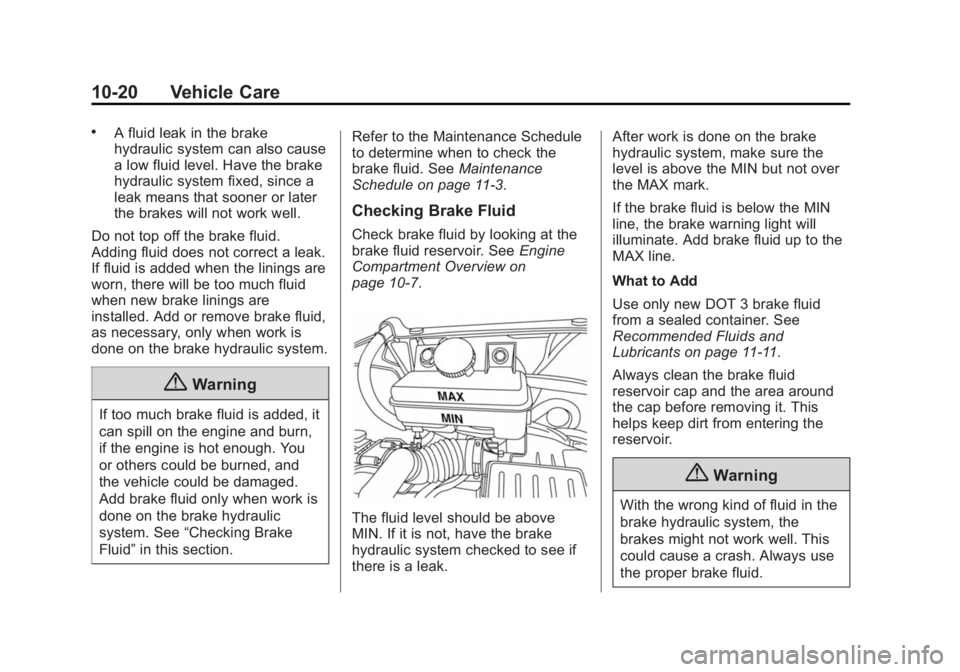
Checking Brake Fluid Check brake fluid by looking at the
brake fluid reservoir. See Engine
Compartment Overview on
page 10-7 .
The fluid level should be above
MIN. If it is not, have the brake
hydraulic system checked to see if
there is a leak. After work is done on the brake
hydraulic system, make sure the
level is above the MIN but not over
the MAX mark.
If the brake fluid is below the MIN
line, the brake warning light will
illuminate. Add brake fluid up to the
MAX line.
What to Add
Use only new DOT 3 brake fluid
from a sealed container. See
Recommended Fluids and
Lubricants on page 11-11 .
Always clean the brake fluid
reservoir cap and the area around
the cap before removing it. This
helps keep dirt from entering the
reservoir.
{ Warning
With the wrong kind of fluid in the
brake hydraulic system, the
brakes might not work well. This
could cause a crash. Always use
the proper brake fluid.
Page 205 of 297
Black plate (22,1)Chevrolet City Express Owner Manual (GMNA-Localizing-U.S./Canada-
7707496) - 2015 - CRC - 11/26/14
10-22 Vehicle Care Note: The extended storage switch
is used for long term vehicle
storage. Even if the extended
storage switch is broken it is not
necessary to replace it. Replace
only the open fuse in the switch with
a new fuse.
How to replace the extended
storage switch:
1. To remove the extended storage
switch, be sure the ignition
switch is in the OFF or LOCK
position.
2. Be sure the headlight switch is
in the OFF position.
3. Remove the fuse box cover.
4. Pinch the locking tabs (1)
and (2) found on each side of
the storage switch.
5. Pull the storage switch straight
out from the fuse box (3). Wiper Blade Replacement Windshield wiper blades should be
inspected for wear and cracking.
See Maintenance Schedule on
page 11-3 .
Replacement blades come in
different types and are removed in
different ways. For proper type and
length, see Maintenance
Replacement Parts on page 11-12 .
{ CautionAllowing the wiper arm to touch
the windshield when no wiper
blade is installed could damage
the windshield. Any damage that
occurs would not be covered by
the vehicle warranty. Do not allow
the wiper arm to touch the
windshield.
1. Lift the wiper arm away from the
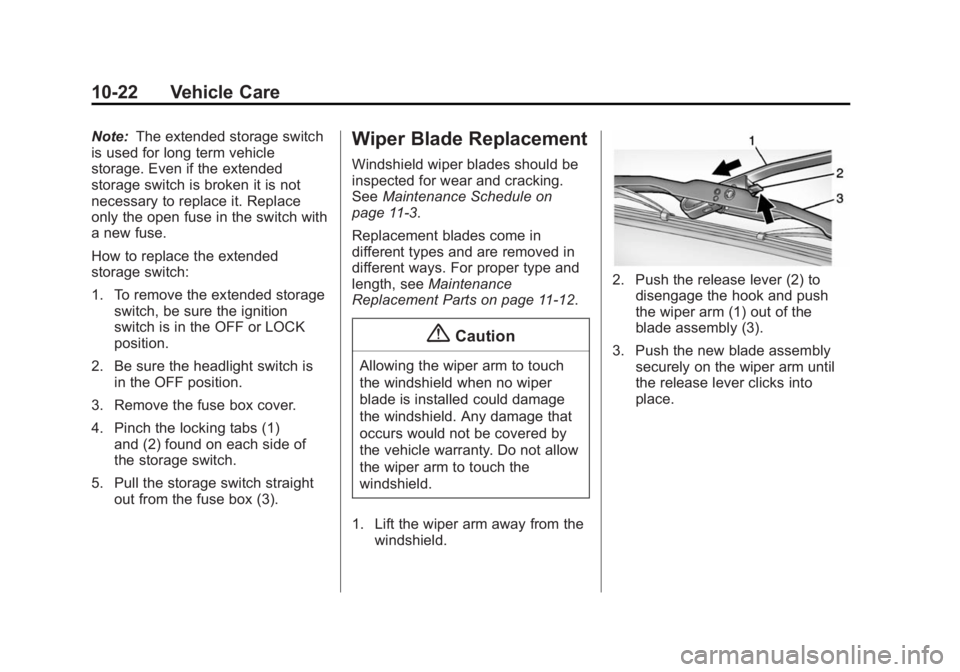
windshield. 2. Push the release lever (2) to
disengage the hook and push
the wiper arm (1) out of the
blade assembly (3).
3. Push the new blade assembly
securely on the wiper arm until
the release lever clicks into
place.