2015 CADILLAC ATS SEDAN center console
[x] Cancel search: center consolePage 192 of 443

Black plate (15,1)Cadillac ATS Owner Manual (GMNA-Localizing-U.S./Canada/Mexico-
7707477) - 2015 - crc - 9/15/14
Infotainment System 7-15
Root Directory
The root directory is treated as a
folder. All files contained directly
under the root directory are
accessed prior to any root directory
folders.
Empty Folders
If a root directory or folder is empty
or contains only folders, the player
advances to the next folder in the
file structure that contains a
compressed audio file. The empty
folder(s) are not displayed or
numbered.
No Folder
When the CD only contains
compressed audio files without any
folders or playlists, all files are
under the root folder.USB Port
Playing from a USB
A USB mass storage device or
Media Transfer Protocol (MTP)
device can be connected to the
USB port.
The USB port is in the center
console under the armrest and,
if equipped, in the storage behind
the climate control system. See
Instrument Panel Storage on
page 4-1.
When connecting a non-Apple
®
device to the USB port in the center
console, the message“This USB
port only supports Apple Devices”
will appear. Connect the device to
the other port to initiate playback.
Both ports are capable of charging
devices.
USB MP3 Player and USB Drives
.The USB MP3 players and USB
drives connected must comply
with the USB Mass Storage
Class specification (USB MSC).
.Hard disc drives are not
supported.
To play a USB device:
.Connect the USB.
.Press the MEDIA button on the
faceplate until the connected
device is shown.
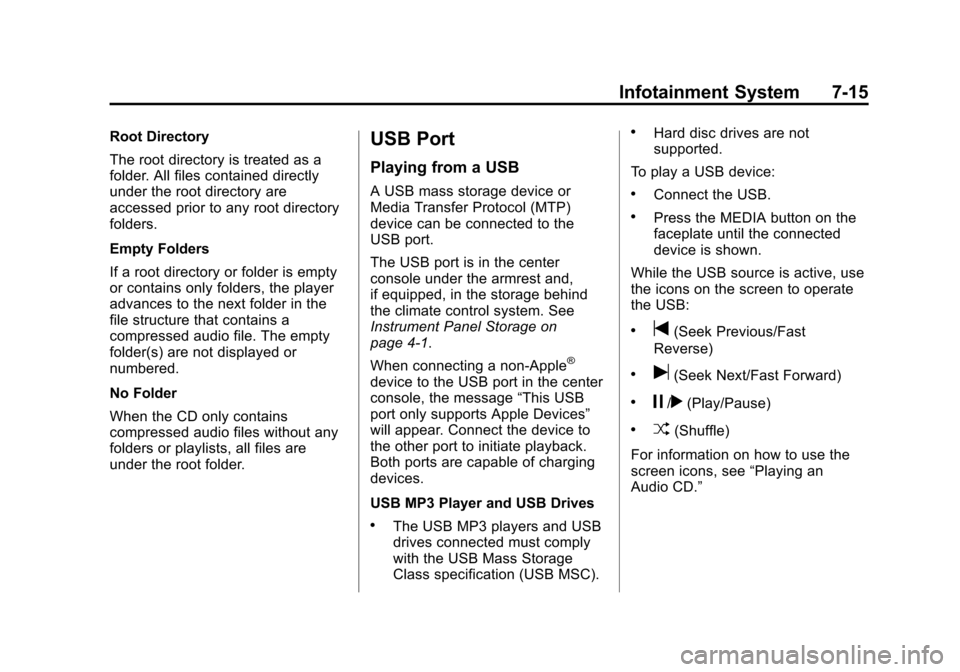
While the USB source is active, use
the icons on the screen to operate
the USB:
.t(Seek Previous/Fast
Reverse)
.u(Seek Next/Fast Forward)
.j/r(Play/Pause)
.Z(Shuffle)
For information on how to use the
screen icons, see “Playing an
Audio CD.”
Page 193 of 443

Black plate (16,1)Cadillac ATS Owner Manual (GMNA-Localizing-U.S./Canada/Mexico-
7707477) - 2015 - crc - 9/15/14
7-16 Infotainment System
USB Menu
Press the MENU knob to display the
USB menu and the following may
display:
Browse:Select to display the files
and folders on the USB device.
Tone Settings: Select to adjust
Bass, Midrange, Treble, Balance,
Fade, and EQ (Equalizer). See
“Tone Settings” under“Playing an
Audio CD.”
Auto Volume: If equipped, see
“Playing an Audio CD.”
Bose AudioPilot
®: If equipped,
this feature can be turned on or off.
See “Bose
®AudioPilot®”in AM-FM
Radio on page 7-8.
EQ (Equalizer) Settings:
If equipped, this feature adjusts the
pre-defined EQ modes. See “EQ
(Equalizer) Settings” inAM-FM
Radio on page 7-8. DSP Modes:
If equipped with a
Bose
®Surround Sound System, this
feature adjusts the DSP modes.
See “DSP Modes” inAM-FM Radio
on page 7-8.
Playing from an iPod®
This feature supports the following
iPod models:
.iPod nano®(1st, 2nd, 3rd, and
4th generation)
.iPod with video (5.0 and 5.5)
.iPod classic®(6th generation)
.iPod touch®(1st and 2nd
generation)
There may be problems with
operation and function in the
following situations:
.When connecting an iPod on
which a more recent version of
the firmware is installed than is
supported by the infotainment
system.
.When connecting an iPod on
which firmware from other
providers is installed.
To connect and control an iPod:
1. Connect one end of the standard iPod USB cable to the iPod's
dock connector.
2. Connect the other end to a USB port in the center console or in
the center stack storage bin.
3. Press the MEDIA button to select the source.
iPod music information displays on
the radio’s display and begins
playing through the vehicle’s audio
system.
The iPod battery recharges
automatically while the vehicle is on.
When the vehicle is off while an
iPod is connected using the iPod
USB cable, the iPod battery stops
charging and the iPod automatically
turns off.
Page 195 of 443

Black plate (18,1)Cadillac ATS Owner Manual (GMNA-Localizing-U.S./Canada/Mexico-
7707477) - 2015 - crc - 9/15/14
7-18 Infotainment System
Genres:
1. Turn the MENU knob to highlightand press to view the genres
stored on the iPod.
2. Turn the MENU knob to select a genre name to view a list of
artists of that genre.
3. Turn the MENU knob to highlight an artist and press to select to
view albums by that artist.
4. Turn the MENU knob to highlight and press to select an album to
view songs.
5. Turn the MENU knob to highlight and press to select the song
from the list to begin playback.
Songs:
1. Turn the MENU knob to highlight and press to view a list of all
songs stored on the iPod.
2. Turn the MENU knob to highlight and press to select the song
from the list to begin playback.Playing from an iPhone®
or iPad®
This feature supports iPhone 3G,
iPhone 3GS, iPhone 4, and iPad.
Follow the same instructions as
stated earlier for using an iPod.
SD Card Reader
This vehicle has an SD card reader
in the center console.
Set up any SD card while the
vehicle is in P (Park).
1. Plug the SD card into the reader.
2. Press the MEDIA button toselect the SD device.
If an SD card has already been
connected, but a different source is
currently active, press the MEDIA
screen button repeatedly to cycle
through all of the available audio
source screens, until the SD card
screen is selected. Playing Music from the SD Card
An SD card is played the same way
a USB device is played. See
USB
Port on page 7-15.
Auxiliary Jack
This vehicle has an AUX port in the
center console under the armrest.
Possible auxiliary audio sources
include:
.Laptop computer
.Audio music player
This jack is not an audio output. Do
not plug headphones into the
auxiliary input jack. Auxiliary
devices should be set up while the
vehicle is in P (Park).
Connect a 3.5 mm (1/8 in) cable
from the auxiliary device to the
auxiliary input jack.
Page 209 of 443

Black plate (32,1)Cadillac ATS Owner Manual (GMNA-Localizing-U.S./Canada/Mexico-
7707477) - 2015 - crc - 9/15/14
7-32 Infotainment System
.Access or delete Report Card
data or Teen Driver settings.
Register or Unregister a Key
Any of the vehicle keys can be
registered as a Teen Driver key.
Label the key to tell it apart from the
other keys. A maximum of eight
keys can be registered. There is
one Report Card per vehicle.
After creating the PIN, to register or
unregister the key(s):
1. Have the vehicle running.
2. For automatic transmissions, the vehicle must be in P (Park). For
manual transmissions, the
vehicle must be stopped with the
parking brake set.
3. Select Teen Driver from the Settings menu.
4. Enter the PIN.
5. Select Key Registration.
The system will display instructions
for registering or unregistering
a key. For Ignition Keyed System:
.If the key is not registered,
select Register and follow the
instructions. A message displays
to confirm successful
registration.
.If the key is already registered,
the option to unregister displays.
If Unregister is selected, the key
is no longer registered and a
confirmation displays.
For Pushbutton Start System:
Once Key Registration is selected,
the system detects whether there is
a transmitter key in the transmitter
pocket, which is in the center
console storage area or on the side
of the steering wheel column. See
Remote Keyless Entry (RKE)
System Operation on page 2-2.
.If no transmitter key is detected,
a message displays indicating to
place the transmitter key in the
transmitter pocket.
.If the transmitter key is in the
transmitter pocket, it will identify
whether the transmitter key is
registered or unregistered.
.If the transmitter key is not
registered, a message
displays requesting
confirmation to register.
Select Register and follow
the instructions. A message
displays to confirm
successful registration.
.If the transmitter key is
already registered, the
option to unregister
displays. If Unregister is
selected, the transmitter
key is no longer registered
and a confirmation displays.
In vehicles with a Pushbutton start
system, if a Teen Driver transmitter
key and a non-Teen Driver
transmitter key are both present at
start up, the vehicle will recognize
the non-Teen Driver transmitter key
to start the vehicle. The Teen Driver
settings will not be active.
Page 254 of 443

Black plate (31,1)Cadillac ATS Owner Manual (GMNA-Localizing-U.S./Canada/Mexico-
7707477) - 2015 - crc - 9/15/14
Driving and Operating 9-31
If equipped with an Electric Parking
Brake (EPB), the switch is on the
center console for manual
transmission vehicles, or on the left
side of the instrument panel for
automatic transmission vehicles.
The EPB can always be activated,
even if the ignition is off. To prevent
draining the battery, avoid repeated
cycles of the EPB when the engine
is not running.
The system has a red parking brake
status light and an amber parking
brake warning light. SeeParking
Brake Light on page 5-19 and
Service Electric Parking Brake Light
on page 5-19. There are also
parking brake-related Driver
Information Center (DIC) messages.
See Brake System Messages on
page 5-33. In case of insufficient
electrical power, the EPB cannot be
applied or released.
Before leaving the vehicle, check
the red parking brake status light to
ensure that the parking brake is
applied.EPB Apply
To apply the EPB:
1. Be sure the vehicle is at a complete stop.
2. Lift up the EPB switch momentarily.
The red parking brake status light
will flash and then stay on once the
EPB is fully applied. If the red
parking brake status light flashes
continuously, then the EPB is only
partially applied or there is a
problem with the EPB. A DIC
message will display. Release the
EPB and try to apply it again. If the
light does not come one, or keeps
flashing, have the vehicle serviced.
Do not drive the vehicle if the red
parking brake status light is flashing.
See your dealer. See Parking Brake
Light on page 5-19.
If the amber parking brake warning
light is on, lift up on the EPB switch
and hold it up. Continue to hold the
switch until the red parking brake status light remains on. If the amber
parking brake warning light is on,
see your dealer.
If the EPB is applied while the
vehicle is moving, the vehicle will
decelerate as long as the switch is
held up. If the switch is held up until
the vehicle comes to a stop, the
EPB will remain applied.
The vehicle may automatically apply
the EPB in some situations when
the vehicle is not moving. This is
normal, and is done to periodically
check the correct operation of the
EPB system.
If the EPB fails to apply, the rear
wheels should be blocked to
prevent vehicle movement.
EPB Release
To release the EPB:
1. Place the ignition in the ACC/
ACCESSORY or ON/RUN/
START position.
2. Apply and hold the brake pedal.
Page 258 of 443

Black plate (35,1)Cadillac ATS Owner Manual (GMNA-Localizing-U.S./Canada/Mexico-
7707477) - 2015 - crc - 9/15/14
Driving and Operating 9-35
Ifdcomes on and stays on:
1. Stop the vehicle.
2. Turn the engine off and wait 15 seconds.
3. Start the engine.
Drive the vehicle. If
dcomes on
and stays on, the vehicle may need
more time to diagnose the problem.
If the condition persists, see your
dealer.
Turning the Systems Off
and On
Manual Transmission TCS/
StabiliTrak Button Shown,
Automatic Transmission TCS/ StabiliTrak Button Similar
The button for TCS and StabiliTrak
is on the center console, behind the
shift lever.
{Caution
Do not repeatedly brake or
accelerate heavily when TCS is
off. The vehicle driveline could be
damaged.
To turn off only TCS, press and
release the
gbutton. The Traction
Off light
idisplays in the
instrument cluster and the
appropriate DIC message displays.
See Ride Control System Messages
on page 5-40.
To turn TCS on again, press and
release the
gbutton. The Traction
Off light
idisplayed in the
instrument cluster will turn off.
If TCS is limiting wheel spin when
the
gbutton is pressed, the system
will not turn off until the wheels stop
spinning.
Page 259 of 443

Black plate (36,1)Cadillac ATS Owner Manual (GMNA-Localizing-U.S./Canada/Mexico-
7707477) - 2015 - crc - 9/15/14
9-36 Driving and Operating
To turn off both TCS and StabiliTrak,
press and hold the
gbutton until
the Traction Off light
iand
StabiliTrak OFF Light
gcome on
and stay on in the instrument
cluster. The appropriate DIC
message displays. See Ride Control
System Messages on page 5-40.
To turn TCS and StabiliTrak on
again, press and release the
g
button. The Traction Off lightiand
StabiliTrak OFF Light
gin the
instrument cluster turn off.
Adding accessories can affect the
vehicle performance. See
Accessories and Modifications on
page 10-3.
Driver Mode Control
Driver Mode Control attempts to add
a sportier feel, provide a more
comfortable ride, or assist in
different weather conditions or
terrain. This system simultaneously
changes the software calibration of
various sub-systems. Depending on
the option package, available
features, and mode selected, the
suspension, steering, and
powertrain will change calibrations
to achieve the desired mode
characteristics. If the vehicle is
equipped with MagneRide™,
selecting the various Driver Modes
adjusts the ride of the vehicle to
enhance the ride performance for
the road conditions and the
selected mode.
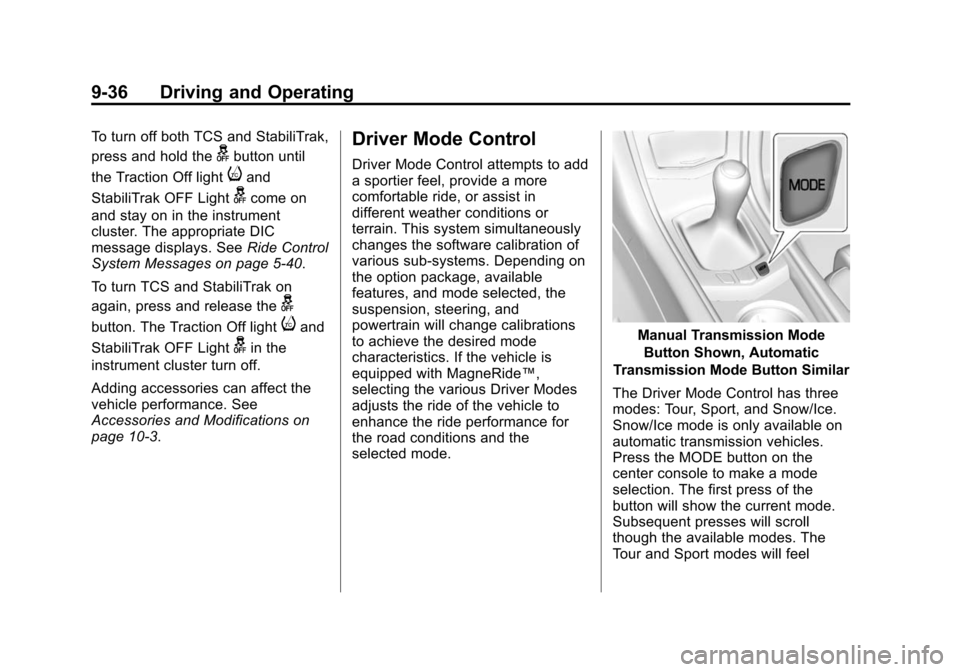
Manual Transmission Mode
Button Shown, Automatic
Transmission Mode Button Similar
The Driver Mode Control has three
modes: Tour, Sport, and Snow/Ice.
Snow/Ice mode is only available on
automatic transmission vehicles.
Press the MODE button on the
center console to make a mode
selection. The first press of the
button will show the current mode.
Subsequent presses will scroll
though the available modes. The
Tour and Sport modes will feel