Page 2 of 20
2
Exterior Lamps Control/Instrument Panel Illumination ControlTurn Signal Lever
Driver Information Center
Tilt/Telescopic Steering Wheel Lever
Adaptive Cruise ControlF/ Forward Collision AlertF/Heated Steering WheelF/Voice Recognition Buttons
Audio Steering Wheel Controls/Driver Information Center Controls
Windshield Wipers Lever
Hood Release Lever
Storage/Fuse Panel Access
Instrument Panel
Oil Pressure
Airbag Readiness
StabiliTrak/Traction Control Warning
Security
Charging System
Door Ajar
Safety Belt Reminder
Brake System Warning
Electric Parking Brake Service
Lights On
Low Tire Pressure
Antilock Brake System Warning
Check Engine
Traction Control Off
StabiliTrak/Traction Control Off
Fog Lamps
Cruise Control
Lane Departure Warning
Symbols
Page 5 of 20
5
Power Seat Adjustment
A. Seat Adjustment
Move the horizontal control to move the seat forward or rearward and to tilt, raise or lower the seat.
B. Seatback Recline Adjustment
Move the vertical control to recline or raise the seatback.
C. Lumbar Adjustment
Press the control pad to adjust the lumbar support.
D. Memory Seat ButtonsF
With the driver’s seat in the desired position, press and hold the MEM button and button 1 or 2 to set the memory position. Press and hold button 1 or 2 to recall the stored position.
Head Restraint Adjustment
Press the release button on the left side of the head restraint to raise or lower the head restraint.
Folding Rear Seats
1. Make sure the safety belt is in the retainer clip (A).
2. Pull the lever (B) on top of the seatback. When the red marking is visible, the seatback is unlatched.
3. Fold down the seatback.
Seats
See Seats and Restraints in your Owner Manual.
F Optional equipment
ABC
D
BA
Page 8 of 20
8
Infotainment System
Refer to your Owner Manual for important safety information about using \
the infotainment system while driving.
The infotainment system controls include the audio system buttons, touch\
screen, steering wheel controls and voice recognition.
Power/ Volume
RADIO:Select AM, FM, XMF
Applications:Touch the screen icon to access the application
Home screen
Interaction Selector:Display the favorites list
Additional Pages:Touch to view additional pages of applications (if available)
Eject CD Previous or next radio station, track or file
◄BACK: Move back one level in the menus
MENU: Tune radio stations/Open and select menus
MEDIA:Select the media source
See your Infotainment System Owner Manual.
F Optional equipment
Page 9 of 20

9
Infotainment System
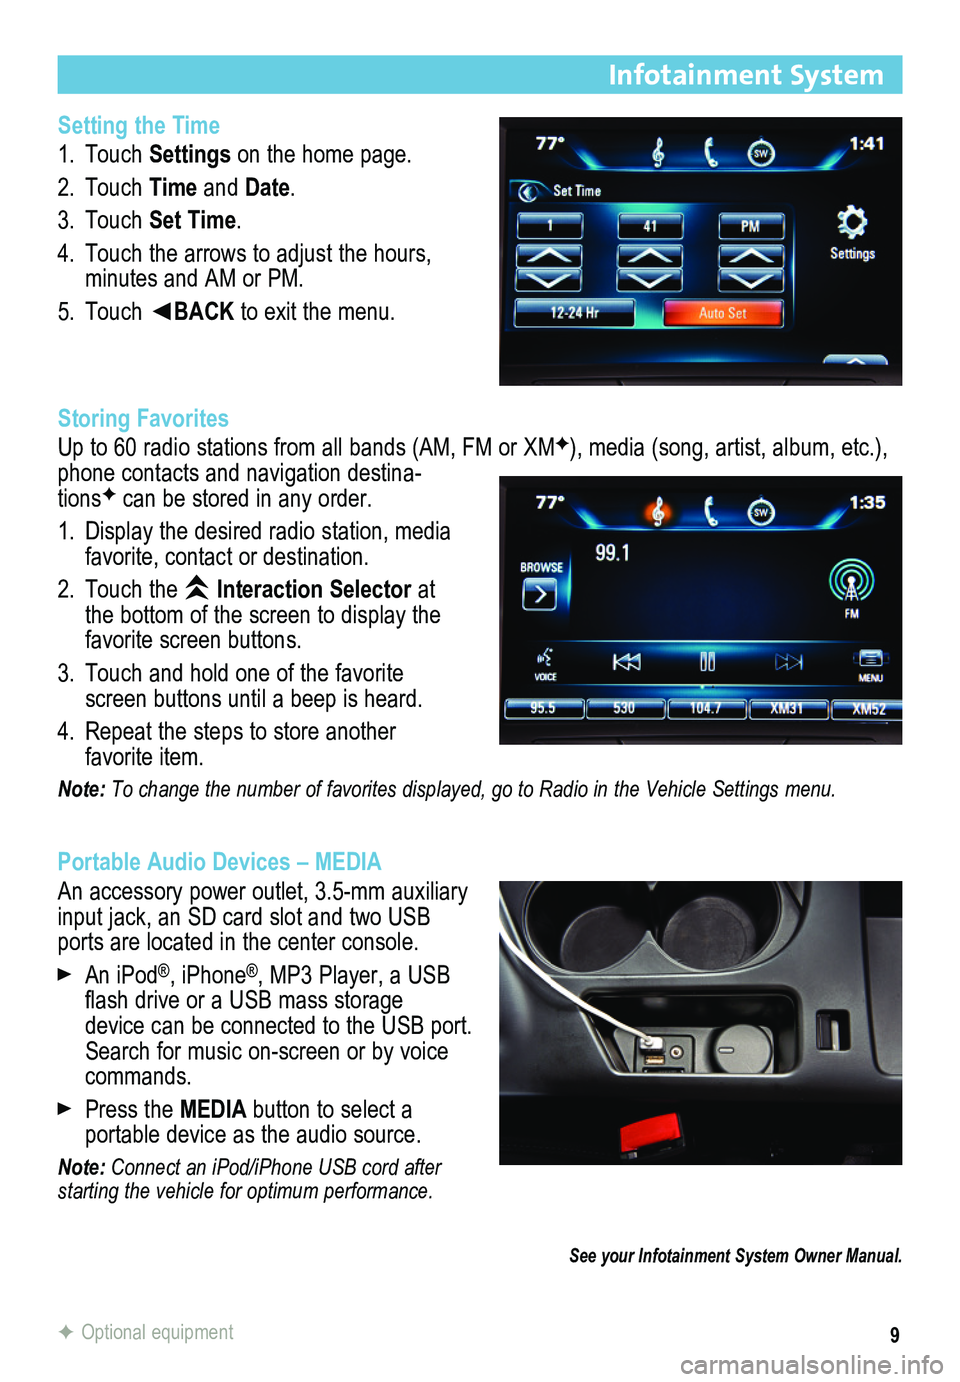
Setting the Time
1. Touch Settings on the home page.
2. Touch Time and Date.
3. Touch Set Time.
4. Touch the arrows to adjust the hours, minutes and AM or PM.
5. Touch ◄BACK to exit the menu.
Storing Favorites
Up to 60 radio stations from all bands (AM, FM or XMF), media (song, artist, album, etc.), phone contacts and navigation destina-tionsF can be stored in any order.
1. Display the desired radio station, media favorite, contact or destination.
2. Touch the Interaction Selector at the bottom of the screen to display the favorite screen buttons.
3. Touch and hold one of the favorite screen buttons until a beep is heard.
4. Repeat the steps to store another favorite item.
Note: To change the number of favorites displayed, go to Radio in the Vehicle Settings menu.
Portable Audio Devices – MEDIA
An accessory power outlet, 3.5-mm auxiliary input jack, an SD card slot and two USB ports are located in the center console.
An iPod®, iPhone®, MP3 Player, a USB flash drive or a USB mass storage device can be connected to the USB port. Search for music on-screen or by voice commands.
Press the MEDIA button to select a
portable device as the audio source.
Note: Connect an iPod/iPhone USB cord after starting the vehicle for optimum performance.
See your Infotainment System Owner Manual.
F Optional equipment