2015 BMW X5M ESP
[x] Cancel search: ESPPage 85 of 255
M Driving Dynamics Control
The concept The M Driving Dynamics Control affects the
response of the vehicle to accelerator pedal movements.
Programs Response behavior options:▷"Efficient": efficient, comfortable. Minimal
fuel consumption.
Ideal e. g. in city traffic or on snow.▷"Sport": sporty, dynamic.▷"Sport Plus": spontaneous, direct. Maxi‐
mum dynamics.
Selecting a channel
Via M Drive On the Control Display:
1."Settings"2."M Drive 1" or "M Drive 2"3. Select the symbol.4.Select the desired channel.
When M Drive is active, setting is immedi‐
ately applied.
To activate M Drive with the selected settings,
press the corresponding button on the steer‐
ing wheel:
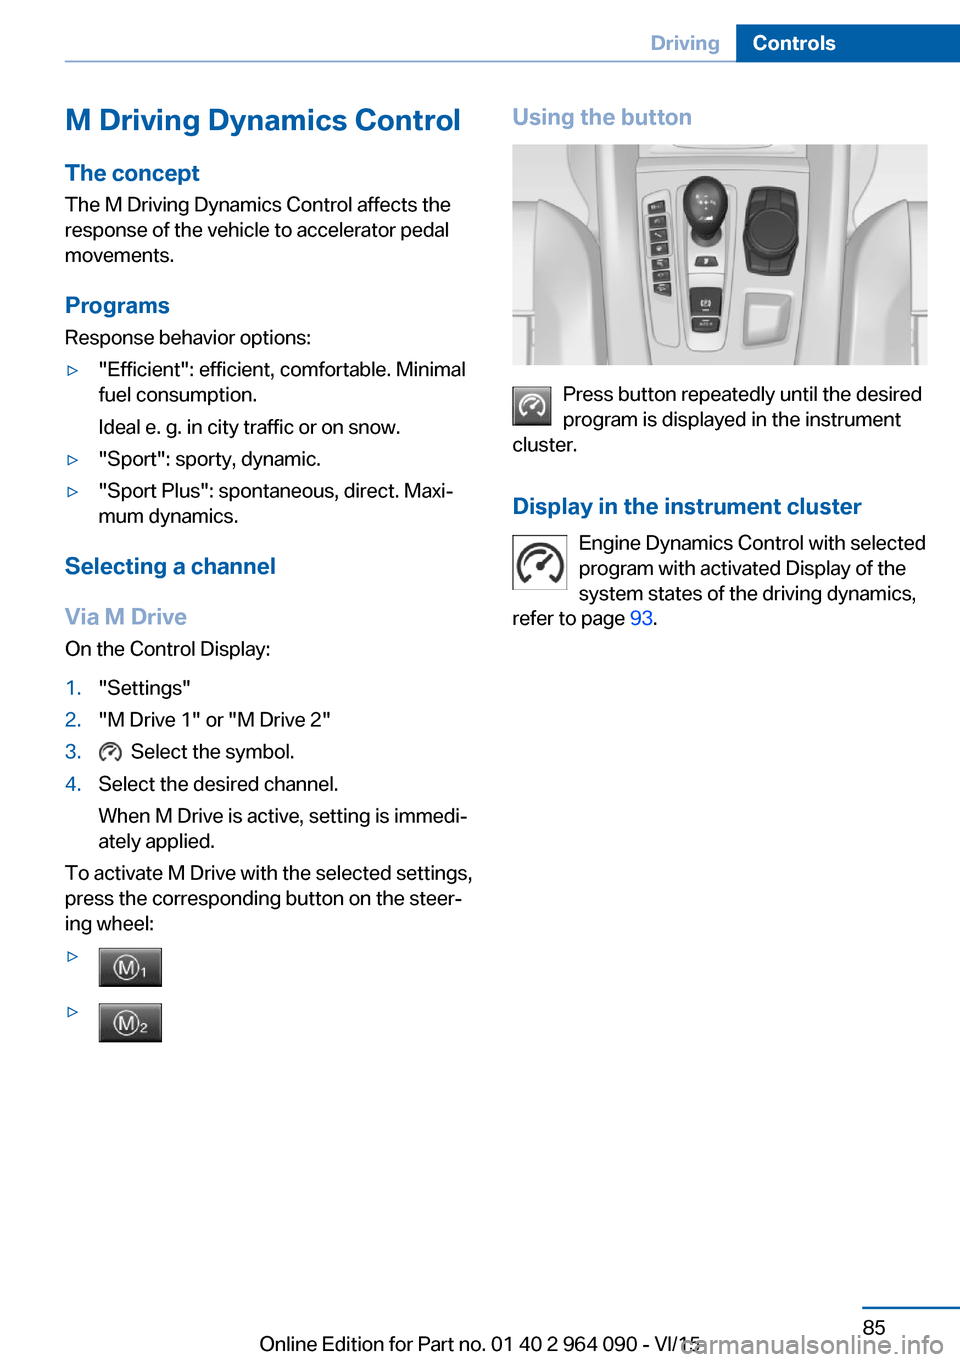
▷▷Using the button
Press button repeatedly until the desired
program is displayed in the instrument
cluster.
Display in the instrument cluster Engine Dynamics Control with selected
program with activated Display of the
system states of the driving dynamics,
refer to page 93.
Seite 85DrivingControls85
Online Edition for Part no. 01 40 2 964 090 - VI/15
Page 86 of 255
DisplaysVehicle features and optionsThis chapter describes all standard, country-
specific and optional features offered with the
series. It also describes features that are not
necessarily available in your car, e. g., due tothe selected options or country versions. This
also applies to safety-related functions and
systems. The respectively applicable country
provisions must be observed when using the
respective features and systems.
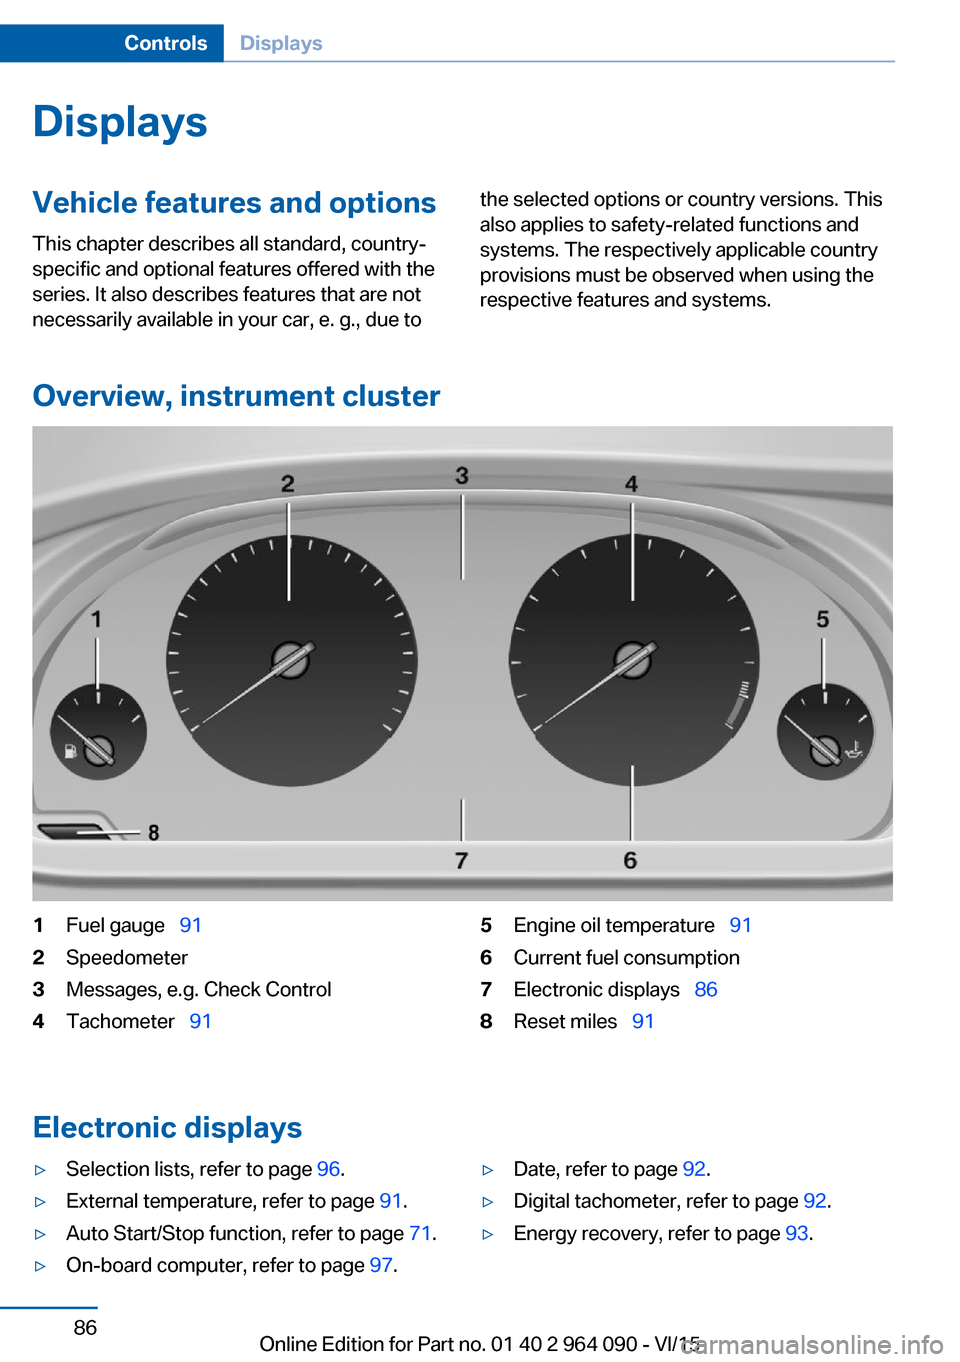
Overview, instrument cluster
1Fuel gauge 912Speedometer3Messages, e.g. Check Control4Tachometer 915Engine oil temperature 916Current fuel consumption7Electronic displays 868Reset miles 91
Electronic displays
▷Selection lists, refer to page 96.▷External temperature, refer to page 91.▷Auto Start/Stop function, refer to page 71.▷On-board computer, refer to page 97.▷Date, refer to page 92.▷Digital tachometer, refer to page 92.▷Energy recovery, refer to page 93.Seite 86ControlsDisplays86
Online Edition for Part no. 01 40 2 964 090 - VI/15
Page 92 of 255
DateThe date is displayed in the on-
board comupter.
Setting the date and date for‐
mat, refer to page 100.
Digital tachometer
Display The current speed is displayed
in the instrument cluster.
Activate display1."Settings"2."Instrument cluster"3."Digital speedometer"
Adjusting the unit
1."Settings"2."Language/Units"3."Dig. speedo:"4.Select the desired unit.
Settings are stored for the profile currently
used.
Gear display with Drivelogic
Sequential mode
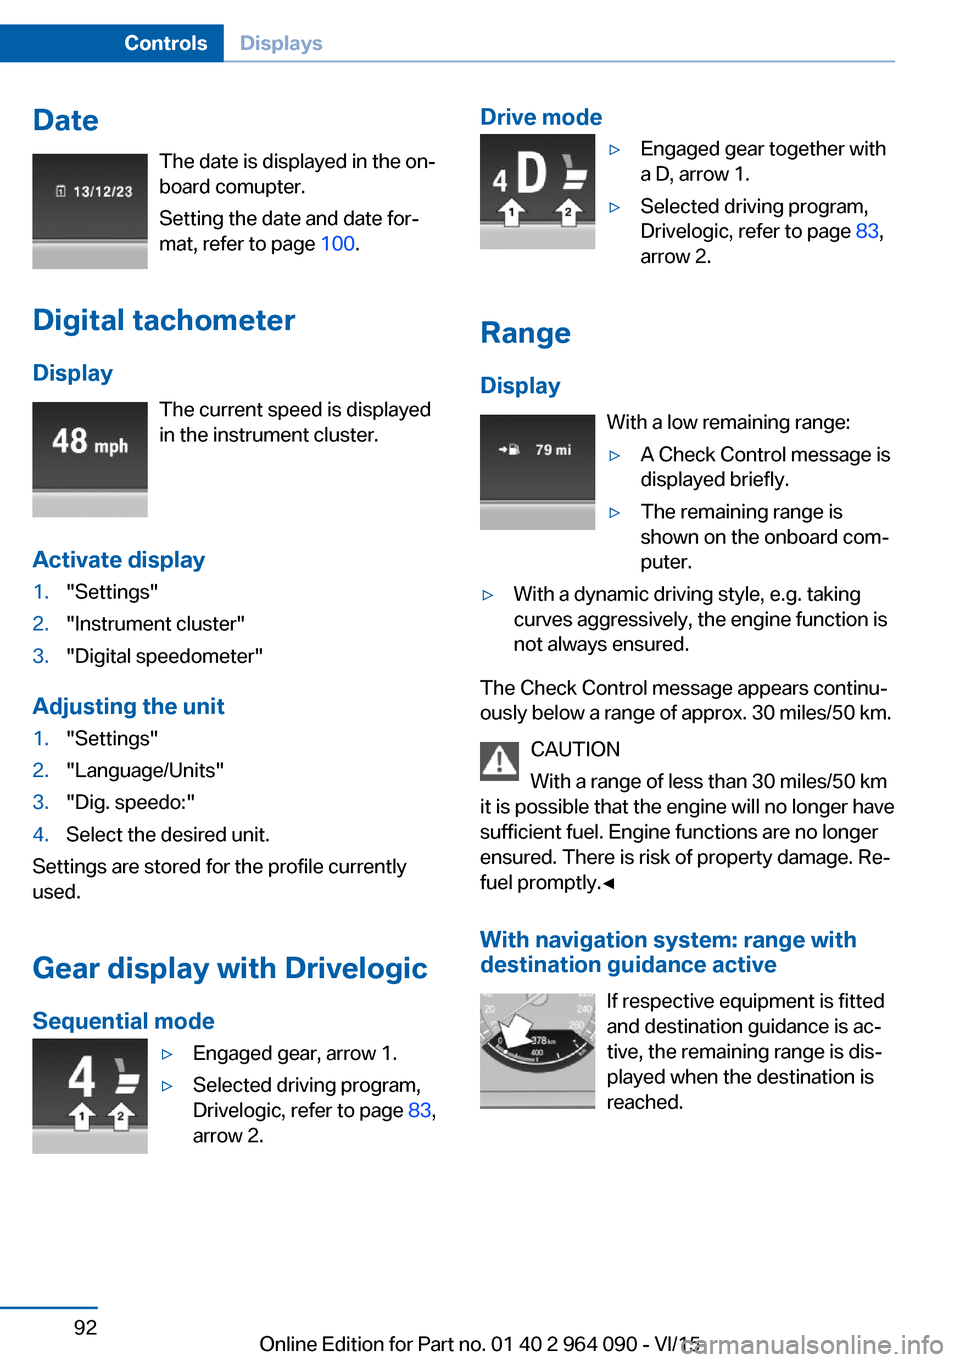
▷Engaged gear, arrow 1.▷Selected driving program,
Drivelogic, refer to page 83,
arrow 2.Drive mode▷Engaged gear together with
a D, arrow 1.▷Selected driving program,
Drivelogic, refer to page 83,
arrow 2.
Range
Display With a low remaining range:
▷A Check Control message is
displayed briefly.▷The remaining range is
shown on the onboard com‐
puter.▷With a dynamic driving style, e.g. taking
curves aggressively, the engine function is
not always ensured.
The Check Control message appears continu‐
ously below a range of approx. 30 miles/50 km.
CAUTION
With a range of less than 30 miles/50 km
it is possible that the engine will no longer have
sufficient fuel. Engine functions are no longer
ensured. There is risk of property damage. Re‐
fuel promptly.◀
With navigation system: range with
destination guidance active
If respective equipment is fitted
and destination guidance is ac‐
tive, the remaining range is dis‐
played when the destination is
reached.
Seite 92ControlsDisplays92
Online Edition for Part no. 01 40 2 964 090 - VI/15
Page 95 of 255

On the Control Display:1."Vehicle info"2."Vehicle status"3.Open "Options".4."Last Service Request"
Gear shift indicatorThe conceptThe system recommends the most fuel effi‐
cient gear for the current driving situation.
General information
The gear shift indicator is active in the sequen‐
tial mode of the M Steptronic Sport transmis‐
sion.
Suggestions to shift gear up or down are dis‐
played in the instrument cluster.
On vehicles without a gear shift indicator, the
engaged gear is displayed.
Displays
SymbolDescriptionShift up to fuel efficient gear.Shift down to fuel efficient gear.
Speed limit detection
The concept
Speed limit detection
Speed limit detection shows the current maxi‐
mum permitted speed in the instrument clus‐
ter. The camera in the area of the interior rear‐
view mirror detects traffic signs at the edge of
the road as well as variable overhead sign
posts. Traffic signs with extra symbols for wet
road conditions, etc. are also detected and
compared with the vehicle's onboard data,
such as for the rain sensor, and will be dis‐
played depending on the situation. The system
takes into account the information stored in
the navigation system and also displays speed
limits present on routes without signs.
Information WARNING
The system does not relieve from the
personal responsibility to correctly assess visi‐
bility and traffic situation. There is risk of an ac‐
cident. Adjust the driving style to the traffic
conditions. Watch traffic closely and actively
interfere in the respective situations.◀
Overview
Camera
The camera is installed near the interior rear‐
view mirror.
Keep the windshield in the area behind the in‐
terior rearview mirror clean and clear.
Switching on/offOn the Control Display:
1."Settings"2."Instrument cluster"3."Speed limit information"Seite 95DisplaysControls95
Online Edition for Part no. 01 40 2 964 090 - VI/15
Page 97 of 255
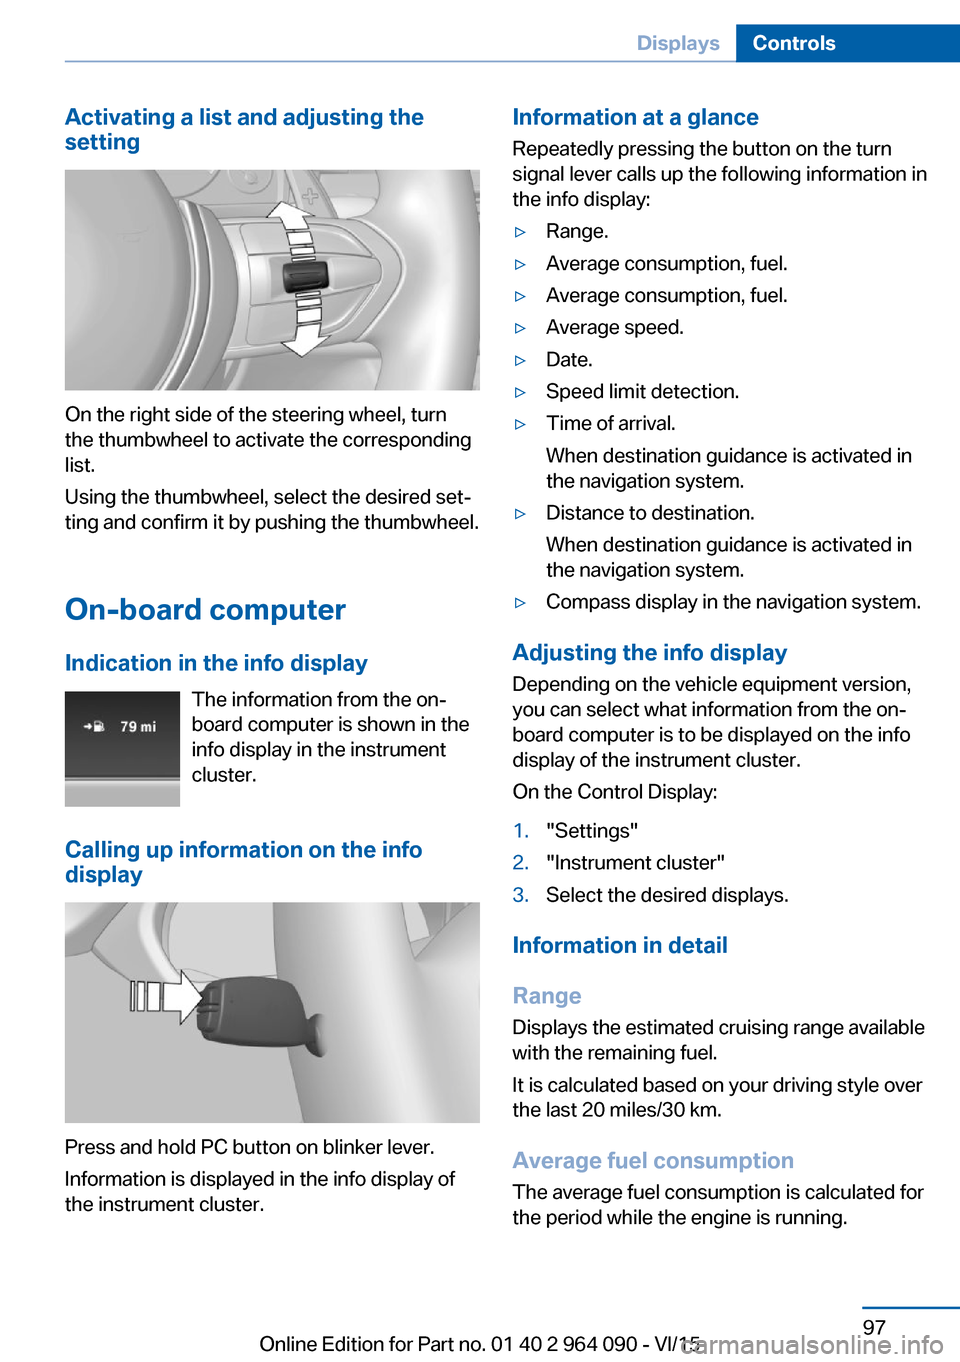
Activating a list and adjusting the
setting
On the right side of the steering wheel, turn
the thumbwheel to activate the corresponding
list.
Using the thumbwheel, select the desired set‐
ting and confirm it by pushing the thumbwheel.
On-board computer
Indication in the info display The information from the on-
board computer is shown in the
info display in the instrument
cluster.
Calling up information on the info
display
Press and hold PC button on blinker lever.
Information is displayed in the info display of
the instrument cluster.
Information at a glance
Repeatedly pressing the button on the turn
signal lever calls up the following information in
the info display:▷Range.▷Average consumption, fuel.▷Average consumption, fuel.▷Average speed.▷Date.▷Speed limit detection.▷Time of arrival.
When destination guidance is activated in
the navigation system.▷Distance to destination.
When destination guidance is activated in
the navigation system.▷Compass display in the navigation system.
Adjusting the info display
Depending on the vehicle equipment version,
you can select what information from the on-
board computer is to be displayed on the info
display of the instrument cluster.
On the Control Display:
1."Settings"2."Instrument cluster"3.Select the desired displays.
Information in detail
Range
Displays the estimated cruising range available
with the remaining fuel.
It is calculated based on your driving style over
the last 20 miles/30 km.
Average fuel consumption
The average fuel consumption is calculated for
the period while the engine is running.
Seite 97DisplaysControls97
Online Edition for Part no. 01 40 2 964 090 - VI/15
Page 104 of 255
LightsVehicle features and optionsThis chapter describes all standard, country-
specific and optional features offered with the
series. It also describes features that are not
necessarily available in your car, e. g., due to
the selected options or country versions. This
also applies to safety-related functions and
systems. The respectively applicable country
provisions must be observed when using the
respective features and systems.
Overview Switches in the vehicle
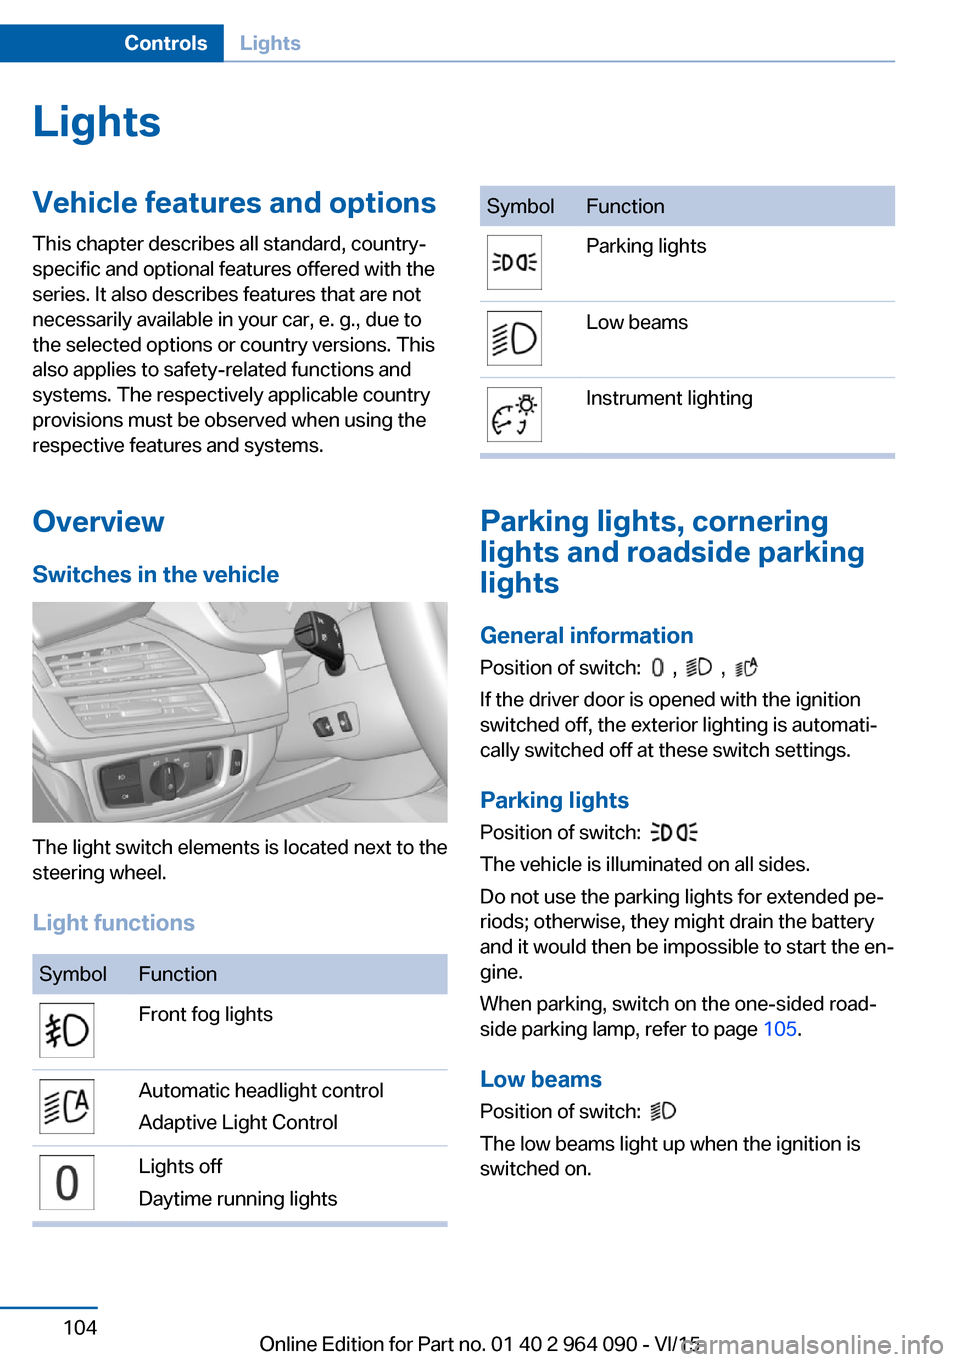
The light switch elements is located next to the
steering wheel.
Light functions
SymbolFunctionFront fog lightsAutomatic headlight control
Adaptive Light ControlLights off
Daytime running lightsSymbolFunctionParking lightsLow beamsInstrument lighting
Parking lights, cornering
lights and roadside parking
lights
General information Position of switch:
, ,
If the driver door is opened with the ignition
switched off, the exterior lighting is automati‐
cally switched off at these switch settings.
Parking lights
Position of switch:
The vehicle is illuminated on all sides.
Do not use the parking lights for extended pe‐
riods; otherwise, they might drain the battery
and it would then be impossible to start the en‐
gine.
When parking, switch on the one-sided road‐
side parking lamp, refer to page 105.
Low beams Position of switch:
The low beams light up when the ignition is
switched on.
Seite 104ControlsLights104
Online Edition for Part no. 01 40 2 964 090 - VI/15
Page 107 of 255
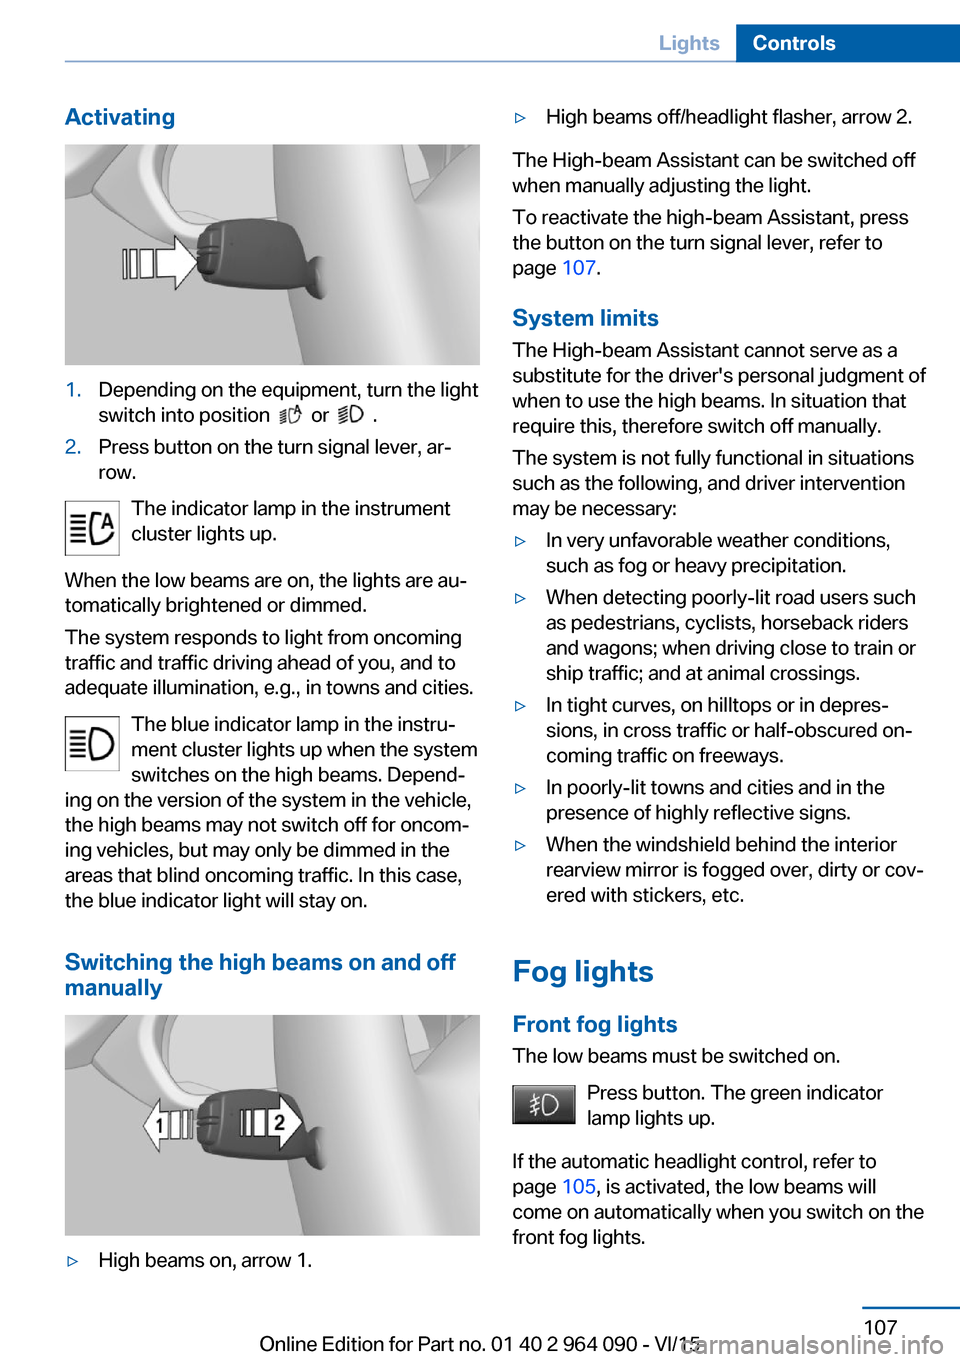
Activating1.Depending on the equipment, turn the light
switch into position
or .
2.Press button on the turn signal lever, ar‐
row.
The indicator lamp in the instrument
cluster lights up.
When the low beams are on, the lights are au‐
tomatically brightened or dimmed.
The system responds to light from oncoming
traffic and traffic driving ahead of you, and to
adequate illumination, e.g., in towns and cities.
The blue indicator lamp in the instru‐
ment cluster lights up when the system
switches on the high beams. Depend‐
ing on the version of the system in the vehicle, the high beams may not switch off for oncom‐
ing vehicles, but may only be dimmed in the
areas that blind oncoming traffic. In this case,
the blue indicator light will stay on.
Switching the high beams on and off
manually
▷High beams on, arrow 1.▷High beams off/headlight flasher, arrow 2.
The High-beam Assistant can be switched off
when manually adjusting the light.
To reactivate the high-beam Assistant, press
the button on the turn signal lever, refer to
page 107.
System limits
The High-beam Assistant cannot serve as a
substitute for the driver's personal judgment of
when to use the high beams. In situation that require this, therefore switch off manually.
The system is not fully functional in situations
such as the following, and driver intervention
may be necessary:
▷In very unfavorable weather conditions,
such as fog or heavy precipitation.▷When detecting poorly-lit road users such
as pedestrians, cyclists, horseback riders
and wagons; when driving close to train or
ship traffic; and at animal crossings.▷In tight curves, on hilltops or in depres‐
sions, in cross traffic or half-obscured on‐
coming traffic on freeways.▷In poorly-lit towns and cities and in the
presence of highly reflective signs.▷When the windshield behind the interior
rearview mirror is fogged over, dirty or cov‐
ered with stickers, etc.
Fog lights
Front fog lights
The low beams must be switched on.
Press button. The green indicator
lamp lights up.
If the automatic headlight control, refer to
page 105, is activated, the low beams will
come on automatically when you switch on the
front fog lights.
Seite 107LightsControls107
Online Edition for Part no. 01 40 2 964 090 - VI/15
Page 109 of 255
SafetyVehicle features and options
This chapter describes all standard, country-
specific and optional features offered with the
series. It also describes features that are not
necessarily available in your car, e. g., due tothe selected options or country versions. This
also applies to safety-related functions and
systems. The respectively applicable country
provisions must be observed when using the
respective features and systems.
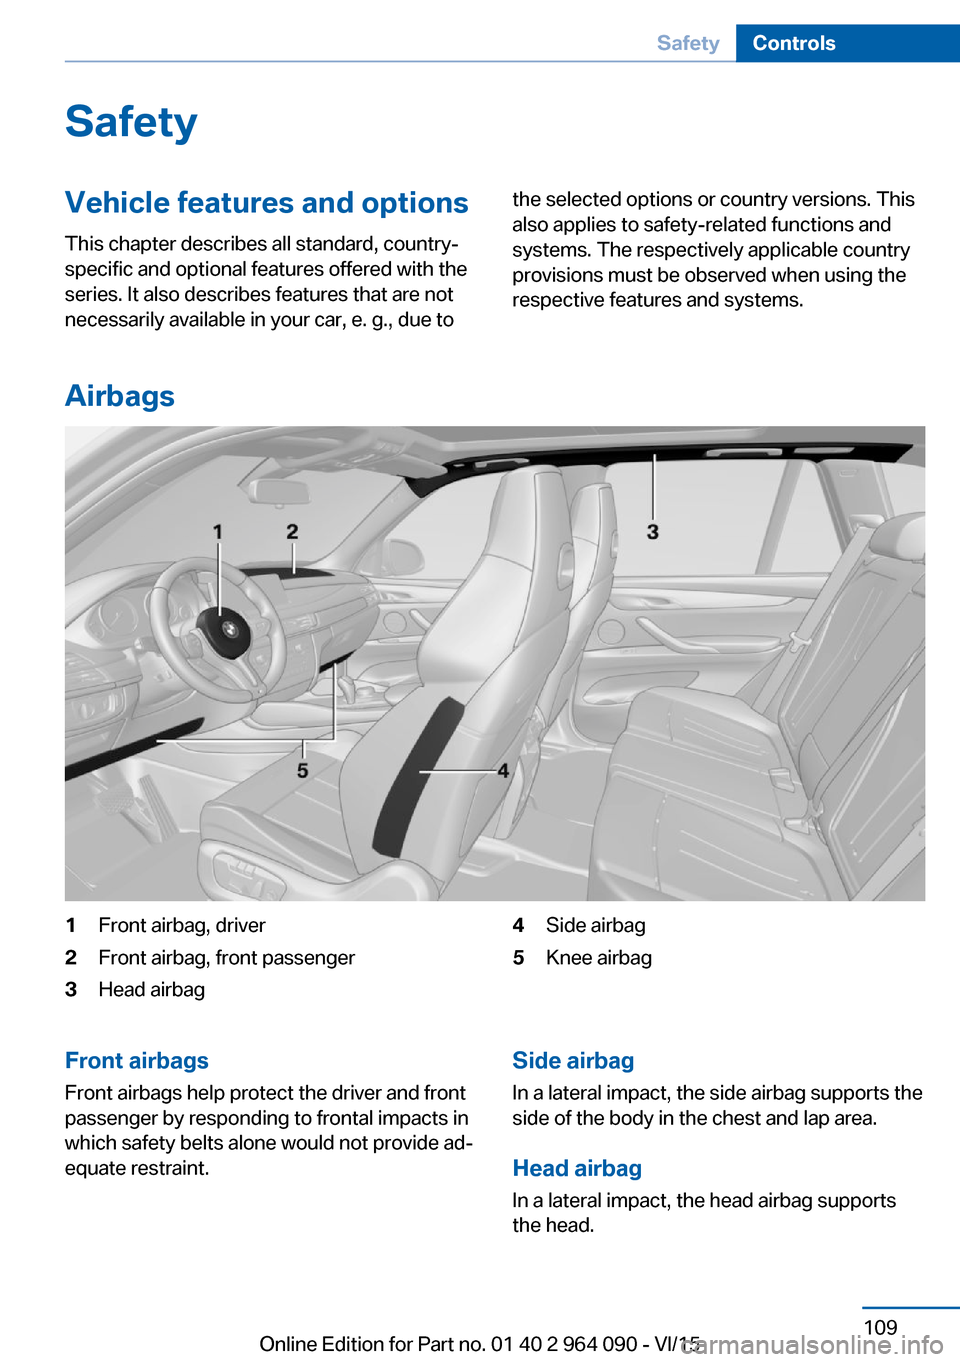
Airbags
1Front airbag, driver2Front airbag, front passenger3Head airbag4Side airbag5Knee airbagFront airbags
Front airbags help protect the driver and front
passenger by responding to frontal impacts in
which safety belts alone would not provide ad‐
equate restraint.Side airbag
In a lateral impact, the side airbag supports the
side of the body in the chest and lap area.
Head airbag In a lateral impact, the head airbag supports
the head.Seite 109SafetyControls109
Online Edition for Part no. 01 40 2 964 090 - VI/15