2015 BMW X5M tailgate
[x] Cancel search: tailgatePage 44 of 255

Unlocking
Grasp the handle of a vehicle door completely,
arrow.
This corresponds with pressing the button on
the remote control.
.
Locking
Touch the surface on the handle of a vehicle
door, arrow, with your finger for approx. 1 sec‐
ond without grasping the door handle.
This corresponds with pressing the button on
the remote control.
.
To save battery power, ensure that the ignition
and all electronic systems and/or power con‐
sumers are turned off before locking the vehi‐
cle.
Convenient closing WARNING
With convenient closing, body parts can
be jammed. There is risk of injuries. Make sure
that the area of movement of the doors is clear
during convenient closing.◀
Touch the surface on the handle of a vehicle
door, arrow, with your finger and hold it there
without grasping the door handle.
This corresponds to pressing and holding
the remote control button.
In addition to locking, the windows and the
glass sunroof close and the exterior mirrors
fold in.
Unlocking the tailgate separately
Press button on tailgate's exterior.
This corresponds with pressing the button on
the remote control.
.
The situation of the doors does not change.
Take the remote control with you and do not
leave it in the trunk; otherwise, the remote con‐
trol is locked inside the vehicle when the tail‐
gate is closed.
CAUTION
The tailgate swings back and up when it
opens. There is risk of property damage. Make
sure that the area of movement of the tailgate
is clear during opening and closing.◀
BMW X6 M: Opening and closing the
tailgate with no-touch activation
General information
The tailgate can be opened and closed with
no-touch activation using the remote control
you are carrying. Two sensors detect a for‐ ward-directed foot motion in the center of the
area at the rear of the car and the trunk lid
opens and/or closes.
Seite 44ControlsOpening and closing44
Online Edition for Part no. 01 40 2 964 090 - VI/15
Page 45 of 255

Foot movement to be carried outWARNING
During no-contact activation, vehicle
parts may be touched, e.g. hot exhaust sys‐
tem. There is risk of injuries. With the foot mo‐
tion, make sure there is steady stance and do
not touch the vehicle.◀1.Place in the center behind the vehicle,
about an arm's length from the vehicle rear.2.Move a foot in the direction of travel as far
under the vehicle as possible and immedi‐
ately pull it back. With this movement, the
leg must pass through the ranges of both
sensors.
Opening
Perform the foot movement described earlier.
The tailgate opens, regardless of whether it
was previously locked or unlocked.
Before the opening, the hazard warning sys‐
tem flashes.
If the remote control is in the sensor area, the
tailgate can be closed inadvertently by an un‐
conscious or alleged recognized foot move‐
ment.
The sensor range reaches approx. 5 ft/1.50 m
behind the area at the rear of the car.
WARNING
Body parts can be jammed when operat‐
ing the tailgate. There is risk of injuries. Make
sure that the area of movement of the tailgate
is clear during opening and closing.◀
CAUTION
The tailgate swings back and up when it
opens. There is risk of property damage. Make
sure that the area of movement of the tailgate
is clear during opening and closing.◀
ClosingPerform the foot movement described earlier.
The hazard warning system flashes on and an
acoustic signal sounds before the tailgate
closes.
The closing of the tailgate has no effect on the
locking of the vehicle.
To avoid locking it into the vehicle, do not
place the remote control in the cargo area.
Another foot movement can interrupt the clos‐
ing operation.
If the remote control is in the sensor area, the
tailgate can be closed inadvertently by an un‐
conscious or alleged recognized foot move‐
ment.
The sensor range reaches approx. 5 ft/1.50 m
behind the area at the rear of the car.
WARNING
Body parts can be jammed when operat‐
ing the tailgate. There is risk of injuries. Make
sure that the area of movement of the tailgate
is clear during opening and closing.◀
CAUTION
The tailgate swings back and up when it
opens. There is risk of property damage. Make
sure that the area of movement of the tailgate
is clear during opening and closing.◀
Malfunction Remote control detection by the vehicle can
among others be malfunctioning under the fol‐
lowing circumstances:▷The battery of the remote control is dis‐
charged. Replace the battery, refer to
page 35.Seite 45Opening and closingControls45
Online Edition for Part no. 01 40 2 964 090 - VI/15
Page 46 of 255

▷Interference of the radio connection from
transmission towers or other equipment
with high transmit power.▷Shielding of the remote control due to
metal objects.▷Interference of the radio connection from
mobile phones or other electronic devices
in direct proximity.
Do not transport the remote control together
with metal objects or electronic devices.
In the case of a malfunction, unlock and lock
the vehicle using the buttons of the remote
control or using the integrated key, refer to
page 39.
Adjusting
Unlocking The settings are saved in the active profile, re‐
fer to page 35.
Doors
1."Settings"2."Doors/key"3. Select the symbol.4.Select the desired function:▷"Driver's door only"
Only the driver's door and the fuel filler
flap are unlocked. Pressing again un‐
locks the entire vehicle.▷"All doors"
The entire vehicle is unlocked.
Tailgate
Depending on optional features and country
version, this setting is not offered in some
cases.
1."Settings"2."Doors/key"3. Select the symbol.4.Select the desired function:▷"Tailgate"
The tailgate is opened.▷"Tailgate + door(s)"
The tailgate is opened and the doors
unlocked.
Confirmation signals from the vehicle
The settings are saved in the active profile, re‐
fer to page 35.
1."Settings"2."Doors/key"3.Deactivate or activate the desired confir‐
mation signals.▷"Acoustic sig. lock/unlock"▷"Flash when lock/unlock"
Automatic locking
The settings are saved in the active profile, re‐fer to page 35.
1."Settings"2."Doors/key"3.Select the desired function:▷"Lock if no door is opened"
The vehicle locks automatically after a
short period of time if no door is
opened.▷"Lock after start driving"
The vehicle locks automatically after
you drive off.
Retrieving the seat, mirror, and
steering wheel settings
The driver's seat, exterior mirror, and steering
wheel position adjusted last will be stored for
the active profile.
When the vehicle is unlocked, these positions
are automatically retrieved if this function was
activated.
Seite 46ControlsOpening and closing46
Online Edition for Part no. 01 40 2 964 090 - VI/15
Page 47 of 255

WARNING
There is risk of jamming when moving
the seats. There is risk of injuries or risk of
property damage. Make sure that the area of
movement of the seat is clear prior to any ad‐
justment.◀
The adjustment procedure is interrupted:▷When a seat position switch is pressed.▷When a button of the seat, mirror, and
steering wheel memory is pressed briefly.
Activating the setting
1."Settings"2."Doors/key"3."Last seat position autom."
Alarm system
The conceptWhen the vehicle is locked, the vehicle alarm
system responds to:
▷Opening a door, the hood or the tailgate.▷Movements in the interior.▷Changes in the vehicle tilt, e. g., during at‐
tempts at stealing a wheel or when towing
the car.▷Disconnected battery voltage.
The alarm system briefly signals tampering:
▷By sounding an acoustic alarm.▷By switching on the hazard warning sys‐
tem.▷By flashing the daytime running lights.
Arming and disarming the alarm
system
When you unlock or lock the vehicle, either
with the remote control or via the Comfort Ac‐
cess, the alarm system is disarmed or armed at
the same time.
Door lock and armed alarm system
The alarm system is triggered when the door is
opened, when the vehicle is unlocked via the
door lock.
Tailgate and armed alarm system
The tailgate can be opened even when the alarm system is armed.
After the tailgate is closed, it is locked and
monitored again when the doors are locked.
The hazard warning system flashes once.
Panic mode
You can trigger the alarm system if you find
yourself in a dangerous situation.
Press button on the remote control for
at least 3 seconds.
To switch off the alarm: press any button.
Indicator lamp on the interior rearview
mirror▷The indicator lamp flashes briefly every
2 seconds:
The alarm system is armed.▷The indicator lamp flashes after locking:
Doors, hood or tailgate are not correctly
closed. Correctly closed access points are
secured.
After 10 seconds, the indicator lamp
flashes continuously. Interior motion sen‐
sor and tilt alarm sensor are not active.Seite 47Opening and closingControls47
Online Edition for Part no. 01 40 2 964 090 - VI/15
Page 61 of 255

Calling up of a seat position
deactivated
After a brief period, calling up stored seat posi‐
tions is deactivated to save battery power.
To reactivate calling up of a seat position:▷Open or close the door or tailgate.▷Press a button on the remote control.▷Press the Start/Stop button.
Mirrors
Exterior mirrors
General information The mirror on the passenger side is more
curved than the driver's side mirror.
Depending on the vehicle equipment, the mir‐
ror setting is stored for the profile currently
used. When the vehicle is unlocked via the re‐
mote control, the position is automatically re‐
trieved if this function is active.
Information WARNING
Objects reflected in the mirror are closer
than they appear. The distance to the traffic
behind could be incorrectly estimated, e.g.
while changing lanes. There is risk of an acci‐
dent. Estimate the distance to the traffic be‐
hind by looking over your shoulder.◀
Overview1Adjusting 612Left/right, Automatic Curb Monitor3Fold in and out 62
Selecting a mirror
To change over to the other mirror:
Slide the switch.
Adjusting electrically The setting corresponds to the direc‐
tion in which the button is pressed.
Saving positions
Seat, mirror, and steering wheel memory, refer
to page 60.
Adjusting manually In case of electrical malfunction press edges of
mirror.
Automatic Curb Monitor The concept
If reverse gear is engaged, the mirror glass on
the front passenger side is tilted downward.
This improves your view of the curb and other
low-lying obstacles when parking, e.g.
Seite 61AdjustingControls61
Online Edition for Part no. 01 40 2 964 090 - VI/15
Page 145 of 255

PDC has failed. Have the system checked.
Surround View
The concept Surround View comprises various camera as‐
sistance systems that help the driver when
parking, maneuvering, and at complex exits
and intersections.▷Rearview camera, refer to page 145.▷Top View, refer to page 148.▷Side View, refer to page 149.
Rearview camera
The concept The rearview camera provides assistance in
parking and maneuvering backwards. The area
behind the vehicle is shown on the Control
Display.
Information WARNING
The system does not relieve from the
personal responsibility to correctly assess the
traffic situation. There is risk of an accident.
Adjust the driving style to the traffic condi‐ tions. Watch traffic and vehicle surroundings
closely and actively interfere in the respective
situations.◀
Overview
Button in the vehicle
Rearview camera
Camera
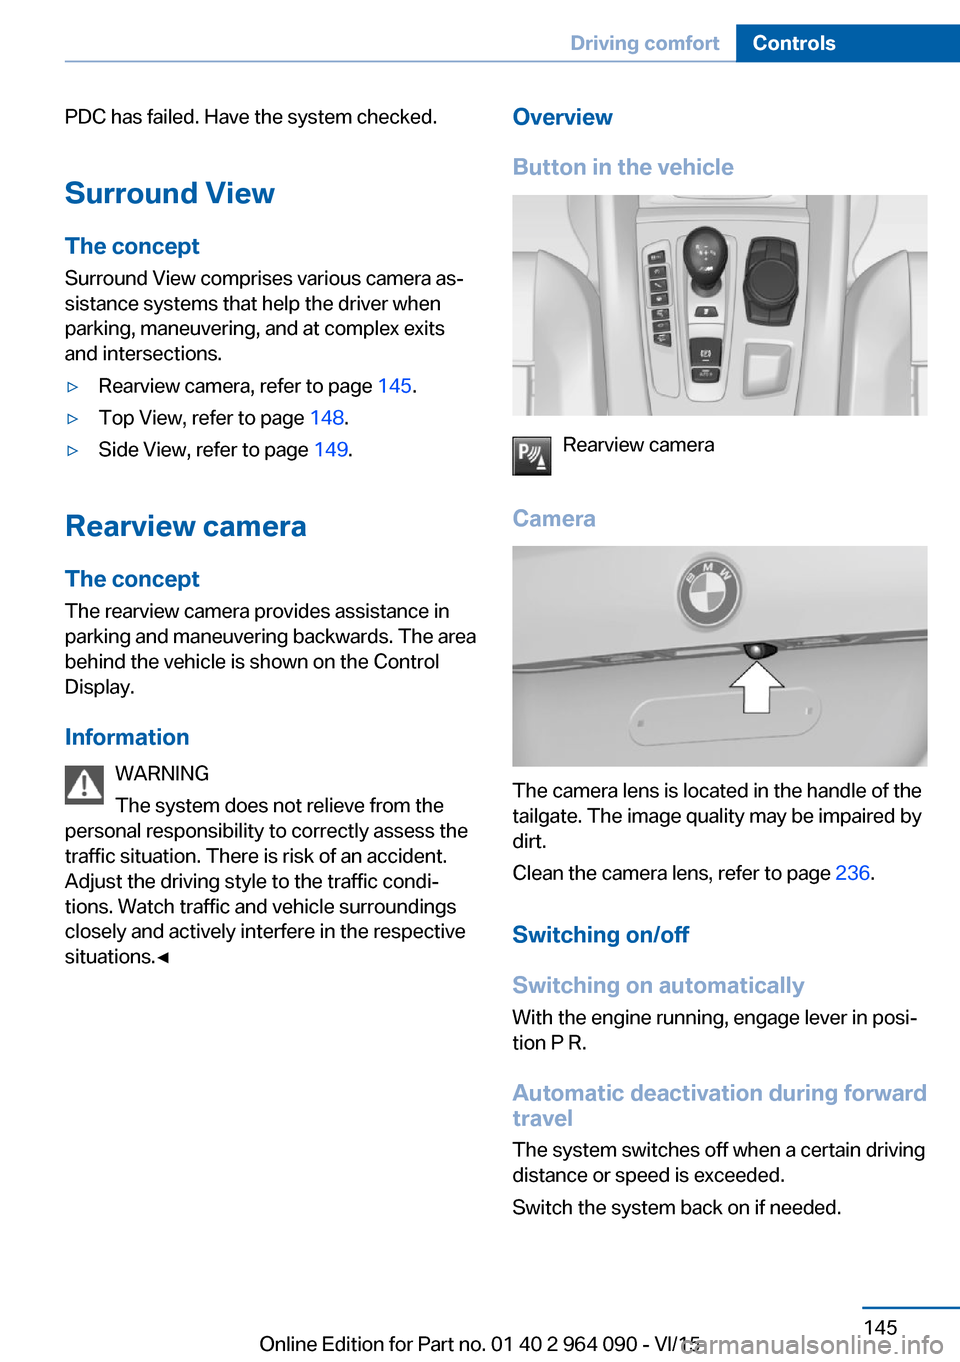
The camera lens is located in the handle of the
tailgate. The image quality may be impaired by
dirt.
Clean the camera lens, refer to page 236.
Switching on/off
Switching on automatically With the engine running, engage lever in posi‐
tion P R.
Automatic deactivation during forward travel
The system switches off when a certain driving
distance or speed is exceeded.
Switch the system back on if needed.
Seite 145Driving comfortControls145
Online Edition for Part no. 01 40 2 964 090 - VI/15
Page 146 of 255

Switching on/off manuallyPress button.▷On: the LED lights up.▷Off: the LED goes out.
The PDC is shown on the Control Display.
The rearview camera image is displayed when
the reverse gear is engaged by pressing the
button.
Switching the view via iDrive With PDC activated or Top View switched on:
"Rear view camera"
The rearview camera image is displayed.
Display on the Control Display
Functional requirement
▷The rearview camera is switched on.▷The tailgate is fully closed.
Activating assistance functions
More than one assistance function can be ac‐
tive at the same time.
▷Parking aid lines
"Parking aid lines"
Lanes and turning radius are indicated.
▷Obstacle marking
"Obstacle marking"
Spatially-shaped markings are displayed.
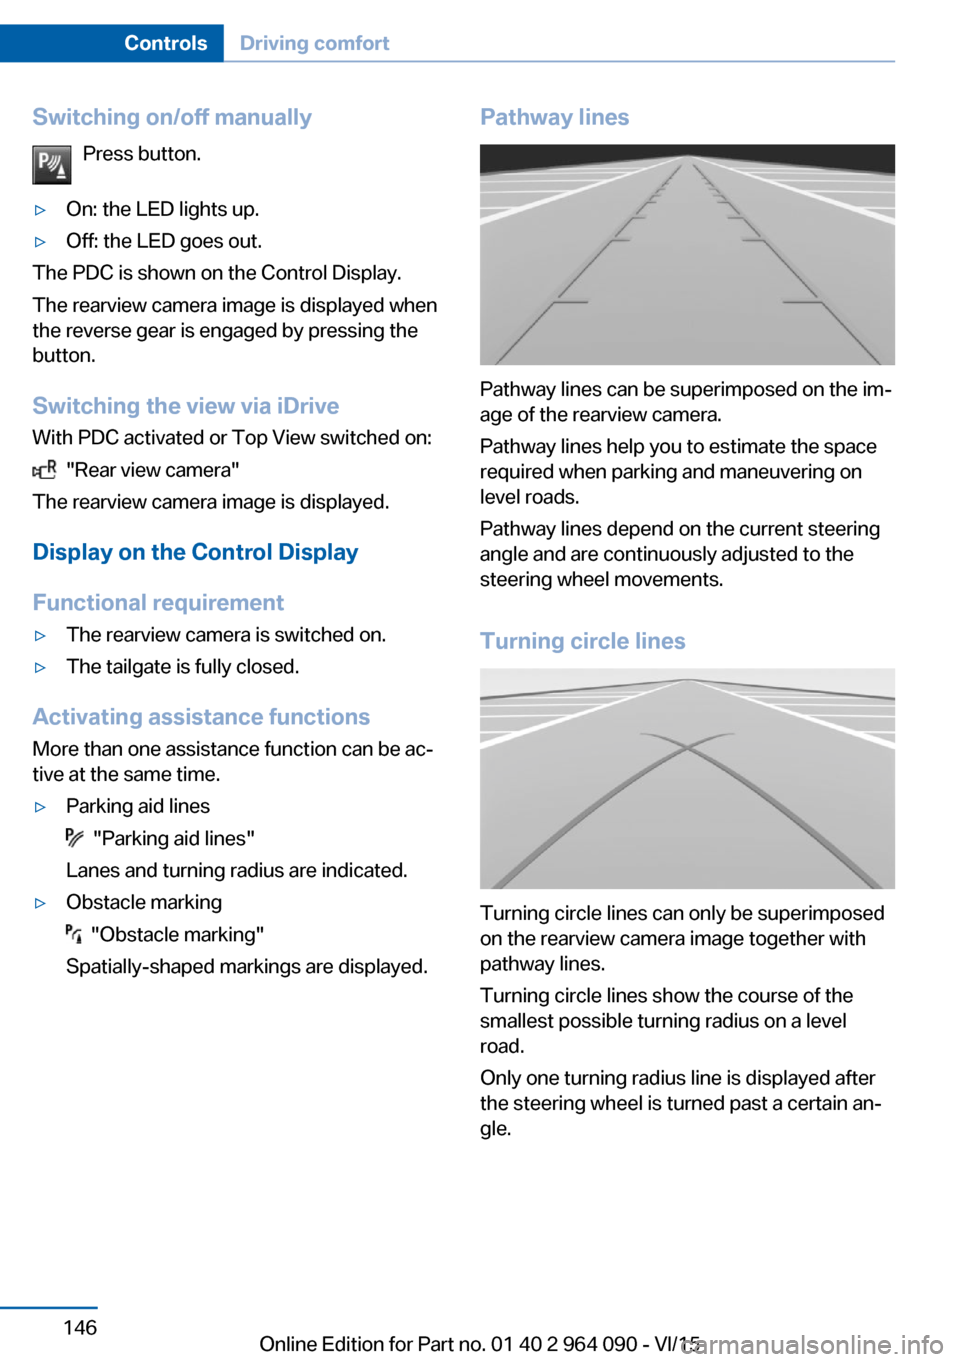
Pathway lines
Pathway lines can be superimposed on the im‐
age of the rearview camera.
Pathway lines help you to estimate the space
required when parking and maneuvering on
level roads.
Pathway lines depend on the current steering
angle and are continuously adjusted to the
steering wheel movements.
Turning circle lines
Turning circle lines can only be superimposed
on the rearview camera image together with
pathway lines.
Turning circle lines show the course of the
smallest possible turning radius on a level
road.
Only one turning radius line is displayed after
the steering wheel is turned past a certain an‐
gle.
Seite 146ControlsDriving comfort146
Online Edition for Part no. 01 40 2 964 090 - VI/15
Page 148 of 255

Top View
The concept Top View provides assistance in parking and
maneuvering. The area around the vehicle is
shown on the Control Display.
General information The image is captured by two cameras
integrated in the exterior mirrors, by the rear‐
view camera and a camera on the front of the
vehicle.
The range is no more than approx. 6.5 ft/2 m to
the side, front and rear.
Obstacles within this range are thus displayed
early on the Control Display.
Information WARNING
The system does not relieve from the
personal responsibility to correctly assess the
traffic situation. There is risk of an accident.
Adjust the driving style to the traffic condi‐ tions. Watch traffic and vehicle surroundings
closely and actively interfere in the respective
situations.◀
Overview
Button in the vehicle
Top View
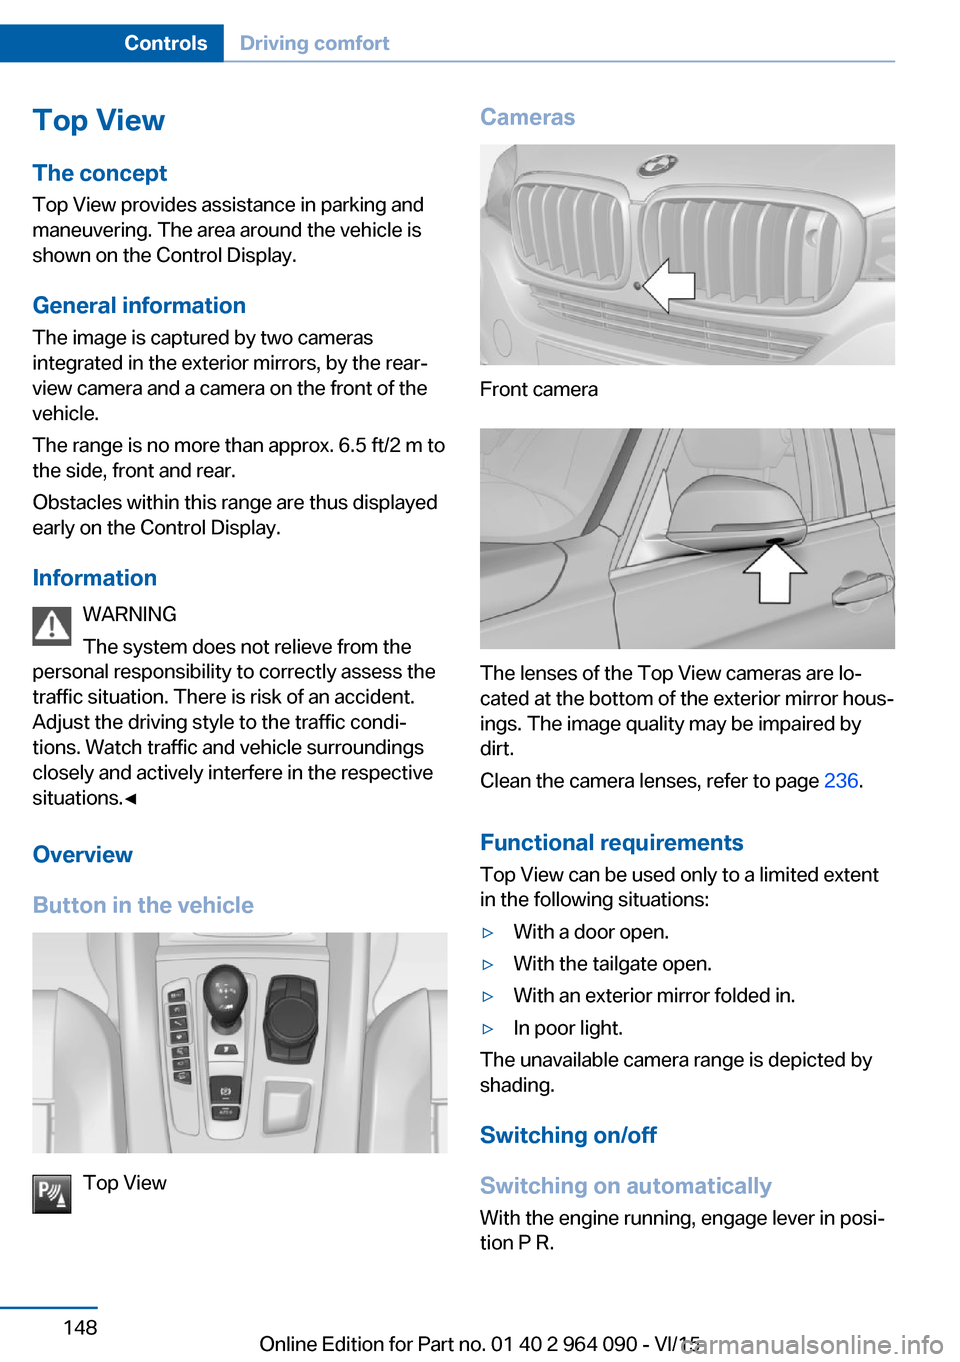
Cameras
Front camera
The lenses of the Top View cameras are lo‐
cated at the bottom of the exterior mirror hous‐
ings. The image quality may be impaired by
dirt.
Clean the camera lenses, refer to page 236.
Functional requirements
Top View can be used only to a limited extent
in the following situations:
▷With a door open.▷With the tailgate open.▷With an exterior mirror folded in.▷In poor light.
The unavailable camera range is depicted by
shading.
Switching on/off
Switching on automatically With the engine running, engage lever in posi‐
tion P R.
Seite 148ControlsDriving comfort148
Online Edition for Part no. 01 40 2 964 090 - VI/15