2015 BMW X5M M mode
[x] Cancel search: M modePage 57 of 255

WARNING
The protective effect of the safety belts
can be limited or lost when safety belts are fas‐
tened incorrectly. An incorrectly fastened
safety belt can cause additional injuries, e.g. in
the event of an accident or during braking and
evasive maneuvers. There is risk of injuries or
danger to life. Make sure that all occupants are
wearing safety belts correctly.◀
WARNING
With a rear backrest that is not locked,
the protective function of the middle safety
belt is not guaranteed. There is risk of injuries
or danger to life. If you are using the middle
safety belt, lock the wider rear backrest.◀
Correct use of safety belts▷Wear the belt twist-free and as tight to
your body as possible over your lap and
shoulders.▷Wear the belt deep on your hips over your
lap. The belt may not press on your stom‐
ach.▷Do not wear the belt on your throat, rub it
on sharp edges, guide it or jam it in across
hard or fragile objects.▷Avoid thick clothing.▷Re-tighten the belt frequently upward
around your upper body.
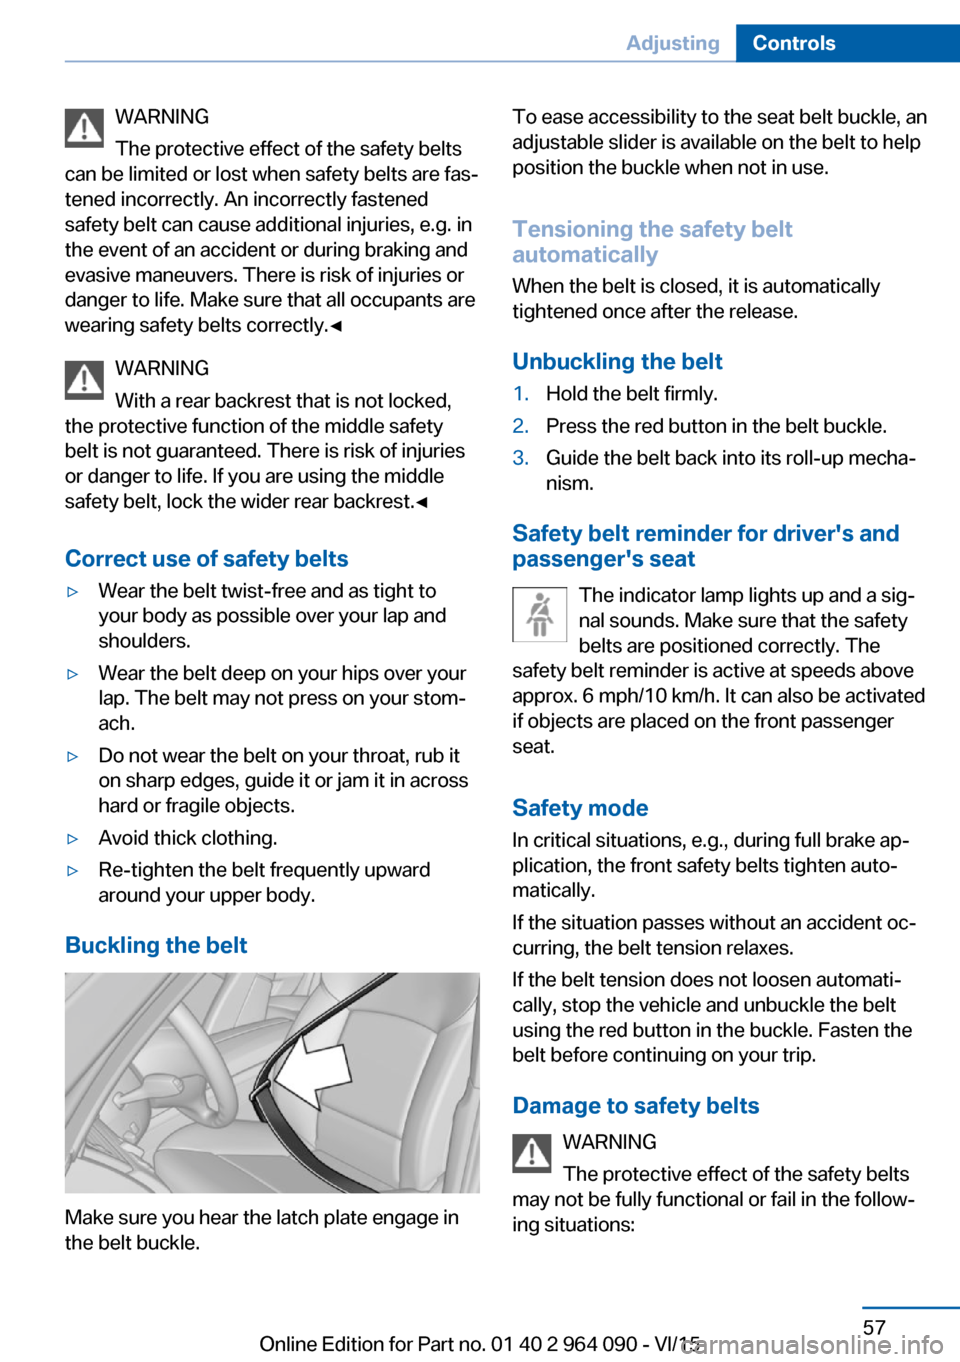
Buckling the belt
Make sure you hear the latch plate engage in
the belt buckle.
To ease accessibility to the seat belt buckle, an
adjustable slider is available on the belt to help
position the buckle when not in use.
Tensioning the safety belt
automatically
When the belt is closed, it is automatically
tightened once after the release.
Unbuckling the belt1.Hold the belt firmly.2.Press the red button in the belt buckle.3.Guide the belt back into its roll-up mecha‐
nism.
Safety belt reminder for driver's and
passenger's seat
The indicator lamp lights up and a sig‐
nal sounds. Make sure that the safety
belts are positioned correctly. The
safety belt reminder is active at speeds above
approx. 6 mph/10 km/h. It can also be activated
if objects are placed on the front passenger
seat.
Safety mode In critical situations, e.g., during full brake ap‐
plication, the front safety belts tighten auto‐
matically.
If the situation passes without an accident oc‐
curring, the belt tension relaxes.
If the belt tension does not loosen automati‐
cally, stop the vehicle and unbuckle the belt
using the red button in the buckle. Fasten the
belt before continuing on your trip.
Damage to safety belts WARNING
The protective effect of the safety belts
may not be fully functional or fail in the follow‐
ing situations:
Seite 57AdjustingControls57
Online Edition for Part no. 01 40 2 964 090 - VI/15
Page 60 of 255

1.Raise the head restraint up against the re‐
sistance.2.Press button, arrow 1, and pull the head re‐
straint out completely.
The center head restraint cannot be removed.
Seat, mirror, and steering
wheel memory
The concept
Two driver's seat and exterior mirror positions
can be stored per profile, refer to page 35, and
called up. Settings for the backrest width and
lumbar support are not stored in memory.
Information WARNING
Using the memory function while driving
can lead to unexpected seat or steering wheel
movements. Vehicle control could be lost.
There is risk of an accident. Only retrieve the
memory function when the vehicle is station‐
ary.◀
WARNING
There is risk of jamming when moving
the seats. There is risk of injuries or risk of
property damage. Make sure that the area of
movement of the seat is clear prior to any ad‐
justment.◀
Overview
Storing
1.Switch on the ignition.2.Set the desired position.3. Press button briefly. The LED in
the button lights up.4.Press selected button 1 or 2 while the LED
is lit. The LED goes out.
If the SET button is pressed accidentally:
Press button again.
The LED goes out.
Calling up settings
Comfort function
1.Open the driver's door.2.If necessary, switch off the ignition.3.Briefly press the desired button 1 or 2.
The corresponding seat position is performed
automatically.
The procedure stops when a switch for adjust‐
ing the seat or one of the buttons is pressed.
Safety mode
1.Close the driver's door or switch on the ig‐
nition.2.Press and hold the desired button 1 or 2
until the adjustment procedure is com‐
pleted.Seite 60ControlsAdjusting60
Online Edition for Part no. 01 40 2 964 090 - VI/15
Page 71 of 255

▷Set the parking brake.▷On uphill grades or on a slope, turn the
front wheels in the direction of the curb.▷On uphill grades or on a slope, also secure
the vehicle, e.g. with a wheel chock.◀
Before driving into a car wash
So that the vehicle can roll into a car wash ob‐
serve instructions for going into an automatic
car wash, refer to page 233.
M Steptronic Sport transmission
Switching off the engine
1.Apply the brakes until the vehicle comes to
a stop.2.Press the Start/Stop button.
The engine is switched off.
The radio-ready state is switched on.3.Set the parking brake.
Auto Start/Stop function
The concept The Auto Start/Stop function helps save fuel.
The system switches off the engine during a
stop, e.g., in traffic congestion or at traffic lights. The ignition remains switched on. The
engine starts again automatically for driving
off.
Semi-automatic mode After every start of the engine using the Start/
Stop button, the Auto Start/Stop function is in
the last selected state, refer to page 72.
When the Auto Start/Stop function is active, it
is available when the vehicle is traveling faster
than about 3 mph, approx. 5 km/h.
Engine stop The engine is switched off automatically dur‐
ing a stop under the following conditions:
▷The selector lever is in selector lever posi‐
tion D.▷The brake pedal remains pressed while the
vehicle is stationary or the vehicle is held
by Automatic Hold.▷The driver's safety belt is buckled or the
driver's door is closed.
The air flow from the air conditioner is reduced
when the engine is switched off.
Displays in the instrument cluster The display indicates that the
Auto Start/Stop function is
ready for an Automatic engine
start.
The display indicates that the conditions for an automatic en‐
gine stop have not been met.
Functional limitations The engine is not switched off automatically in
the following situations:
▷External temperature too low.▷The external temperature is high and auto‐
matic climate control is running.▷The car's interior has not yet been heated
or cooled to the required level.▷The engine is not yet at operating temper‐
ature.▷The wheels are at a sharp angle or the
steering wheel is being turned.▷After driving in reverse.▷Fogging of the windows when the auto‐
matic climate control is switched on.▷Vehicle battery is heavily discharged.▷At higher elevations.▷The engine compartment lid is unlocked.▷HDC Hill Descent Control is activated.Seite 71DrivingControls71
Online Edition for Part no. 01 40 2 964 090 - VI/15
Page 72 of 255

▷The parking assistant is activated.▷Stop-and-go traffic.▷Use of fuel with high ethanol content.
Starting the engineThe engine starts automatically under the fol‐
lowing conditions:
▷By releasing the brake pedal.
When Automatic Hold is activated: press
the accelerator pedal.
After the engine starts, accelerate as usual.
Safety mode
After the engine switches off automatically, it
will not start again automatically if any one of
the following conditions are met:
▷The driver's safety belt is unbuckled and
the driver's door is open.▷The hood was unlocked.
Some indicator lights light up for a varied
length of time.
The engine can only be started via the Start/
Stop button.
Functional limitations
Even if driving off was not intended, the deacti‐
vated engine starts up automatically in the fol‐
lowing situations:
▷Excessive warming of the car's interior
when the cooling function is switched on.▷The steering wheel is turned.▷Change from selector lever position D to N,
R or D/S.▷The accelerator and the brake are pressed
at the same time.▷Fogging of the windows when the auto‐
matic climate control is switched on.▷Vehicle battery is heavily discharged.▷Excessive cooling of the car's interior when
the heating is switched on.Preventing automatic engine stop
The concept To make it possible to drive off very quickly,
such as at an intersection, the automatic en‐
gine stop can be actively prevented.
Preventing an engine stop using the
brake pedal
The engine stop can be actively prevented
within one second after the vehicle comes to a
standstill:▷Immediately after the vehicle comes to a
standstill, briefly press the brake pedal
forcefully.▷Then press the brake pedal with normal
braking force.
Activating/deactivating the system
manually
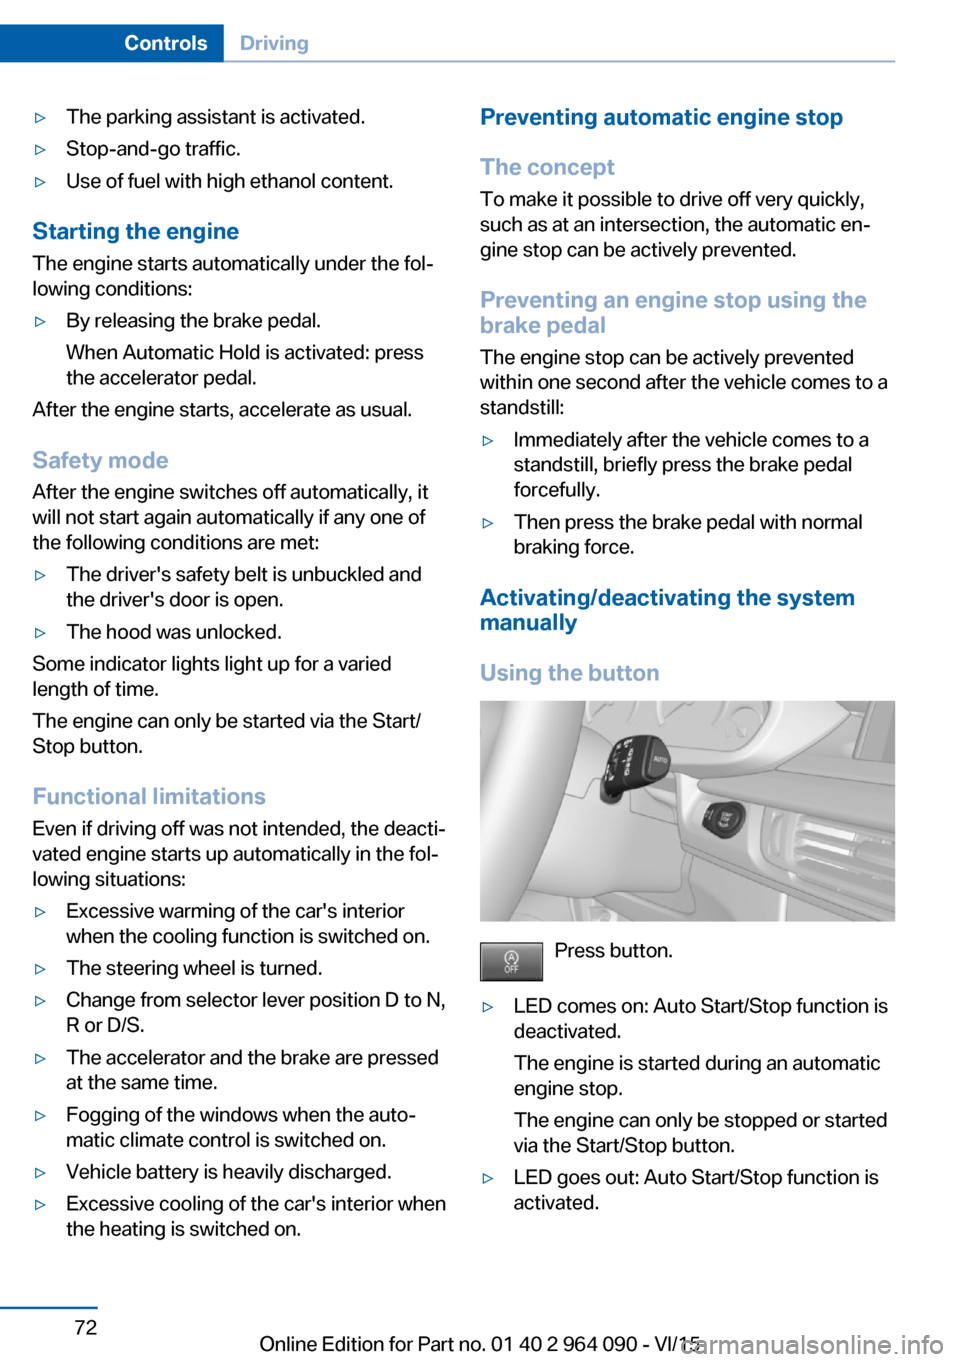
Using the button
Press button.
▷LED comes on: Auto Start/Stop function is
deactivated.
The engine is started during an automatic
engine stop.
The engine can only be stopped or started
via the Start/Stop button.▷LED goes out: Auto Start/Stop function is
activated.Seite 72ControlsDriving72
Online Edition for Part no. 01 40 2 964 090 - VI/15
Page 74 of 255

A Check Control message is displayed.
If the vehicle is slowed down to a speed of ap‐
prox. 2 mph/3 km/h the parking brake is set.
Releasing
With the ignition switched on:
Press the switch while pressing on the
brake pedal.
The LED and indicator lamp go out.
The parking brake is released.
Automatic release For automatic release, step on the accelerator
pedal.
The LED and indicator lamp go out.
The parking brake is automatically released
when you step on the accelerator:▷Engine on.▷Drive mode engaged.▷Driver buckled in and doors closed.
Automatic Hold
The concept This system assists the driver by automatically
setting and releasing the brake, such as when
moving in stop-and-go traffic.
The vehicle is automatically held in place when
it is stationary.
On inclines, the system prevents the vehicle
from rolling backward when driving off.
Overview
Automatic Hold
Safety information WARNING
An unsecured vehicle can put itself into
motion and roll away. There is risk of an acci‐
dent. Before exiting, secure the vehicle against
rolling.
In order to ensure that the vehicle is secured
against rolling away, observe the following:
▷Set the parking brake.▷On uphill grades or on a slope, turn the
front wheels in the direction of the curb.▷On uphill grades or on a slope, also secure
the vehicle, e.g. with a wheel chock.◀
Under the following conditions, Automatic
Hold is automatically deactivated and the park‐
ing brake is set:
▷The engine is switched off.▷A door is opened and driver's safety belt is
unbuckled while the vehicle is stationary.▷The moving vehicle is brought to a stand‐
still using the parking brake.
The indicator lamp switches from
green to red and the letters AUTO H go out.
Seite 74ControlsDriving74
Online Edition for Part no. 01 40 2 964 090 - VI/15
Page 78 of 255

▷Fast wiper speed: tap up twice or tap once
beyond the resistance point.
Wipers change to normal speed when ve‐
hicle comes to standstill.
Switch off and brief wipe
The lever automatically returns to its initial po‐
sition when released.
▷Single wipe: press down once.▷To switch off from normal wiper speed:
press down once.▷To switch off from fast wiper speed: press
down twice.
Interval mode or rain sensor
The concept Without the rain sensor, the frequency of the
wiper operation is preset.
The rain sensor automatically controls the time
between wipes depending on the intensity of the rainfall. The sensor is located on the wind‐
shield, directly behind the interior rearview mir‐
ror.
Activating/deactivating
Press button on the wiper lever.
Wiping is started. If the vehicle is equipped
with a rain sensor: LED in wiper lever lights up.
When wipers are frozen to windshield, wiper
operation is deactivated.
During trip interruption with the rain sensor
switched on: if the trip is resumed within ap‐
prox. 15 minutes, the rain sensor is automati‐
cally activated again.
CAUTION
If the rain sensor is activated, the wipers
can accidentally start moving in car washes.
There is risk of property damage. Deactivate
the rain sensor in car washes.◀
Setting the frequency or sensitivity of
the rain sensor
Turn the thumbwheel to adjust the frequency
or sensitivity of the rain sensor.
Up: short interval or high sensitivity of the rain
sensor.
Seite 78ControlsDriving78
Online Edition for Part no. 01 40 2 964 090 - VI/15
Page 79 of 255

Down: long interval or low sensitivity of the rain
sensor.
Clean the windshield, headlights
Pull the wiper lever towards you.
The system sprays washer fluid on the wind‐
shield and activates the wipers briefly.
In addition, the headlights are cleaned at regu‐
lar intervals when the vehicle's lights are acti‐
vated.
WARNING
The washer fluid can freeze onto the win‐
dow at low temperatures and obstruct the
view. There is risk of an accident. Only use the
washer systems, if the washer fluid cannot
freeze. Use antifreeze if needed.◀
CAUTION
When the wiper water container is
empty, the wash pump cannot work as in‐
tended. There is risk of property damage. Do
not use the washer system when the wash wa‐
ter container is empty.◀
Windshield washer nozzles
The windshield washer nozzles are automati‐
cally heated while the ignition is switched on.
BMW X5 M: rear window wiper
Switching on the rear window wiper
Turn the switch from idle position 0 upward,
arrow 1: interval mode. When reverse gear is
engaged, the system switches to continuous
operation.
Cleaning rear window
In interval mode: turn the switch further, ar‐
row 2. The switch automatically returns to its
interval position when released.
In idle position: turn switch downward, arrow 3.
The switch automatically returns to its idle po‐
sition when released.
Fold-out position of the wipers
Fold wipers back when you want to change the
blades or with pending low temperatures.
WARNING
If the wipers start moving in the folded
away state, damage may occur to parts of the
vehicle or body parts can be jammed. There is
risk of injuries or risk of property damage.
Make sure that the vehicle is switched off
when the wipers are in the folded away state
and the wipers are folded in when switching
on.◀
1.Switch the ignition on and off again.2.With icy conditions make sure that blades
are not frozen to the windshield.3.Press the wiper lever up beyond the point
of resistance and hold it for approx. 3 sec‐Seite 79DrivingControls79
Online Edition for Part no. 01 40 2 964 090 - VI/15
Page 80 of 255

onds, until the wiper remains in a nearly
vertical position.
After the wipers are folded back down, the
wiper system must be reactivated.
1.Switch on the ignition.2.Push wiper lever down. Wipers move to
their resting position and are ready again
for operation.
Washer fluid
Information WARNING
Some antifreeze agents can contain
harmful substances and are flammable. There
is risk of fire and risk of injuries. Observe the
instructions on the containers. Keep antifreeze
away from ignition sources. Do not refill oper‐
ating materials into different bottles. Store op‐
erating materials out of reach of children.
United States: The washer fluid mixture ratio is
regulated by the U.S. EPA and many individual
states; do not exceed the allowable washer
fluid dilution ratio limits that apply. Follow the
usage instructions on the washer fluid con‐
tainer.
Use of BMW’s Windshield Washer Concen‐
trate or the equivalent is recommended.◀
WARNING
Improperly executed work under the
hood can damage components and lead to a
safety risk. There is risk of accidents or risk of
property damage. Have work under the hood
be executed by a dealer’s service center or an‐
other qualified service center or repair shop.◀
Washer fluid reservoir
All washer nozzles are supplied from one res‐
ervoir in the engine compartment.
Fill with a mixture of windshield washer con‐
centrate and tap water and – if required – with a
washer antifreeze, according to the manufac‐
turer's recommendations.
Mix the washer fluid before adding to find the
right mixture.
Do not add windshield washer concentrate and
antifreeze undiluted and do not fill with pure
water; this could damage the wiper system.
Do not mix window washer concentrates of dif‐
ferent manufacturers because they can clog
the windshield washer nozzles.
Recommended minimum fill quantity:
0.2 US gal/1 liter.
M Steptronic Sport
transmission
General information
The M Steptronic Sport transmission is oper‐
ated via the selector lever or two shift paddles
on the steering wheel.
Functions
▷Drive mode or Sequential mode.▷Various drive programs, Drivelogic.▷Upshifting display, Shift point indicator, re‐
fer to page 102.Seite 80ControlsDriving80
Online Edition for Part no. 01 40 2 964 090 - VI/15