2015 BMW I3 turn signal
[x] Cancel search: turn signalPage 30 of 236

CockpitVehicle features and options
This chapter describes all standard, country-
specific and optional features offered with the
series. It also describes features that are not
necessarily available in your car, e. g., due tothe selected options or country versions. This
also applies to safety-related functions and
systems. The respectively applicable country
provisions must be observed when using the
respective features and systems.
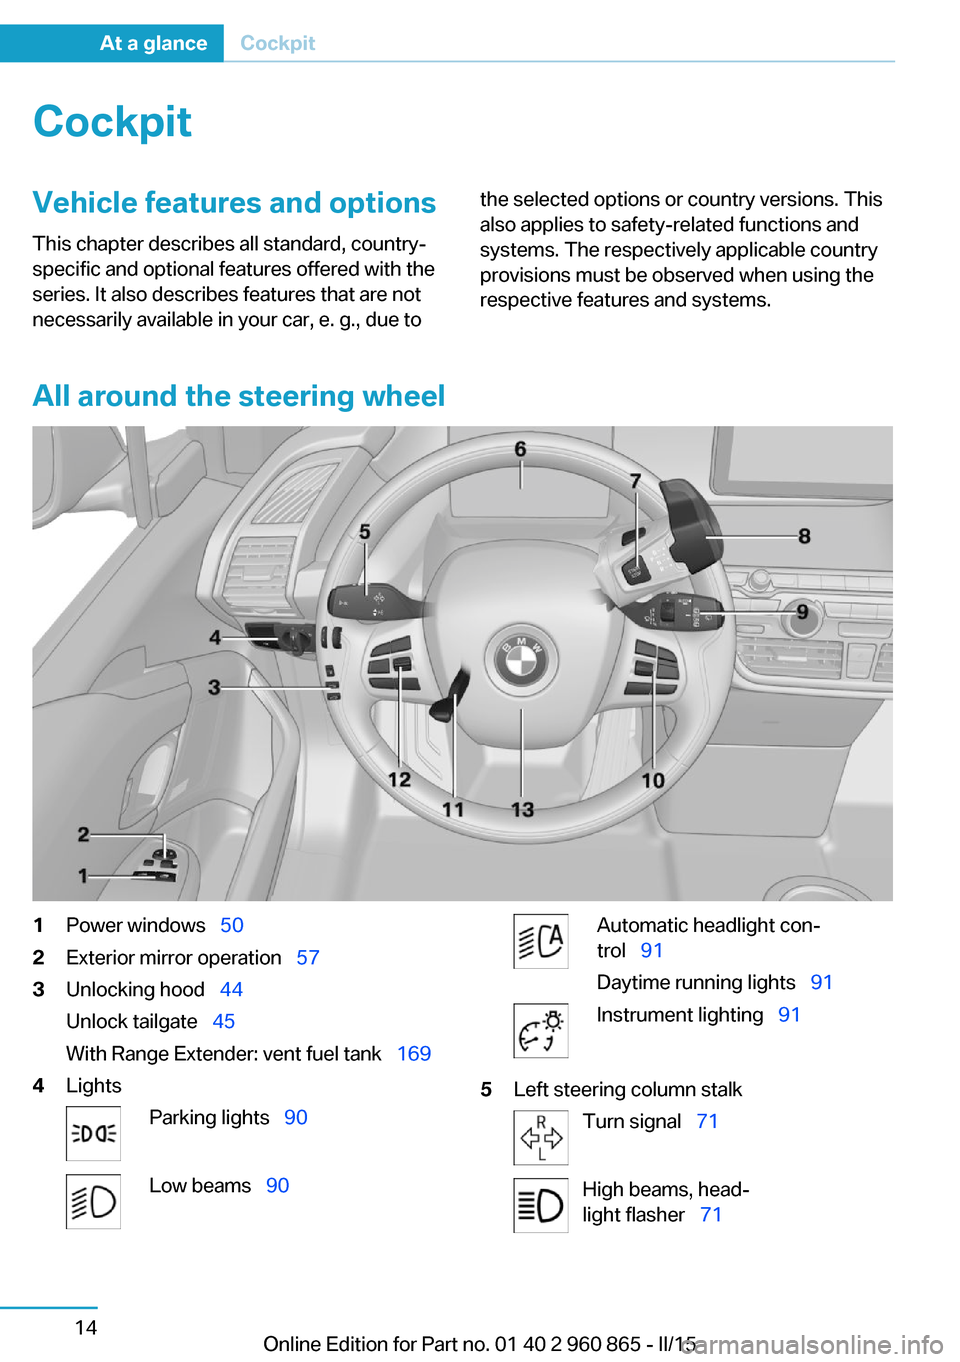
All around the steering wheel
1Power windows 502Exterior mirror operation 573Unlocking hood 44
Unlock tailgate 45
With Range Extender: vent fuel tank 1694LightsParking lights 90Low beams 90Automatic headlight con‐
trol 91
Daytime running lights 91Instrument lighting 915Left steering column stalkTurn signal 71High beams, head‐
light flasher 71Seite 14At a glanceCockpit14
Online Edition for Part no. 01 40 2 960 865 - II/15
Page 39 of 236

Additional symbolsSymbolMeaning Spoken instructions are turned off. Check the current vehicle position.
Split screen
General information Additional information can be displayed on the
right side of the split screen, e.g., information
from the on-board comupter.
In the divided screen view, the so-called split
screen, this information remains visible even when you change to another menu.
Switching the split screen on and off On the Control Display:
1. Press button.2."Split screen"
Selecting the display
On the Control Display:
1. Press button.2."Split screen"3.Move the controller until the split screen is
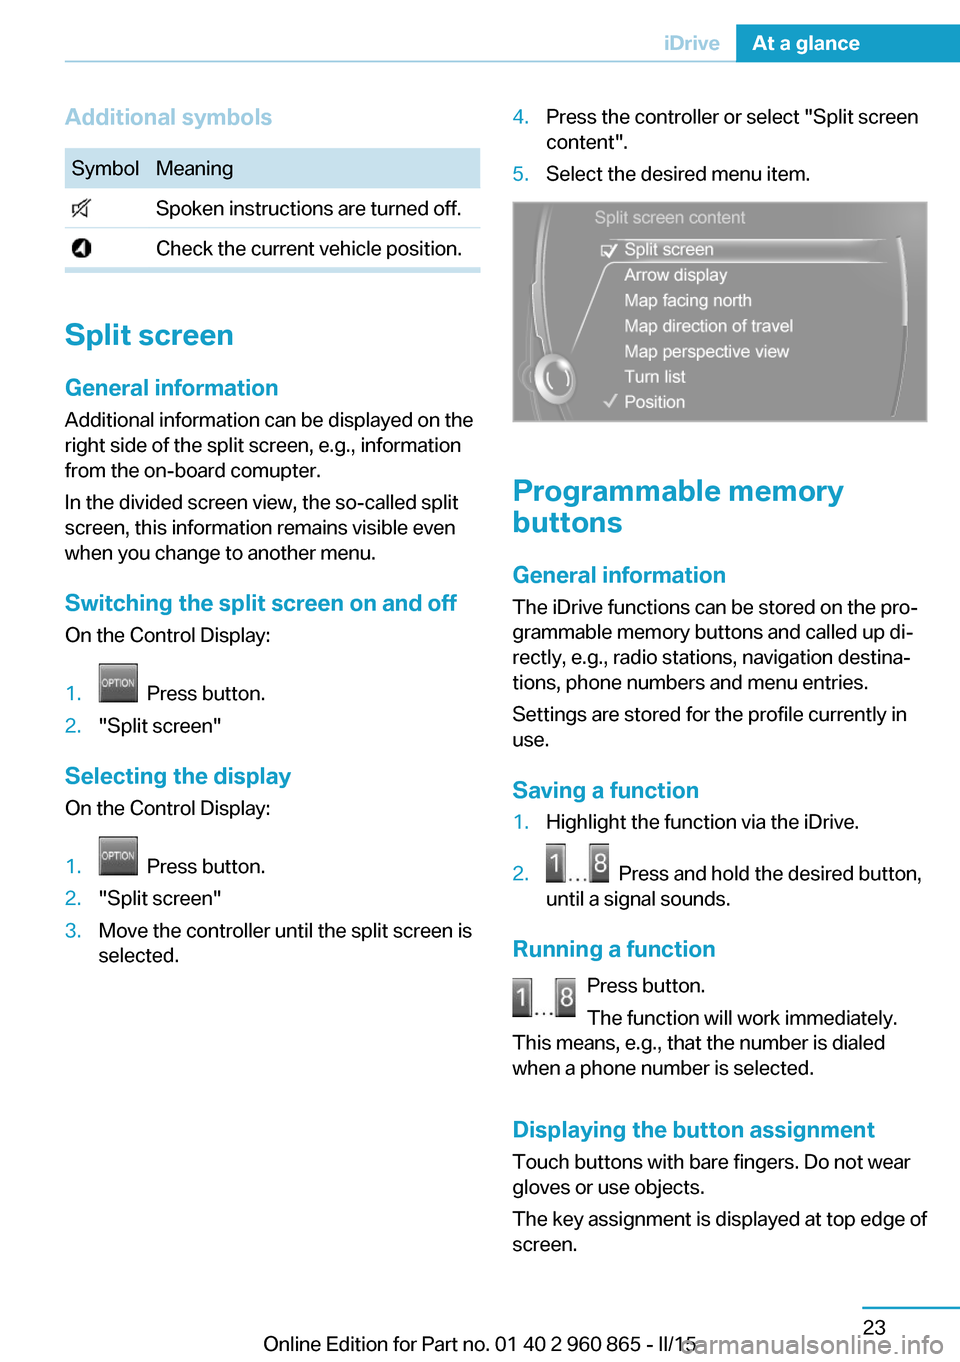
selected.4.Press the controller or select "Split screen
content".5.Select the desired menu item.
Programmable memory
buttons
General information
The iDrive functions can be stored on the pro‐
grammable memory buttons and called up di‐
rectly, e.g., radio stations, navigation destina‐
tions, phone numbers and menu entries.
Settings are stored for the profile currently in
use.
Saving a function
1.Highlight the function via the iDrive.2. Press and hold the desired button,
until a signal sounds.
Running a function
Press button.
The function will work immediately.
This means, e.g., that the number is dialed
when a phone number is selected.
Displaying the button assignment Touch buttons with bare fingers. Do not wear
gloves or use objects.
The key assignment is displayed at top edge of
screen.
Seite 23iDriveAt a glance23
Online Edition for Part no. 01 40 2 960 865 - II/15
Page 74 of 236

Be aware of the traffic situation and the vehi‐
cle's surroundings at all times, otherwise acci‐
dents are still possible depending on the situa‐
tion.◀
Requirements▷Vehicle moving.▷Speed less than 12 mph/20 km/h.▷Turn signal is set.
Activating
Slide the switch to the driver's side
mirror position.
Deactivating
Slide the switch to the passenger side mirror
position.
Fold in and out Press button.
Possible at speeds up to approx.
15 mph/20 km/h.
E. g. this is advantageous
▷In car washes.▷In narrow streets.▷For folding mirrors back out that were
folded away manually.
Mirrors that were folded in are folded out auto‐
matically at a speed of approx.
25 mph/40 km/h.
Fold in the mirror in a car wash
Before washing the car in an automatic
car wash, fold in the exterior mirrors by hand or
with the button; otherwise, the mirrors could
be damaged, depending on the width of the
vehicle.◀
Automatic heating
Both exterior mirrors are automatically heated
whenever drive readiness is switched on.
Automatic dimming feature
Both exterior mirrors are automatically dim‐
med. Photocells are used to control the Interior
rearview mirror, refer to page 58.
Interior rearview mirror, manually
dimmable
Flip lever
To reduce the blinding effect of the interior
rear view mirror, flip the lever forward.
Interior rearview mirror, automatic dimming feature
The concept
Photocells are used for control:
▷In the mirror glass.▷On the back of the mirror.
Functional requirement For proper operation:
▷Keep the photocells clean.Seite 58ControlsAdjusting58
Online Edition for Part no. 01 40 2 960 865 - II/15
Page 81 of 236

▷While the driver's safety belt is unbuckled
with driver's door open and low beams off.▷When the batteries' state of charge is low,
if the low beams are turned off.▷The low beams switch to parking lights af‐
ter approx. 15 minutes of no use.
Drive readiness
If drive readiness is switched on, the vehicle
ready to drive and the READY signal, refer to
page 65, is displayed in the instrument clus‐
ter.
All vehicle systems are ready for operation.
Most of the indicator and warning lights in the
instrument cluster light up for a varied length
of time.
Activated drive readiness is the equivalent of a
running engine in conventional vehicles. Deac‐
tivated engine readiness is equivalent to
switching the ignition off.
To save battery power when parking, switch
off drive readiness and any unnecessary elec‐
tronic systems/power consumers.
Drive readiness is switched off automatically:
▷When opening or closing the driver door, if
the driver's safety belt is unbuckled.
Note
If drive readiness is switched on, the system
automatically switches to the radio-ready state
when the door is opened and the driver's
safety belt is unbuckled, or if the lights are
turned off or the daytime running lights are ac‐
tivated.
Selector lever position P with drive readi‐
ness switched off
When drive readiness is switched off, selector
lever position P is automatically engaged.
When in an automatic car wash, e.g., ensure
that the drive readiness is not switched off ac‐
cidentally, otherwise, wheels can lock up.◀
Drive readiness in detail
Hints Do not leave the vehicle unattended
Do not leave the vehicle unattended with
drive readiness switched on; otherwise, it may
pose a risk.◀
Before leaving the vehicle
Before leaving the vehicle, with drive
readiness switched on engage lever in position
P P and set the parking brake; otherwise, the
vehicle is not secured against rolling away.◀
Switching on drive readiness1.Close the driver's door.2.Depress the brake pedal.3.Press the Start/Stop button.
Drive readiness is switched on.
Display in the instrument cluster The READY display indicates
that the vehicle is ready for driv‐
ing.
Display on the Start/Stop button
General information
Drive readiness is also displayed through light
indicators on the Start/Stop button.
Seite 65DrivingControls65
Online Edition for Part no. 01 40 2 960 865 - II/15
Page 82 of 236

Lighting pulses orange▷After unlocking and opening the door.▷After switching off drive readiness.
When the brake pedal is depressed, the light‐
ing becomes more intense.
Lighting lights up steady blue
After drive readiness is switched on, light turns
blue. The vehicle is ready to drive. The READY
indicator lights up in the instrument cluster. In
addition, a signal sounds.
Lighting off
Drive readiness, operating readiness and
radio-ready state are turned off. The vehicle is
in the idle state. The charging cable may be
connected.
Driving off
Requirements
Driving is possible under the following condi‐
tions:
▷The high-voltage battery is sufficiently
charged.▷The driver's door is closed.
Driving
1.Switch on drive readiness.2.Apply the brake and engage lever in posi‐
tion P D or R.3.Release the parking brake.4.Depress the accelerator pedal to drive.Selector lever positions
The engaged selector lever position is dis‐
played on the selector lever.
D Drive
Position for normal vehicle operation.
R is Reverse
Select only when the vehicle is stationary.
N is NeutralUse in automatic car washes, e.g. The vehicle
may roll.
P Park Engage only while the vehicle is stationary and
the brake is applied. The drive wheels are
blocked.
P is engaged automatically:
▷If the belt on the driver's seat is off, the
driver's door is open and neither brake nor
accelerator pedal are depressed while
drive readiness is switched on and selector
lever position D or R is set.▷After switching off drive readiness via the
Start/Stop button, if selector lever posi‐
tion D or R is set.▷With operating readiness turned off.
Before exiting the vehicle, make sure that se‐
lector lever position P is set. Otherwise, the ve‐
hicle may begin to move. On uphill slopes, also
Set parking brake, refer to page 70.
Seite 66ControlsDriving66
Online Edition for Part no. 01 40 2 960 865 - II/15
Page 83 of 236

Engaging selector lever positions
General information▷Interlock: the selector lever position P can
be exited only with drive readiness en‐
gaged.▷Shift lock: with the vehicle stationary, press
on the brake pedal before shifting out of P
or N; otherwise, the shift command will not
be executed.▷Shift lock: before shifting out of P, remove
the charging cable from the vehicle; other‐
wise, the shift command will not be exe‐
cuted.
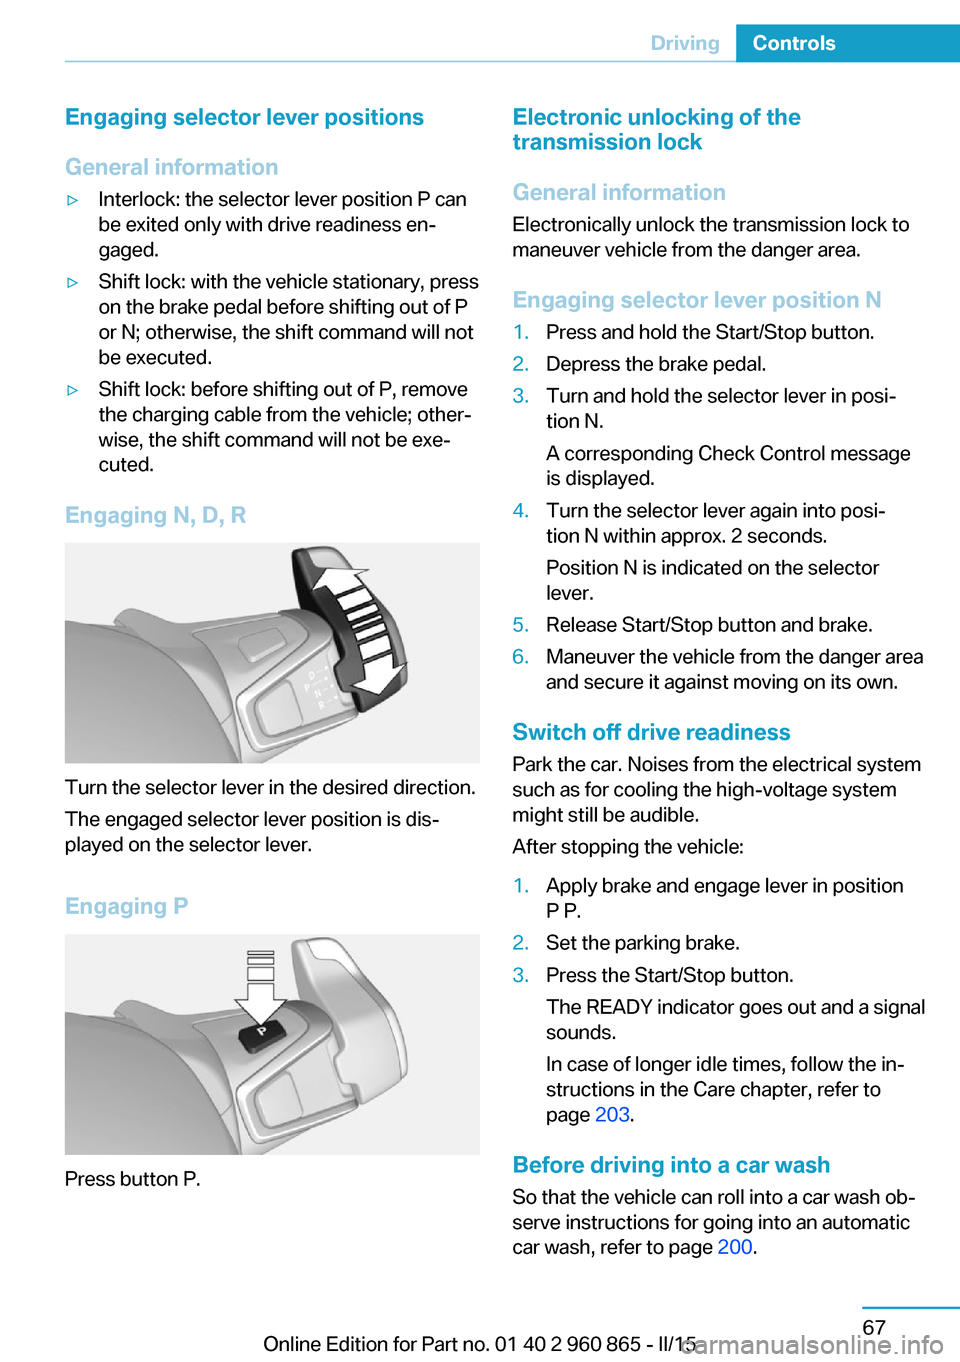
Engaging N, D, R
Turn the selector lever in the desired direction.
The engaged selector lever position is dis‐
played on the selector lever.
Engaging P
Press button P.
Electronic unlocking of the
transmission lock
General information
Electronically unlock the transmission lock to
maneuver vehicle from the danger area.
Engaging selector lever position N1.Press and hold the Start/Stop button.2.Depress the brake pedal.3.Turn and hold the selector lever in posi‐
tion N.
A corresponding Check Control message
is displayed.4.Turn the selector lever again into posi‐
tion N within approx. 2 seconds.
Position N is indicated on the selector
lever.5.Release Start/Stop button and brake.6.Maneuver the vehicle from the danger area
and secure it against moving on its own.
Switch off drive readiness
Park the car. Noises from the electrical system
such as for cooling the high-voltage system might still be audible.
After stopping the vehicle:
1.Apply brake and engage lever in position
P P.2.Set the parking brake.3.Press the Start/Stop button.
The READY indicator goes out and a signal
sounds.
In case of longer idle times, follow the in‐
structions in the Care chapter, refer to
page 203.
Before driving into a car wash
So that the vehicle can roll into a car wash ob‐
serve instructions for going into an automatic
car wash, refer to page 200.
Seite 67DrivingControls67
Online Edition for Part no. 01 40 2 960 865 - II/15
Page 87 of 236

After a power failure
Putting the parking brake into
operation1.Switch on the ignition.2. Press the reel while stepping on the
brake pedal or selector lever position P is
set.
It may take several seconds for the brake to be
put into operation. Any sounds associated with
this are normal.
The indicator lamp in the instrument
cluster goes out as soon as the parking
brake is ready for operation.
Hold function The concept
The system holds the vehicle automatically
when gear is engaged. This prevents rolling
against the direction of travel.
In selector lever position D, the vehicle cannot
roll backwards. In selector lever position R, it
cannot roll forward. The brake pedal does not
have to be pressed.
Hints
To reduce energy consumption when the hold
function is activated, activate the parking brake
or engage lever in position P P when the vehi‐
cle is stopped for long periods of time.
The hold function can be by the vehicle's load
and the road incline. If needed a Check Control
message will appear and position P will be se‐
lected automatically.
Turn signal, high beams,
headlight flasher
Turn signal
Hints Do not adjust the exterior mirrors
Do not adjust the exterior mirror while
driving and when turn signals/hazard warning
flashers are on, or else the additional turn sig‐
nal lights in the exterior mirror are out of posi‐ tion and can't be seen.◀
Using turn signals
Press the lever beyond the resistance point.
To switch off manually, press the lever to the
resistance point.
Unusually rapid flashing of the indicator lamp
indicates that a turn signal bulb has failed.
Triple turn signal activation Press the lever to the resistance point.
The turn signal flashes three times.
The function can be activated or deactivated.
On the Control Display:
1."Settings"2."Lighting"3."Triple turn signal"
Settings are stored for the profile currently in
use.
Seite 71DrivingControls71
Online Edition for Part no. 01 40 2 960 865 - II/15
Page 88 of 236

Signaling briefly
Press the lever to the resistance point and hold
it there for as long as you want the turn signal
to flash.
High beams, headlight flasher▷High beams, arrow 1.▷Headlight flasher, arrow 2.
Washer/wiper system Switching the wipers on/off and brief
wipe
Hints Do not activate wipers if frozen to wind‐
shield
Do not switch on the wipers if they are frozen
to the windshield; otherwise, the wiper blades
and the wiper motor may be damaged.◀
Do not activate wipers on dry windshield
Do not use the wipers if the windshield is
dry, as this may damage the wiper blades or
cause them to become worn more quickly.◀
Switching on
Push wiper lever up.
The lever automatically returns to its initial po‐
sition when released.
▷Normal wiper speed: push up once.
The wipers switch to intermittent operation
when the vehicle is stationary.▷Fast wiper speed: press up twice or press
once beyond the resistance point.
Wipers change to normal speed when ve‐
hicle comes to standstill.
Switch off and brief wipe
Push wiper lever down.
The lever automatically returns to its initial po‐
sition when released.
▷Single wipe: press down once.▷To switch off normal wipe: press down
once.▷To switch off fast wipe: press down twice.Seite 72ControlsDriving72
Online Edition for Part no. 01 40 2 960 865 - II/15