2015 BMW ACTIVE HYBRID 3 trunk
[x] Cancel search: trunkPage 172 of 251
Multi-function hook
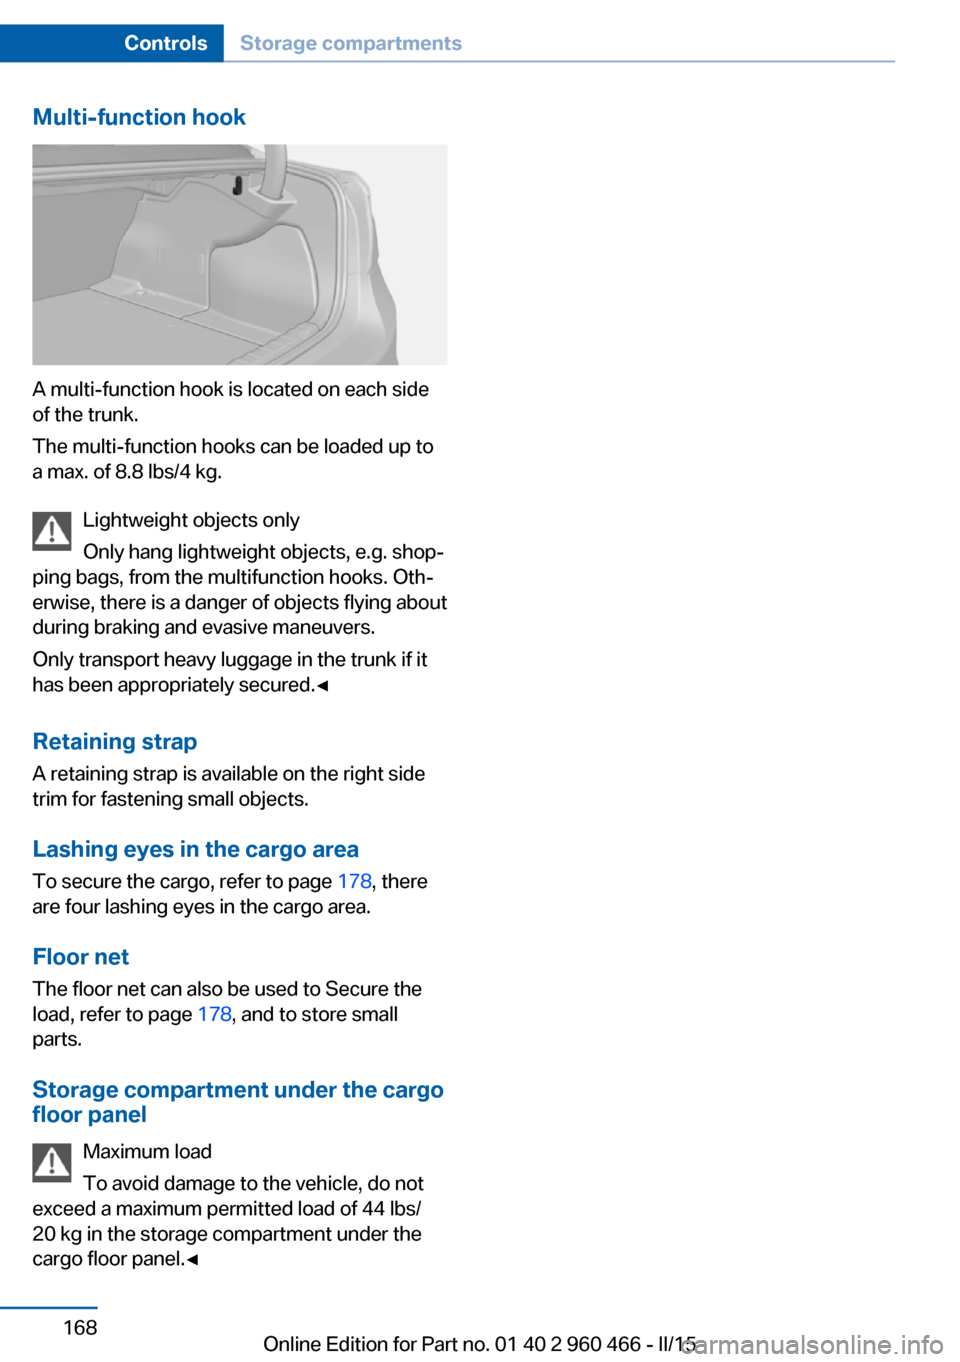
A multi-function hook is located on each side
of the trunk.
The multi-function hooks can be loaded up to
a max. of 8.8 lbs/4 kg.
Lightweight objects only
Only hang lightweight objects, e.g. shop‐
ping bags, from the multifunction hooks. Oth‐
erwise, there is a danger of objects flying about
during braking and evasive maneuvers.
Only transport heavy luggage in the trunk if it
has been appropriately secured.◀
Retaining strap A retaining strap is available on the right side
trim for fastening small objects.
Lashing eyes in the cargo area
To secure the cargo, refer to page 178, there
are four lashing eyes in the cargo area.
Floor net
The floor net can also be used to Secure the
load, refer to page 178, and to store small
parts.
Storage compartment under the cargo
floor panel
Maximum load
To avoid damage to the vehicle, do not
exceed a maximum permitted load of 44 lbs/
20 kg in the storage compartment under the
cargo floor panel.◀
Seite 168ControlsStorage compartments168
Online Edition for Part no. 01 40 2 960 466 - II/15
Page 178 of 251

Coasting to a standstill and braking phases are
used more often to recover energy.
eDRIVE electric driving and the Auto Start
Stop function will also be deactivated.
Fast charging
In exceptional cases it can be charged in place,
such as before extended idle phases in order
to prevent damage to the high-voltage battery.1.Start the engine.2.Engage transmission position P and set
parking brake.3.Press and hold down brake pedal.4.Use the accelerator pedal to maintain an
engine speed of approx. 2,000 rpm.
After a few minutes, the high-voltage battery is
fully charged again.
The battery charge indicator in the instrument
cluster, refer to page 82, is used to check the
status.
General driving notes
Closing the trunk lid Drive with the trunk lid closed
Only drive with the tailgate closed; other‐
wise, in the event of an accident or braking and
evasive maneuvers, passengers and other traf‐
fic may be injured, and the vehicle may be
damaged. In addition, exhaust fumes may en‐
ter the vehicle interior.◀
If driving with the tailgate open cannot be
avoided:
▷Close all windows and the glass sunroof.▷Greatly increase the air flow from the vents.▷Drive moderately.Hot exhaust system
Hot exhaust system
High temperatures are generated in the
exhaust system.
Do not remove the heat shields installed and
never apply undercoating to them. Make sure
that flammable materials, e. g. hay, leaves,
grass, etc. do not come in contact with the hot
exhaust system while driving, while in idle po‐
sition mode, or when parked. Such contact
could lead to a fire, resulting in an increased
risk of serious personal injury as well as prop‐
erty damage.
Do not touch hot exhaust pipes; otherwise,
there is a danger of getting burned.◀
Mobile communication devices in the
vehicle
Mobile communication devices in the ve‐
hicle
It is not recommended to use mobile phones,
such as mobile phones, in the vehicle interior
without a direct connection to an external aer‐
ial. Otherwise, the vehicle's electronics and
mobile communication devices can interfere
with each other. In addition, there is no assur‐
ance that the radiation generated during trans‐
mission will be conducted away from the vehi‐
cle interior.◀
Hydroplaning Hydroplaning
When driving on wet or slushy roads, re‐
duce your speed to prevent hydroplaning.◀
On wet or slushy roads, a wedge of water can
form between the tires and road surface.
This phenomenon is referred to as hydroplan‐
ing. It is characterized by a partial or complete
loss of contact between the tires and the road
surface, ultimately undermining your ability to
steer and brake the vehicle.Seite 174Driving tipsThings to remember when driving174
Online Edition for Part no. 01 40 2 960 466 - II/15
Page 182 of 251
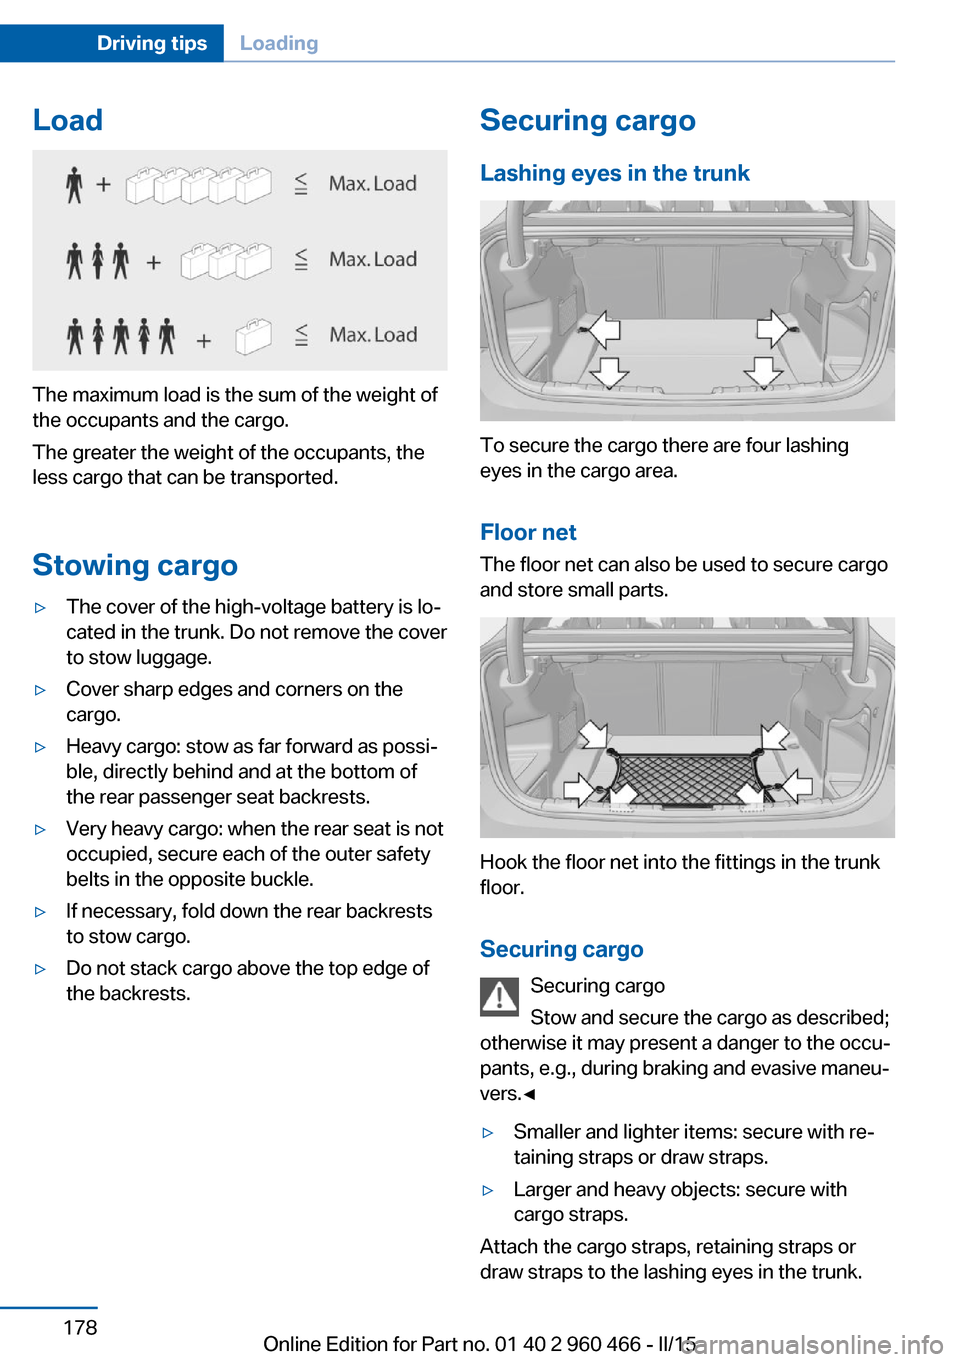
Load
The maximum load is the sum of the weight of
the occupants and the cargo.
The greater the weight of the occupants, the
less cargo that can be transported.
Stowing cargo
▷The cover of the high-voltage battery is lo‐
cated in the trunk. Do not remove the cover
to stow luggage.▷Cover sharp edges and corners on the
cargo.▷Heavy cargo: stow as far forward as possi‐
ble, directly behind and at the bottom of
the rear passenger seat backrests.▷Very heavy cargo: when the rear seat is not
occupied, secure each of the outer safety
belts in the opposite buckle.▷If necessary, fold down the rear backrests
to stow cargo.▷Do not stack cargo above the top edge of
the backrests.Securing cargo
Lashing eyes in the trunk
To secure the cargo there are four lashing
eyes in the cargo area.
Floor net
The floor net can also be used to secure cargo
and store small parts.
Hook the floor net into the fittings in the trunk
floor.
Securing cargo Securing cargo
Stow and secure the cargo as described;
otherwise it may present a danger to the occu‐
pants, e.g., during braking and evasive maneu‐
vers.◀
▷Smaller and lighter items: secure with re‐
taining straps or draw straps.▷Larger and heavy objects: secure with
cargo straps.
Attach the cargo straps, retaining straps or
draw straps to the lashing eyes in the trunk.
Seite 178Driving tipsLoading178
Online Edition for Part no. 01 40 2 960 466 - II/15
Page 183 of 251
Roof-mounted luggage rackNoteRoof racks are available as special accessories.
Securing Follow the installation instructions of the roof
rack.
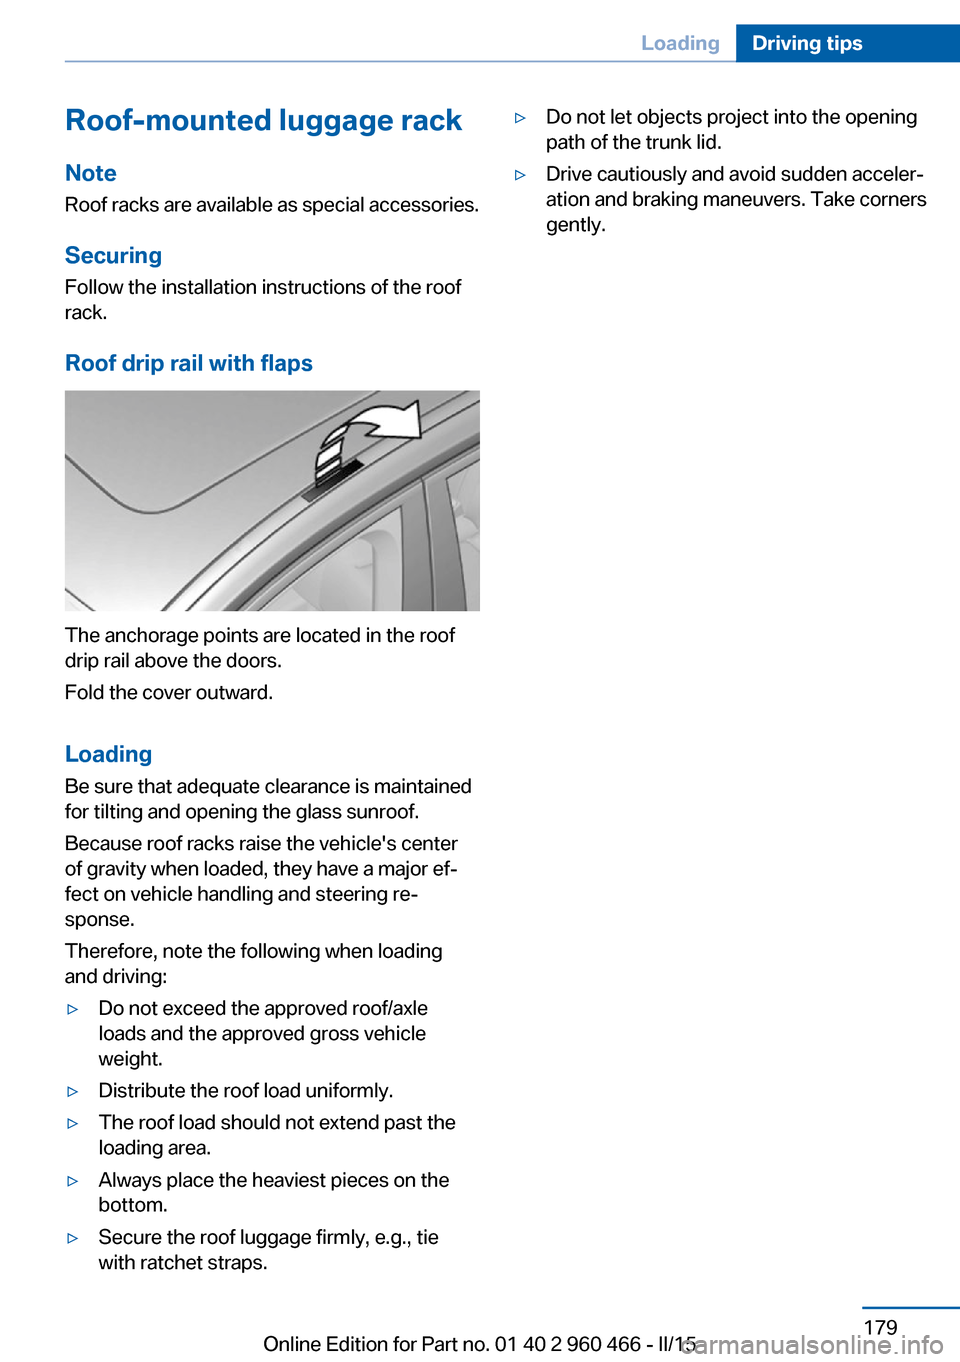
Roof drip rail with flaps
The anchorage points are located in the roof
drip rail above the doors.
Fold the cover outward.
Loading Be sure that adequate clearance is maintained
for tilting and opening the glass sunroof.
Because roof racks raise the vehicle's center
of gravity when loaded, they have a major ef‐
fect on vehicle handling and steering re‐
sponse.
Therefore, note the following when loading
and driving:
▷Do not exceed the approved roof/axle
loads and the approved gross vehicle
weight.▷Distribute the roof load uniformly.▷The roof load should not extend past the
loading area.▷Always place the heaviest pieces on the
bottom.▷Secure the roof luggage firmly, e.g., tie
with ratchet straps.▷Do not let objects project into the opening
path of the trunk lid.▷Drive cautiously and avoid sudden acceler‐
ation and braking maneuvers. Take corners
gently.Seite 179LoadingDriving tips179
Online Edition for Part no. 01 40 2 960 466 - II/15
Page 193 of 251
2.Close the fuel filler flap.
Do not pinch the retaining strap
Do not pinch the retaining strap attached
to the lid; otherwise, the lid cannot be closed
properly and fuel vapors can escape.◀
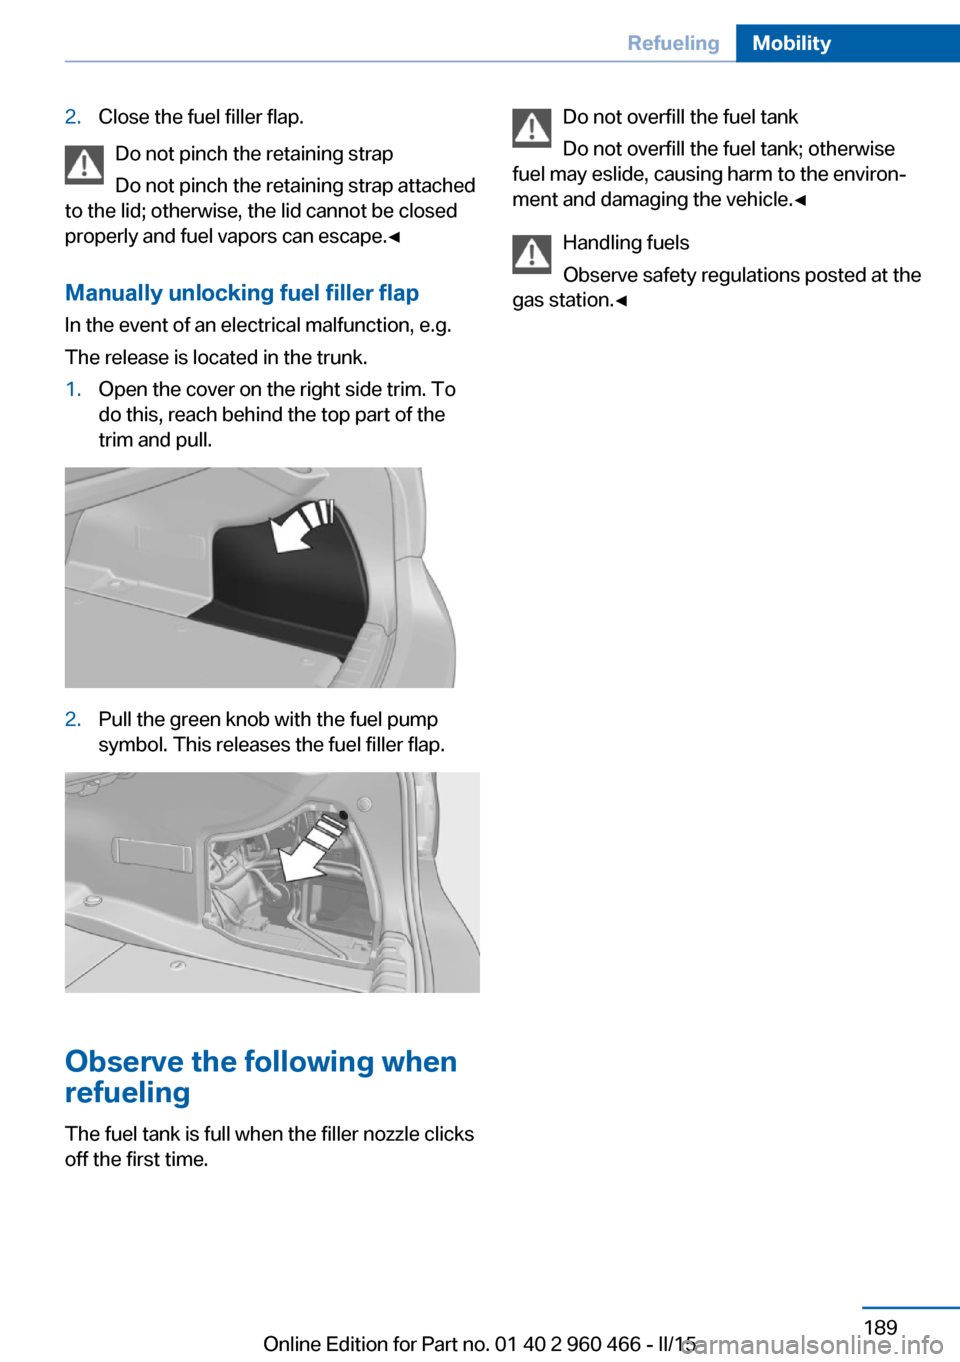
Manually unlocking fuel filler flap In the event of an electrical malfunction, e.g.
The release is located in the trunk.
1.Open the cover on the right side trim. To
do this, reach behind the top part of the
trim and pull.2.Pull the green knob with the fuel pump
symbol. This releases the fuel filler flap.
Observe the following when
refueling
The fuel tank is full when the filler nozzle clicks
off the first time.
Do not overfill the fuel tank
Do not overfill the fuel tank; otherwise
fuel may eslide, causing harm to the environ‐
ment and damaging the vehicle.◀
Handling fuels
Observe safety regulations posted at the
gas station.◀Seite 189RefuelingMobility189
Online Edition for Part no. 01 40 2 960 466 - II/15
Page 215 of 251
Replacing componentsVehicle features and optionsThis chapter describes all standard, country-
specific and optional features offered with the
series. It also describes features that are not
necessarily available in your car, e. g., due to
the selected options or country versions. This
also applies to safety-related functions and
systems. The respectively applicable country
provisions must be observed when using the
respective features and systems.
Onboard vehicle tool kit
The onboard vehicle tool kit is located in the
trunk in a storage compartment beneath the
cargo floor panel.
Wiper blade replacement Note Do not fold down the wipers without
wiper blades
Do not fold down the wipers if wiper blades
have not been installed; this may damage the
windshield.◀
Replacing the wiper blades1.To change the wiper blades, fold up, refer
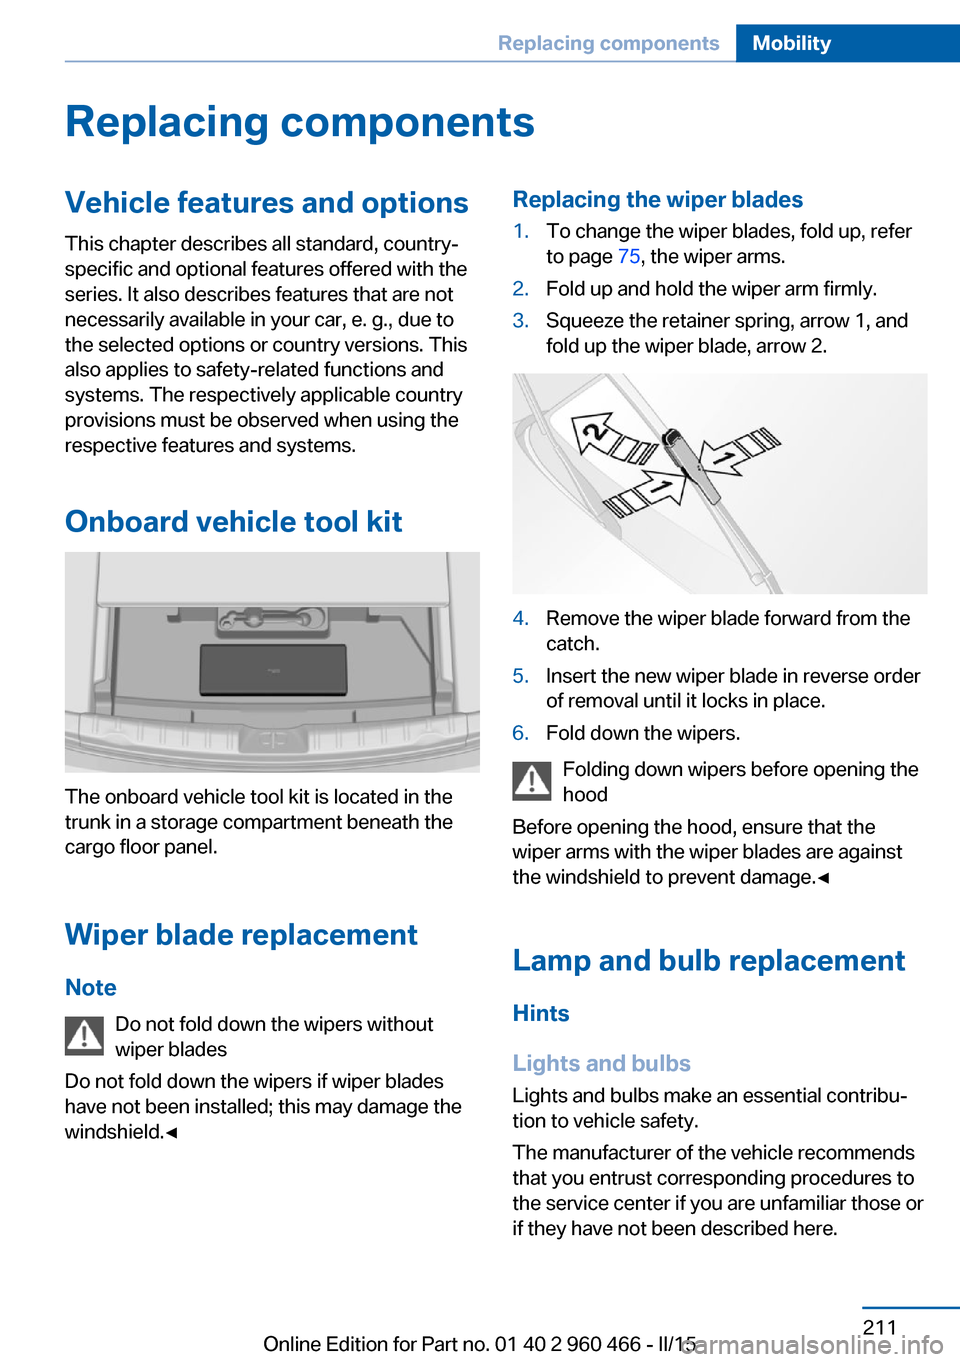
to page 75, the wiper arms.2.Fold up and hold the wiper arm firmly.3.Squeeze the retainer spring, arrow 1, and
fold up the wiper blade, arrow 2.4.Remove the wiper blade forward from the
catch.5.Insert the new wiper blade in reverse order
of removal until it locks in place.6.Fold down the wipers.
Folding down wipers before opening the hood
Before opening the hood, ensure that the
wiper arms with the wiper blades are against
the windshield to prevent damage.◀
Lamp and bulb replacement
Hints
Lights and bulbs Lights and bulbs make an essential contribu‐
tion to vehicle safety.
The manufacturer of the vehicle recommends
that you entrust corresponding procedures to
the service center if you are unfamiliar those or
if they have not been described here.
Seite 211Replacing componentsMobility211
Online Edition for Part no. 01 40 2 960 466 - II/15
Page 221 of 251
Tail lights, bulb replacement
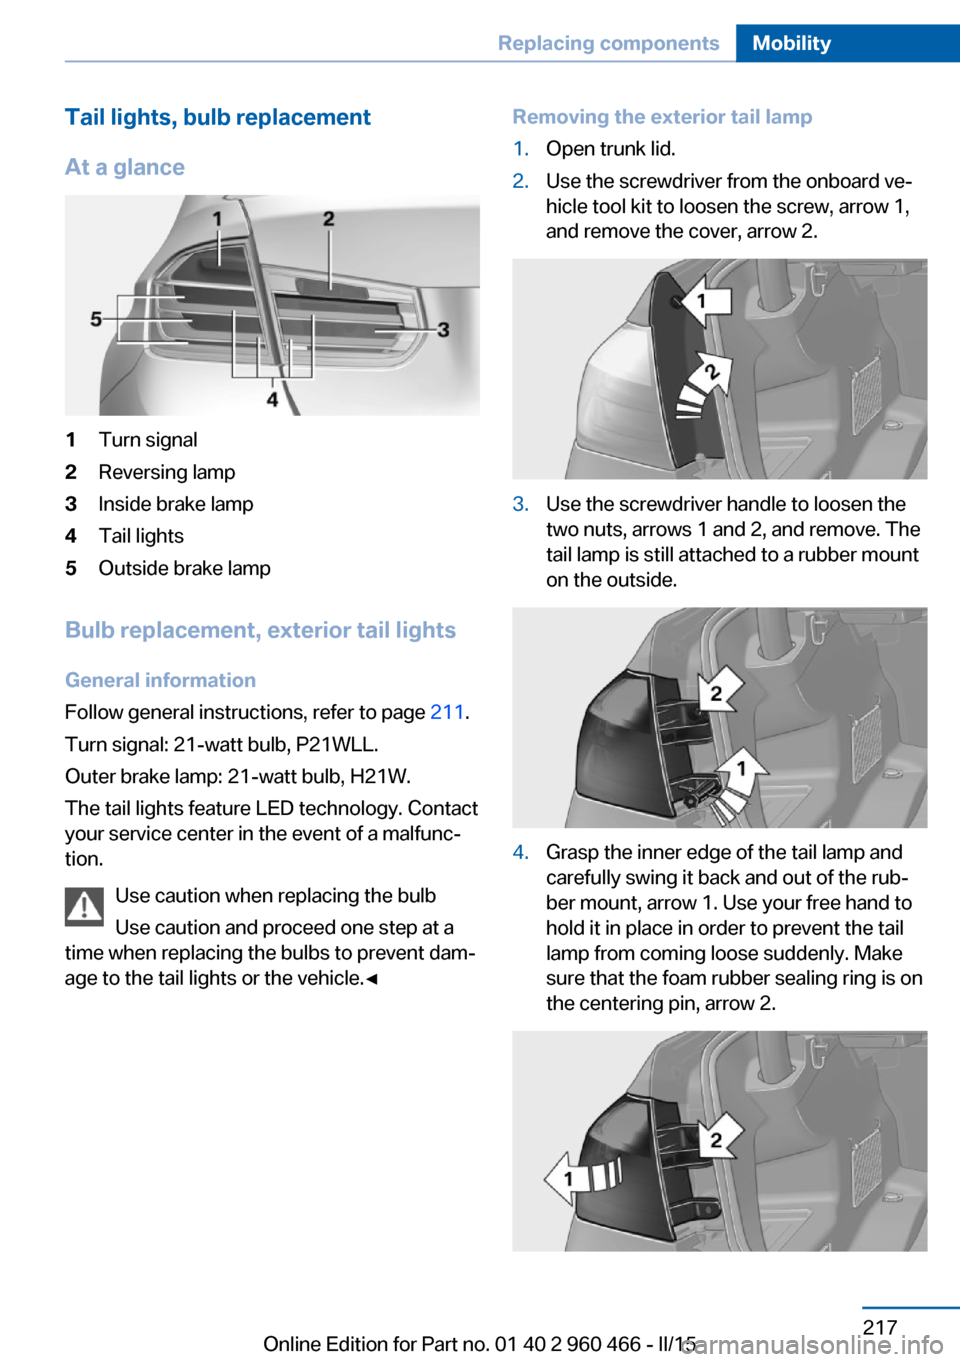
At a glance1Turn signal2Reversing lamp3Inside brake lamp4Tail lights5Outside brake lamp
Bulb replacement, exterior tail lights General information
Follow general instructions, refer to page 211.
Turn signal: 21-watt bulb, P21WLL.
Outer brake lamp: 21-watt bulb, H21W.
The tail lights feature LED technology. Contact
your service center in the event of a malfunc‐
tion.
Use caution when replacing the bulb
Use caution and proceed one step at a
time when replacing the bulbs to prevent dam‐
age to the tail lights or the vehicle.◀
Removing the exterior tail lamp1.Open trunk lid.2.Use the screwdriver from the onboard ve‐
hicle tool kit to loosen the screw, arrow 1,
and remove the cover, arrow 2.3.Use the screwdriver handle to loosen the
two nuts, arrows 1 and 2, and remove. The
tail lamp is still attached to a rubber mount
on the outside.4.Grasp the inner edge of the tail lamp and
carefully swing it back and out of the rub‐
ber mount, arrow 1. Use your free hand to
hold it in place in order to prevent the tail
lamp from coming loose suddenly. Make
sure that the foam rubber sealing ring is on
the centering pin, arrow 2.Seite 217Replacing componentsMobility217
Online Edition for Part no. 01 40 2 960 466 - II/15
Page 222 of 251

5.Remove the connecting line from the clip
on the bulb holder.6.Press and hold the catch at the top on the
connector of the connecting line and re‐
move the connector from the bulb holder.
Replacing the bulbs
1.Loosen the four fasteners, arrow 1, on the
bulb holder and remove the bulb holder
from the tail lamp, arrow 2.2.Press the defective bulb gently into the
socket, turn counterclockwise and remove.3.Proceed in the reverse order to insert the
new bulb and attach the bulb holder. Make
sure that the bulb holder engages in all fas‐
teners.
Installing the tail lamp
1.Connect the connecting line to the tail
lamp and secure the bulb holder in the clip.2.Make sure that the foam rubber sealing
ring is on the centering pin, arrow 2, and is
not damaged.3.Position and firmly press the outer part of
the tail lamp onto the rubber mount, ar‐
row 1 and the inner part onto the centeringcomponent, arrow 2. Make sure that the
tail lamp engages in the rubber mount.4.Screw the tail lamp on with the two nuts.5.Insert and secure the cover. Make sure that
the tubular seal is not pinched.
Lights in the trunk lid
General information
Follow general instructions, refer to page 211.
Reversing lights: 16-watt bulb, PW16W.
Inner brake lights: 21-watt bulb, H21W
Accessing the lights
1.If needed, remove warning triangle, refer to
page 223, and bracket with the screw‐
driver from the onboard vehicle tool kit, re‐
fer to page 211.2.Use the screwdriver from the onboard ve‐
hicle tool kit to loosen and completely re‐
move the screws on the trim.3.Carefully loosen the trim from the trunk lid,
starting at the edge and working towardSeite 218MobilityReplacing components218
Online Edition for Part no. 01 40 2 960 466 - II/15