2015 BMW 740LI SEDAN window display
[x] Cancel search: window displayPage 56 of 314
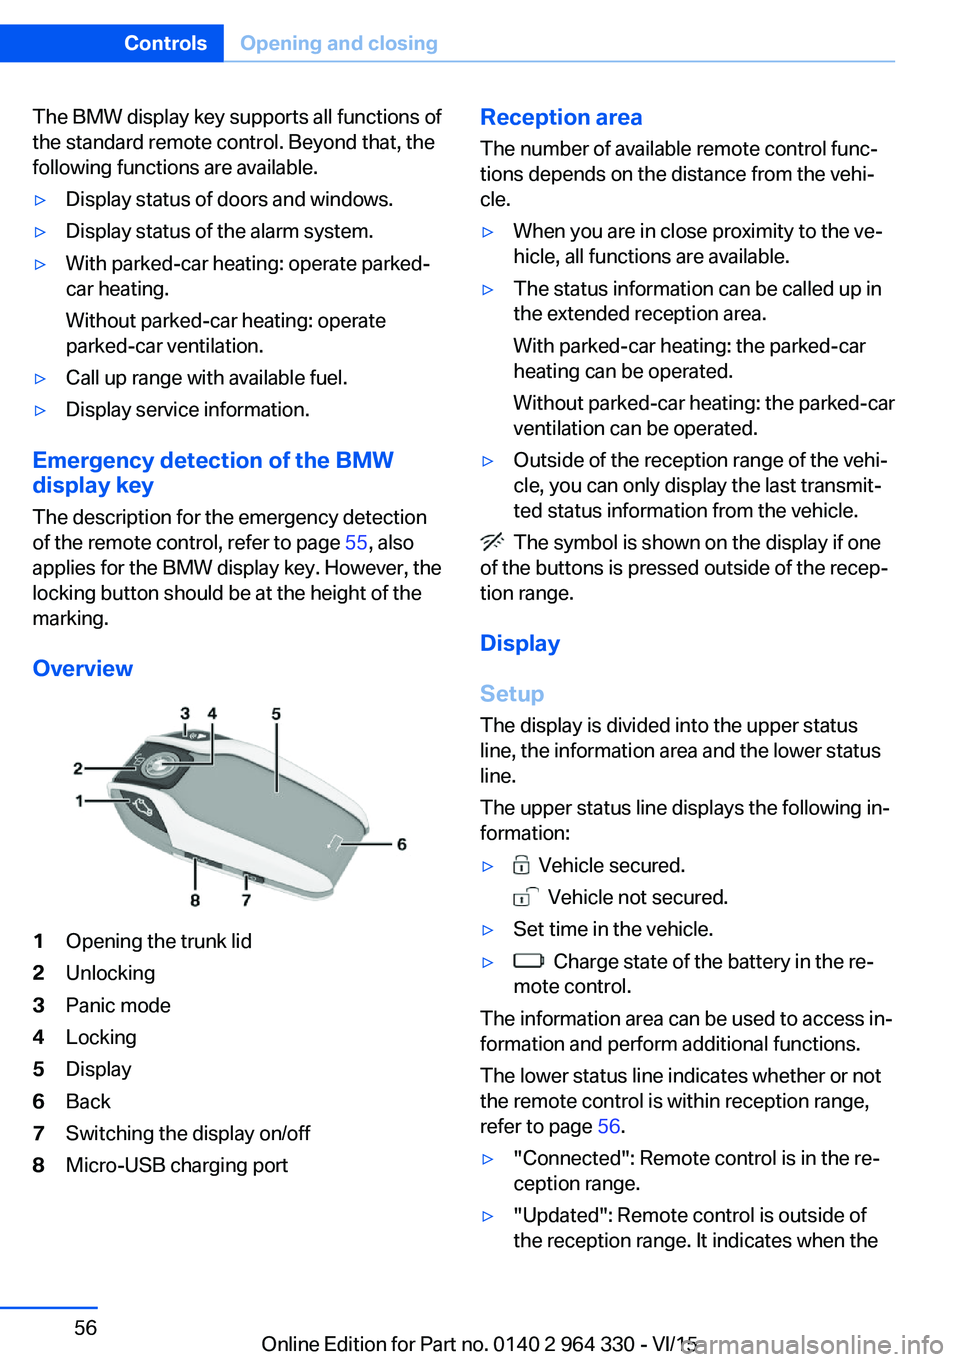
The BMW display key supports all functions of
the standard remote control. Beyond that, the
following functions are available.▷Display status of doors and windows.▷Display status of the alarm system.▷With parked-car heating: operate parked-
car heating.
Without parked-car heating: operate
parked-car ventilation.▷Call up range with available fuel.▷Display service information.
Emergency detection of the BMW
display key
The description for the emergency detection
of the remote control, refer to page 55, also
applies for the BMW display key. However, the
locking button should be at the height of the
marking.
Overview
1Opening the trunk lid2Unlocking3Panic mode4Locking5Display6Back7Switching the display on/off8Micro-USB charging portReception area
The number of available remote control func‐
tions depends on the distance from the vehi‐
cle.▷When you are in close proximity to the ve‐
hicle, all functions are available.▷The status information can be called up in
the extended reception area.
With parked-car heating: the parked-car
heating can be operated.
Without parked-car heating: the parked-car
ventilation can be operated.▷Outside of the reception range of the vehi‐
cle, you can only display the last transmit‐
ted status information from the vehicle.
The symbol is shown on the display if one
of the buttons is pressed outside of the recep‐
tion range.
Display
Setup The display is divided into the upper status
line, the information area and the lower status
line.
The upper status line displays the following in‐
formation:
▷ Vehicle secured.
Vehicle not secured.
▷Set time in the vehicle.▷ Charge state of the battery in the re‐
mote control.
The information area can be used to access in‐
formation and perform additional functions.
The lower status line indicates whether or not
the remote control is within reception range,
refer to page 56.
▷"Connected": Remote control is in the re‐
ception range.▷"Updated": Remote control is outside of
the reception range. It indicates when theSeite 56ControlsOpening and closing56
Online Edition for Part no. 0140 2 964 330 - VI/15
Page 57 of 314
last data transfer from the vehicle took
place.
Controls
If the information area contains more than one
page, then page indicators are shown beneath
the information.
The indicator for the current page has
been filled in.
Swipe to the right or left with a finger to
change between the pages.
If additional information is available on a page,
tap the appropriate symbol.
Touch the arrow symbol beneath the dis‐
play to return to the original page.
Switching the display on/off
The display will go out automatically after a
brief period to conserve battery power.
To hide the display manually, press the button
on the left side of the remote control. Over‐
view, refer to page 56.
Show the display:
1.Press button on the left side of the remote
control.2.Then, swipe with your finger from bottom
to top to unlock the screen lock.
Completely switch off the display to increase
the usable battery life.
1.Press and hold the button on the left side
of the remote control for longer than 4 sec‐
onds.2."OK" tap.
Press button on the left side of the remote
control to switch on the switched-off display.
Operating concept
Depending on the equipment, there are up to
five main menus that provide access to the
sub-menus.
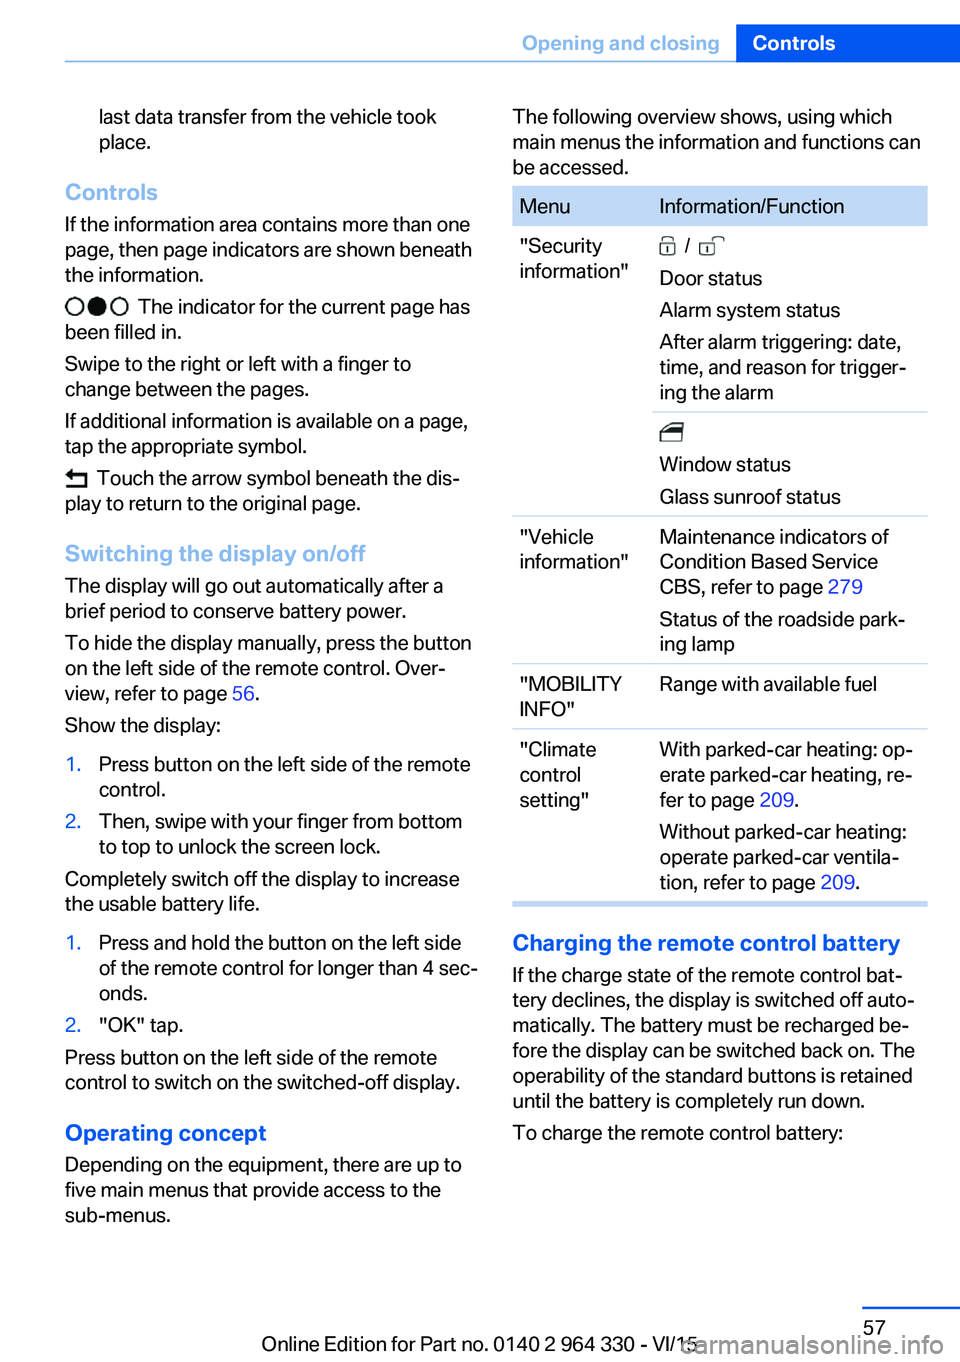
The following overview shows, using which
main menus the information and functions can
be accessed.MenuInformation/Function"Security
information" /
Door status
Alarm system status
After alarm triggering: date,
time, and reason for trigger‐
ing the alarm
Window status
Glass sunroof status"Vehicle
information"Maintenance indicators of
Condition Based Service
CBS, refer to page 279
Status of the roadside park‐
ing lamp"MOBILITY
INFO"Range with available fuel"Climate
control
setting"With parked-car heating: op‐
erate parked-car heating, re‐
fer to page 209.
Without parked-car heating:
operate parked-car ventila‐
tion, refer to page 209.
Charging the remote control battery
If the charge state of the remote control bat‐
tery declines, the display is switched off auto‐
matically. The battery must be recharged be‐
fore the display can be switched back on. The
operability of the standard buttons is retained
until the battery is completely run down.
To charge the remote control battery:
Seite 57Opening and closingControls57
Online Edition for Part no. 0140 2 964 330 - VI/15
Page 61 of 314
Convenient openingPress and hold this button on the re‐
mote control after unlocking.
The windows and the glass sunroof are
opened, as long as the button on the remote
control is pressed.
Locking WARNING
For some country-specific variants, un‐
locking from the inside is only possible with
special knowledge.
If people must spend a longer time in the vehi‐
cle while it is very hot or cold outside, there is
risk of injuries or danger to life. Do not lock the
vehicle from the outside when there are people
in it.◀
The driver's door must be closed. Press button on the remote control.▷All doors, the tailgate, and the fuel filler flap
are locked.▷The rear sliding visor is being closed.▷Anti-theft protection is switched on. It pre‐
vents the doors from being unlocked using
the lock buttons or the door opener.▷The alarm system, refer to page 69, is
armed.
Switching on exterior lighting
Press button on the remote control with
the vehicle locked.
▷The interior lights are being switched on,
unless they were manually switched off.
Switching the interior lights on and off
manually, refer to page 133.▷In the dark, door handle lighting and Wel‐
come Light Carpet are switched on if these
functions were activated. For Settings, re‐
fer to page 67.If the button is pressed again within 10 sec‐
onds after vehicle was locked, the interior mo‐
tion sensor and tilt alarm sensor of the anti-
theft warning system, refer to page 70, are
turned off. After locking, wait 10 seconds be‐
fore pressing the button again.
Panic mode
You can trigger the alarm system if you find
yourself in a dangerous situation.
Press button on the remote control
and hold for at least 3 seconds.
To switch off the alarm: press any button.
Opening the tailgate CAUTION
During opening, the trunk lid pivots back
and up. There is risk of property damage. Make
sure that the area of movement of the tailgate
is clear during opening and closing.◀
Press and hold button on the remotecontrol for approx. one second.
The trunk lid opens, regardless of whether the
vehicle was previously locked or unlocked.
To avoid locking it into the vehicle, do not
place the remote control in the cargo area.
Depending on the features and the country
version, it is also possible to have door un‐
locked. Create the settings, refer to page 67.
If the doors were not unlocked, the trunk lid is
locked again as soon as it closes.
Switching on the headlight courtesy delay feature
Press button on the remote control.
The duration can be set in the Control Display.Seite 61Opening and closingControls61
Online Edition for Part no. 0140 2 964 330 - VI/15
Page 98 of 314
3.Set the parking brake.
Before driving into a car wash
So that the vehicle can roll into a car wash ob‐
serve instructions for going into an automatic
car wash, refer to page 291.
Auto Start/Stop function
The concept The Auto Start/Stop function helps save fuel.
The system switches off the engine during a
stop, e.g., in traffic congestion or at traffic lights. Drive readiness remains switched on.
The engine starts again automatically for driv‐
ing off.
Information After every engine start via the Start/Stop but‐
ton, the Auto Start/Stop function is activated or
deactivated, according to the last setting, refer
to page 99. If the Auto Start/Stop function is
active, it is available as soon as a speed of ap‐
prox. 3 mph, approx. 5 km/h is exceeded.
Engine stop
The engine is switched off automatically dur‐
ing a stop under the following conditions:
▷The selector lever is in selector lever posi‐
tion D.▷The brake pedal remains pressed while the
vehicle is stationary or the vehicle is held
by Automatic Hold.▷The driver's safety belt is buckled or the
driver's door is closed.
The air flow from the air conditioner is reduced
when the engine is switched off.
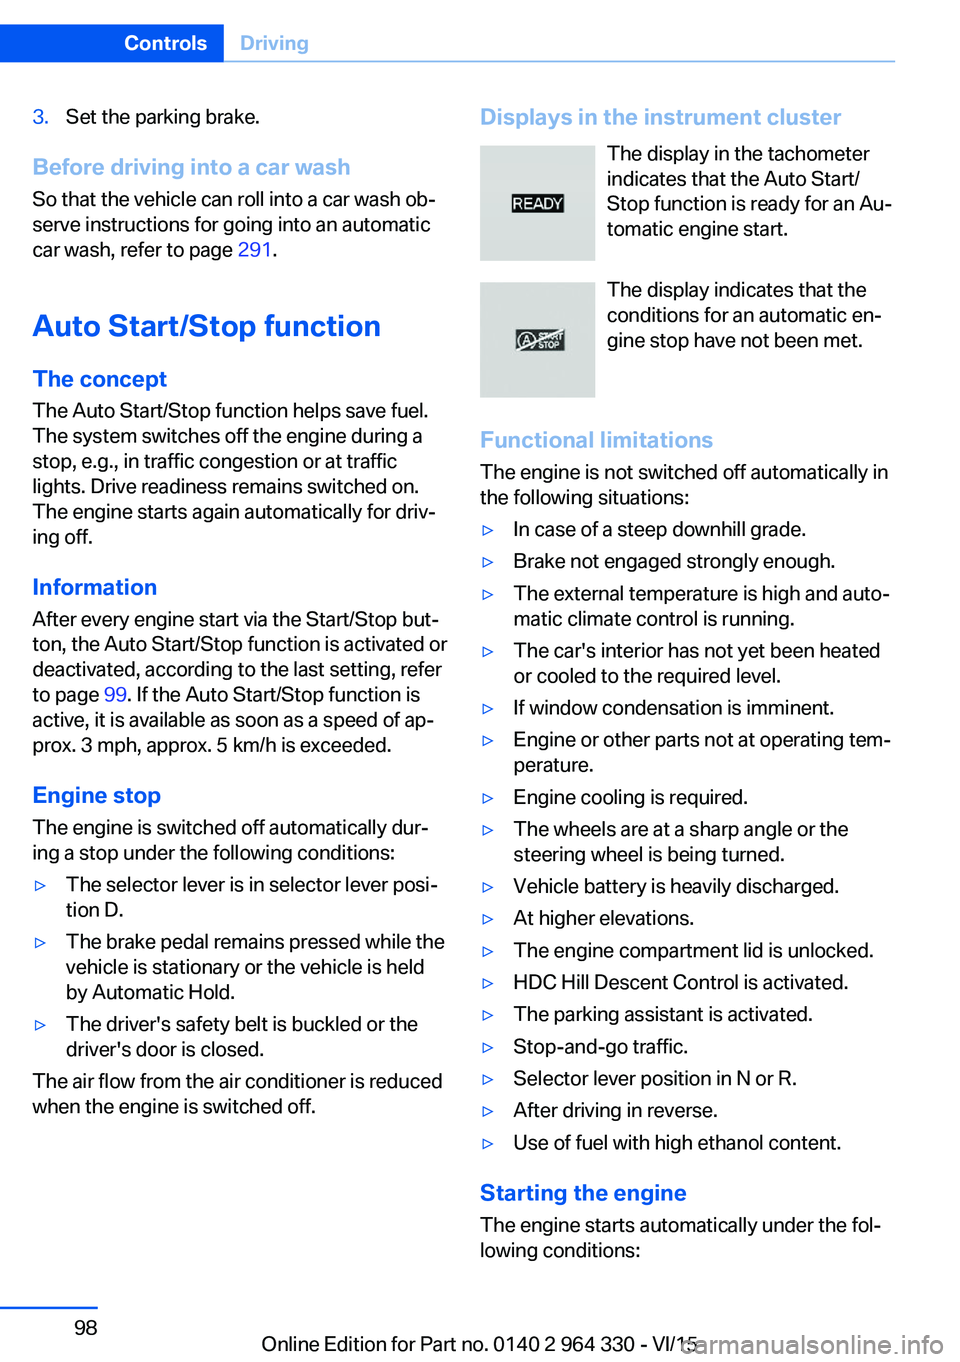
Displays in the instrument cluster
The display in the tachometer
indicates that the Auto Start/
Stop function is ready for an Au‐
tomatic engine start.
The display indicates that the
conditions for an automatic en‐
gine stop have not been met.
Functional limitations The engine is not switched off automatically in
the following situations:▷In case of a steep downhill grade.▷Brake not engaged strongly enough.▷The external temperature is high and auto‐
matic climate control is running.▷The car's interior has not yet been heated
or cooled to the required level.▷If window condensation is imminent.▷Engine or other parts not at operating tem‐
perature.▷Engine cooling is required.▷The wheels are at a sharp angle or the
steering wheel is being turned.▷Vehicle battery is heavily discharged.▷At higher elevations.▷The engine compartment lid is unlocked.▷HDC Hill Descent Control is activated.▷The parking assistant is activated.▷Stop-and-go traffic.▷Selector lever position in N or R.▷After driving in reverse.▷Use of fuel with high ethanol content.
Starting the engine
The engine starts automatically under the fol‐
lowing conditions:
Seite 98ControlsDriving98
Online Edition for Part no. 0140 2 964 330 - VI/15
Page 100 of 314
Automatic deactivation
In certain situations, Auto Start/Stop function
is deactivated automatically for safety reasons
as if the driver were absent.
Malfunction
The Auto Start/Stop function no longer
switches off the engine automatically. A Check
Control message is displayed. It is possible to
continue driving. Have the system checked.
Parking brake The concept
The parking brake is used to prevent the vehi‐
cle from rolling when it is parked.
Information WARNING
An unsecured vehicle can put itself into
motion and roll away. There is risk of an acci‐
dent. Before exiting, secure the vehicle against
rolling.
In order to ensure that the vehicle is secured
against rolling away, observe the following:▷Set the parking brake.▷On uphill grades or on a slope, turn the
front wheels in the direction of the curb.▷On uphill grades or on a slope, also secure
the vehicle, e.g. with a wheel chock.◀
WARNING
Unattended children or animals can
move the vehicle and endanger themselves
and traffic, e.g. with the following actions:
▷Pressing the Start/Stop button.▷Releasing the parking brake.▷Opening and closing of doors or windows.▷Shifting the selector lever into neutral.▷Using vehicle equipment.There is risk of accidents or injuries. Do not
leave children or animals unattended in the ve‐
hicle. Carry remote control along when exiting
and lock the vehicle.◀
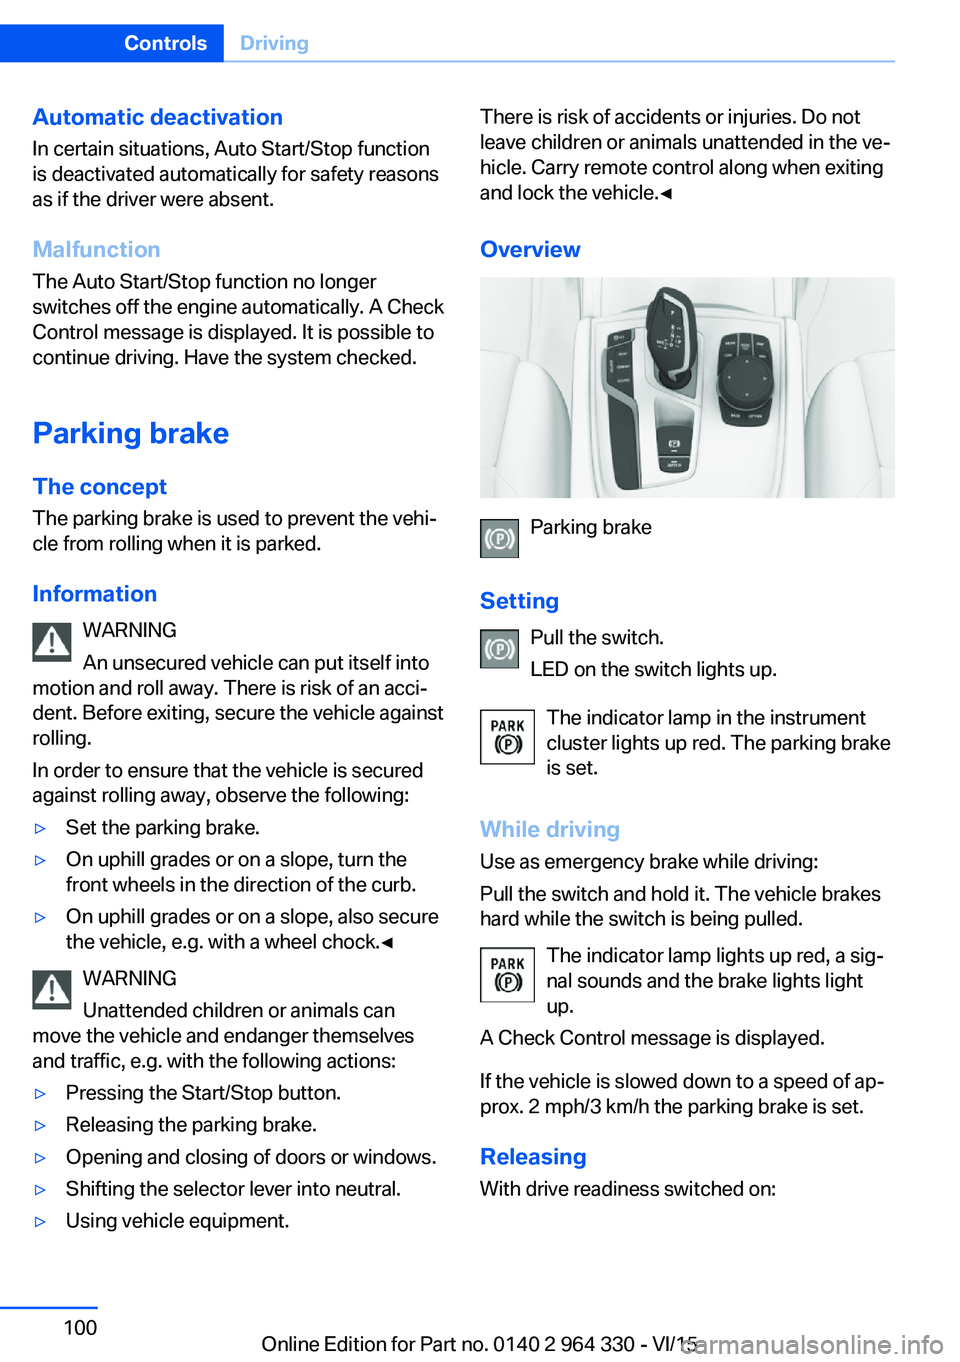
Overview
Parking brake
Setting Pull the switch.
LED on the switch lights up.
The indicator lamp in the instrument
cluster lights up red. The parking brake
is set.
While driving Use as emergency brake while driving:
Pull the switch and hold it. The vehicle brakes
hard while the switch is being pulled.
The indicator lamp lights up red, a sig‐
nal sounds and the brake lights light
up.
A Check Control message is displayed.
If the vehicle is slowed down to a speed of ap‐
prox. 2 mph/3 km/h the parking brake is set.
Releasing
With drive readiness switched on:
Seite 100ControlsDriving100
Online Edition for Part no. 0140 2 964 330 - VI/15
Page 160 of 314
▷NBG009014A.
Compliance statement:
This device complies with part 15 of the FCC
Rules. Operation is subject to the following
two conditions:
▷This device may not cause harmful inter‐
ference, and▷this device must accept any interference
received, including interference that may
cause undesired operation.
Any unauthorized modifications or changes to
these devices could void the user's authority to
operate this equipment.
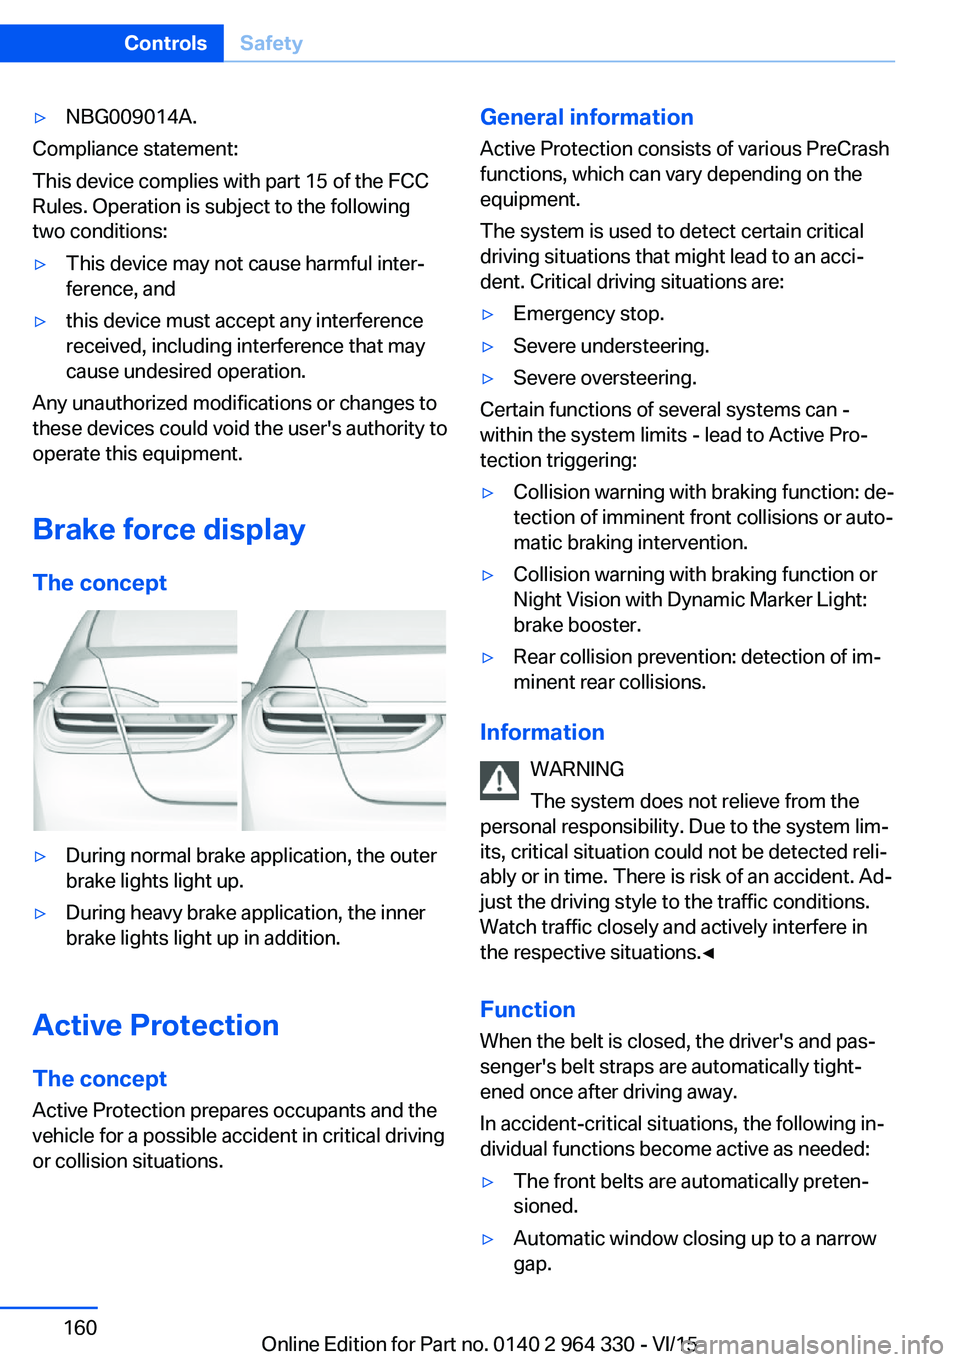
Brake force display
The concept
▷During normal brake application, the outer
brake lights light up.▷During heavy brake application, the inner
brake lights light up in addition.
Active Protection
The concept
Active Protection prepares occupants and the
vehicle for a possible accident in critical driving
or collision situations.
General information
Active Protection consists of various PreCrash
functions, which can vary depending on the
equipment.
The system is used to detect certain critical
driving situations that might lead to an acci‐
dent. Critical driving situations are:▷Emergency stop.▷Severe understeering.▷Severe oversteering.
Certain functions of several systems can -
within the system limits - lead to Active Pro‐
tection triggering:
▷Collision warning with braking function: de‐
tection of imminent front collisions or auto‐
matic braking intervention.▷Collision warning with braking function or
Night Vision with Dynamic Marker Light:
brake booster.▷Rear collision prevention: detection of im‐
minent rear collisions.
Information
WARNING
The system does not relieve from the
personal responsibility. Due to the system lim‐
its, critical situation could not be detected reli‐
ably or in time. There is risk of an accident. Ad‐
just the driving style to the traffic conditions.
Watch traffic closely and actively interfere in
the respective situations.◀
Function
When the belt is closed, the driver's and pas‐
senger's belt straps are automatically tight‐
ened once after driving away.
In accident-critical situations, the following in‐
dividual functions become active as needed:
▷The front belts are automatically preten‐
sioned.▷Automatic window closing up to a narrow
gap.Seite 160ControlsSafety160
Online Edition for Part no. 0140 2 964 330 - VI/15
Page 188 of 314
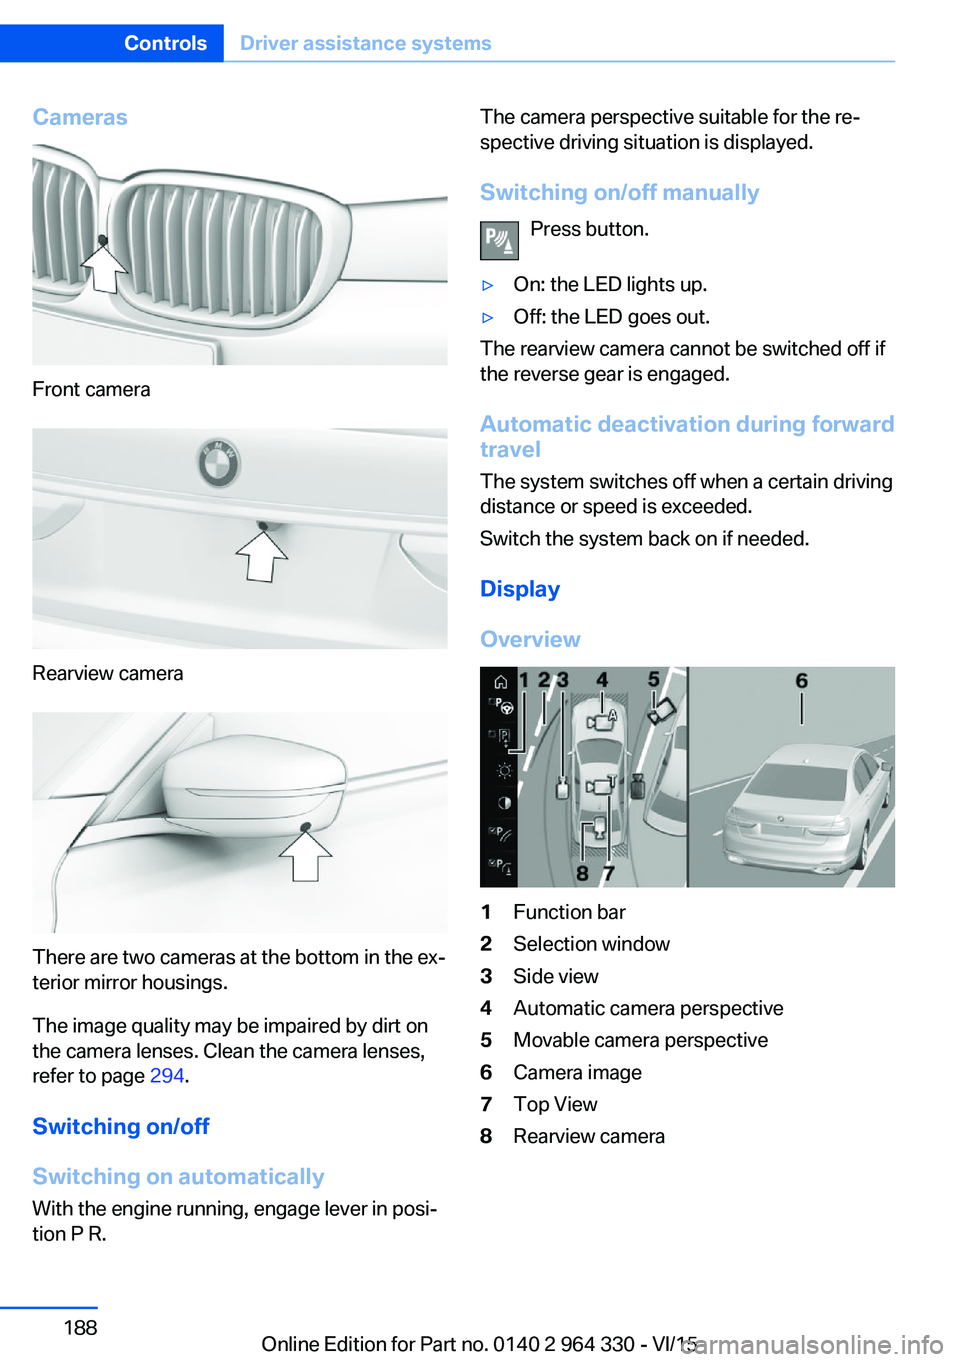
Cameras
Front camera
Rearview camera
There are two cameras at the bottom in the ex‐
terior mirror housings.
The image quality may be impaired by dirt on
the camera lenses. Clean the camera lenses,
refer to page 294.
Switching on/off
Switching on automatically With the engine running, engage lever in posi‐
tion P R.
The camera perspective suitable for the re‐
spective driving situation is displayed.
Switching on/off manually Press button.▷On: the LED lights up.▷Off: the LED goes out.
The rearview camera cannot be switched off if
the reverse gear is engaged.
Automatic deactivation during forward
travel
The system switches off when a certain driving
distance or speed is exceeded.
Switch the system back on if needed.
Display
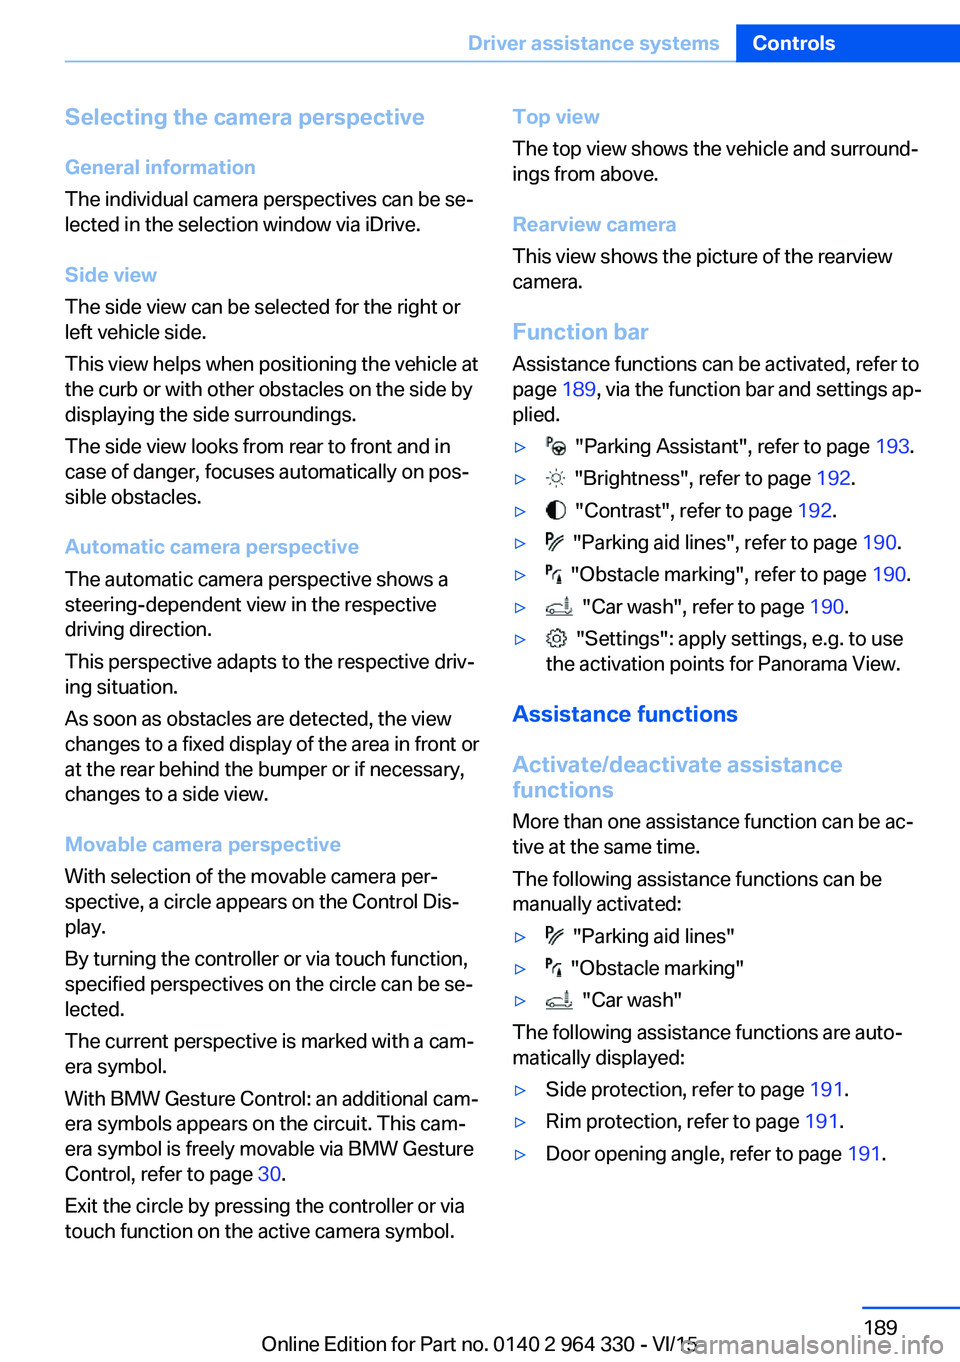
Overview
1Function bar2Selection window3Side view4Automatic camera perspective5Movable camera perspective6Camera image7Top View8Rearview cameraSeite 188ControlsDriver assistance systems188
Online Edition for Part no. 0140 2 964 330 - VI/15
Page 189 of 314
Selecting the camera perspectiveGeneral information
The individual camera perspectives can be se‐
lected in the selection window via iDrive.
Side view
The side view can be selected for the right or
left vehicle side.
This view helps when positioning the vehicle at
the curb or with other obstacles on the side by
displaying the side surroundings.
The side view looks from rear to front and in
case of danger, focuses automatically on pos‐
sible obstacles.
Automatic camera perspective
The automatic camera perspective shows a
steering-dependent view in the respective
driving direction.
This perspective adapts to the respective driv‐ ing situation.
As soon as obstacles are detected, the view
changes to a fixed display of the area in front or
at the rear behind the bumper or if necessary,
changes to a side view.
Movable camera perspective
With selection of the movable camera per‐
spective, a circle appears on the Control Dis‐
play.
By turning the controller or via touch function,
specified perspectives on the circle can be se‐
lected.
The current perspective is marked with a cam‐
era symbol.
With BMW Gesture Control: an additional cam‐
era symbols appears on the circuit. This cam‐
era symbol is freely movable via BMW Gesture
Control, refer to page 30.
Exit the circle by pressing the controller or via
touch function on the active camera symbol.Top view
The top view shows the vehicle and surround‐
ings from above.
Rearview camera
This view shows the picture of the rearview
camera.
Function bar
Assistance functions can be activated, refer to
page 189, via the function bar and settings ap‐
plied.▷ "Parking Assistant", refer to page 193.▷ "Brightness", refer to page 192.▷ "Contrast", refer to page 192.▷ "Parking aid lines", refer to page 190.▷ "Obstacle marking", refer to page 190.▷ "Car wash", refer to page 190.▷ "Settings": apply settings, e.g. to use
the activation points for Panorama View.
Assistance functions
Activate/deactivate assistance
functions
More than one assistance function can be ac‐
tive at the same time.
The following assistance functions can be
manually activated:
▷ "Parking aid lines"▷ "Obstacle marking"▷ "Car wash"
The following assistance functions are auto‐
matically displayed:
▷Side protection, refer to page 191.▷Rim protection, refer to page 191.▷Door opening angle, refer to page 191.Seite 189Driver assistance systemsControls189
Online Edition for Part no. 0140 2 964 330 - VI/15