2015 BMW 6 SERIES COUPE Lighter
[x] Cancel search: LighterPage 170 of 251

4.Likewise, press and hold the button of the
desired function on the hand-held trans‐
mitter.5.Release both buttons as soon as the inte‐
rior rearview mirror LED flashes more rap‐
idly. The LED flashing faster indicates that
the button on the interior rearview mirror
has been programmed. The system can
then be controlled by the button on the in‐
terior rearview mirror.
If the LED does not flash faster after at
least 60 seconds, change the distance and
repeat the step. Several more attempts at
different distances may be necessary. Wait
at least 15 seconds between attempts.
Canada: if programming with the hand-
held transmitter was interrupted, hold
down the interior rearview mirror button
and repeatedly press and release the
hand-held transmitter button for 2 sec‐
onds.
Controls
Before operation
Before operating a system using the uni‐
versal garage door opener, ensure that there are no people, animals, or objects within the
range of movement of the remote-controlled
system; otherwise, there is a risk of injury or
damage.
Also follow the safety instructions of the hand-
held transmitter.◀
The system, such as the garage door, can be
operated using the button on the interior rear‐
view mirror while the engine is running or when
the ignition is started. To do this, hold down
the button within receiving range of the system
until the function is activated. The interior rear‐ view mirror LED stays lit while the wireless sig‐
nal is being transmitted.
Deleting stored functions Press and hold the left and right button on the
interior rearview mirror simultaneously for ap‐
proximately 20 seconds until the LED flashes
rapidly. All stored functions are deleted. The
functions cannot be deleted individually.
Sun visor Glare shieldFold the sun visor down or up.
Vanity mirror A vanity mirror is located in the sun visor be‐
hind a cover. When the cover is opened, the
mirror lighting switches on.
Ashtray/cigarette lighterSteptronic transmission: open
Press button.
Emptying Take out the insert.
Lighter Push in the lighter.
The lighter can be removed as
soon as it pops back out.
Danger of burns
Only hold the hot lighter by its knob; oth‐
erwise, there is a danger of getting burned.
Seite 166ControlsInterior equipment166
Online Edition for Part no. 01 40 2 954 494 - II/15
Page 171 of 251

Switch off the ignition and take the remote
control with you when leaving the vehicle so
that children cannot use the lighter and burn
themselves.◀
Replace the cover after use
Reinsert the lighter or socket cover after
use, otherwise objects may get into the lighter
socket or fixture and cause a short circuit.◀
Connecting electrical
devices
Hints Do not connect charging devices to the12 volt socket in the vehicle
Do not connect battery chargers to the fac‐
tory-installed 12 volt sockets in the vehicle as
this may damage the vehicle battery due to an
increased power consumption.◀
Replace the cover after use
Reinsert the lighter or socket cover after
use, otherwise objects may get into the lighter
socket or fixture and cause a short circuit.◀
Sockets
General information
The lighter socket can be used as a socket for
electrical equipment while the engine is run‐
ning or when the ignition is switched on.
Note The total load of all sockets must not exceed
140 watts at 12 volts.
Do not damage the socket by using unsuitable
connectors.Steptronic transmission: center
console
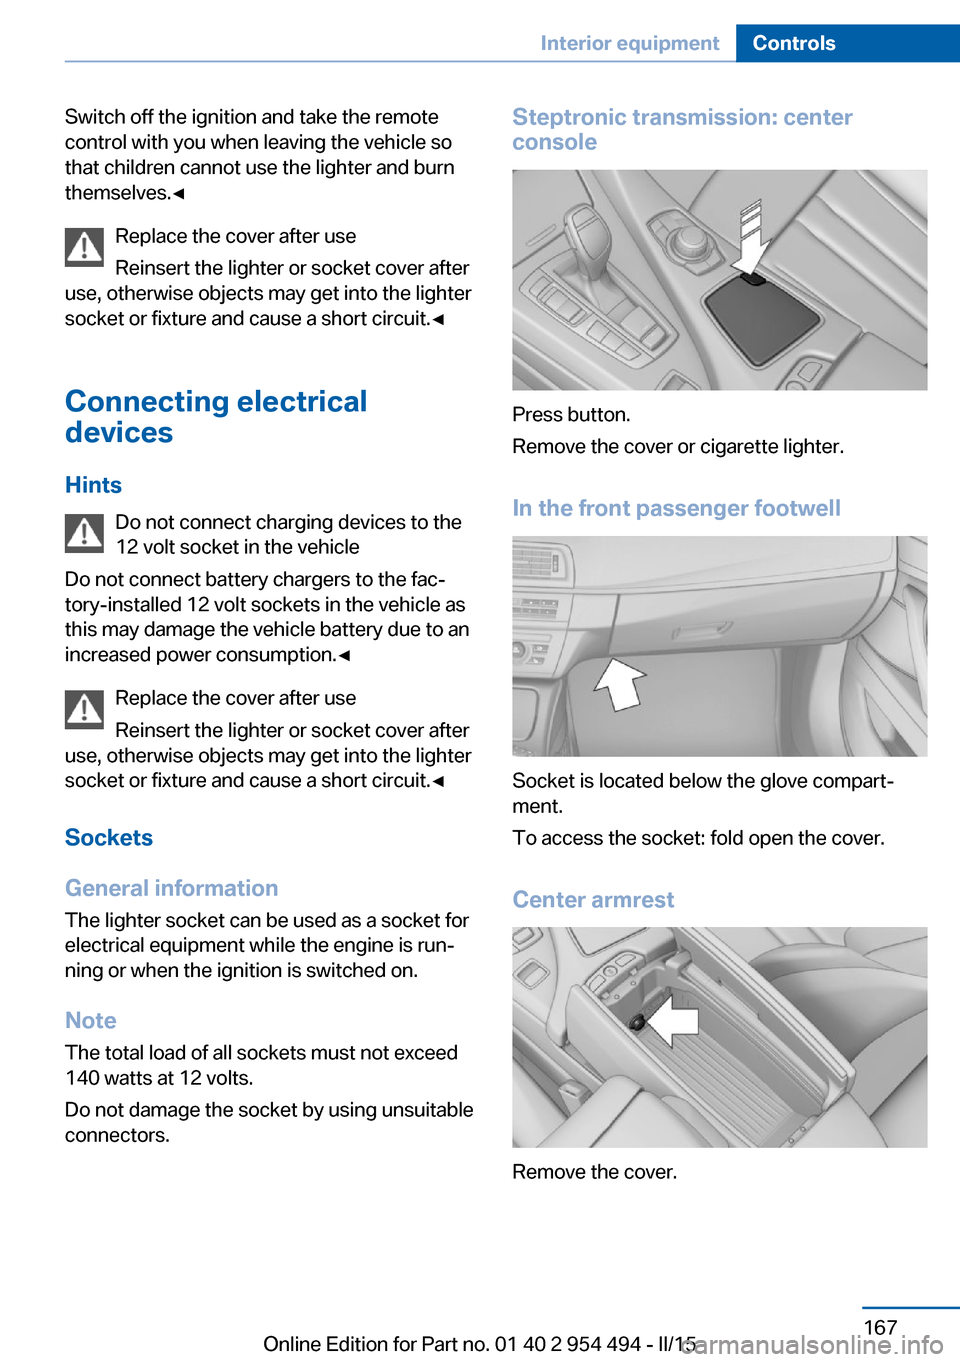
Press button.
Remove the cover or cigarette lighter.
In the front passenger footwell
Socket is located below the glove compart‐
ment.
To access the socket: fold open the cover.
Center armrest
Remove the cover.
Seite 167Interior equipmentControls167
Online Edition for Part no. 01 40 2 954 494 - II/15
Page 182 of 251

Load
The maximum load is the sum of the weight of
the occupants and the cargo.
The greater the weight of the occupants, the
less cargo that can be transported.
Stowing cargo
▷Cover sharp edges and corners on the
cargo.▷Heavy cargo: stow as far forward as possi‐
ble, directly behind and at the bottom of
the rear passenger seat backrests.▷Very heavy cargo: when the rear seat is not
occupied, secure each of the outer safety
belts in the opposite buckle.
Securing cargo
Lashing eyes in the trunk
To secure the cargo there are four lashing
eyes in the cargo area.
Securing cargo
Securing cargo
Stow and secure the cargo as described;
otherwise it may present a danger to the occu‐
pants, e.g., during braking and evasive maneu‐
vers.◀▷Smaller and lighter items: secure with re‐
taining straps or with a cargo net or draw
straps.▷Larger and heavy objects: secure with
cargo straps.
Cargo straps, cargo netting, retaining straps or
draw straps on the lashing eyes in the trunk.
Seite 178Driving tipsLoading178
Online Edition for Part no. 01 40 2 954 494 - II/15
Page 228 of 251

corresponding engine or body ground of
the vehicle to be started.
Starting the engine
Never use spray fluids to start the engine.
1.Start the engine of the assisting vehicle
and let it run for several minutes at an in‐
creased idle speed.2.Start the engine of the vehicle that is to be
started in the usual way.
If the first starting attempt is not success‐
ful, wait a few minutes before making an‐
other attempt in order to allow the dis‐
charged battery to recharge.3.Let both engines run for several minutes.4.Disconnect the jumper cables in the re‐
verse order.
Check the battery and recharge if needed.
Tow-starting and towing Note Tow-starting and towing
For tow-starting or towing, switch off the
Intelligent Safety systems; otherwise malfunc‐
tions of the individual braking systems might
lead to accidents.◀
Steptronic transmission: transporting
your vehicle
Note Your vehicle is not permitted to be towed.
Therefore, contact a service center in the
event of a breakdown.
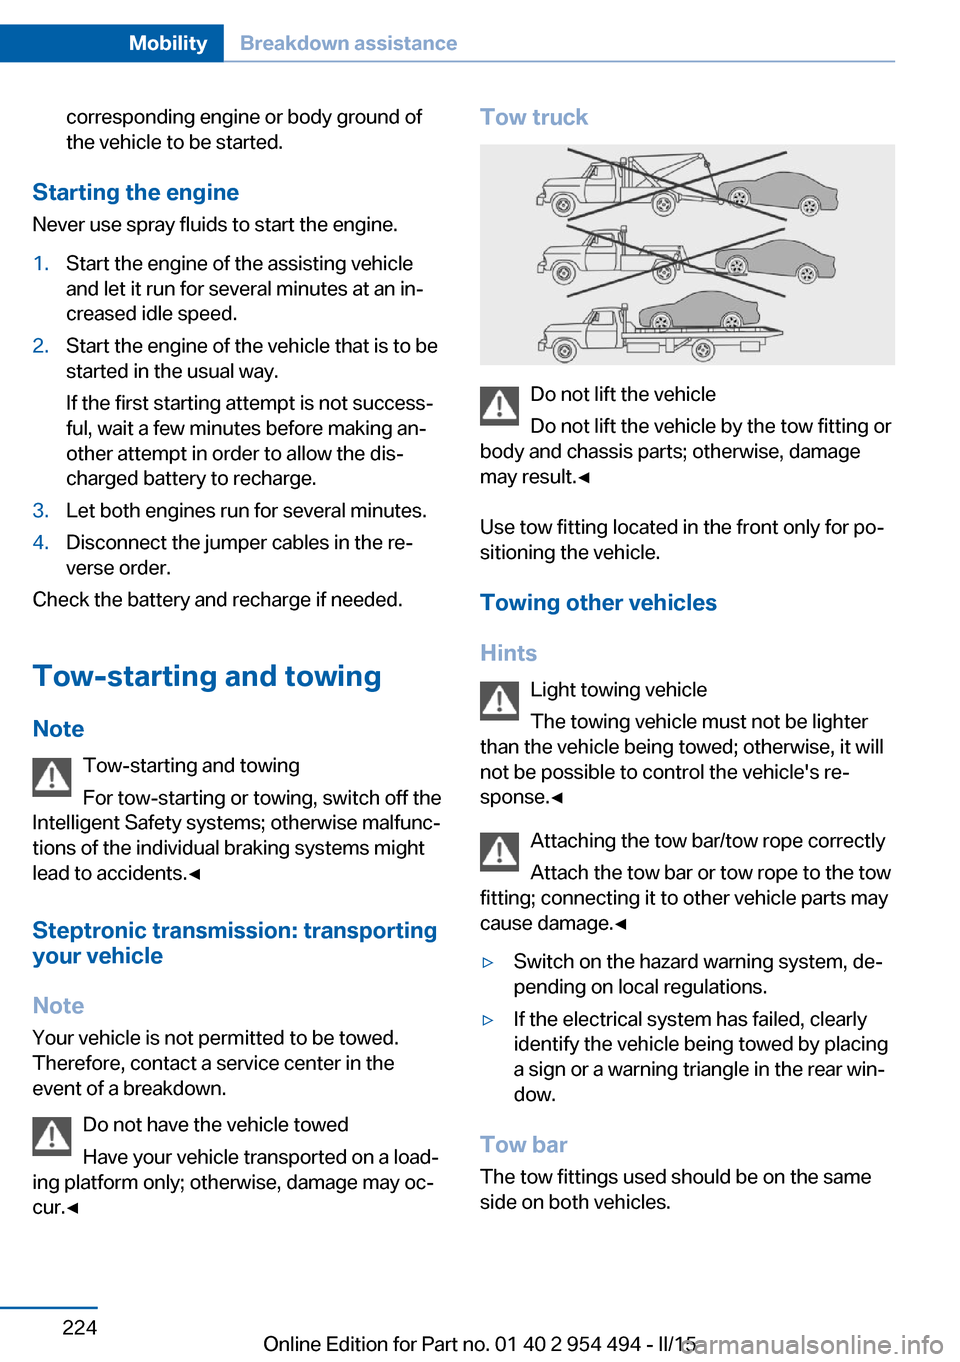
Do not have the vehicle towed
Have your vehicle transported on a load‐
ing platform only; otherwise, damage may oc‐
cur.◀
Tow truck
Do not lift the vehicle
Do not lift the vehicle by the tow fitting or
body and chassis parts; otherwise, damage
may result.◀
Use tow fitting located in the front only for po‐
sitioning the vehicle.
Towing other vehicles
Hints Light towing vehicle
The towing vehicle must not be lighter
than the vehicle being towed; otherwise, it will
not be possible to control the vehicle's re‐
sponse.◀
Attaching the tow bar/tow rope correctly
Attach the tow bar or tow rope to the tow
fitting; connecting it to other vehicle parts may
cause damage.◀
▷Switch on the hazard warning system, de‐
pending on local regulations.▷If the electrical system has failed, clearly
identify the vehicle being towed by placing
a sign or a warning triangle in the rear win‐
dow.
Tow bar
The tow fittings used should be on the same
side on both vehicles.
Seite 224MobilityBreakdown assistance224
Online Edition for Part no. 01 40 2 954 494 - II/15
Page 241 of 251

Blinds, sun protection 46
BMW Assist, see user's manual for Navigation, En‐
tertainment and Communi‐
cation
BMW Driver’s Guide App 6
BMW Homepage 6
BMW Internet page 6
BMW maintenance sys‐ tem 214
Bonus range, ECO PRO 181
Bottle holder, refer to Cu‐ pholder 171
Brake assistant 128
Brake assistant, adaptive 128
Brake discs, break-in 174
Brake force display 125
Brake lights, adaptive 125
Brake lights, brake force dis‐ play 125
Brake lights, bulb replace‐ ment 218
Brake pads, break-in 174
Braking, hints 175
Breakdown assistance 221
Break-in 174
Brightness of Control Dis‐ play 93
Bulb replacement, front 216
Bulb replacement, rear 218
Button, RES 139
Button, Start/Stop 63
Bypassing, refer to Jump- starting 223
C
California Proposition 65 Warning 7
Calling up mirror adjust‐ ment 43
Calling up seat adjust‐ ment 43
Calling up steering wheel ad‐ justment 43
Camera lenses, care 229 Camera, rearview cam‐
era 148
Camera, Side View 150
Camera, Top View 152
Can holder, refer to Cu‐ pholder 171
Car battery 219
Car care products 227
Care, displays 229
Care, vehicle 227
Cargo 177
Cargo area, storage compart‐ ments 171
Cargo, securing 178
Cargo straps, securing cargo 178
Car key, refer to Remote con‐ trol 34
Carpet, care 229
Car wash 226
Catalytic converter, refer to Hot exhaust system 174
CBS Condition Based Serv‐ ice 214
CD/Multimedia, see user's manual for Navigation, En‐
tertainment and Communi‐
cation
Center console 16
Central locking system 40
Central screen, refer to Con‐ trol Display 18
Changes, technical, refer to Safety 7
Changing parts 216
Changing wheels 219
Changing wheels/tires 200
Chassis number, see vehicle identification number 9
Check Control 81
Checking the engine oil level electronically 209
Checking the oil level elec‐ tronically 209
Children, seating position 59 Children, transporting
safely 59
Child restraint fixing sys‐ tem 59
Child restraint fixing system LATCH 61
Child restraint fixing systems, mounting 59
Child seat, mounting 59
Child seats 59
Chrome parts, care 228
Cigarette lighter 166
Cleaning displays 229
Climate control 157
Climate control laminated tinted safety glass 175
Climate control wind‐ shield 175
Clock 86
Closing/opening via door lock 39
Closing/opening with remote control 37
Clothes hooks 170
Coasting 183
Coasting with engine decou‐ pled, coasting 183
Coasting with idling en‐ gine 183
Combination reel, refer to Turn signals 69
Combination switch, refer to Wiper system 70
COMFORT+ program, Driving Dynamics Control 134
Comfort Access 41
COMFORT program, Driving Dynamics Control 134
Compressor 202
Computer, refer to On-board computer 90
Condensation on win‐ dows 158
Condensation under the vehi‐ cle 176 Seite 237Everything from A to ZReference237
Online Edition for Part no. 01 40 2 954 494 - II/15