Page 176 of 263
4.Likewise, press and hold the button of the
desired function on the hand-held trans‐
mitter.5.Release both buttons as soon as the inte‐
rior rearview mirror LED flashes more rap‐
idly. The LED flashing faster indicates that
the button on the interior rearview mirror
has been programmed. The system can
then be controlled by the button on the in‐
terior rearview mirror.
If the LED does not flash faster after at
least 60 seconds, change the distance and
repeat the step. Several more attempts at
different distances may be necessary. Wait
at least 15 seconds between attempts.
Canada: if programming with the hand-
held transmitter was interrupted, hold
down the interior rearview mirror button
and repeatedly press and release the
hand-held transmitter button for 2 sec‐
onds.
Controls
Before operation
Before operating a system using the uni‐
versal garage door opener, ensure that there are no people, animals, or objects within the
range of movement of the remote-controlled
system; otherwise, there is a risk of injury or
damage.
Also follow the safety instructions of the hand-
held transmitter.◀
The system, such as the garage door, can be
operated using the button on the interior rear‐
view mirror while the engine is running or when
the ignition is started. To do this, hold down
the button within receiving range of the system
until the function is activated. The interior rear‐ view mirror LED stays lit while the wireless sig‐
nal is being transmitted.
Deleting stored functions Press and hold the left and right button on the
interior rearview mirror simultaneously for ap‐
proximately 20 seconds until the LED flashes
rapidly. All stored functions are deleted. The
functions cannot be deleted individually.
Sun visor Glare shieldFold the sun visor down or up.
Vanity mirror A vanity mirror is located in the sun visor be‐
hind a cover. When the cover is opened, the
mirror lighting switches on.
Ashtray/cigarette lighterFront
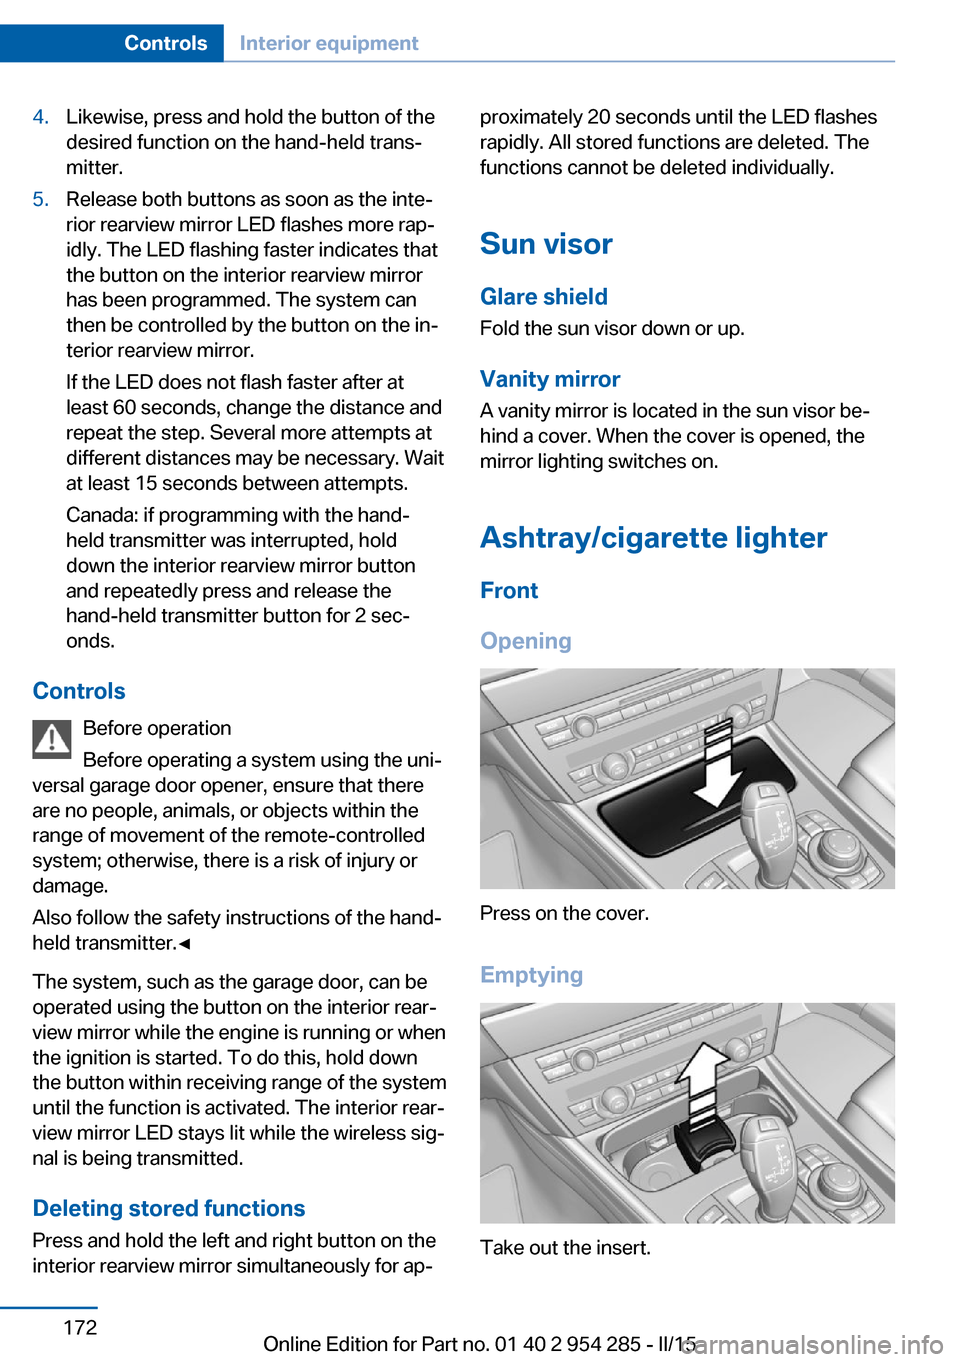
Opening
Press on the cover.
Emptying
Take out the insert.
Seite 172ControlsInterior equipment172
Online Edition for Part no. 01 40 2 954 285 - II/15
Page 179 of 263
Cargo area
Cargo cover
Note Do not deposit heavy objects
Do not deposit heavy or hard objects on
the cargo cover. Otherwise, they may pose a
risk to occupants, such as during braking and
evasive maneuvers.◀
General information The cargo cover is in two parts.
It can be removed and stowed in the rear stor‐
age compartment when transporting bulky
items.
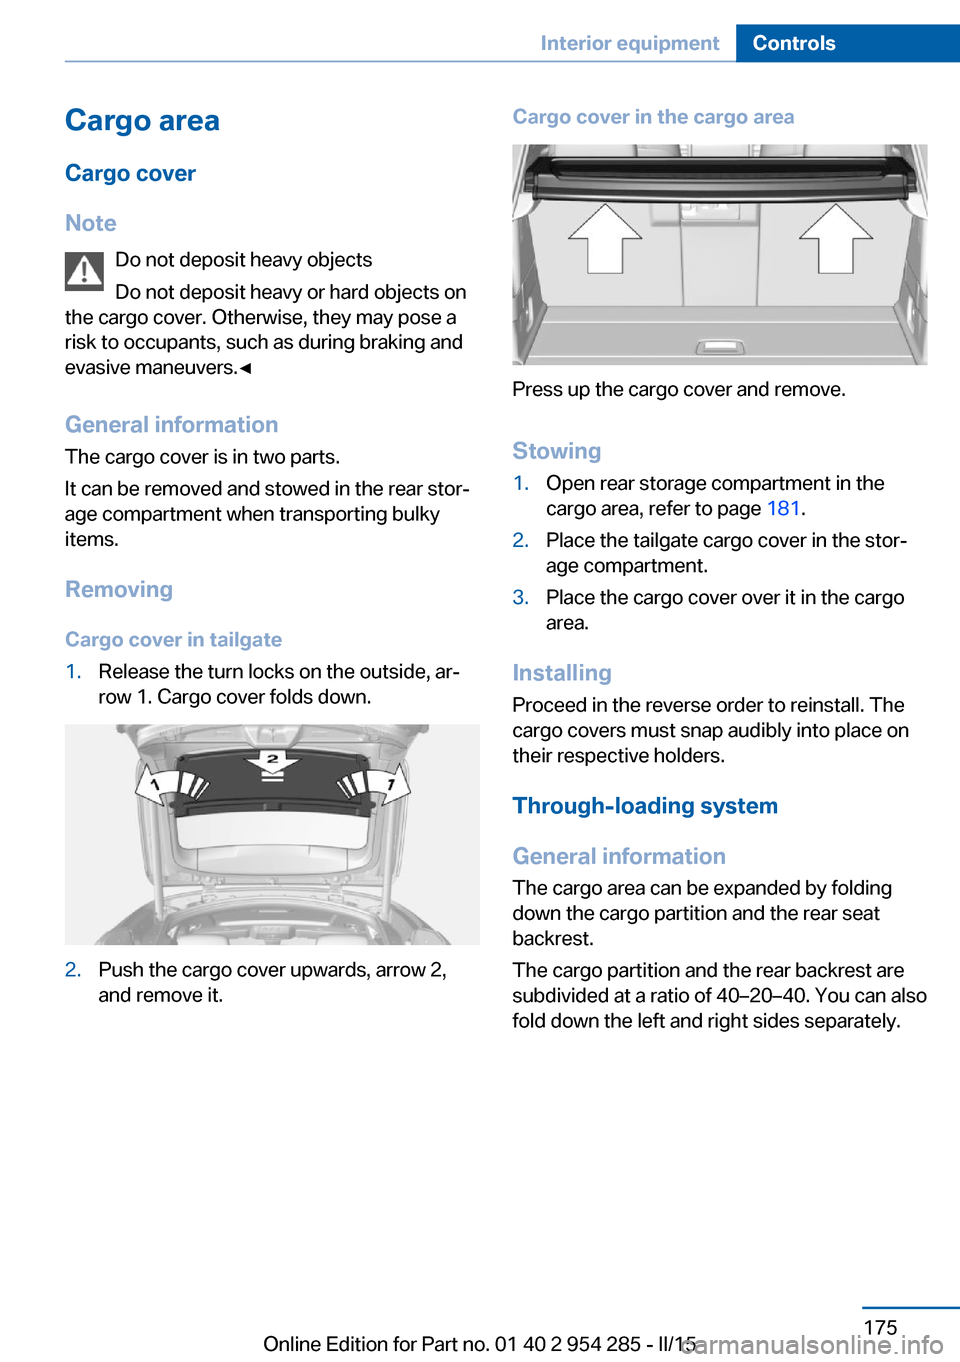
Removing Cargo cover in tailgate1.Release the turn locks on the outside, ar‐
row 1. Cargo cover folds down.2.Push the cargo cover upwards, arrow 2,
and remove it.Cargo cover in the cargo area
Press up the cargo cover and remove.
Stowing
1.Open rear storage compartment in the
cargo area, refer to page 181.2.Place the tailgate cargo cover in the stor‐
age compartment.3.Place the cargo cover over it in the cargo
area.
Installing
Proceed in the reverse order to reinstall. The
cargo covers must snap audibly into place on
their respective holders.
Through-loading system
General information
The cargo area can be expanded by folding
down the cargo partition and the rear seat
backrest.
The cargo partition and the rear backrest are
subdivided at a ratio of 40–20–40. You can also
fold down the left and right sides separately.
Seite 175Interior equipmentControls175
Online Edition for Part no. 01 40 2 954 285 - II/15
Page 180 of 263
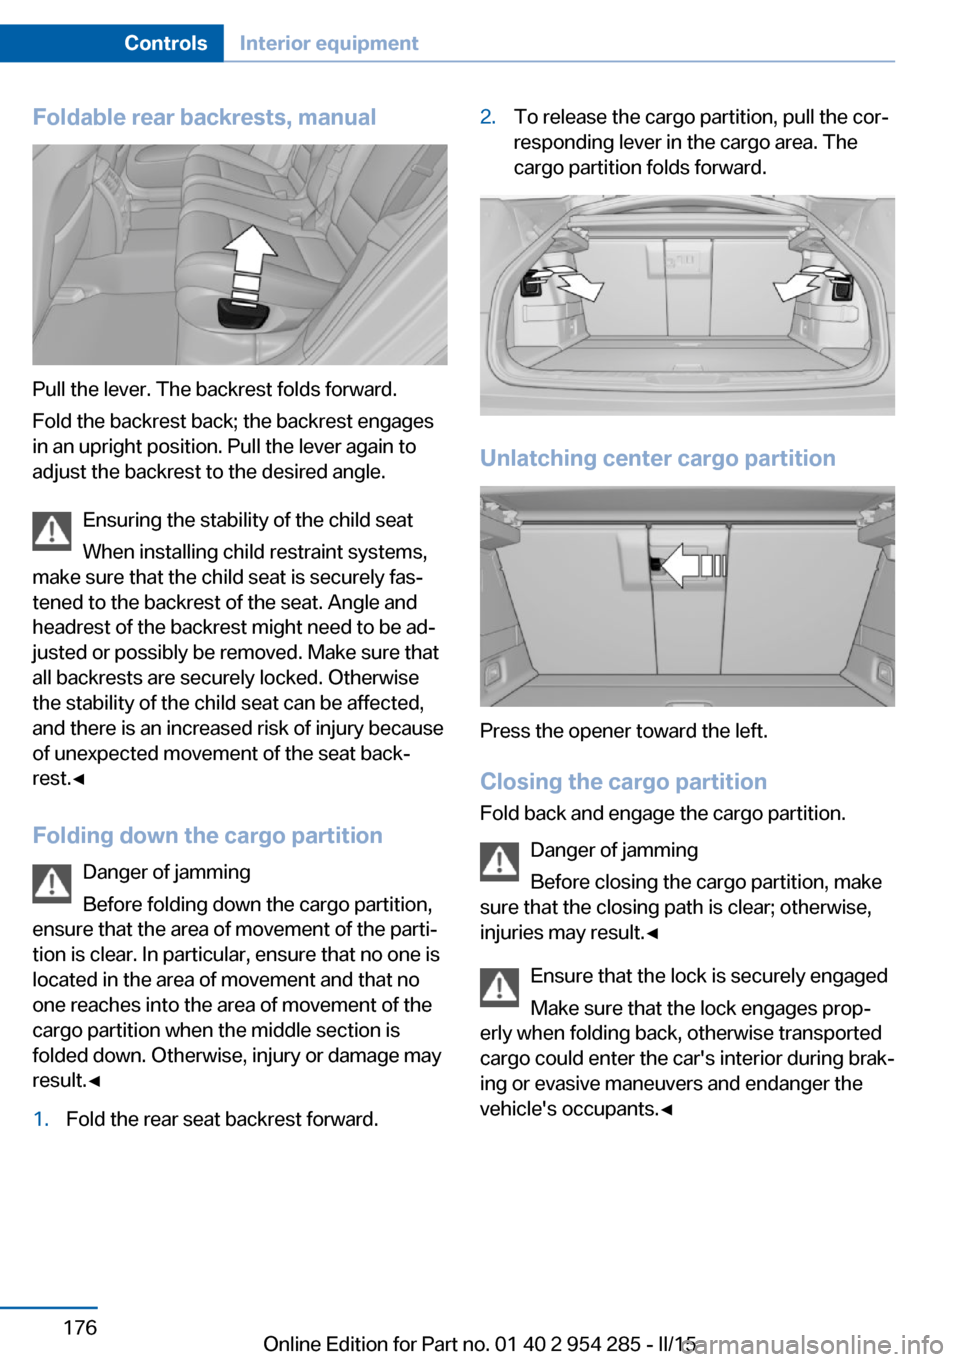
Foldable rear backrests, manual
Pull the lever. The backrest folds forward.
Fold the backrest back; the backrest engages
in an upright position. Pull the lever again to
adjust the backrest to the desired angle.
Ensuring the stability of the child seat
When installing child restraint systems,
make sure that the child seat is securely fas‐
tened to the backrest of the seat. Angle and
headrest of the backrest might need to be ad‐
justed or possibly be removed. Make sure that
all backrests are securely locked. Otherwise
the stability of the child seat can be affected,
and there is an increased risk of injury because
of unexpected movement of the seat back‐
rest.◀
Folding down the cargo partition Danger of jamming
Before folding down the cargo partition,
ensure that the area of movement of the parti‐
tion is clear. In particular, ensure that no one is
located in the area of movement and that no
one reaches into the area of movement of the cargo partition when the middle section is
folded down. Otherwise, injury or damage may
result.◀
1.Fold the rear seat backrest forward.2.To release the cargo partition, pull the cor‐
responding lever in the cargo area. The
cargo partition folds forward.
Unlatching center cargo partition
Press the opener toward the left.
Closing the cargo partition Fold back and engage the cargo partition.
Danger of jamming
Before closing the cargo partition, make
sure that the closing path is clear; otherwise,
injuries may result.◀
Ensure that the lock is securely engaged
Make sure that the lock engages prop‐
erly when folding back, otherwise transported
cargo could enter the car's interior during brak‐
ing or evasive maneuvers and endanger the
vehicle's occupants.◀
Seite 176ControlsInterior equipment176
Online Edition for Part no. 01 40 2 954 285 - II/15
Page 181 of 263
Loading position
Upright position
To expand the cargo area, the cargo partition
can be moved into a vertical position.1.Fold the rear seat backrest forward.
Through-loading system, refer to
page 175.2.To release the cargo partition, pull both
levers in the cargo area. The cargo parti‐
tion folds into an upright position and rests
against the rear backrest.
Repositioning
Fold back and engage the cargo partition.
Ski and snowboard bagGeneral information
The ski and snowboard bag is contained in a
protective jacket in the cargo area.
Follow the installation and operation instruc‐
tions included in the protective jacket.
Seite 177Interior equipmentControls177
Online Edition for Part no. 01 40 2 954 285 - II/15
Page 204 of 263
RefuelingVehicle features and options
This chapter describes all standard, country-
specific and optional features offered with the
series. It also describes features that are not
necessarily available in your car, e. g., due to
the selected options or country versions. This
also applies to safety-related functions and
systems. The respectively applicable country
provisions must be observed when using the
respective features and systems.
Hints Observe the fuel recommendation, refer to
page 202, prior to refueling.
Refuel promptly
Refuel no later than at a range of
30 miles/50 km or engine operation might fail
and damage might occur.◀
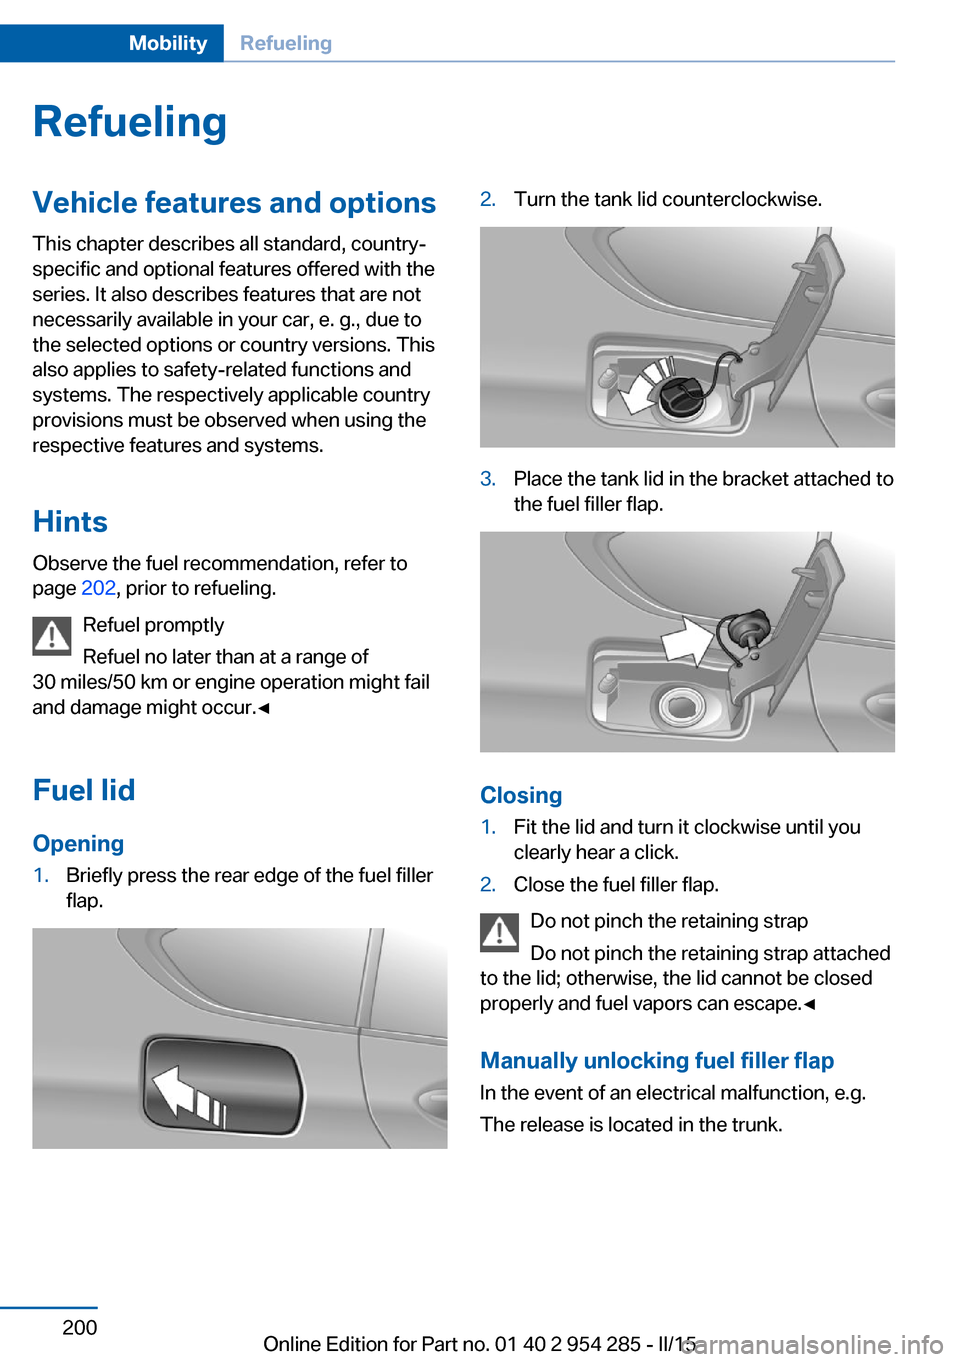
Fuel lid Opening1.Briefly press the rear edge of the fuel filler
flap.2.Turn the tank lid counterclockwise.3.Place the tank lid in the bracket attached to
the fuel filler flap.
Closing
1.Fit the lid and turn it clockwise until you
clearly hear a click.2.Close the fuel filler flap.
Do not pinch the retaining strap
Do not pinch the retaining strap attached
to the lid; otherwise, the lid cannot be closed
properly and fuel vapors can escape.◀
Manually unlocking fuel filler flap In the event of an electrical malfunction, e.g.
The release is located in the trunk.
Seite 200MobilityRefueling200
Online Edition for Part no. 01 40 2 954 285 - II/15
Page 205 of 263
1.Open the cover on the right side trim.2.Pull the green knob with the fuel pump
symbol. This releases the fuel filler flap.
Observe the following when
refueling
The fuel tank is full when the filler nozzle clicks
off the first time.
Do not overfill the fuel tank
Do not overfill the fuel tank; otherwise
fuel may eslide, causing harm to the environ‐
ment and damaging the vehicle.◀
Handling fuels
Observe safety regulations posted at the
gas station.◀
Seite 201RefuelingMobility201
Online Edition for Part no. 01 40 2 954 285 - II/15
Page 221 of 263
Never reach into the engine compart‐
ment
Never reach into spaces or gaps in the engine
compartment; otherwise, there is a risk of in‐
jury, e.g., from rotating or hot parts.◀
Danger of injury when the hood is open
There is a danger of injury from protrud‐
ing parts when the hood is open.◀1.Pull the lever.2.Press the release handle and open the
hood.3.Be careful of protruding parts on the hood.Closing the hood
Hood open when driving
If you see any signs that the hood is not
completely closed while driving, pull over im‐
mediately and close it securely.◀
Danger of jamming
Make sure that the closing path of the
hood is clear; otherwise, injuries may result.◀
Let the hood drop from a height of approx. 16
in/40 cm and push down on it to lock it fully.
The hood must audibly engage on both sides.
Seite 217Engine compartmentMobility217
Online Edition for Part no. 01 40 2 954 285 - II/15
Page 237 of 263
When the emergency request is received
at the BMW Response Center, the BMW
Response Center contacts you and takes
further steps to help you.
Even if you are unable to respond, the
BMW Response Center can take further
steps to help you under certain circum‐
stances.
For this, data are transmitted to the BMW
Response Center which serve to deter‐
mine the necessary rescue measures. E. g.
the current position of the vehicle, if it can
be established.▷If the LED is flashing green, but the BMW
Response Center can no longer be heard
via the speaker, you can nevertheless still
be heard at the BMW Response Center.
Initiating an Emergency Request
automatically
Under certain conditions, an Emergency Re‐
quest is automatically initiated immediately af‐
ter a severe accident. Automatic Collision Noti‐
fication is not affected by pressing the SOS
button.
Warning triangle
The warning triangle is located on the left in
the trunk.
Release the Velcro® fastener to remove it.
First aid kit
Note
Some of the articles have a limited service life.
Check the expiration dates of the contents
regularly and replace any expired items
promptly.
Storage
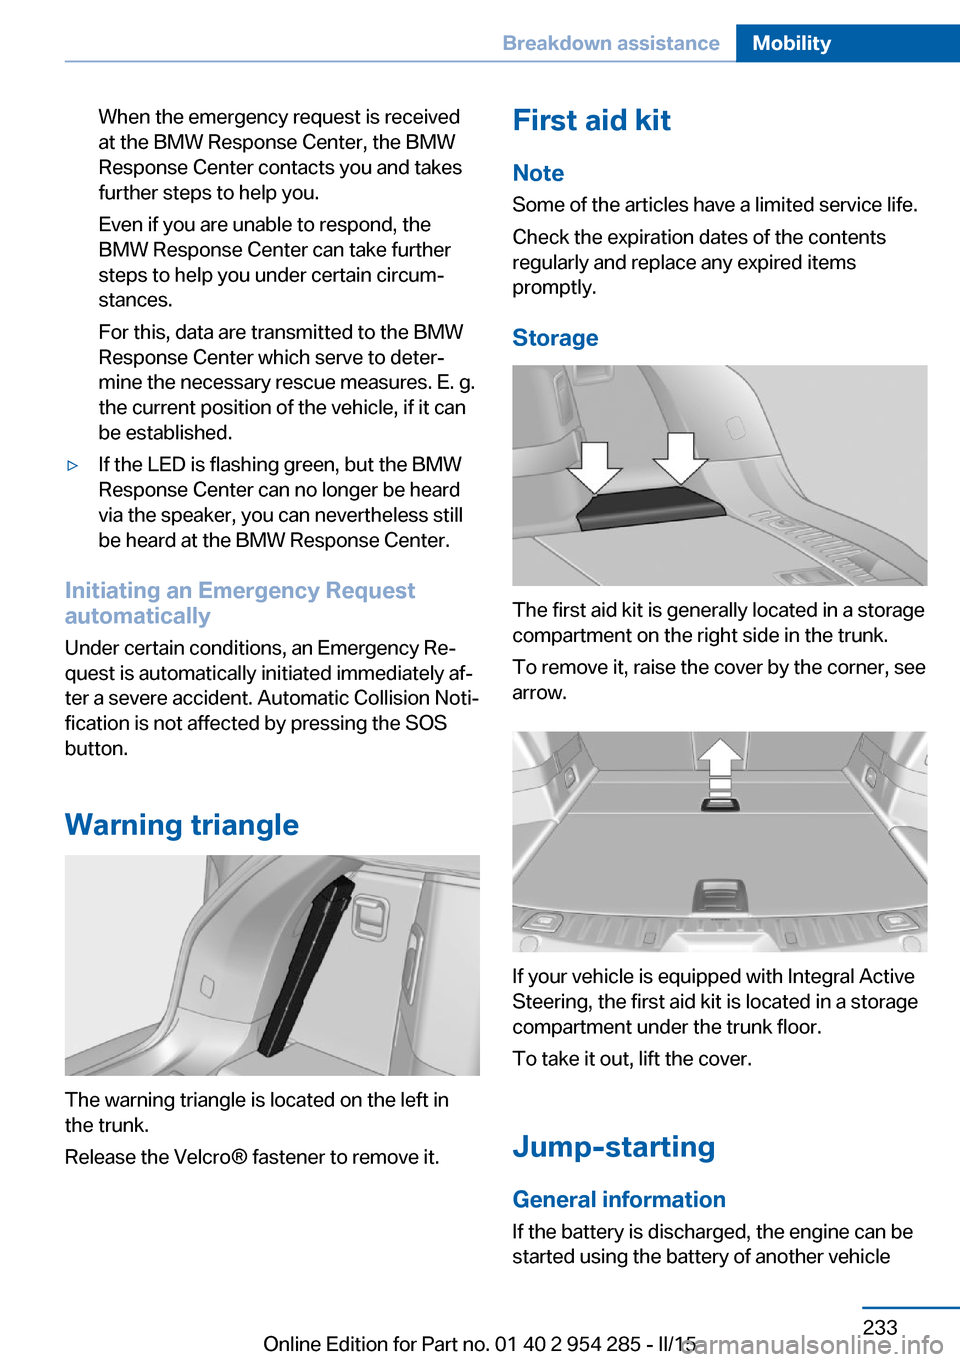
The first aid kit is generally located in a storage
compartment on the right side in the trunk.
To remove it, raise the cover by the corner, see
arrow.
If your vehicle is equipped with Integral Active
Steering, the first aid kit is located in a storage
compartment under the trunk floor.
To take it out, lift the cover.
Jump-starting
General information If the battery is discharged, the engine can be
started using the battery of another vehicle
Seite 233Breakdown assistanceMobility233
Online Edition for Part no. 01 40 2 954 285 - II/15