2015 BMW 5 SERIES GRAN TURISMO Fog
[x] Cancel search: FogPage 153 of 263
Cruise controlThe concept The system maintains a preset speed via the
buttons on the steering wheel. The system
brakes on downhill gradients if engine braking
is insufficient.
General information
Depending on the driving settings, the features
of the cruise control can change in certain
areas.
Hints Unfavorable conditions
Do not use the system if unfavorable
conditions make it impossible to drive at a con‐
stant speed, e.g.:▷On winding roads.▷In heavy traffic.▷On slippery roads, in fog, snow or rain, or
on a loose road surface.
Otherwise, you could lose control of the vehi‐
cle and cause an accident.◀
Controls
Overview
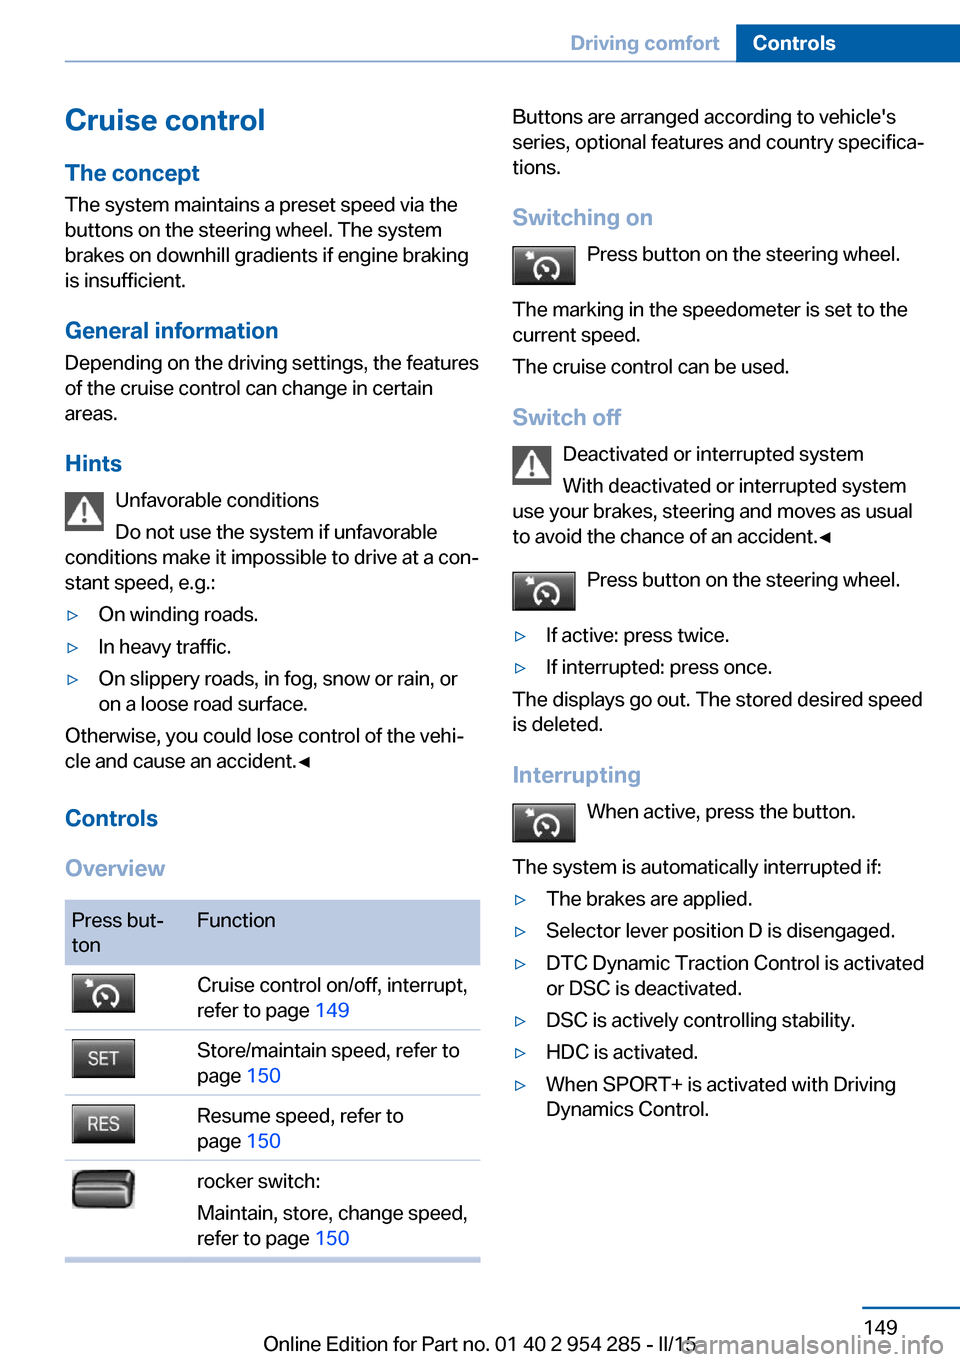
Press but‐
tonFunctionCruise control on/off, interrupt,
refer to page 149Store/maintain speed, refer to
page 150Resume speed, refer to
page 150rocker switch:
Maintain, store, change speed,
refer to page 150Buttons are arranged according to vehicle's
series, optional features and country specifica‐
tions.
Switching on Press button on the steering wheel.
The marking in the speedometer is set to the
current speed.
The cruise control can be used.
Switch off Deactivated or interrupted system
With deactivated or interrupted system
use your brakes, steering and moves as usual
to avoid the chance of an accident.◀
Press button on the steering wheel.▷If active: press twice.▷If interrupted: press once.
The displays go out. The stored desired speed
is deleted.
Interrupting When active, press the button.
The system is automatically interrupted if:
▷The brakes are applied.▷Selector lever position D is disengaged.▷DTC Dynamic Traction Control is activated
or DSC is deactivated.▷DSC is actively controlling stability.▷HDC is activated.▷When SPORT+ is activated with Driving
Dynamics Control.Seite 149Driving comfortControls149
Online Edition for Part no. 01 40 2 954 285 - II/15
Page 168 of 263
HintsSufficient ventilation
When remaining in the vehicle for an ex‐
tended period of time, ensure sufficient exter‐
nal ventilation. Do not continuously use recir‐
culated-air mode; otherwise the air quality in
the interior continuously deteriorates and win‐
dow condensation increases.◀
Climate control functions in detail
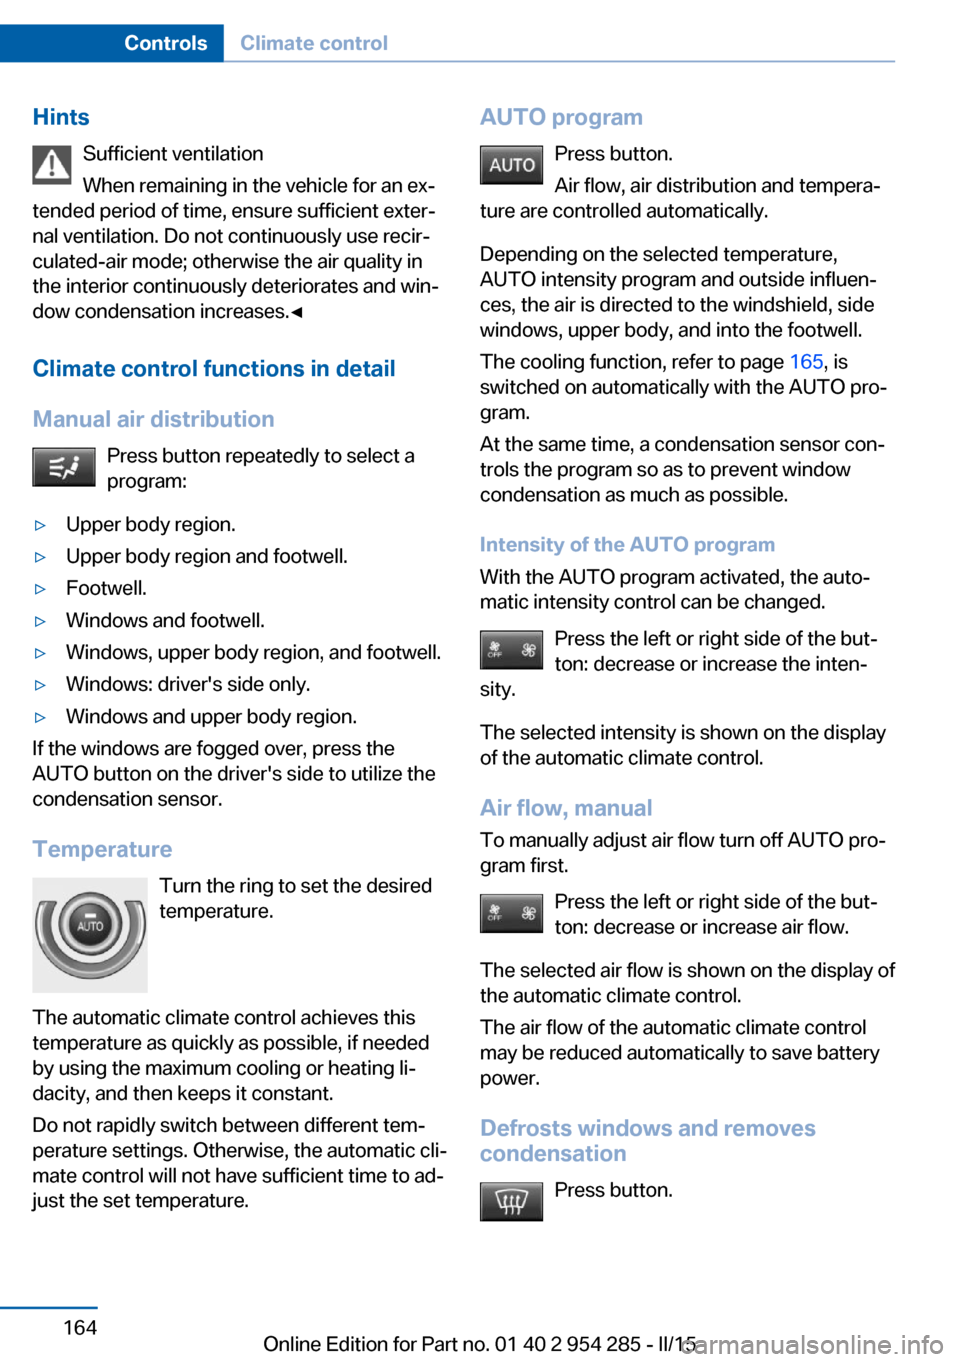
Manual air distribution Press button repeatedly to select a
program:▷Upper body region.▷Upper body region and footwell.▷Footwell.▷Windows and footwell.▷Windows, upper body region, and footwell.▷Windows: driver's side only.▷Windows and upper body region.
If the windows are fogged over, press the
AUTO button on the driver's side to utilize the
condensation sensor.
Temperature Turn the ring to set the desired
temperature.
The automatic climate control achieves this
temperature as quickly as possible, if needed
by using the maximum cooling or heating li‐
dacity, and then keeps it constant.
Do not rapidly switch between different tem‐
perature settings. Otherwise, the automatic cli‐
mate control will not have sufficient time to ad‐
just the set temperature.
AUTO program
Press button.
Air flow, air distribution and tempera‐
ture are controlled automatically.
Depending on the selected temperature,
AUTO intensity program and outside influen‐
ces, the air is directed to the windshield, side
windows, upper body, and into the footwell.
The cooling function, refer to page 165, is
switched on automatically with the AUTO pro‐
gram.
At the same time, a condensation sensor con‐
trols the program so as to prevent window
condensation as much as possible.
Intensity of the AUTO program
With the AUTO program activated, the auto‐
matic intensity control can be changed.
Press the left or right side of the but‐
ton: decrease or increase the inten‐
sity.
The selected intensity is shown on the display
of the automatic climate control.
Air flow, manual
To manually adjust air flow turn off AUTO pro‐
gram first.
Press the left or right side of the but‐
ton: decrease or increase air flow.
The selected air flow is shown on the display of
the automatic climate control.
The air flow of the automatic climate control
may be reduced automatically to save battery
power.
Defrosts windows and removes
condensation
Press button.Seite 164ControlsClimate control164
Online Edition for Part no. 01 40 2 954 285 - II/15
Page 169 of 263
Ice and condensation are quickly removed
from the windshield and the front side win‐
dows.
For this purpose, point the side vents onto the
side windows as needed.
Adjust air flow with the program active.
If the windows are fogged over, you can also
switch on the cooling function or press the
AUTO button to utilize the condensation sen‐
sor.
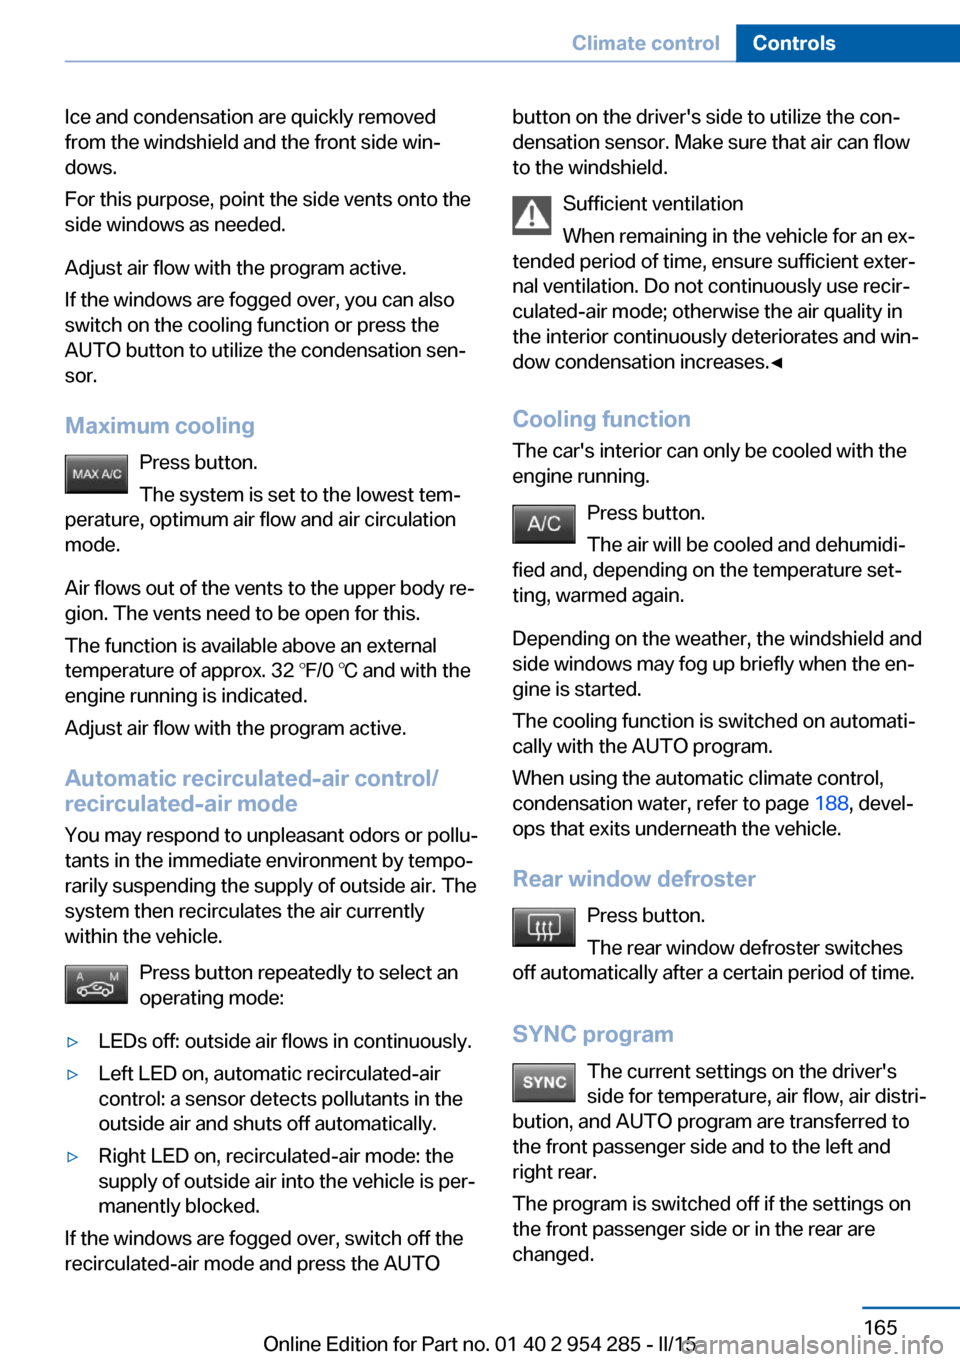
Maximum cooling Press button.
The system is set to the lowest tem‐
perature, optimum air flow and air circulation mode.
Air flows out of the vents to the upper body re‐
gion. The vents need to be open for this.
The function is available above an external
temperature of approx. 32 ℉/0 ℃ and with the
engine running is indicated.
Adjust air flow with the program active.
Automatic recirculated-air control/
recirculated-air mode
You may respond to unpleasant odors or pollu‐
tants in the immediate environment by tempo‐
rarily suspending the supply of outside air. The
system then recirculates the air currently
within the vehicle.
Press button repeatedly to select an
operating mode:▷LEDs off: outside air flows in continuously.▷Left LED on, automatic recirculated-air
control: a sensor detects pollutants in the
outside air and shuts off automatically.▷Right LED on, recirculated-air mode: the
supply of outside air into the vehicle is per‐
manently blocked.
If the windows are fogged over, switch off the
recirculated-air mode and press the AUTO
button on the driver's side to utilize the con‐
densation sensor. Make sure that air can flow
to the windshield.
Sufficient ventilation
When remaining in the vehicle for an ex‐
tended period of time, ensure sufficient exter‐
nal ventilation. Do not continuously use recir‐
culated-air mode; otherwise the air quality in
the interior continuously deteriorates and win‐
dow condensation increases.◀
Cooling function The car's interior can only be cooled with the
engine running.
Press button.
The air will be cooled and dehumidi‐
fied and, depending on the temperature set‐
ting, warmed again.
Depending on the weather, the windshield and
side windows may fog up briefly when the en‐
gine is started.
The cooling function is switched on automati‐
cally with the AUTO program.
When using the automatic climate control,
condensation water, refer to page 188, devel‐
ops that exits underneath the vehicle.
Rear window defroster Press button.
The rear window defroster switches
off automatically after a certain period of time.
SYNC program The current settings on the driver's
side for temperature, air flow, air distri‐
bution, and AUTO program are transferred to the front passenger side and to the left and
right rear.
The program is switched off if the settings on
the front passenger side or in the rear are
changed.Seite 165Climate controlControls165
Online Edition for Part no. 01 40 2 954 285 - II/15
Page 172 of 263
The rear automatic climate control is not op‐
erational if the automatic climate control is
switched off or if the function for defrosting or
defogging the windows is active.
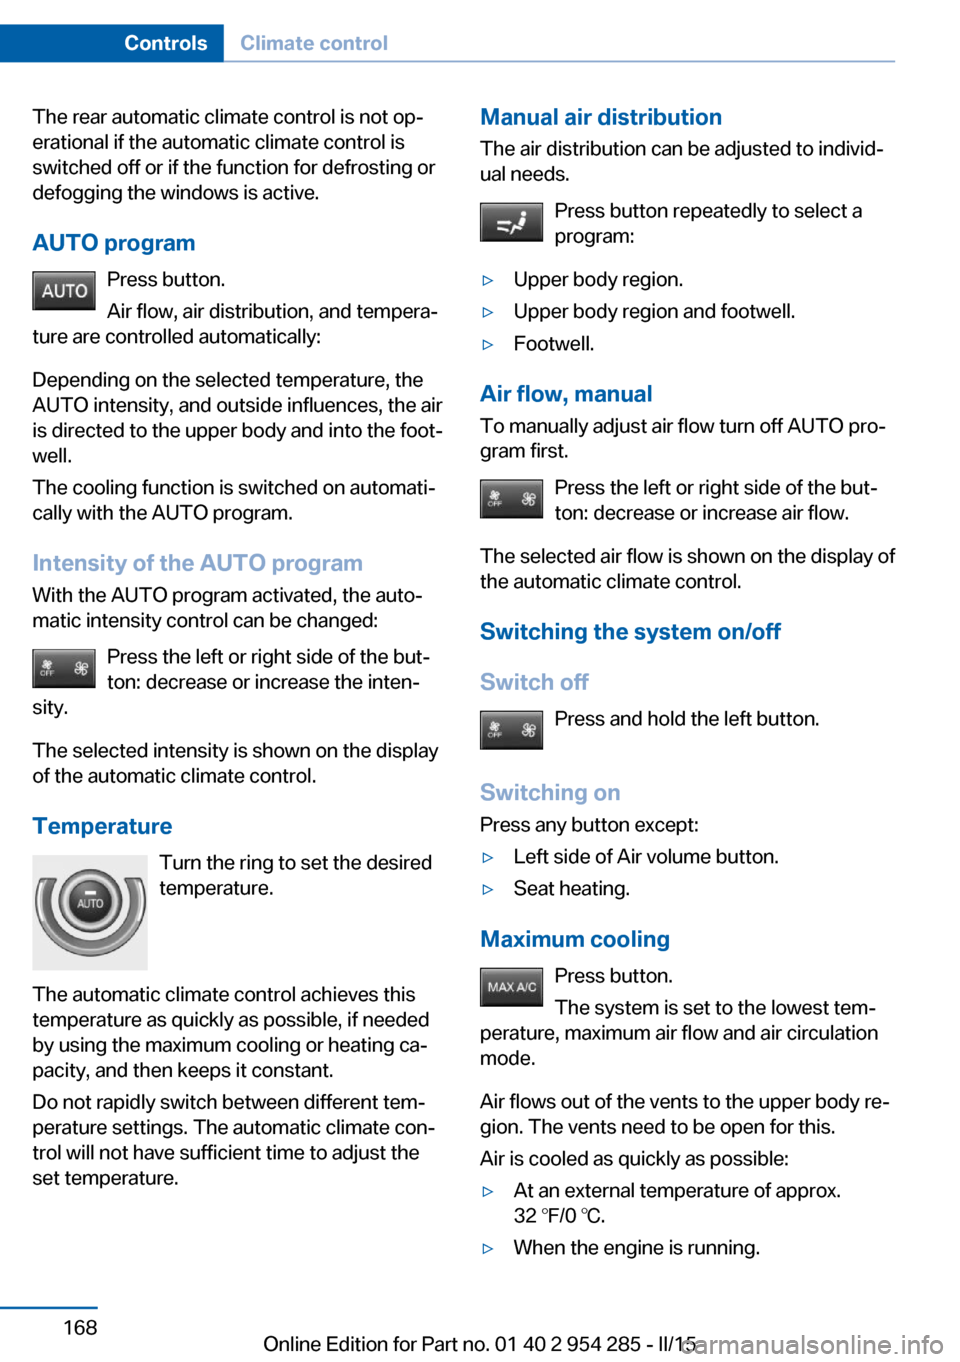
AUTO program Press button.
Air flow, air distribution, and tempera‐
ture are controlled automatically:
Depending on the selected temperature, the
AUTO intensity, and outside influences, the air
is directed to the upper body and into the foot‐
well.
The cooling function is switched on automati‐
cally with the AUTO program.
Intensity of the AUTO program With the AUTO program activated, the auto‐
matic intensity control can be changed:
Press the left or right side of the but‐
ton: decrease or increase the inten‐
sity.
The selected intensity is shown on the display
of the automatic climate control.
Temperature Turn the ring to set the desired
temperature.
The automatic climate control achieves this
temperature as quickly as possible, if needed
by using the maximum cooling or heating ca‐
pacity, and then keeps it constant.
Do not rapidly switch between different tem‐
perature settings. The automatic climate con‐
trol will not have sufficient time to adjust the
set temperature.Manual air distribution
The air distribution can be adjusted to individ‐
ual needs.
Press button repeatedly to select a
program:▷Upper body region.▷Upper body region and footwell.▷Footwell.
Air flow, manual
To manually adjust air flow turn off AUTO pro‐
gram first.
Press the left or right side of the but‐
ton: decrease or increase air flow.
The selected air flow is shown on the display of
the automatic climate control.
Switching the system on/off
Switch off Press and hold the left button.
Switching on Press any button except:
▷Left side of Air volume button.▷Seat heating.
Maximum cooling
Press button.
The system is set to the lowest tem‐
perature, maximum air flow and air circulation
mode.
Air flows out of the vents to the upper body re‐
gion. The vents need to be open for this.
Air is cooled as quickly as possible:
▷At an external temperature of approx.
32 ℉/0 ℃.▷When the engine is running.Seite 168ControlsClimate control168
Online Edition for Part no. 01 40 2 954 285 - II/15
Page 231 of 263
Hints
Because of the long life of these bulbs, the
likelihood of failure is very low. Switching the
lights on and off frequently shortens their life.
If a bulb fails, reel on the front fog lights and
continue the trip with great care. Comply with
local regulations.
Do not perform work/bulb replacement
on xenon headlights
Have any work on the xenon lighting system,
including bulb replacement, performed only by
a service center. Due to the high voltage
present in the system, there is a danger of fatal
injuries if work is carried out improperly.◀
For checking and adjusting headlamp aim,
please contact your BMW center.
Parking lights and roadside parking lamp,
turn signal lights
Follow general instructions, refer to page 225.
These lights feature LED technology.
Contact your service center in the event of a
malfunction.
Corner-illuminating lights
Follow general instructions, refer to page 225.
The illustration shows the left side of the en‐
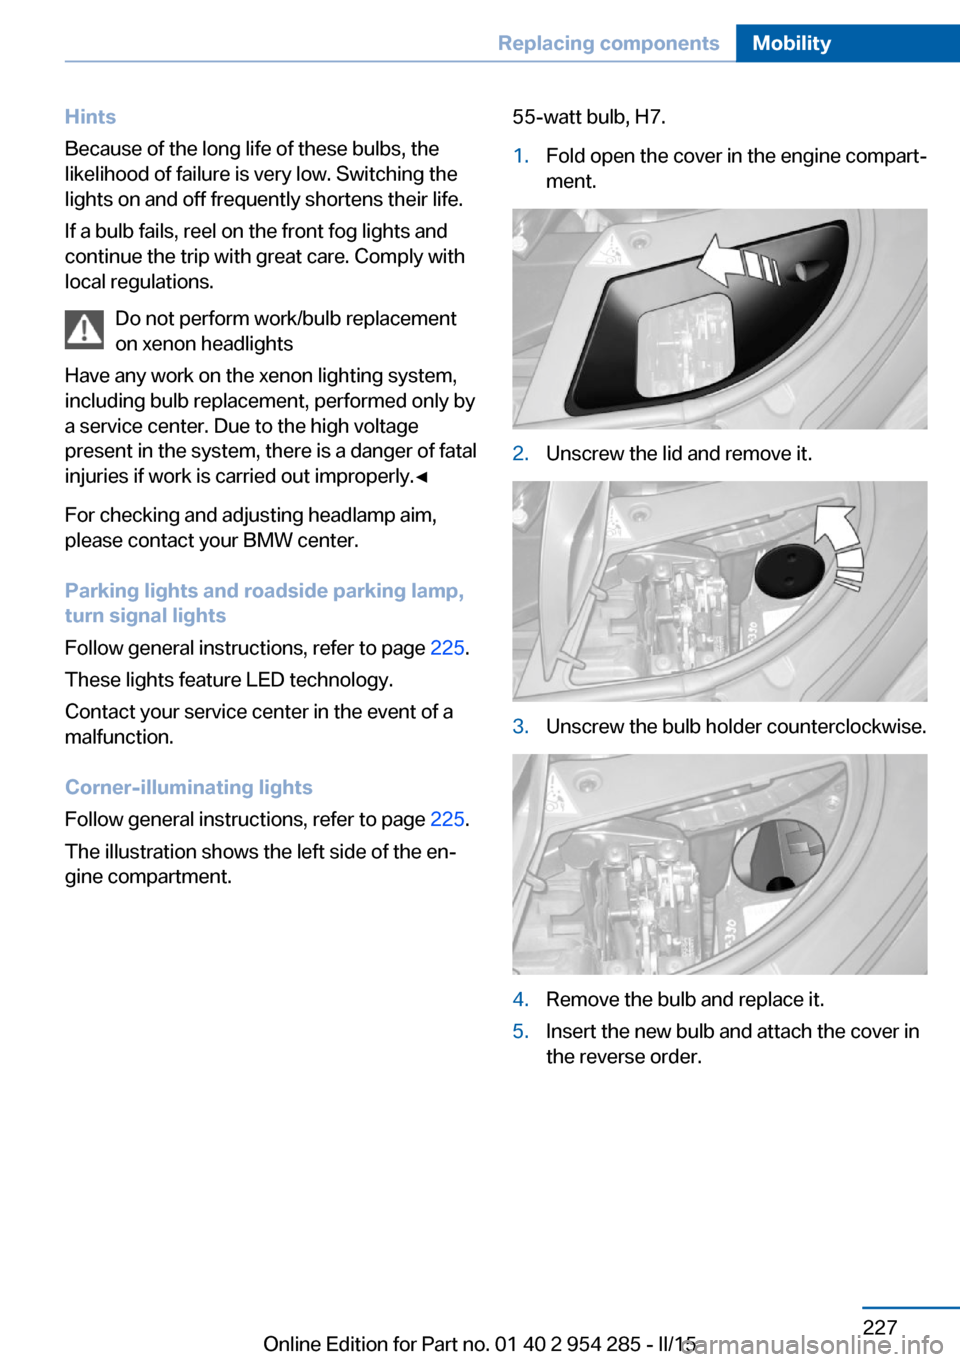
gine compartment.55-watt bulb, H7.1.Fold open the cover in the engine compart‐
ment.2.Unscrew the lid and remove it.3.Unscrew the bulb holder counterclockwise.4.Remove the bulb and replace it.5.Insert the new bulb and attach the cover in
the reverse order.Seite 227Replacing componentsMobility227
Online Edition for Part no. 01 40 2 954 285 - II/15
Page 232 of 263
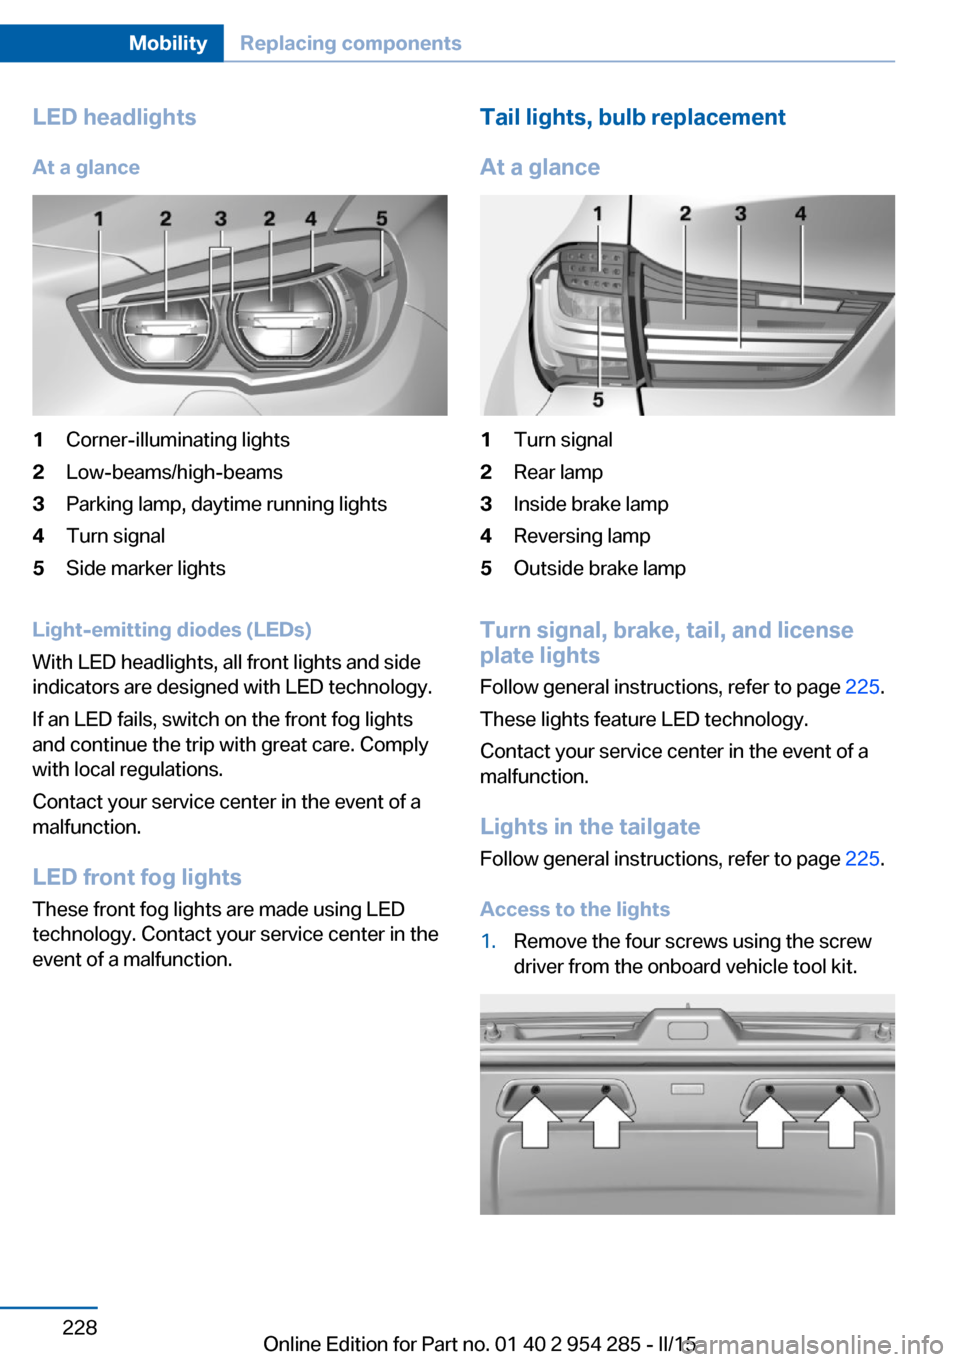
LED headlightsAt a glance1Corner-illuminating lights2Low-beams/high-beams3Parking lamp, daytime running lights4Turn signal5Side marker lights
Light-emitting diodes (LEDs)
With LED headlights, all front lights and side
indicators are designed with LED technology.
If an LED fails, switch on the front fog lights
and continue the trip with great care. Comply
with local regulations.
Contact your service center in the event of a
malfunction.
LED front fog lights
These front fog lights are made using LED
technology. Contact your service center in the
event of a malfunction.
Tail lights, bulb replacement
At a glance1Turn signal2Rear lamp3Inside brake lamp4Reversing lamp5Outside brake lamp
Turn signal, brake, tail, and license
plate lights
Follow general instructions, refer to page 225.
These lights feature LED technology.
Contact your service center in the event of a
malfunction.
Lights in the tailgate Follow general instructions, refer to page 225.
Access to the lights
1.Remove the four screws using the screw
driver from the onboard vehicle tool kit.Seite 228MobilityReplacing components228
Online Edition for Part no. 01 40 2 954 285 - II/15
Page 255 of 263
Emergency Request 232
Emergency start function, en‐ gine start 35
Emergency unlocking, tail‐ gate 44
Emergency unlocking, trans‐ mission lock 83
Energy Control 93
Energy recovery 93
Engine, automatic Start/Stop function 71
Engine, automatic switch- off 71
Engine compartment 216
Engine compartment, work‐ ing in 216
Engine coolant 221
Engine idling when driving, coasting 196
Engine oil 218
Engine oil, adding 219
Engine oil additives 219
Engine oil change 220
Engine oil filler neck 219
Engine oil temperature 91
Engine oil types, alterna‐ tive 220
Engine oil types, ap‐ proved 220
Engine start during malfunc‐ tion 35
Engine start, jump-start‐ ing 233
Engine start, refer to Starting the engine 71
Engine stop 71
Engine temperature 91
Entering a car wash 237
Equipment, interior 170
Error displays, see Check Control 87
ESP Electronic Stability Pro‐ gram, refer to DSC 134
Exchanging wheels/tires 210
Exhaust system 186 Exterior mirror, automatic
dimming feature 64
Exterior mirrors 63
External start 233
External temperature dis‐ play 92
External temperature warn‐ ing 92
Eyes for securing cargo 190
F
Failure message, see Check Control 87
False alarm, refer to Uninten‐ tional alarm 49
Fan, refer to Air flow 164
Filler neck for engine oil 219
Fine wood, care 239
First aid kit 233
Fitting for towing, see Tow fit‐ ting 236
Flat tire, changing wheels 229
Flat Tire Monitor FTM 110
Flat tire, Tire Pressure Moni‐ tor TPM 112
Flat tire, warning lamp 111, 113
Flooding 187
Floor carpet, care 240
Floor mats, care 240
Fold down the rear seat back‐ rest, see Though-loading
system 175
Fold-out position, wiper 80
Foot brake 187
Front airbags 107
Front-end collision warning with braking function 119
Front-end collision warning with City Braking func‐
tion 117
Front fog lights 105
Front fog lights, bulb replace‐ ment 228 front-seat passenger airbags,
automatic deactivation 109
Front-seat passenger airbags, indicator lamp 109
Front seats 54
FTM Flat Tire Monitor 110
Fuel 202
Fuel consumption, refer to Average fuel consump‐
tion 97
Fuel filler flap 200
Fuel gauge 91
Fuel lid 200
Fuel quality 202
Fuel recommendation 202
Fuel, tank capacity 246
Fuse 230
G
Garage door opener, refer to Universal Integrated Remote
Control 170
Gasoline 202
Gear change, Steptronic transmission 81
Gear shift indicator 94
General driving notes 186
Glare shield 172
Glass sunroof, refer to Panor‐ amic glass sunroof 51
Glove compartment 178
Gross vehicle weight, ap‐ proved 245
H
Handbrake, refer to Parking brake 73
Hand-held transmitter, alter‐ nating code 171
Hazard warning flashers 232
HDC Hill Descent Con‐ trol 136
Head airbags 107 Seite 251Everything from A to ZReference251
Online Edition for Part no. 01 40 2 954 285 - II/15
Page 257 of 263
Leather, care 239
LED front fog lights, bulb re‐ placement 228
LED headlights, bulb replace‐ ment 228
LED light 228
LEDs, light-emitting di‐ odes 226
Length, vehicle 244
Letters and numbers, enter‐ ing 24
License plate lamp, bulb re‐ placement 228
Light alloy wheels, care 239
Light bulb replacement, see Lamp and bulb replace‐
ment 225
Light control 103
Light-emitting diodes, LEDs 226
Lighting 102
Lighting, speaker 106
Lights 102
Lights and bulbs, see Lamp and bulb replacement 225
Light switch 102
Load 190
Loading 189
Loading position 177
Lock, door 39
Locking/unlocking via door lock 39
Locking/unlocking with re‐ mote control 37
Locking, automatic 47
Locking, settings 46
Locking via tailgate 41
Lock, power window 50
Locks, doors, and win‐ dows 69
Low beams 102
Low beams, automatic, refer to High-beam Assistant 104
Lower back support 56
Luggage rack, see Roof- mounted luggage rack 190 Lumbar support 56
M
Maintenance 223
Maintenance require‐ ments 223
Maintenance, service require‐ ments 93
Maintenance system, BMW 223
Make-up mirror 172
Malfunction displays, see Check Control 87
Malfunction, self-leveling sus‐ pension 139
Manual air distribution 164
Manual air flow 164
Manual brake, refer to Parking brake 73
Manual mode, Steptronic transmission 82
Manual operation, door lock 39
Manual operation, exterior mirrors 63
Manual operation, fuel filler flap 200
Manual operation, Park Dis‐ tance Control PDC 152
Manual operation, parking brake 76
Manual operation, rearview camera 154
Manual operation, Side View 156
Manual operation, Top View 158
Marking on approved tires 210
Marking, run-flat tires 211
Massage seat, front 57
Master key, refer to Remote control 34
Maximum cooling 165
Maximum speed, display 94 Maximum speed, winter
tires 211
Measure, units of 99
Medical kit 233
Memory for seat, mirrors, steering wheel 62
Menu, EfficientDynamics 195
Menu in instrument clus‐ ter 96
Menus, operating, iDrive 18
Menus, refer to iDrive operat‐ ing concept 19
Messages, see Check Con‐ trol 87
Microfilter 166
Minimum tread, tires 209
Mirror 63
Mirror memory 62
Mobile communication devi‐ ces in the vehicle 187
Mobility System 212
Modifications, technical, refer to Safety 7
Moisture in headlight 226
Monitor, refer to Control Dis‐ play 18
Mounting of child restraint systems 66
Multifunctional instrument display 85
Multi-function hook 181
Multifunction steering wheel, buttons 14
N
Navigation, see user's manual for Navigation, Entertain‐
ment and Communication
Neck restraints, front, refer to Head restraints 60
Neck restraints, rear, refer to Head restraints 61
Neutral cleaner, see wheel cleaner 239
New wheels and tires 210 Seite 253Everything from A to ZReference253
Online Edition for Part no. 01 40 2 954 285 - II/15