2015 BMW 4 SERIES COUPE hood
[x] Cancel search: hoodPage 6 of 247

Addendum
thereof: “BMW recommends that you have
the maintenance carried out by your service
center.”
10. At page 186, under the heading “Tire infla-
tion specifications,” the sentence begin-
ning, “Tire inflation pressure specifications
apply to approved tire sizes …” should be
disregarded.
11. At page 192, under the heading: “Mount-
ing,” the paragraph beginning, “Have
mounting and balancing …” should be dis-
regarded and the following text should be
read in lieu thereof: “BMW recommends
that you have mounting and balancing per-
formed by your service center or a tire
mounting specialist.”
12. At page 193, under the heading: “Approved
wheels and tires,” the term “Approved”
should be disregarded and in lieu thereof,
the term “Recommended” should be read
in its place. In addition, the text of that sec-
tion should be disregarded and the follow-
ing text should be read in lieu thereof:
The manufacturer of your vehicle strongly
suggests that you use wheels and tires that
have been recommended by the vehicle
manufacturer for your vehicle type; other-
wise, for example, despite having the same
official size ratings, variations can lead to
body contact and with it, the risk of severe
accidents.
The manufacturer of your vehicle does not
evaluate non-recommended wheels and
tires to determine if they are suitable for use
on your vehicle.
13. At page 197, under the heading: “Snow
Chains,” the text should be disregarded and
the following text should be read in lieu
thereof:
Only certain types of fine-link snow chains
have been tested by the manufacturer of
your vehicle and are determined by the
manufacturer of your vehicle to be road safe
and are recommended by the manufacturer
of your vehicle.
Information about recommended snow
chains is available from a service center.
14. At page 200, under the heading “Hood,” the
sentence beginning, “If you are unfamiliar”
should be disregarded.
15. At page 203, under the heading: “Engine oil
change,” the text should be disregarded
and in lieu thereof should be read as follows:
BMW recommends that you have the oil
changed at your BMW dealer's service cen-
ter or at another service center that has
trained personnel that can perform the work
in accordance with BMW specifications.
16. At page 205, under the heading: “Service
and Warranty Information Booklet for US
models and Warranty and Service Guide
Booklet for Canadian models,” the second
paragraph should be disregarded and the
following text read in lieu thereof:
The manufacturer of your vehicle recom-
mends that you have maintenance and
repair performed by your BMW dealer's ser-
vice center or another service center or
repair shop that employs trained personnel
that can perform maintenance and repair
work on your vehicle in accordance with
BMW specifications. The manufacturer of
your vehicle recommends that you maintain
records of all maintenance and repair work
performed on your vehicle.
17. At page 208, where it reads: “Do not per-
form work/bulb replacement on xenon
headlights,” that text should be disregarded
and in lieu thereof the following text should
be read: “Xenon headlight work or replace-
ment can cause serious and fatal injuries.”
In the text that follows, where it reads:
“[h]ave any work on the xenon lighting
system … ,” the following words should be
read as preceding that passage: “It is
strongly suggested that you …”
18. At page 214, under the “Battery replace-
ment” section, the text should be disre-
garded and in lieu thereof the following text
should be read:
Online Edition for Part no. 01 40 2 960 520 - II/15
Page 19 of 247
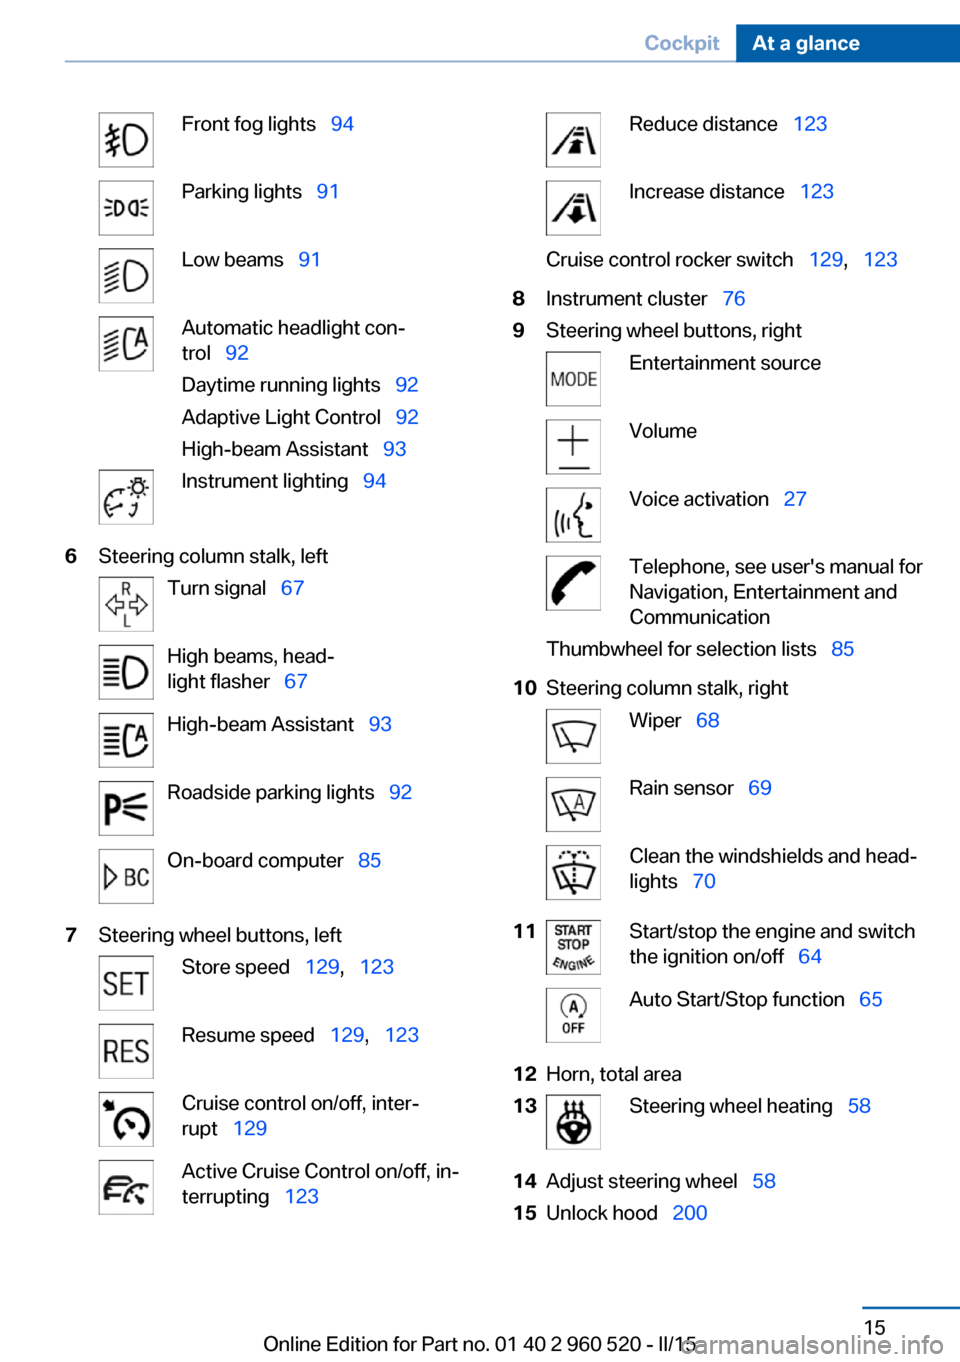
Front fog lights 94Parking lights 91Low beams 91Automatic headlight con‐
trol 92
Daytime running lights 92
Adaptive Light Control 92
High-beam Assistant 93Instrument lighting 946Steering column stalk, leftTurn signal 67High beams, head‐
light flasher 67High-beam Assistant 93Roadside parking lights 92On-board computer 857Steering wheel buttons, leftStore speed 129, 123Resume speed 129, 123Cruise control on/off, inter‐
rupt 129Active Cruise Control on/off, in‐
terrupting 123Reduce distance 123Increase distance 123Cruise control rocker switch 129, 1238Instrument cluster 769Steering wheel buttons, rightEntertainment sourceVolumeVoice activation 27Telephone, see user's manual for
Navigation, Entertainment and
CommunicationThumbwheel for selection lists 8510Steering column stalk, rightWiper 68Rain sensor 69Clean the windshields and head‐
lights 7011Start/stop the engine and switch
the ignition on/off 64Auto Start/Stop function 6512Horn, total area13Steering wheel heating 5814Adjust steering wheel 5815Unlock hood 200Seite 15CockpitAt a glance15
Online Edition for Part no. 01 40 2 960 520 - II/15
Page 48 of 247

▷"Tailgate + door(s)"
The trunk lid is opened and the doors
are unlocked.
Confirmation signals from the vehicle
The settings are saved in the active profile, re‐
fer to page 35.
1."Settings"2."Doors/key"3.Deactivate or activate the desired confir‐
mation signals.▷"Acoustic sig. lock/unlock"▷"Flash when lock/unlock"
Automatic locking
The settings are saved in the active profile, re‐fer to page 35.
1."Settings"2."Doors/key"3.Select the desired function:▷"Lock if no door is opened"
The vehicle locks automatically after a
short period of time if no door is
opened.▷"Lock after start driving"
The vehicle locks automatically after
you drive off.
Retrieving the seat and mirror settings
The driver's seat and exterior mirror positions
used last are stored for the remote control cur‐
rently in use.
When the vehicle is unlocked, these positions
are automatically retrieved if this function was
activated.
Pinch hazard when moving back the seat
If this function is used, first make sure
that the footwell behind the driver's seat is
empty. Otherwise, people might get injured or
objects damaged when the seat is moved
back.◀
The adjustment procedure is interrupted:▷When a seat position switch is pressed.▷When a button of the seat and mirror mem‐
ory is pressed.
Activating the setting
1."Settings"2."Doors/key"3."Last seat position autom."
Alarm system
The conceptWhen the vehicle is locked, the vehicle alarm
system responds to:
▷Opening a door, the hood or the trunk lid.▷Movements in the interior.▷Changes in the vehicle tilt, e. g., during at‐
tempts at stealing a wheel or when towing
the car.▷Disconnected battery voltage.
The alarm system briefly signals tampering:
▷By sounding an acoustic alarm.▷By switching on the hazard warning sys‐
tem.▷By flashing the daytime running lights.
Arming and disarming the alarm
system
When you unlock or lock the vehicle, either
with the remote control or via the Comfort Ac‐
cess, the alarm system is disarmed or armed at
the same time.
Door lock and armed alarm systemThe alarm system is triggered when the door is
opened, when the vehicle is unlocked via the
door lock.
Seite 44ControlsOpening and closing44
Online Edition for Part no. 01 40 2 960 520 - II/15
Page 49 of 247

Trunk lid and armed alarm systemThe trunk lid can be opened even when the
alarm system is armed.
After the trunk lid is closed, it is locked and
monitored again when the doors are locked.
The hazard warning system flashes once.
Panic mode
You can trigger the alarm system if you find
yourself in a dangerous situation.
Press button on the remote control for
at least 3 seconds.
To switch off the alarm: press any button.
Indicator lamp on the interior rearview
mirror▷The indicator lamp flashes briefly every
2 seconds:
The system is armed.▷The indicator lamp flashes after locking:
The doors, hood or trunk lid is not closed
properly, but the rest of the vehicle is se‐
cured.
After 10 seconds, the indicator lamp
flashes continuously. Interior motion sen‐
sor and tilt alarm sensor are not active.
When the still open access is closed, inte‐
rior motion sensor and tilt alarm sensor will
be switched on.▷The indicator lamp goes out after unlock‐
ing:
The vehicle has not been tampered with.▷The indicator lamp flashes after unlocking
until the engine ignition is switched on, but
no longer than approx. 5 minutes:
An alarm has been triggered.
Tilt alarm sensor The tilt of the vehicle is monitored.
The alarm system responds in situations such
as attempts to steal a wheel or when the car is
towed.
Interior motion sensor The windows and glass sunroof must be
closed for the system to function properly.
Avoiding unintentional alarms The tilt alarm sensor and interior motion sen‐
sor can be switched off together, such as in
the following situations:
▷In automatic car washes.▷In duplex garages.▷During transport on trains carrying vehi‐
cles, at sea or on a trailer.▷With animals in the vehicle.
Switching off the tilt alarm sensor and
interior motion sensor
Press the remote control button again
within 10 seconds as soon as the vehicle
is locked.
The indicator lamp lights up for approx. 2 sec‐
onds and then continues to flash.
The tilt alarm sensor and interior motion sen‐
sor are turned off, until the vehicle is locked again.
Switching off the alarm
▷Unlock vehicle with the remote control or
switch on the ignition, if needed through
emergency detection of remote control, re‐
fer to page 35.Seite 45Opening and closingControls45
Online Edition for Part no. 01 40 2 960 520 - II/15
Page 70 of 247

▷The engine is not yet at operating temper‐
ature.▷The wheels are at a sharp angle or the
steering wheel is being turned.▷After driving in reverse.▷Fogging of the windows when the auto‐
matic climate control is switched on.▷Vehicle battery is heavily discharged.▷At higher elevations.▷The engine compartment lid is unlocked.▷The parking assistant is activated.▷Stop-and-go traffic.▷The selector lever is in position N, M/S or
R.▷Use of fuel with high ethanol content.
Starting the engine
The engine starts automatically under the fol‐
lowing conditions:
▷Steptronic transmission:
By releasing the brake pedal.▷Manual transmission:
The clutch pedal is pressed.
After the engine starts, accelerate as usual.
Safety mode
After the engine switches off automatically, it
will not start again automatically if any one of
the following conditions are met.
▷The driver's safety belt is unbuckled and
the driver's door is open.▷The hood was unlocked.
Some indicator lights light up for a varied
length of time.
The engine can only be started via the Start/
Stop button.
Functional limitations
Even if driving off was not intended, the deacti‐
vated engine starts up automatically in the fol‐
lowing situations:▷Excessive warming of the car's interior
when the cooling function is switched on.▷The steering wheel is turned.▷Steptronic transmission: change from se‐
lector lever position D to R, N or M/S.▷Steptronic transmission: change from se‐
lector lever position P to N, D, R or M/S.▷The vehicle begins rolling.▷Fogging of the windows when the auto‐
matic climate control is switched on.▷Vehicle battery is heavily discharged.▷Excessive cooling of the car's interior when
the heating is switched on.▷Low brake vacuum pressure; this can oc‐
cur, e.g., if the brake pedal is depressed a
number of times in succession.
Activating/deactivating the system
manually
Using the button
Press button.
▷LED comes on: Auto Start/Stop function is
deactivated.
The engine is started during an automatic
engine stop.
The engine can only be stopped or started
via the Start/Stop button.Seite 66ControlsDriving66
Online Edition for Part no. 01 40 2 960 520 - II/15
Page 72 of 247

Using turn signals
Press the lever beyond the resistance point.
To switch off manually, press the lever to the
resistance point.
Unusually rapid flashing of the indicator lamp
indicates that a turn signal bulb has failed.
Triple turn signal activation Press the lever to the resistance point.
The turn signal flashes three times.
The function can be activated or deactivated.
On the Control Display:
1."Settings"2."Lighting"3."Triple turn signal"
Settings are stored for the profile currently in
use.
Signaling briefly
Press the lever to the resistance point and hold
it there for as long as you want the turn signal
to flash.
High beams, headlight flasher▷High beams, arrow 1.▷Headlight flasher, arrow 2.
Washer/wiper system
Switching the wipers on/off and brief
wipe
Hints Do not activate wipers if frozen to wind‐
shield
Do not switch on the wipers if they are frozen
to the windshield; otherwise, the wiper blades
and the wiper motor may be damaged.◀
Do not activate wipers on dry windshield
Do not use the wipers if the windshield is
dry, as this may damage the wiper blades or
cause them to become worn more quickly.◀
Do not activate wipers with wipers folded
away
Do not switch on the wipers if they are folded
away, otherwise the hood or the wipers may be
damaged.◀
Seite 68ControlsDriving68
Online Edition for Part no. 01 40 2 960 520 - II/15
Page 101 of 247
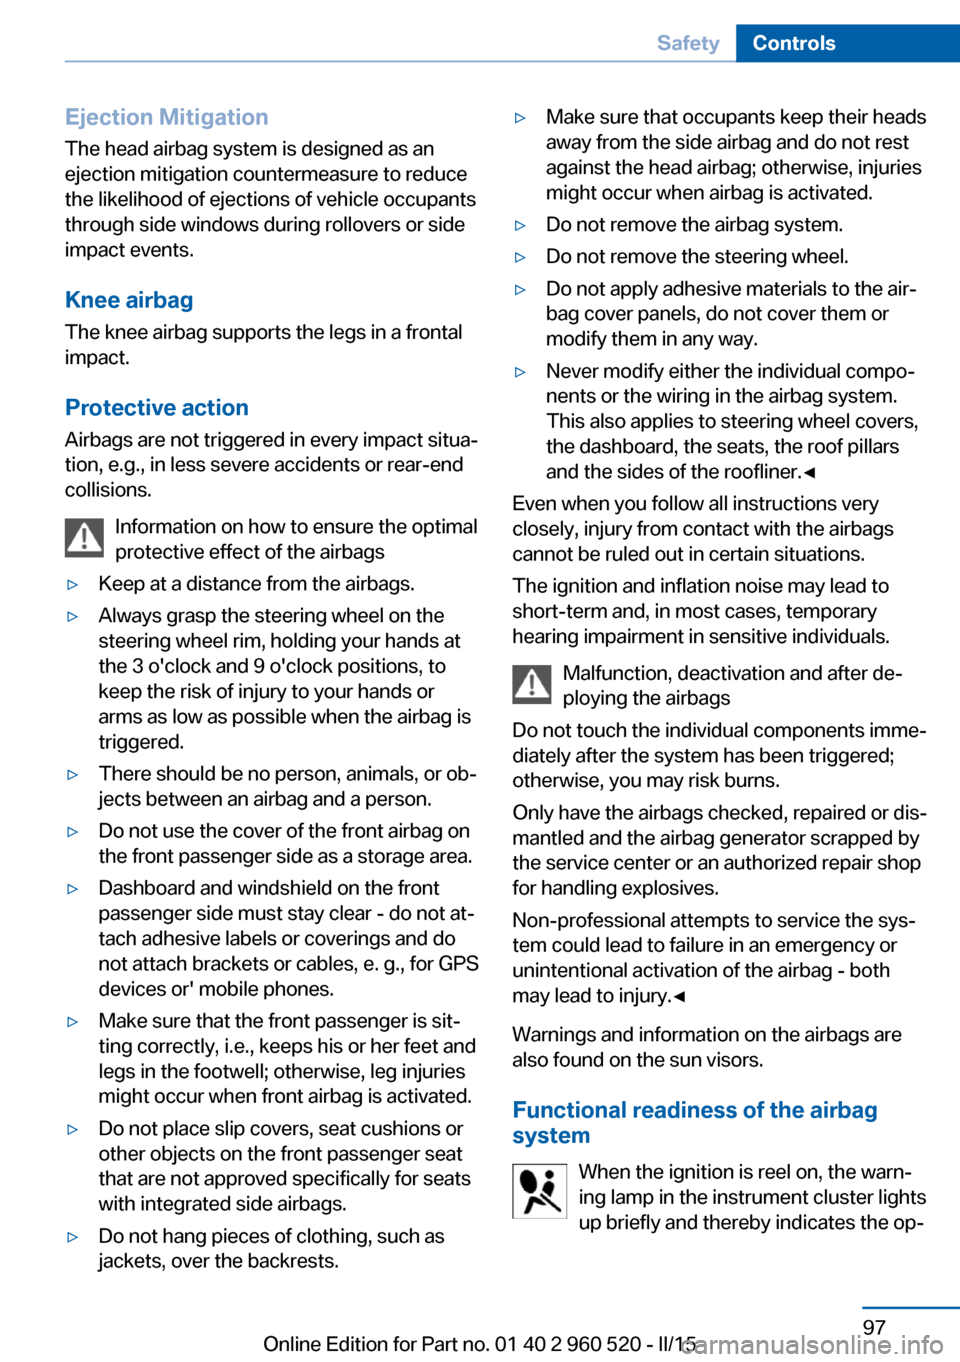
Ejection MitigationThe head airbag system is designed as an
ejection mitigation countermeasure to reduce
the likelihood of ejections of vehicle occupants
through side windows during rollovers or side
impact events.
Knee airbag The knee airbag supports the legs in a frontal
impact.
Protective action
Airbags are not triggered in every impact situa‐
tion, e.g., in less severe accidents or rear-end
collisions.
Information on how to ensure the optimal
protective effect of the airbags▷Keep at a distance from the airbags.▷Always grasp the steering wheel on the
steering wheel rim, holding your hands at
the 3 o'clock and 9 o'clock positions, to
keep the risk of injury to your hands or
arms as low as possible when the airbag is
triggered.▷There should be no person, animals, or ob‐
jects between an airbag and a person.▷Do not use the cover of the front airbag on
the front passenger side as a storage area.▷Dashboard and windshield on the front
passenger side must stay clear - do not at‐
tach adhesive labels or coverings and do
not attach brackets or cables, e. g., for GPS
devices or' mobile phones.▷Make sure that the front passenger is sit‐
ting correctly, i.e., keeps his or her feet and
legs in the footwell; otherwise, leg injuries
might occur when front airbag is activated.▷Do not place slip covers, seat cushions or
other objects on the front passenger seat
that are not approved specifically for seats
with integrated side airbags.▷Do not hang pieces of clothing, such as
jackets, over the backrests.▷Make sure that occupants keep their heads
away from the side airbag and do not rest
against the head airbag; otherwise, injuries
might occur when airbag is activated.▷Do not remove the airbag system.▷Do not remove the steering wheel.▷Do not apply adhesive materials to the air‐
bag cover panels, do not cover them or
modify them in any way.▷Never modify either the individual compo‐
nents or the wiring in the airbag system.
This also applies to steering wheel covers,
the dashboard, the seats, the roof pillars
and the sides of the roofliner.◀
Even when you follow all instructions very
closely, injury from contact with the airbags
cannot be ruled out in certain situations.
The ignition and inflation noise may lead to
short-term and, in most cases, temporary
hearing impairment in sensitive individuals.
Malfunction, deactivation and after de‐
ploying the airbags
Do not touch the individual components imme‐
diately after the system has been triggered;
otherwise, you may risk burns.
Only have the airbags checked, repaired or dis‐
mantled and the airbag generator scrapped by
the service center or an authorized repair shop
for handling explosives.
Non-professional attempts to service the sys‐
tem could lead to failure in an emergency or
unintentional activation of the airbag - both
may lead to injury.◀
Warnings and information on the airbags are also found on the sun visors.
Functional readiness of the airbag
system
When the ignition is reel on, the warn‐
ing lamp in the instrument cluster lights
up briefly and thereby indicates the op‐
Seite 97SafetyControls97
Online Edition for Part no. 01 40 2 960 520 - II/15
Page 204 of 247

Hood
Hints Working in the engine compartment
Never attempt to perform any service or
repair operations on your vehicle without the
necessary professional technical training.
If you are unfamiliar with the statutory guide‐
lines, have any work on the vehicle performed
only by a service center.
If work is not carried out properly, there is a
danger of subsequent damage and related
safety hazards.◀
Never reach into the engine compart‐
ment
Never reach into spaces or gaps in the engine
compartment; otherwise, there is a risk of in‐
jury, e.g., from rotating or hot parts.◀
Fold down wiper arm
Before opening the hood, ensure that the
wiper arms are against the windshield, or this
may result in damage.◀
Opening the hood1.Pull lever, arrow 1.
Hood is unlocked2.After the lever is released, pull the lever
again, arrow 2.
Hood can be opened.Indicator/warning lights
When the hood is unlocked, a Check Control
message is displayed.
Closing the hood Hood open when driving
If you see any signs that the hood is not
completely closed while driving, pull over im‐
mediately and close it securely.◀
Danger of jamming
Make sure that the closing path of the
hood is clear; otherwise, injuries may result.◀
Let the hood drop from a height of approx. 16
in/40 cm and push down on it to lock it fully.
The hood must audibly engage on both sides.
Seite 200MobilityEngine compartment200
Online Edition for Part no. 01 40 2 960 520 - II/15