2015 Acura TLX Remote
[x] Cancel search: RemotePage 175 of 545

174
uuOperating the Switches Around the Steering Wheel uDriving Position Memory System
Controls
Driving Position Memory SystemYou can store two driver’s seat (except for power lumbar) and door mirror positions
with the driving position memory system.
When you unlock and open the driver’s door with a remote transmitter, or keyless
access system, the seat and door mirrors adjust automatically to one of the two
preset positions.
The multi-information display shows you which remote transmitter you used to
unlock the vehicle when you enter.
• DRIVER 1 transmitter is linked to memory button 1.
• DRIVER 2 transmitter is linked to memory button 2.
The driver’s seat moves rearward depending
on the set seating position once you
•Stop the vehicle.
• Put the transmission in
(P
.
• Turn the engine off.
• Then open the driver’s door.
Once the power mode is in the ACCESSORY
position, the driver’s seat moves forward to
the DRIVER 1 or 2 preset position.
1 Driving Position Memory System
Using the audio/information screen or multi-
information display, you can disable the automatic
seat and door mirror adjustment function.
2 Customized Features P. 126, 259
The driver’s seat easy exit feature:•Can be turned ON/OFF. 2Customized Features P. 126
System Operation
The system will not operate if:•The vehicle speed is above 3 mph (5 km/h).•Either memory position button is pressed while the
seat is in motion.•The seat position is adjusted while in operation.•The memory 1 or 2 position is set fully to the rear.
DRIVER 1 DRIVER 2
Page 201 of 545

uuClimate Control System uUsing Automatic Climate Control
200Controls
In addition to the button/switch operations, you can control the climate control
system from the On Demand Multi-Use Display
TM touch screen.
■
Operating from the On Demand Multi-Use Display
TM
1Using Automatic Climate Control
When you unlock the doors with your remote, the
driver’s ID ( Driver 1 or Driver 2) is detected, and the
climate control settings are turned to the respective
mode automatically when you set the power mode to
ON.
You can store two customized climate control
settings to the system and recall them from the On
Demand Multi-Use Display
TM.
2 Shortcuts P. 205
On Demand Multi-Use Display
TM
A/C (Air Conditioning) and
SYNC (Synchronized) Icon
Vent Mode Icon Driver’s Side
Temperature Control
Icon
Recirculation/Fresh Air
mode Icon
Fan Control Icon Passenger’s Side
Temperature Control
Icon
Shortcuts Icon
Page 210 of 545

209
Features
This chapter describes how to operate technology features.
Audio SystemAbout Your Audio System ................ 210
USB Port .......................................... 211
Auxiliary Input Jack .......................... 212
Audio System Theft Protection ......... 213
Audio Remote Controls .................... 214
Audio System Basic Operation ........ 215
On Demand Multi-Use Display
TM....... 216
Audio/Information Screen ................ 222
Adjusting the Sound ........................ 226
Display Setup ................................... 227
Playing AM/FM Radio ....................... 228
Playing SiriusXM ® Radio ................... 232 Playing a CD .................................... 235
Playing an iPod ................................ 238
Playing Internet Radio ...................... 242
Playing a USB Flash Drive ................. 245
Playing
Bluetooth ® Audio................. 248
Audio Error Messages CD Player ......................................... 250
iPod/USB Flash Drive ........................ 251
Pandora ®......................................... 252
Aha
TM Radio ..................................... 254
General Information on the Audio SystemSiriusXM ® Radio Service ................... 255
Recommended CDs ......................... 256
Compatible iPod, iPhone, and USB Flash
Drives ................................................. 258Customized Features ........................ 259
Defaulting All the Settings ............... 276
HomeLink ® Universal Transceiver ... 277
Bluetooth ® HandsFreeLink ®
Using HFL ........................................ 279
HFL Menus ...................................... 281
Compass
*.......................................... 313
* Not available on all models
Page 211 of 545

210Features
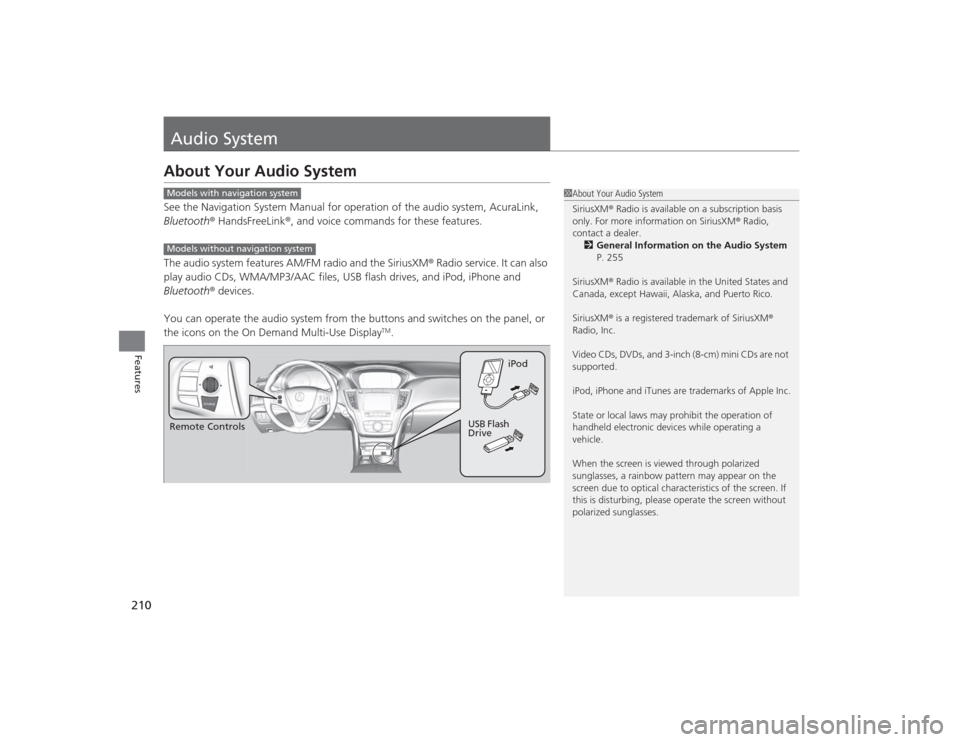
Audio SystemAbout Your Audio SystemSee the Navigation System Manual for operation of the audio system, AcuraLink,
Bluetooth® HandsFreeLink ®, and voice commands for these features.
The audio system features AM/FM radio and the SiriusXM ® Radio service. It can also
play audio CDs, WMA/MP3/AAC files, USB flash drives, and iPod, iPhone and
Bluetooth ® devices.
You can operate the audio system from the buttons and switches on the panel, or
the icons on the On Demand Multi-Use Display
TM.
1 About Your Audio System
SiriusXM ® Radio is available on a subscription basis
only. For more information on SiriusXM ® Radio,
contact a dealer.
2 General Information on the Audio System
P. 255
SiriusXM ® Radio is available in the United States and
Canada, except Hawaii, Alaska, and Puerto Rico.
SiriusXM ® is a registered trademark of SiriusXM ®
Radio, Inc.
Video CDs, DVDs, and 3-inch (8-cm) mini CDs are not
supported.
iPod, iPhone and iTunes are trademarks of Apple Inc.
State or local laws may prohibit the operation of
handheld electronic devices while operating a
vehicle.
When the screen is viewed through polarized
sunglasses, a rainbow pattern may appear on the
screen due to optical character istics of the screen. If
this is disturbing, please operate the screen without
polarized sunglasses.
Models with navigation systemModels without navigation systemRemote Controls iPod
USB Flash
Drive
Page 215 of 545

214
uuAudio System uAudio Remote Controls
Features
Audio Remote ControlsAllow you to operate the audio system while driving.
SOURCE Button
Cycles through the audio modes as follows:
FM AM SiriusXM®CD USB/iPod
Bluetooth ® Audio Pandora ®
*
Aha
TM *
AUX
Left Selector Wheel
Roll Up: To increase the volume.
Roll Down: To decrease the volume.
Push: To mute. Push again to unmute.
• When listening to the radio
Move to the right: To select the next preset radio station.
Move to the left: To select the previous preset radio station.
Move to the right and hold: To select the next strong station.
Move to the left and hold: To select the previous strong station.
• When listening to a CD, iPod, USB flash drive, or Bluetooth® Audio
Move to the right: To skip to the next song.
Move to the left: To go back to the beginning of the current or previous song.
Move to the right and hold: To go to the group up. (Bluetooth® Audio only)
Move to the left and hold: To go to the group down. (Bluetooth® Audio only)
• When listening to a CD or USB flash drive
Move to the right and hold: To skip to the next folder.
Move to the left and hold: To go back to the previous folder.
• When listening to Pandora ®
*
Move to the right: To skip to the next song.
Move to the right and hold: To select the next station.
Move to the left and hold: To select the previous station.
1Audio Remote Controls
The CD mode appears only when a CD is loaded.
Left Selector WheelSOURCE Button
* Not available on all models
Page 216 of 545

215Features
Audio System Basic OperationTo use the audio system, the power mode must be in ACCESSORY or ON.Use the interface dial or MENU button to
access some audio functions.
Press to switch between the normal and
extended display for some functions.
Interface dial: Rotate left or right to scroll
through the available choices. Press to set
your selection. Move right, left, up or down to
select a secondary menu.
MENU button: Press to select any mode. The
available mode includes Change Source,
Station List , Save Preset , Radio Text,
Music Search , and play modes. Play modes
can be also selected from Scan, Random/
Repeat , and so on.
BACK button: Press to go back to the
previous display.
(Day/Night) button: Press to change
the audio/information screen brightness.
Press once and make an adjustment
using the interface dial. u Each time you press , the mode
switches between the daytime mode,
nighttime mode and off mode.
1Audio System Basic Operation
These indications are used to show how to operate
the interface dial.
Rotate to select.
Press to enter.
Move , , or to select a secondary menu.
Audio Menu Items
2 Station List P. 230
2 Save Preset P. 229, 234
2 Radio Text P. 231
2 Music Search P. 236, 240, 246
2 Scan P. 237, 247
2 Random/Repeat P. 237, 241, 247
When you unlock the doors with your remote, the
driver’s ID ( Driver 1 or Driver 2) is detected, and the
audio system settings and preset memory are turned
to the respective mode au tomatically when you set
the power mode to ON.
Interface Dial
MENU Button
BACK Button
Button
Page 230 of 545

Continued
229
uuAudio System Basic Operation uPlaying AM/FM Radio
Features
To store a station:
1. Tune to the selected station.
2. Press the MENU button.
3. Rotate to select Save Preset, then press .
4. Rotate to select the preset number you want to store that station, then press
.
You can also store that station by the following procedure.
1. Tune to the selected station.
2. Rotate to select the preset number you want to store the station.
3. Press and hold for a few seconds.
1. Tune to the selected station.
2. Select More.
3. Select Save Preset .
4. Select the preset number you want to store that station.
You can also store that station by the following procedure.
1. Tune to the selected station.
2. Change the display to the preset screen.
3. Select and hold the preset number you want to store that station.■
Preset Memory
1Playing AM/FM Radio
The ST indicator appears on the display indicating
stereo FM broadcasts.
Stereo reproduction in AM is not available.
Switching the Audio Mode
Press the SOURCE button on the steering wheel.
2 Audio Remote Controls P. 214
You can also switch the mode by pressing the MENU
button and selecting Change Source on the Audio
menu screen.
You can store 6 AM stations and 12 FM stations into
the preset memory.
Interface DialOn Demand Multi-Use Display
TM
Page 234 of 545

Continued
233
uuAudio System Basic Operation uPlaying SiriusXM ® Radio
Features
1. Select the SiriusXM® mode.
2 Audio Remote Controls P. 214
2 On Demand Multi-Use Display
TM P. 216
2.Press the MENU button.
3. Rotate to select Channel List, then press .
4. Rotate to select a channel from a list, then press .
2. Select a channel using the , , , icons on the tune mode screen or
the preset numbers ( 1-12) on the preset mode screen.
To change the tune mode:
1. Press the MENU button.
2. Rotate to select XM Tune Mode, then press .
3. Rotate to select Channel Mode or Category Mode , then press .
1. Select More.
2. Select XM Tune Mode .
3. Select Channel Mode or Category Mode .■
To Play SiriusXM® Radio
1 Playing SiriusXM ® Radio
In the channel mode, all availa ble channels are
selectable. In the category mode, you can select a
channel within a category (Jazz, Rock, Classical, etc.).
There may be instances when SiriusXM ® Radio does
not broadcast all the data fields (artist name, title).
This does not indicate a problem with your audio
system.
SiriusXM ® Radio stations load in ascending order,
which can take about a minute. Once they have
loaded you will be able to scroll up or down to make
your selections.
Interface DialOn Demand Multi-Use Display
TM
Interface DialOn Demand Multi-Use Display
TM