Page 3 of 365

Contents
This owner’s manual should be considered a permanent part of the
vehicle and should remain with the vehicle when it is sold.
This owner’s manual covers all models of your vehicle. You may find
descriptions of equipment and features that are not on your
particular model.
Images throughout this owner’s manual (including the front cover)
represent features and equipment that are available on some, but
not all, models. Your particular mo del may not have some of these
features.
This owner’s manual is for vehicles sold in the United States and
Canada.
The information and specifications in cluded in this publication were
in effect at the time of approval for printing. Honda Motor Co., Ltd.
reserves the right, however, to discontinue or change specifications
or design at any time without notice and without incurring any
obligation.2 Safe Driving P. 23
For Safe Driving P. 24 Seat Belts P. 29 Airbags P. 37
2Instrument Panel P. 67
Indicators P. 68 Gauges and Multi-Information Display P. 82
2Controls P. 95
Setting the Clock P. 96 Locking and Unlocking the Doors P. 97
Opening and Closing the Moonroof P. 118
Adjusting the Seats P. 136
2Features P. 157
Audio System P. 158 Audio System Basic Operation P. 161
HomeLink ® Universal Transceiver P. 194
2 Driving P. 227
Before Driving P. 228 Towing a Trailer P. 233
Parking Your Vehicle P. 261Multi-View Rear Camera P. 262
2Maintenance P. 267
Before Performing Maintenance P. 268 Maintenance MinderTM P. 271
Checking and Maintaining Wiper Blades P. 297
Climate Control System Main tenance P. 312 Cleaning P. 313
2Handling the Unexpected P. 319
Tools P. 320 If a Tire Goes Flat P. 321
Overheating P. 333 Indicator, Coming On/Blinking P. 335
2Information P. 345
Specifications P. 346 Identification Numbers P. 348
Emissions Testing P. 351 Warranty Coverages P. 353
Page 4 of 365

Contents
Child Safety P. 52Exhaust Gas Hazard P. 64Safety Labels P. 65
Opening and Closing the Tailgate P. 107 Security System P. 113 Opening and Closing the Windows P. 115
Operating the Switches Around the Steering Wheel P. 119 Adjusting the Mirrors P. 133
Interior Lights/Interior Convenience Items P. 143 Climate Control System P. 152
Audio Error Messages P. 187General Information on the Audio System P. 190
Bluetooth ® HandsFreeLink ® P. 196 Compass* P. 225
Off-Highway Driving Guidelines P. 238 When Driving P. 240 Braking P. 257
Refueling P. 263 Fuel Economy P. 265Accessories and Modifications P. 266
Maintenance Under the Hood P. 275 Replacing Light Bulbs P. 287
Checking and Maintaining Tires P. 301 Battery P. 310 Remote Transmitter Care P. 311
Engine Does Not Start P. 327 Jump Starting P. 330 Shift Lever Does Not Move P. 332
Fuses P. 339 Emergency Towing P. 342When You Cannot Open the Tailgate P. 343
Devices that Emit Radio Waves P. 349 Reporting Safety Defects P. 350
Authorized Manuals P. 355 Client Service Information P. 356
Quick Reference GuideP. 4
Safe DrivingP. 23
Instrument PanelP. 67
ControlsP. 95
FeaturesP. 157
DrivingP. 227
MaintenanceP. 267
Handling the UnexpectedP. 319
InformationP. 345
IndexP. 357
Page 5 of 365
4
Quick Reference Guide
Quick Reference Guide
Visual Index
❙Steering Wheel Adjustments
(P 132)
❙ (Vehicle Stability Assist (VSA®)
System OFF) Button
(P 252)
❙System Indicators (P 68)
❙Gauges (P 82)
❙Multi-Information Display (P 83)
❙Audio/Information Screen*
❙Hazard Warning Button
❙Audio System (P 158)
❙Navigation System*
() See Navigation System Manual
❙Climate Control System (P 152)
❙Rear Window Defogger (P 129)
❙Heated Mirror Button (P 129)
❙ENGINE START/STOP Button (P 119)
Page 16 of 365
15
Quick Reference Guide
Features (P 157)
Audio System (P 158)
For navigation system operation () See Navigation System Manual
Audio/Information Screen
SCAN Button
CATEGORY
Bar
Selector Knob
BACK
Button VOL
/ (Power/volume)
Knob
CD Button
AUX Button
CD Slot
(CD Eject)
Button
Preset Buttons
(1-6)
SETUP Button
SKIP
Bar
PHONE Button Button
FM/AM
Button
A.SEL Button
DISPLAY Button
●Audio Remote Controls (P 165)
● VOL (Volume) Button
Press and release to adjust the volume
up/down.
● MODE Button
Press and release to change the audio
mode: FM1/FM2 /AM/CD/XM1 /XM2/AUX.
● CH (Channel) Button
Radio: Press and release to change the preset station.
Press and hold to select the next or
previous strong station.
CD/USB device: Press and release to skip to the
beginning of the next song or
return to the beginning of the
current song.
Press and hold to change a folder.
MODE Button
CH (Channel) Buttons
VOL
(Volume) Buttons
Page 120 of 365

119Continued
Controls
Operating the Switches Around the Steering Wheel
ENGINE START/STOP Button
■Changing the Power Mode1ENGINE START/STOP Button
ENGINE START/STOP Button Operating Range
You can start the engine when the keyless access
remote is inside the vehicle.
The engine may also run if the keyless access remote
is close to the door or window, even if it is outside the
vehicle.
ON mode:
Indicator in the button is of f, if the engine is running.
If the keyless access remote battery is weak, beeper
sounds and the TO START, HOLD REMOTE NEAR
START BUTTON message appears on the multi-
information display. 2 If the Keyless Access Remote Battery is
Weak P. 328
If the power mode does not change from VEHICLE
OFF to ACCESSORY, press the ENGINE START/STOP
button while moving the st eering wheel left and
right. The steering wheel will unlock, allowing the
mode to change.
Operating RangeVEHICLE OFF (LOCK)
Indicator in the button is off.
The steering wheel is locked. The power
to all electrical components is turned off.
ACCESSORY
Indicator in the button is on.
Indicator in the button blinks (from ON to
ACCESSORY).
Operate the audio system and other
accessories in this position.
ON
Indicator in the button is on.
All electrical components
can be used.
: Press the ENGINE START/STOP button to change the mode.
: Press the button without the shift lever in
( P.
: Shift to Park, then press the button.
Indicator
Page 158 of 365

157
Features
This chapter describes how to operate technology features.
Audio SystemAbout Your Audio System ................ 158
USB Adapter Cable .......................... 159
Auxiliary Input Jack .......................... 159
Audio System Theft Protection ......... 160
Audio System Basic Operation ........ 161
Audio/Information Screen
*.............. 162
Audio Remote Controls .................... 165
Adjusting the Sound ........................ 166
Playing the AM/FM Radio ................. 167
Playing the XM ® Radio ..................... 169
Playing a CD .................................... 171
Playing an iPod ................................ 174 Playing Pandora
®............................. 177
Playing a USB Flash Drive ................. 179
Playing Bluetooth ® Audio................. 182
Wallpaper Setup .............................. 184
Display Setup ................................... 186
Audio Error Messages ...................... 187
General Information on the Audio System ............................................. 190
HomeLink ® Universal Transceiver
Training HomeLink ........................... 194
Bluetooth® HandsFreeLink®
Using HFL ........................................ 196
HFL Menus....................................... 198 Compass
*.......................................... 225
* Not available on all models
Page 159 of 365

158
Features
Audio System
About Your Audio System
On models with navigation system, see Navigation System Manual for operation of
the audio system, Bluetooth® HandsFreeLink ®, and voice commands for these
features.
The audio system features AM/FM radio and the XM ® Radio service. It can also play
audio CDs, WMA/MP3/AAC files, iP od, iPhone, USB flash drives, and Bluetooth®
devices.
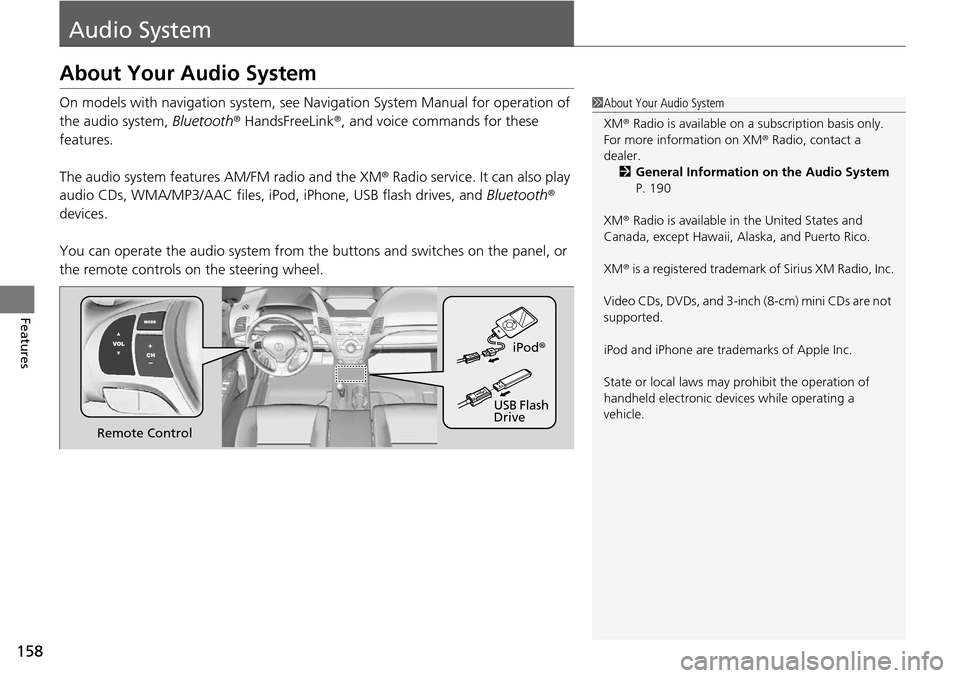
You can operate the audio system from the buttons and switches on the panel, or
the remote controls on the steering wheel.1About Your Audio System
XM ® Radio is available on a subscription basis only.
For more information on XM ® Radio, contact a
dealer.
2 General Information on the Audio System
P. 190
XM ® Radio is available in the United States and
Canada, except Ha waii, Alaska, and Puerto Rico.
XM ® is a registered trademark of Sirius XM Radio, Inc.
Video CDs, DVDs, and 3-inch (8-cm) mini CDs are not
supported.
iPod and iPhone are trademarks of Apple Inc.
State or local laws may pr ohibit the operation of
handheld electronic devices while operating a
vehicle.
Remote Control iPod
®
USB Flash
Drive
Page 160 of 365

159
uuAudio System uUSB Adapter Cable
Features
USB Adapter Cable
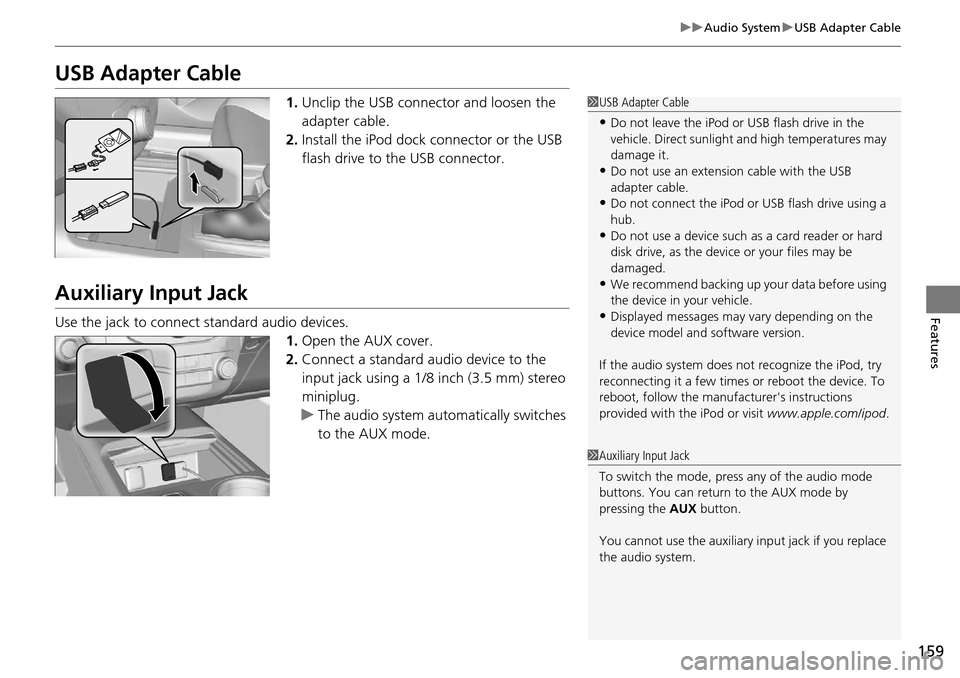
1. Unclip the USB connec tor and loosen the
adapter cable.
2. Install the iPod dock connector or the USB
flash drive to the USB connector.
Auxiliary Input Jack
Use the jack to connect standard audio devices.
1.Open the AUX cover.
2. Connect a standard audio device to the
input jack using a 1/8 inch (3.5 mm) stereo
miniplug.
u The audio system auto matically switches
to the AUX mode.
1 USB Adapter Cable
•Do not leave the iPod or USB flash drive in the
vehicle. Direct sunlight and high temperatures may
damage it.
•Do not use an extension cable with the USB
adapter cable.
•Do not connect the iPod or USB flash drive using a
hub.
•Do not use a device such as a card reader or hard
disk drive, as the device or your files may be
damaged.
•We recommend backing up yo ur data before using
the device in your vehicle.
•Displayed messages may vary depending on the
device model and software version.
If the audio system does not recognize the iPod, try
reconnecting it a few times or reboot the device. To
reboot, follow the manufac turer's instructions
provided with the iPod or visit www.apple.com/ipod.
1Auxiliary Input Jack
To switch the mode, pres s any of the audio mode
buttons. You can return to the AUX mode by
pressing the AUX button.
You cannot use the auxiliary input jack if you replace
the audio system.