Page 76 of 247
74StorageCaution
Do not fold the outer seatbacks
while the seats are in the inner
position. The seats could be
damaged.
Remove the load compartment cover if necessary 3 75.
Push head restraints down by
pressing both catches.
Take the seat belt out of the retaining clip on the backrest.
Pull the handle on the front side of the
backrest and fold down the backrest
onto the seat cushion. The seat is
lowered automatically.
The backrests can also be folded
from the load compartment.Pull the handle on the back side of the backrest and fold down the backrest.
To fold up, pull the handle and raise
the backrests into an upright position
until they engage audibly.
9 Warning
When folding up, ensure that
backrests are securely locked in
position before driving. Failure to
do so may result in personal injury or damage to load or vehicle in the event of heavy braking or collision.
Page 77 of 247
Storage75Rear storage
On the left side of the load
compartment there is a stowage
compartment.
Turn the fastener anticlockwise and
fold down the cover.
Load compartment cover
Do not place any objects on the cover.
Removing the cover
Unhook retaining straps from tailgate.
Lift cover at the rear and push it
upwards at the front.
Remove the cover.
Stowing the cover
Unhook retaining straps from tailgate.
Lift cover at the rear and push it
upwards out of the side guides at the
front.
Stow the cover behind the rear seats.
Fitting the cover Engage cover in side guides and fold
downwards. Attach retaining straps to tailgate.
Page 79 of 247
Storage77Lashing eyes
The lashing eyes are designed to
secure items against slippage, e.g.
using lashing straps or luggage net.
Safety net The safety net can be installed behind the front seats.
Passengers must not be transported
behind the safety net.
Installation
There are two installation openings in the roof frame: suspend rod of net at
one side, push to the front and
engage. Extend rod, suspend at other
side, push to the front and engage.
Suspend hooks of net tensioning
belts in lashing eyes in the floor
behind the front seats. Tension the
net by pulling the loose end of the belt.
Suspend and tighten on both sides.
Removal Tilt length adjuster of the net
tensioning belts upwards and detach
the belts on both sides. Disengage
the upper rod on one side, disengage
other side and remove from the
openings.
Page 82 of 247
80StorageLoading information
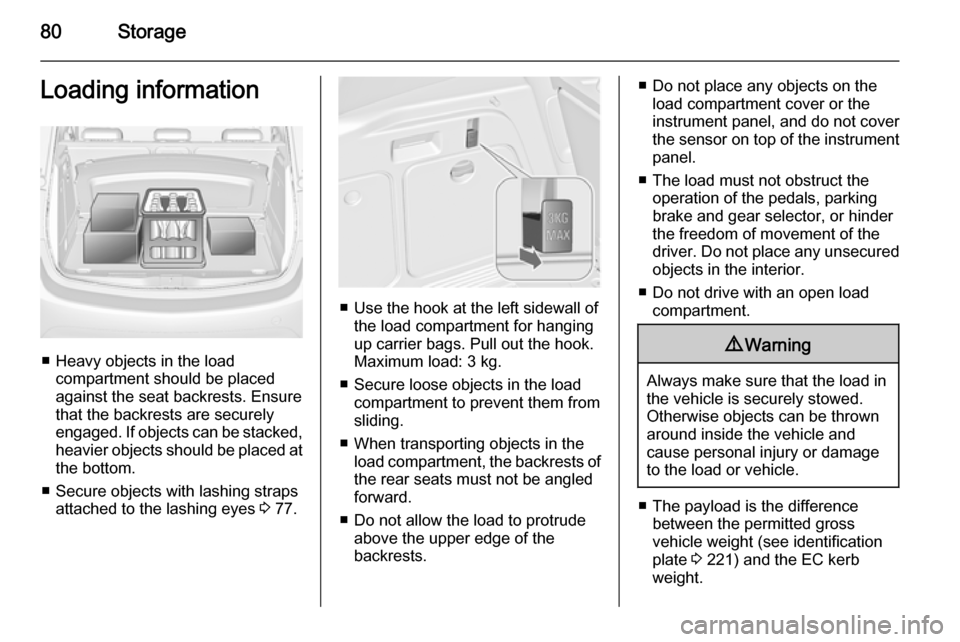
■ Heavy objects in the loadcompartment should be placedagainst the seat backrests. Ensure
that the backrests are securely
engaged. If objects can be stacked, heavier objects should be placed at
the bottom.
■ Secure objects with lashing straps attached to the lashing eyes 3 77.
■ Use the hook at the left sidewall of
the load compartment for hanging
up carrier bags. Pull out the hook.
Maximum load: 3 kg.
■ Secure loose objects in the load compartment to prevent them from
sliding.
■ When transporting objects in the load compartment, the backrests ofthe rear seats must not be angled
forward.
■ Do not allow the load to protrude above the upper edge of the
backrests.
■ Do not place any objects on the load compartment cover or the
instrument panel, and do not cover
the sensor on top of the instrument
panel.
■ The load must not obstruct the operation of the pedals, parking
brake and gear selector, or hinder the freedom of movement of thedriver. Do not place any unsecured objects in the interior.
■ Do not drive with an open load compartment.9 Warning
Always make sure that the load in
the vehicle is securely stowed.
Otherwise objects can be thrown
around inside the vehicle and
cause personal injury or damage
to the load or vehicle.
■ The payload is the difference between the permitted gross
vehicle weight (see identification
plate 3 221) and the EC kerb
weight.
Page 96 of 247

94Instruments and controls
Control indicators in the centreconsole
Turn signal
O illuminates or flashes green.
Illuminates briefly The parking lights are switched on.
Flashes A turn signal or the hazard warning
flashers are activated.
Rapid flashing: failure of a turn signal
light or associated fuse, failure of turn
signal light on trailer.
Bulb replacement 3 176, Fuses
3 186.
Turn signals 3 120.
Seat belt reminder Seat belt reminder on frontseats X illuminates or flashes red.
Illuminates
After the ignition has been switched on until the seat belt has been
fastened.
Flashes
After having started the engine for a maximum of 100 seconds until the seat belt has been fastened.
Fastening the seat belt 3 45.
Seat belt status on rear seats
> or X in the Driver Information
Centre flashes or illuminates.Illuminates
After having started the engine for a
minimum of 35 seconds until the seat
belt has been fastened.
If an unfastened seat belt is fastened
whilst driving.
Flashes
After starting off when the seat belt is
unfastened.
Fastening the seat belt 3 45.
Airbag and belt tensioners v illuminates red.
When the ignition is switched on, the control indicator illuminates for
approx. 4 seconds. If it does not
illuminate, does not go out after
4 seconds or illuminates whilst
driving, there is a fault in the airbag
system. Seek the assistance of a
workshop. The airbags and belt
pretensioners may fail to trigger in the
event of an accident.
Deployment of the belt pretensioners
or airbags is indicated by continuous
illumination of v.
Page 120 of 247

118LightingHeadlight range
adjustment
Manual headlight range
adjustment
To adapt headlight range to the
vehicle load to prevent dazzling: turn
thumb wheel ? to required position.
0=front seats occupied1=all seats occupied2=all seats occupied and load
compartment laden3=driver's seat occupied and load
compartment ladenHeadlights when driving
abroad
The asymmetrical headlight beam
extends visibility at the edge of the
road on the front passenger side.
However, when driving in countries
where traffic drives on the opposite
side of the road, adjust the headlights to prevent dazzling of oncoming
traffic.
Vehicles without Adaptive
Forward Lighting
Turn the adjusting screws clockwise
using the screwdriver for half a turn.
The adjusting screws are located at the headlights above the low beam
caps 3 176.
For deactivation, turn the adjusting
screws anticlockwise for half a turn.Caution
Have the adjustment of the
headlights checked after
deactivation.
We recommend consulting a
workshop.
Page 128 of 247

126Climate control
Notice
If the settings for demisting and
defrosting are selected, an Autostop will be inhibited.
If the settings for demisting and
defrosting are selected while the
engine is in an Autostop, the engine will restart automatically.
Stop-start system 3 138.
Air conditioning systemIn addition to the heating and
ventilation system, the air
conditioning system has controls for:n=cooling4=air recirculation
Heated seats ß 3 40, Heated
steering wheel * 3 83.
Cooling n
Press n to switch on cooling.
Activation is indicated by the LED in
the button. Cooling is only functional
when the engine is running and
climate control fan is switched on.
Press n again to switch off cooling.
The air conditioning system cools and
dehumidifies (dries) as soon as the
outside temperature is slightly above
the freezing point. Therefore
condensation may form and drip from under the vehicle.
If no cooling or drying is required,
switch off the cooling system for fuel
saving reasons. Activated cooling
might inhibit Autostops.
Air recirculation system 4
Press 4 to activate air recirculation
mode. Activation is indicated by the
LED in the button.
Page 130 of 247

128Climate control
Notice
If V is pressed while the engine is
running, an Autostop will be inhibited
until V is pressed again.
If V is pressed while the engine is
in an Autostop, the engine will restart
automatically.
Stop-start system 3 138.
Electronic climate control
system
The dual zone climate control allows
different climatisation temperatures
for driver and front passenger side.
In Automatic mode temperature, fan
speed and air distribution are
regulated automatically.
Controls for:
■ temperature on driver side
■ air distribution
■ fan speed
■ temperature on front passenger side
n=coolingAUTO=automatic mode4=manual air recirculationV=demisting and defrosting
Heated rear window Ü 3 32, Heated
seats ß 3 40, Heated steering wheel
* 3 83.
Climate control settings are shown on
the Graphic-Info-Display, or
depending on the version, on Colour-
Info-Display. Setting modifications
are briefly popped-up in both
displays, superimposed over the
currently displayed menu.
The electronic climate control system is only fully operational when the
engine is running.


