2015.5 Peugeot 308 brake
[x] Cancel search: brakePage 174 of 396
172
Operating fault
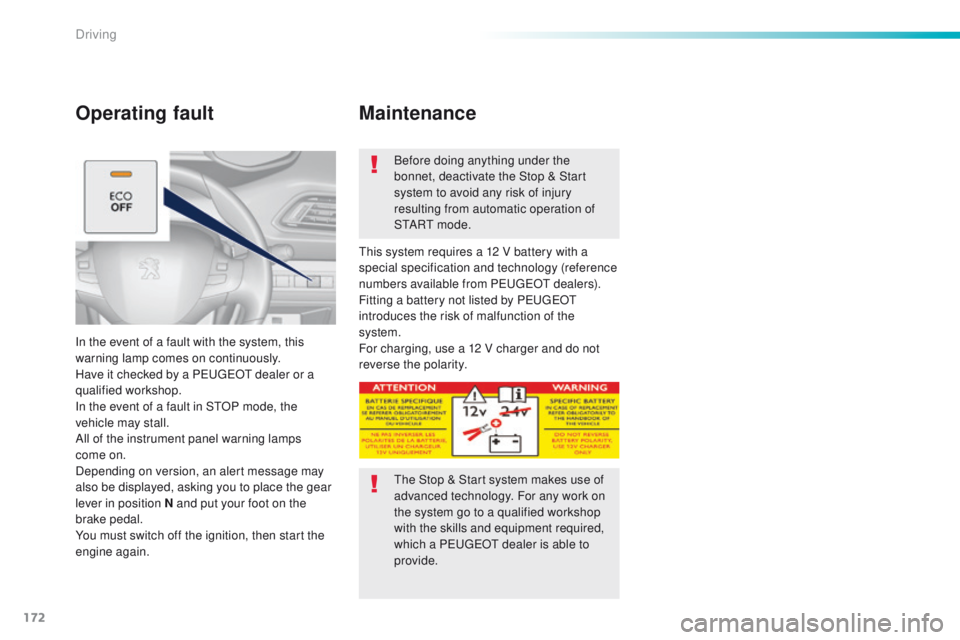
In the event of a fault with the system, this
warning lamp comes on continuously.
Have it checked by a P
e
uge
Ot
dealer or a
qualified workshop.
In the event of a fault in S
tO
P mode, the
vehicle may stall.
All of the instrument panel warning lamps
come on.
Depending on version, an alert message may
also be displayed, asking you to place the gear
lever in position N and put your foot on the
brake pedal.
You must switch off the ignition, then start the
engine again. Before doing anything under the
bonnet, deactivate the Stop & Start
system to avoid any risk of injury
resulting from automatic operation of
S
t
A R
t m
o d e .
th
is system requires a 12 V battery with a
special specification and technology (reference
numbers available from P
e
uge
Ot d
ealers).
Fitting a battery not listed by P
e
uge
Ot
introduces the risk of malfunction of the
system.
For charging, use a 12 V charger and do not
reverse the polarity.
Maintenance
the Stop & Start system makes use of
advanced technology. For any work on
the system go to a qualified workshop
with the skills and equipment required,
which a P
e
uge
Ot
dealer is able to
provide.
Driving
Page 179 of 396
177
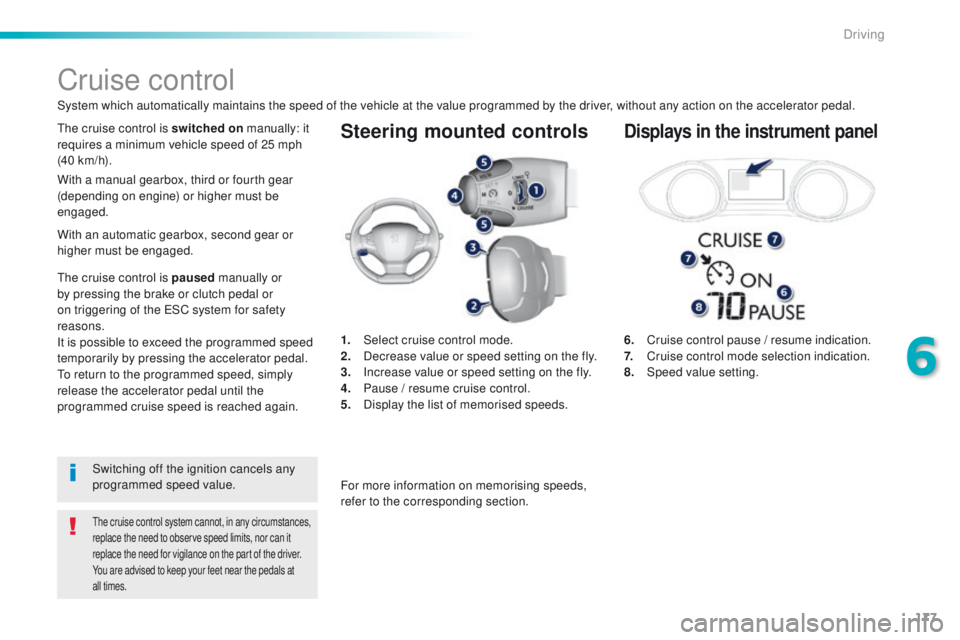
Steering mounted controls
6. Cruise control pause / resume indication.
7. Cruise control mode selection indication.
8.
Spe
ed value setting.
Cruise control
System which automatically maintains the speed of the vehicle at the value programmed by the driver, without any action on the accelerator pedal.
the cruise control system cannot, in any circumstances,
replace the need to observe speed limits, nor can it
replace the need for vigilance on the part of the driver.
You are advised to keep your feet near the pedals at
all times.
the cruise control is switched on manually: it
requires a minimum vehicle speed of 25 mph
(40 km/h).
1.
Sel
ect cruise control mode.
2.
D
ecrease value or speed setting on the fly.
3.
I
ncrease value or speed setting on the fly.
4.
P
ause / resume cruise control.
5.
D
isplay the list of memorised speeds.Displays in the instrument panel
Switching off the ignition cancels any
programmed speed value.
th
e cruise control is paused
manually or
by pressing the brake or clutch pedal or
on triggering of the e SC system for safety
reasons.
It is possible to exceed the programmed speed
temporarily by pressing the accelerator pedal.
to r
eturn to the programmed speed, simply
release the accelerator pedal until the
programmed cruise speed is reached again. With a manual gearbox, third or fourth gear
(depending on engine) or higher must be
engaged.
For more information on memorising speeds,
refer to the corresponding section.
With an automatic gearbox, second gear or
higher must be engaged.
6
Driving
Page 183 of 396
181
the active cruise control is switched on manually,
it requires that the speed of the vehicle be between
25 mph (40 km/h) and 90 mph (150 km/h).
General points
the active cruise control can be paused
manually with the control, or automatically:
-
b
y pressing the brake or clutch pedal,
-
i
n the event of operation of the e SC, for
safety reasons,
-
i
n the event of an action of the electric
parking brake control,
-
w
hen an inter-vehicle time threshold is
reached (calculated according to the
relative speeds of your vehicle and the
vehicle in front and the inter-vehicle time
setting chosen),
-
w
hen the distance between your vehicle
and the one in front becomes to small,
-
w
hen the speed of the vehicle in front is
to
low,
-
w
hen the speed of your vehicle becomes
too low.
th
e active cruise control cannot in any
circumstances replace the observation
of speed limits, nor the need for the
vigilance on the part of the driver.
It is recommended that you always keep
your feet close to the pedals.
the
inter-vehicle time setting is
memorised when switching off the
ignition.
With a manual gearbox, third or fourth gear
(depending on engine) or higher must be
engaged.
With an automatic gearbox, second gear or
higher must be engaged.
If the cruise speed setting is above 90 mph
(150 km/h), the active cruise control switches to
normal cruise control mode (without automatic
adjustment of the safety inter-vehicle distance).
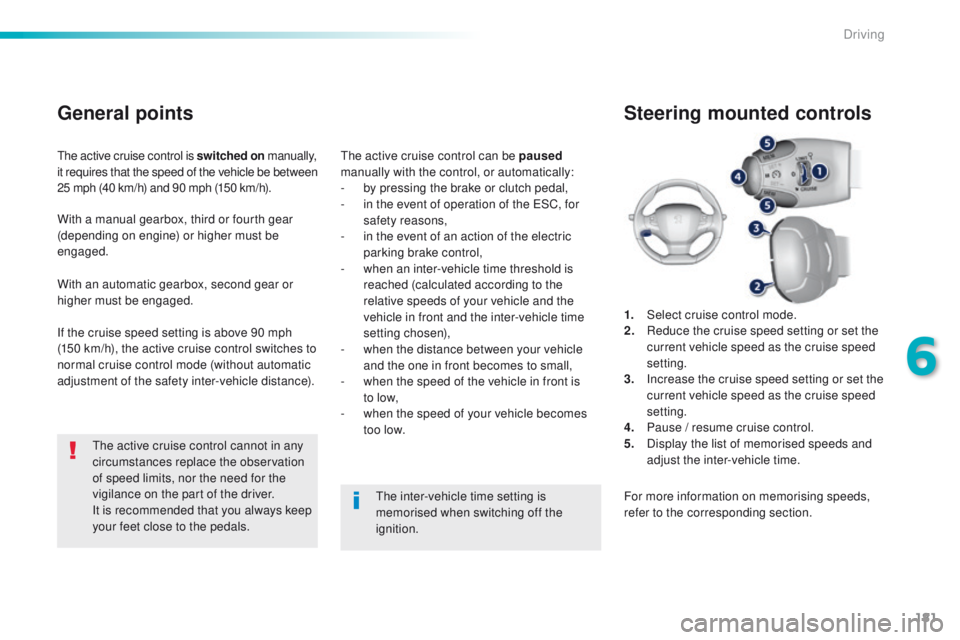
1.
Sel
ect cruise control mode.
2.
R
educe the cruise speed setting or set the
current vehicle speed as the cruise speed
setting.
3.
I
ncrease the cruise speed setting or set the
current vehicle speed as the cruise speed
setting.
4.
P
ause / resume cruise control.
5.
D
isplay the list of memorised speeds and
adjust the inter-vehicle time.
Steering mounted controls
For more information on memorising speeds,
refer to the corresponding section.
6
Driving
Page 187 of 396
185
When the active cruise control is
automatically paused, it can only be
reactivated when safe conditions are
restored. t
h
e message "Activation
not possible, conditions unsuitable"
is displayed while reactivation is not
possible.
When the conditions allow, it is
recommended that the function be
reactivated by pressing button 2 (S
et
+
)
or 3 (S
e
t
-
), which will make the current
speed of your vehicle the new cruise
speed setting, rather than by pressing
button 4 (on/pause) which reactivates
the cruise control using the old cruise
speed setting, which may be very
different from the current speed of your
vehicle.th e speed regulation range is limited to a
maximum difference of 20 mph (30 km/h)
between the speed setting and the speed of the
vehicle in front.
Above this, the system goes into pause if the
safe distance becomes too low.
th
e active cruise control uses only engine
braking to slow the vehicle. Consequently the
vehicle looses speed slowly, as when releasing
the accelerator pedal.
th
e system is paused automatically:
-
i
f the vehicle in front slows down to much
or too suddenly, and the driver does not
brake,
-
i
f a vehicle comes between your vehicle
and the vehicle in front,
-
i
f the system does not slow the vehicle
enough to continue to maintain a safe
distance, for example when descending a
steep hill.
Limits of operation
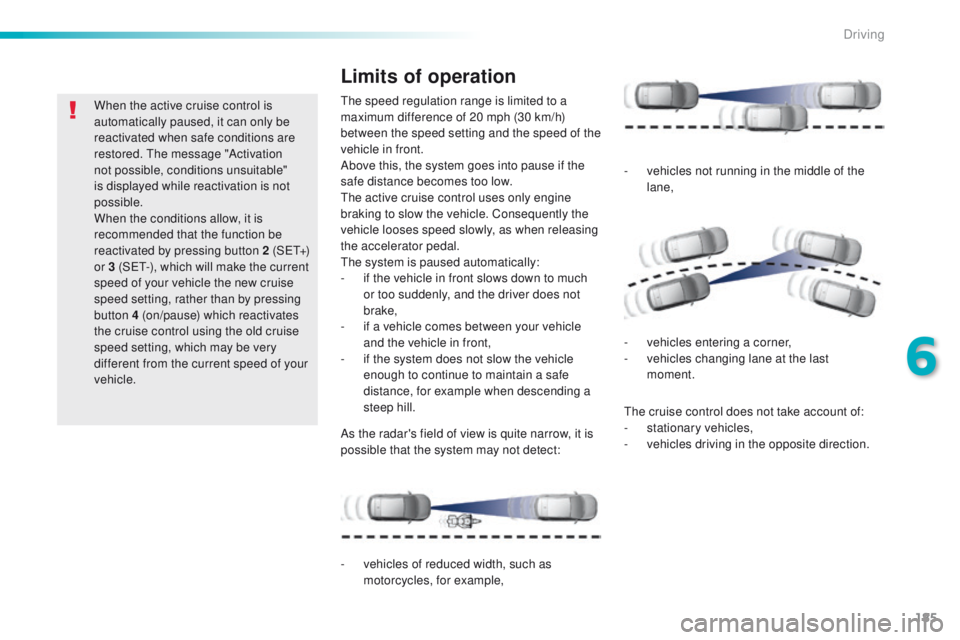
As the radar's field of view is quite narrow, it is
possible that the system may not detect:
th
e cruise control does not take account of:
- s tationary vehicles,
- v ehicles driving in the opposite direction.
-
v
ehicles of reduced width, such as
motorcycles, for example, -
v
ehicles not running in the middle of the
lane,
-
v
ehicles entering a corner,
-
v
ehicles changing lane at the last
moment.
6
Driving
Page 194 of 396
192
the change from one level of alert
to the next takes place if the driving
conditions do not change (speed
unchanged, no change of lane...).If the speed of your vehicle is too high
when approaching another vehicle, the
first level of alert may not be displayed:
the level 2 alert may be displayed
di r e c t l y.
On the other hand, the level 1 alert
is never displayed with the "close"
triggering threshold 3.
Severe weather conditions (very heavy
rain, accumulations of snow in front
of the radar) may inter fere with the
operation of the system, resulting in
the display of this message "
SYSTEM
INACTIVE: Reduced visibility ".
t
h
e
system will remain unavailable until the
message disappears.
the
emergency collision alert system
does not replace the need for vigilance
on the part of the driver.
Alerts
According to the collision risk detected by
the system and the alert threshold chosen,
different levels of alert can be given.
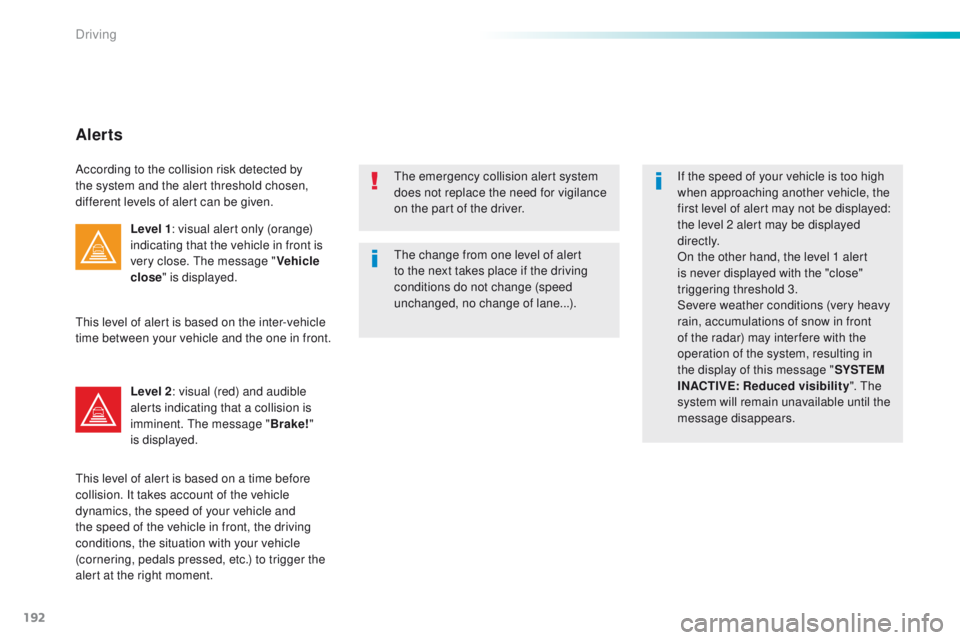
Level 1: visual alert only (orange)
indicating that the vehicle in front is
very close.
t
h
e message "Vehicle
close " is displayed.
Level 2 : visual (red) and audible
alerts indicating that a collision is
imminent.
t
h
e message "Brake!"
is displayed.
th
is level of alert is based on the inter-vehicle
time between your vehicle and the one in front.
th
is level of alert is based on a time before
collision. It takes account of the vehicle
dynamics, the speed of your vehicle and
the speed of the vehicle in front, the driving
conditions, the situation with your vehicle
(cornering, pedals pressed, etc.) to trigger the
alert at the right moment.
Driving
Page 195 of 396
193
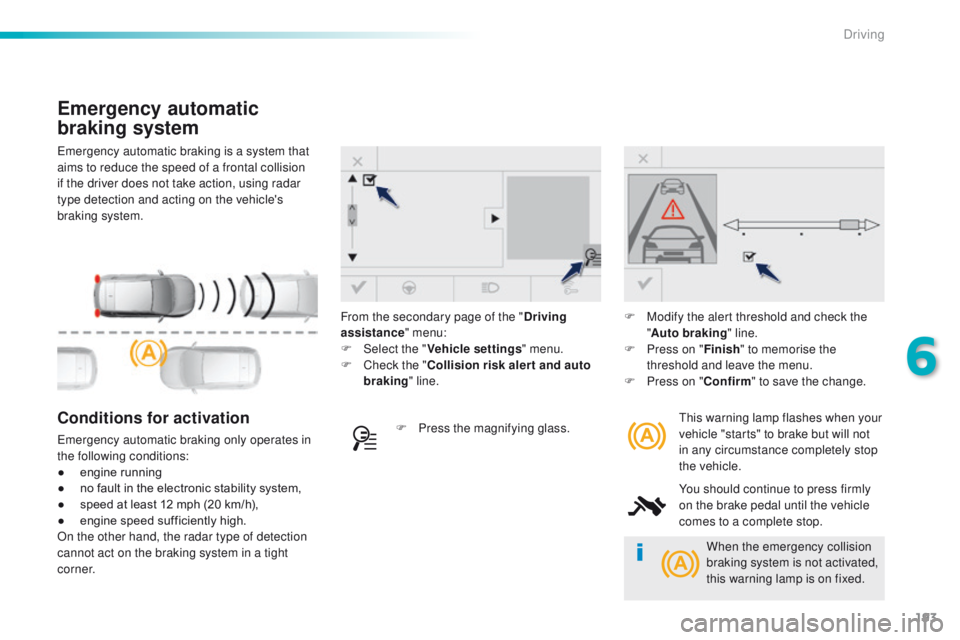
emergency automatic braking is a system that
aims to reduce the speed of a frontal collision
if the driver does not take action, using radar
type detection and acting on the vehicle's
braking system.
Emergency automatic
braking system
this warning lamp flashes when your
vehicle "starts" to brake but will not
in any circumstance completely stop
the vehicle.
You should continue to press firmly
on the brake pedal until the vehicle
comes to a complete stop.Conditions for activation
emergency automatic braking only operates in
the following conditions:
●
e
ngine running
●
n
o fault in the electronic stability system,
●
s
peed at least 12 mph (20 km/h),
●
e
ngine speed sufficiently high.
On the other hand, the radar type of detection
cannot act on the braking system in a tight
c o r n e r. F
P ress the magnifying glass.F
M
odify the alert threshold and check the
" Auto braking " line.
F
P
ress on "
Finish" to memorise the
threshold and leave the menu.
F
P
ress on "
Confirm" to save the change.
From the secondary page of the "
Driving
assistance " menu:
F
Sel
ect the "
Vehicle settings " menu.
F
C
heck the "
Collision risk alert and auto
braking " line.
When the emergency collision
braking system is not activated,
this warning lamp is on fixed.
6
Driving
Page 203 of 396
201
Park Assist
this system provides active assistance with
parking, detecting a parking space then
controlling the steering to park in the space.
It controls the steering while the driver
manages the accelerator, brakes, gears and
clutch (manual gearbox). During phases of
entry into and exit from a parking space, the
system provides visual and audible information
to the driver in order to make the manoeuvres
safe. It may be necessary to move for wards
and backwards more than once.During a manoeuvre the steering wheel
turns quickly: do not hold the steering
wheel, do not place your hand between
the spokes of the steering wheel and
take care with loose and bulky clothing,
scarves, handbags...
t
h
ere is a risk of
injury.
When Park Assist is activated, it
prevents a change to S
tO
P mode of
Stop & Start. In S
tO
P mode, activation
of Park Assist restarts the engine.
th
e Park Assist system cannot in any
circumstances replace the need for
vigilance on the part of the driver.
th
e driver must remain in control
of their vehicle ensuring that the
space remains clear throughout the
manoeuvre.
In some circumstances, the sensors
may not detect small obstacles located
in their blind spots.
th
e driver can take control at any time by
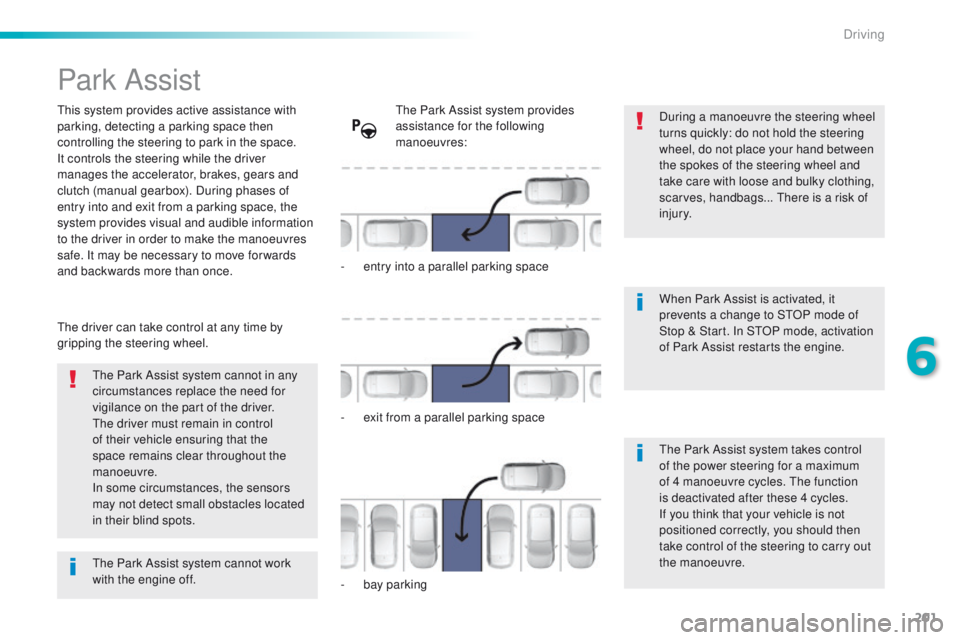
gripping the steering wheel.th e Park Assist system provides
assistance for the following
manoeuvres:
-
e
ntry into a parallel parking space
-
e
xit from a parallel parking space
-
b
ay parking
th
e Park Assist system takes control
of the power steering for a maximum
of 4 manoeuvre cycles.
t
h
e function
is deactivated after these 4 cycles.
If you think that your vehicle is not
positioned correctly, you should then
take control of the steering to carry out
the manoeuvre.
th
e Park Assist system cannot work
with the engine off.
6
Driving
Page 218 of 396
216
Snow chains
In wintry conditions, snow chains improve traction as well as the behaviour of the vehicle
when braking.
th
e snow chains must be fitted only
to the front wheels.
t
h
ey must never
be fitted to "space-saver" type spare
wheels.
ta
ke account of the legislation in force
in your country on the use of snow
chains and the maximum running speed
authorised.
Avoid driving with snow chains on roads
that have been cleared of snow, to
avoid damaging your vehicle's tyres and
the road sur face. If your vehicle is fitted
with alloy wheels, check that no part of
the chain or its fixings is in contact with
the wheel rim.
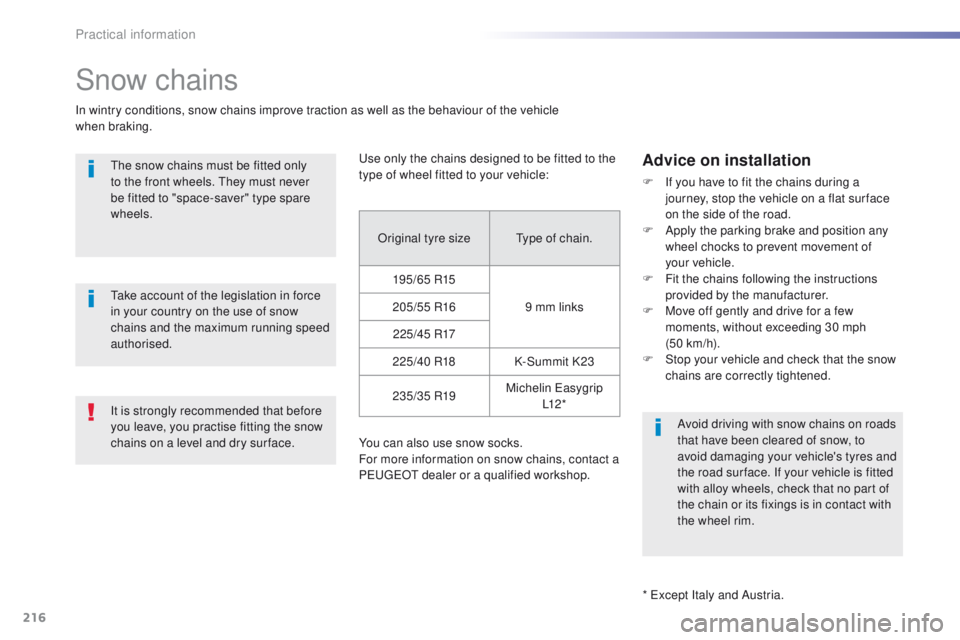
us
e only the chains designed to be fitted to the
type of wheel fitted to your vehicle:
You can also use snow socks.
For more information on snow chains, contact a
P
e
uge
Ot
dealer or a qualified workshop.
Advice on installation
F If you have to fit the chains during a journey, stop the vehicle on a flat sur face
on the side of the road.
F
A
pply the parking brake and position any
wheel chocks to prevent movement of
your
vehicle.
F
F
it the chains following the instructions
provided by the manufacturer.
F
M
ove off gently and drive for a few
moments, without exceeding 30 mph
(50
km/h).
F
S
top your vehicle and check that the snow
chains are correctly tightened.
Original tyre size
ty
pe of chain.
195/65 R15 9 mm links
205/55 R16
2 2 5 /4 5 R17
225/40 R18 K-Summit K23
235/35 R19 Michelin
e
a
sygrip
L1 2 *
It is strongly recommended that before
you leave, you practise fitting the snow
chains on a level and dry sur face.
*
e
x
cept Italy and Austria.
Practical information