Page 30 of 396
28
Coolant temperature gauge
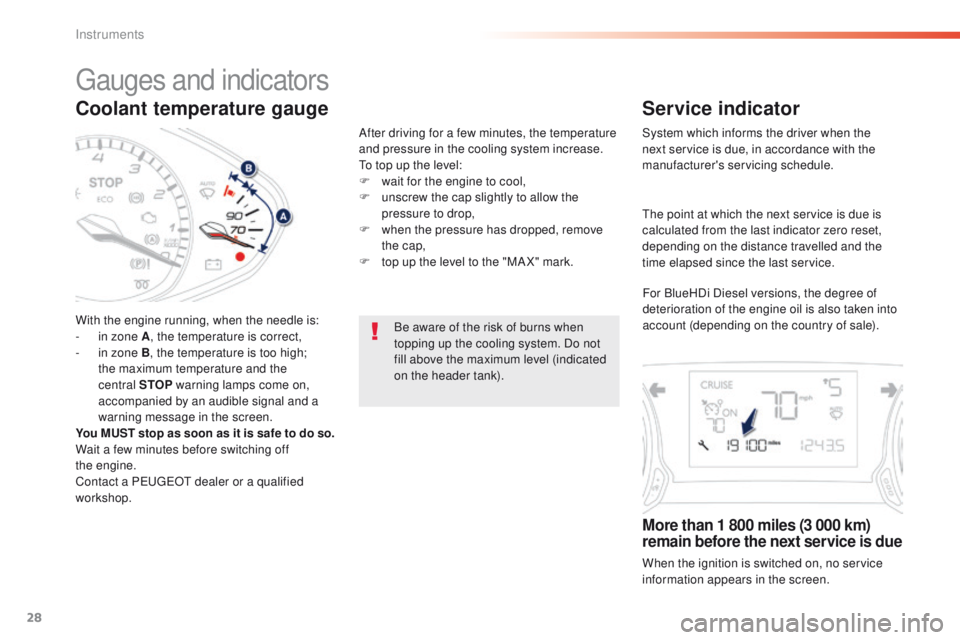
With the engine running, when the needle is:
- i n zone A , the temperature is correct,
-
i
n zone B, the temperature is too high;
the maximum temperature and the
central STOP warning lamps come on,
accompanied by an audible signal and a
warning message in the screen.
You MUST stop as soon as it is safe to do so.
Wait a few minutes before switching off
the
engine.
Contact a P
e
uge
Ot
dealer or a qualified
workshop. After driving for a few minutes, the temperature
and pressure in the cooling system increase.
to t
op up the level:
F
w
ait for the engine to cool,
F
u
nscrew the cap slightly to allow the
pressure to drop,
F
w
hen the pressure has dropped, remove
the cap,
F
t
op up the level to the "MA X" mark.
Be aware of the risk of burns when
topping up the cooling system. Do not
fill above the maximum level (indicated
on the header tank).
gauges and indicators
Service indicator
System which informs the driver when the
next service is due, in accordance with the
manufacturer's servicing schedule.
More than 1 800 miles (3 000 km)
remain before the next service is due
When the ignition is switched on, no service
information appears in the screen.
th
e point at which the next service is due is
calculated from the last indicator zero reset,
depending on the distance travelled and the
time elapsed since the last service.
For BlueHDi Diesel versions, the degree of
deterioration of the engine oil is also taken into
account (depending on the country of sale).
Instruments
Page 32 of 396
30
the distance remaining may be
weighted by the time factor, depending
on the driving conditions.
th
erefore, the spanner may also come
on if you have exceeded the period
since the last service, indicated in the
manufacturer's service schedule.
For BlueHDi Diesel versions, the
spanner may also be brought on earlier
than expected, depending on the
degree of deterioration of the engine oil
(depending on the country of sale).
th
e rate of deterioration of the engine
oil depends on the driving conditions in
which the vehicle is used.
Service indicator zero reset
Following this operation, if you wish to
disconnect the battery, lock the vehicle
and wait at least five minutes for the
zero reset to be registered.
Retrieving the service
information
You can access the service information at any
time.
F
P
ress the trip distance recorder zero reset
button.
t
h
e service information is displayed for a
few seconds, then disappears.
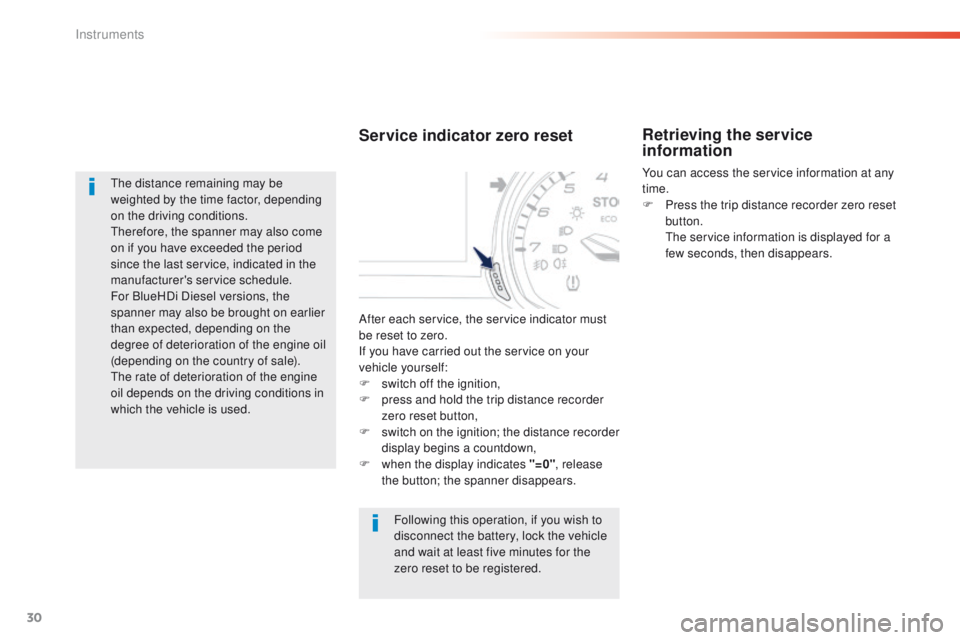
After each service, the service indicator must
be reset to zero.
If you have carried out the service on your
vehicle yourself:
F
s
witch off the ignition,
F
p
ress and hold the trip distance recorder
zero reset button,
F
s
witch on the ignition; the distance recorder
display begins a countdown,
F
w
hen the display indicates "=0" , release
the button; the spanner disappears.
Instruments
Page 33 of 396
31
Engine oil level indicator
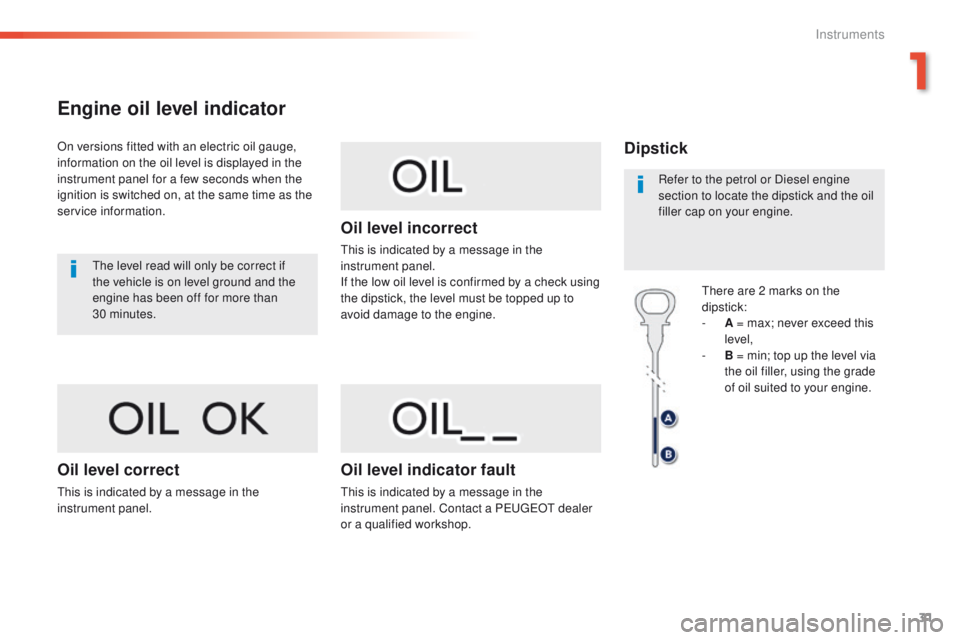
On versions fitted with an electric oil gauge,
information on the oil level is displayed in the
instrument panel for a few seconds when the
ignition is switched on, at the same time as the
service information.
th
e level read will only be correct if
the vehicle is on level ground and the
engine has been off for more than
30
minutes.
Oil level correct
this is indicated by a message in the
instrument panel.
Oil level incorrect
this is indicated by a message in the
instrument panel.
If the low oil level is confirmed by a check using
the dipstick, the level must be topped up to
avoid damage to the engine.
Oil level indicator fault
this is indicated by a message in the
instrument panel. Contact a Pe ugeOt dealer
or a qualified workshop.
Dipstick
there are 2 marks on the
dipstick:
-
A
= max; never exceed this
level,
-
B
= min; top up the level via
the oil filler, using the grade
of oil suited to your engine.
Refer to the petrol or Diesel engine
section to locate the dipstick and the oil
filler cap on your engine.
1
Instruments
Page 51 of 396
49
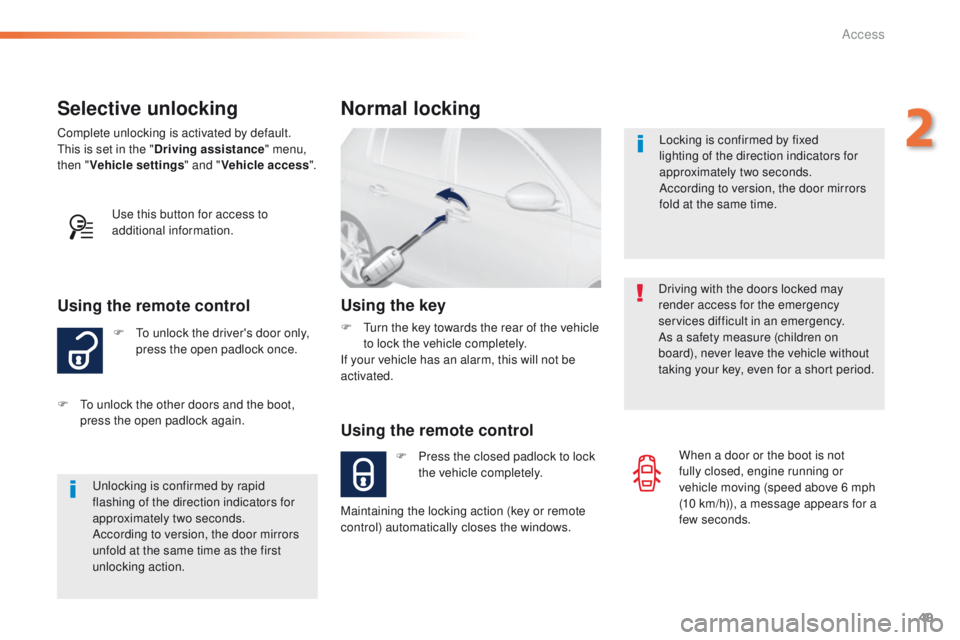
Selective unlocking
F to unlock the driver's door only, press the open padlock once.
Using the remote control
Complete unlocking is activated by default.this is set in the " Driving assistance " menu,
then " Vehicle settings " and "Vehicle access ".
un
locking is confirmed by rapid
flashing of the direction indicators for
approximately two seconds.
According to version, the door mirrors
unfold at the same time as the first
unlocking action.
F
t
o u
nlock the other doors and the boot,
press the open padlock again.
us
e this button for access to
additional information. Locking is confirmed by fixed
lighting of the direction indicators for
approximately two seconds.
According to version, the door mirrors
fold at the same time.
Driving with the doors locked may
render access for the emergency
services difficult in an emergency.
As a safety measure (children on
board), never leave the vehicle without
taking your key, even for a short period.
Normal locking
Using the remote control
F Press the closed padlock to lock the vehicle completely.
Using the key
F turn the key towards the rear of the vehicle to lock the vehicle completely.
If your vehicle has an alarm, this will not be
activated.
Maintaining the locking action (key or remote
control) automatically closes the windows. When a door or the boot is not
fully closed, engine running or
vehicle moving (speed above 6 mph
(10
km/h)), a message appears for a
few seconds.
2
Access
Page 53 of 396
51
Electronic engine immobiliser
the key contains an electronic chip which has
a special code. When the ignition is switched
on, this code must be recognised in order for
starting to be possible.
th
is electronic engine immobiliser locks the
engine management system a few moments
after the ignition is switched off and prevents
starting of the engine by anyone who does not
have the key.
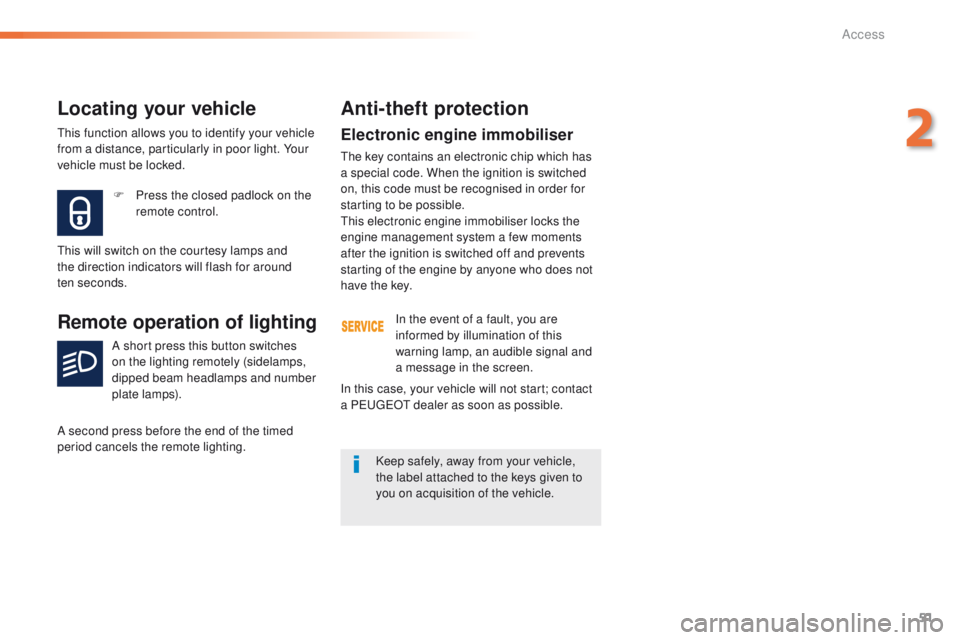
F
P
ress the closed padlock on the
remote control.
Locating your vehicle
this will switch on the courtesy lamps and
the direction indicators will flash for around
ten
seconds.
Remote operation of lighting
A short press this button switches
on the lighting remotely (sidelamps,
dipped beam headlamps and number
plate lamps).
A second press before the end of the timed
period cancels the remote lighting.
Anti-theft protection
In the event of a fault, you are
informed by illumination of this
warning lamp, an audible signal and
a message in the screen.
Keep safely, away from your vehicle,
the label attached to the keys given to
you on acquisition of the vehicle.
In this case, your vehicle will not start; contact
a P
e
uge
Ot
dealer as soon as possible.
th
is function allows you to identify your vehicle
from a distance, particularly in poor light. Your
vehicle must be locked.
2
Access
Page 56 of 396
54
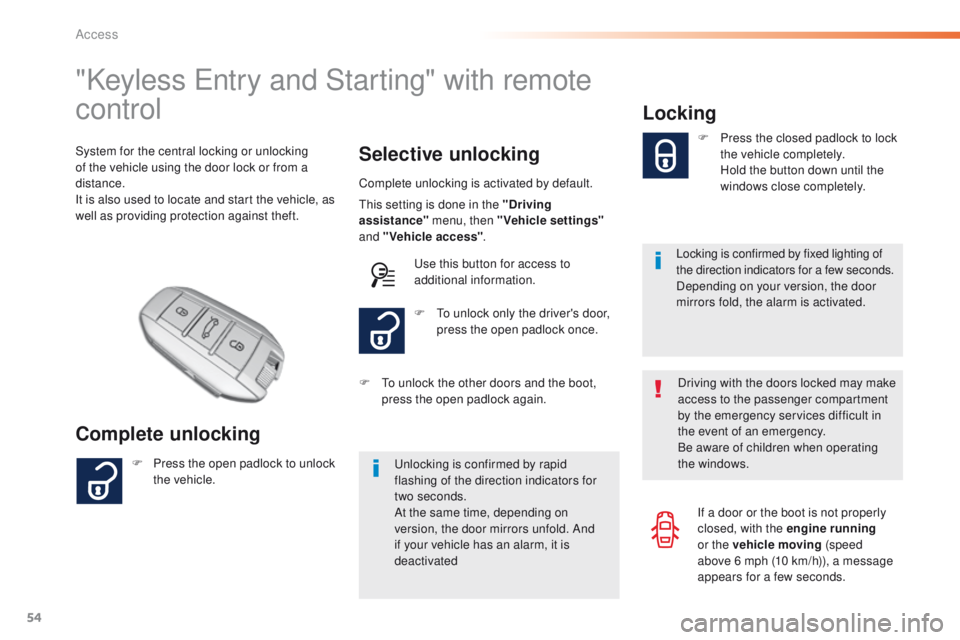
"Keyless entry and Starting" with remote
control
Complete unlocking Selective unlocking
System for the central locking or unlocking
of the vehicle using the door lock or from a
distance.
It is also used to locate and start the vehicle, as
well as providing protection against theft.
Complete unlocking is activated by default.
un
locking is confirmed by rapid
flashing of the direction indicators for
two
seconds.
At the same time, depending on
version, the door mirrors unfold. And
if your vehicle has an alarm, it is
deactivated F
t
o u
nlock only the driver's door,
press the open padlock once.
F
P
ress the open padlock to unlock
the vehicle. F
t
o u
nlock the other doors and the boot,
press the open padlock again.
th
is setting is done in the "Driving
assistance" menu, then "Vehicle settings"
and "Vehicle access" .
us
e this button for access to
additional information.
Locking
Locking is confirmed by fixed lighting of
the direction indicators for a few seconds.
Depending on your version, the door
mirrors fold, the alarm is activated. F
P
ress the closed padlock to lock
the vehicle completely.
H
old the button down until the
windows close completely.
Driving with the doors locked may make
access to the passenger compartment
by the emergency services difficult in
the event of an emergency.
Be aware of children when operating
the windows. If a door or the boot is not properly
closed, with the engine running
or the vehicle moving (speed
above 6
mph (10 km/h)), a message
appears for a few seconds.
Access
Page 57 of 396
55
this function allows you to identify
your vehicle from a distance,
particularly in poor light. Your vehicle
must be locked.
Locating your vehicle
F Press the closed padlock on the remote control.
th
is will switch on the courtesy lamps and
the direction indicators will flash for around
ten
seconds.As a safety measure (children on
board), never leave the vehicle without
taking the key for the Keyless
e
n
try
and Starting system, even for a short
period.
gu
ard against theft when the key for
the Keyless
e
n
try and Starting system
is in the recognition zone with the
vehicle unlocked.
In order to preserve the charge of the
cell battery in the remote control, the
"hands-free" functions go into extended
stand-by after 21 days of non-use.
t
o
r
estore these functions, press one of
the remote control buttons or start the
engine with the electronic key in the
reader.
2
Access
Page 59 of 396
57
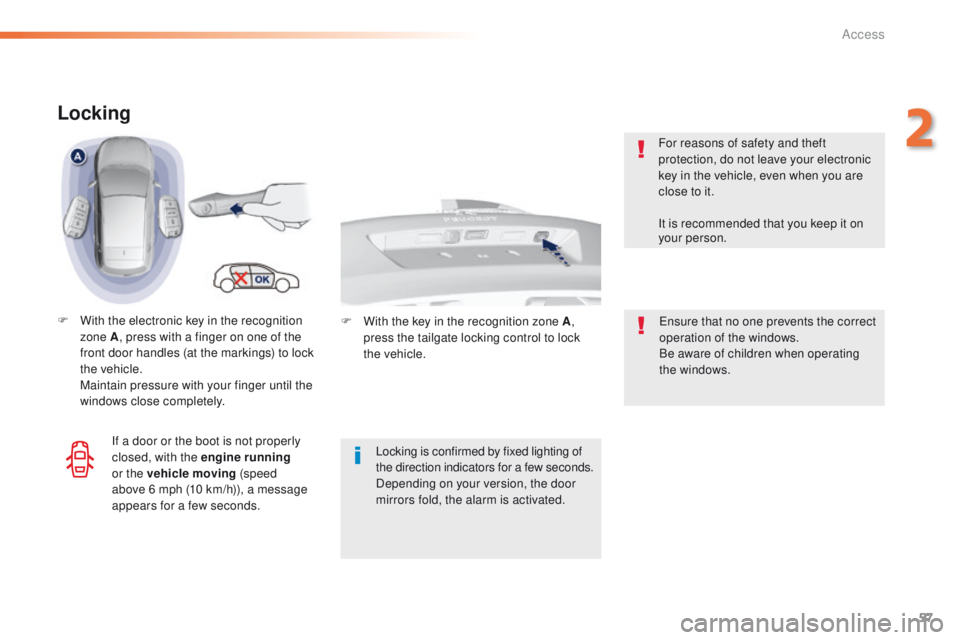
Locking
F With the electronic key in the recognition zone A , press with a finger on one of the
front door handles (at the markings) to lock
the vehicle.
M
aintain pressure with your finger until the
windows close completely.
Locking is confirmed by fixed lighting of
the direction indicators for a few
seconds.
Depending on your version, the door
mirrors fold, the alarm is activated.en sure that no one prevents the correct
operation of the windows.
Be aware of children when operating
the windows.
For reasons of safety and theft
protection, do not leave your electronic
key in the vehicle, even when you are
close to it.
It is recommended that you keep it on
your person.
If a door or the boot is not properly
closed, with the engine running
or the vehicle moving (speed
above 6
mph (10 km/h)), a message
appears for a few seconds. F
W ith the key in the recognition zone A,
press the tailgate locking control to lock
the
vehicle.
2
Access