Page 67 of 344
65
Manual operation
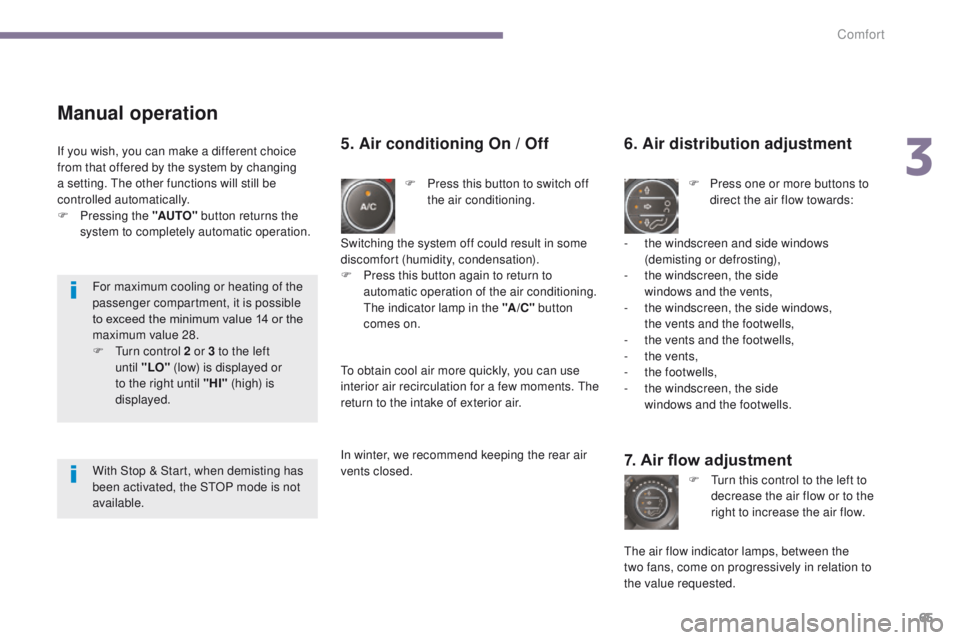
F Press this button to switch off the air conditioning.
6. Air distribution adjustment
F Press one or more buttons to direct the air flow towards:
7. Air flow adjustment
F Turn this control to the left to decrease the air flow or to the
right to increase the air flow.
5. Air conditioning On / Off
- the windscreen and side windows (demisting or defrosting),
-
t
he windscreen, the side
windows and the vents,
-
t
he windscreen, the side windows,
the vents and the footwells,
-
t
he vents and the footwells,
-
t
he vents,
-
t
he footwells,
-
t
he windscreen, the side
windows and the footwells.
The air flow indicator lamps, between the
two
fans, come on progressively in relation to
the value requested.
Switching the system off could result in some
discomfort (humidity, condensation).
F
P
ress this button again to return to
automatic operation of the air conditioning.
The indicator lamp in the "A /C " button
comes on.
If you wish, you can make a different choice
from that offered by the system by changing
a setting. The other functions will still be
controlled automatically.
F
P
ressing the "AUTO"
button returns the
system to completely automatic operation.
To obtain cool air more quickly, you can use
interior air recirculation for a few moments. The
return to the intake of exterior air.
In winter, we recommend keeping the rear air
vents closed.
For maximum cooling or heating of the
passenger compartment, it is possible
to exceed the minimum value 14 or the
maximum value 28.
F
T
urn control 2 or 3 to the left
until
"LO" (low) is displayed or
to the right until "HI" (high) is
displayed.
With Stop & Start, when demisting has
been activated, the STOP mode is not
available.
3
Comfort
Page 101 of 344
99
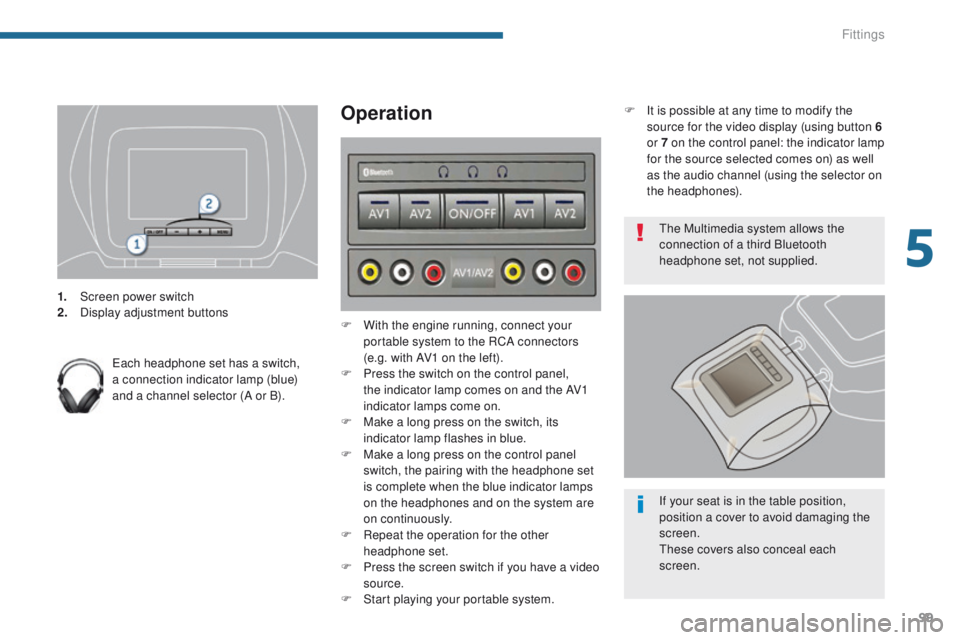
1. Screen power switch
2. Display adjustment buttons
Each headphone set has a switch,
a connection indicator lamp (blue)
and a channel selector (A or B).
Operation
F With the engine running, connect your portable system to the RCA connectors
(e.g. with AV1 on the left).
F
P
ress the switch on the control panel,
the indicator lamp comes on and the AV1
indicator lamps come on.
F
M
ake a long press on the switch, its
indicator lamp flashes in blue.
F
M
ake a long press on the control panel
switch, the pairing with the headphone set
is complete when the blue indicator lamps
on the headphones and on the system are
on continuously.
F
R
epeat the operation for the other
headphone set.
F
P
ress the screen switch if you have a video
source.
F
S
tart playing your portable system. The Multimedia system allows the
connection of a third Bluetooth
headphone set, not supplied.
If your seat is in the table position,
position a cover to avoid damaging the
screen.
These covers also conceal each
screen.
F
I
t is possible at any time to modify the
source for the video display (using button 6
or 7 on the control panel: the indicator lamp
for the source selected comes on) as well
as the audio channel (using the selector on
the headphones).
5
Fittings
Page 149 of 344
147
System which projects various information onto
a transparent blade in the driver's field of vision
so that they do not have to take their eyes off
the road.
This system operates when the engine is
running and the settings are stored when the
ignition is switched off.
Head-up display
1. Head-up display on / off.
2. Br ightness adjustment.
3.
D
isplay height adjustment. Once the system has been activated, the
following information is grouped together in the
head-up display:
A.
T
he speed of your vehicle.
B.
C
ruise control/speed limiter information.
ButtonsDisplays during operation
C. "Distance alert" information (depending on
ve r s i o n).
The blade is activated by pressing one
of the buttons. D.
N
avigation information (depending on
ve r s i o n).
F
or more information on the navigation
system, refer to the "Audio equipment and
telematics" section.
8
Driving
Page 150 of 344
148
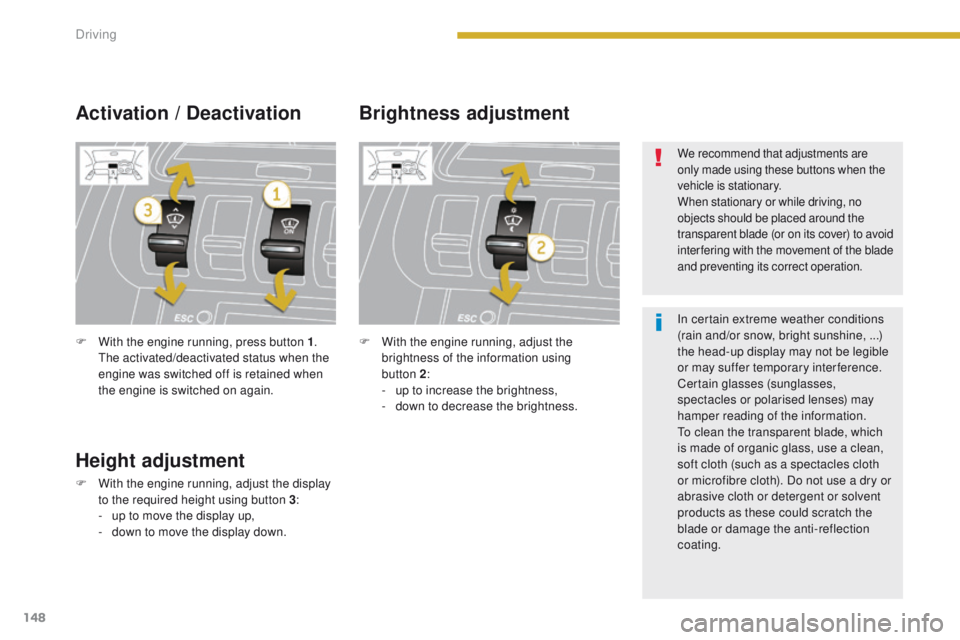
F With the engine running, press button 1.
The activated/deactivated status when the
engine was switched off is retained when
the engine is switched on again. F
W ith the engine running, adjust the
brightness of the information using
button
2:
-
u
p to increase the brightness,
-
d
own to decrease the brightness.
Activation / Deactivation Brightness adjustment
Height adjustment
F With the engine running, adjust the display to the required height using button 3 :
-
u
p to move the display up,
-
d
own to move the display down.
We recommend that adjustments are
only made using these buttons when the
vehicle is stationary.
When stationary or while driving, no
objects should be placed around the
transparent blade (or on its cover) to avoid
inter fering with the movement of the blade
and preventing its correct operation.
In certain extreme weather conditions
(rain and/or snow, bright sunshine, ...)
the head-up display may not be legible
or may suffer temporary interference.
Certain glasses (sunglasses,
spectacles or polarised lenses) may
hamper reading of the information.
To clean the transparent blade, which
is made of organic glass, use a clean,
soft cloth (such as a spectacles cloth
or microfibre cloth). Do not use a dry or
abrasive cloth or detergent or solvent
products as these could scratch the
blade or damage the anti-reflection
coating.
Driving
Page 151 of 344
149
Distance alert*
For the safety time to be observed, refer
to the current legislation or highway code
recommendations in your country.
The system operates when the speed of your
vehicle is higher than 45 mph (70 km/h) and
below 90 mph (150 km/h).
It has a programmable visual alert which
remains in the memory when the ignition is
switched off.
This system is a driving aid and cannot, in any
circumstances, take the place of vigilance on
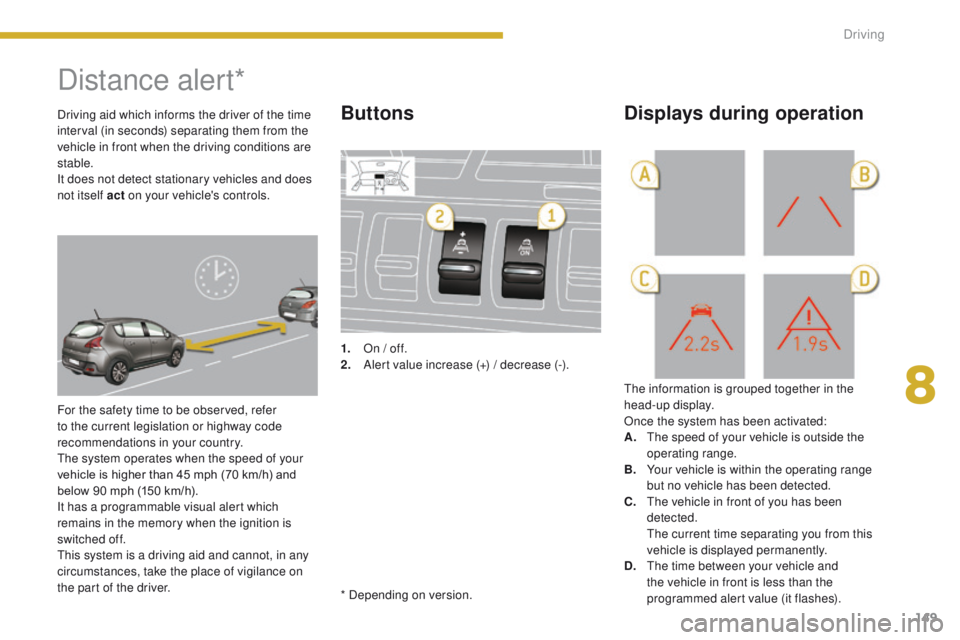
the part of the driver.1.
O
n / off.
2.
A
lert value increase (+) / decrease (-).
The information is grouped together in the
head-up display.
Once the system has been activated:
A.
T
he speed of your vehicle is outside the
operating range.
B.
Y
our vehicle is within the operating range
but no vehicle has been detected.
C.
T
he vehicle in front of you has been
detected.
T
he current time separating you from this
vehicle is displayed permanently.
D.
T
he time between your vehicle and
the vehicle in front is less than the
programmed alert value (it flashes).
Buttons Displays during operationDriving aid which informs the driver of the time
interval (in seconds) separating them from the
vehicle in front when the driving conditions are
stable.
It does not detect stationary vehicles and does
not itself act on your vehicle's controls.
* Depending on version.
8
Driving
Page 155 of 344
153
Programming
F Switch the speed limiter off by pressing button 4: the display confirms that it has
been switched off (OFF/Pause).
F
S
witch the speed limiter back on by
pressing button 4 again.
F
S
et the speed value by pressing button 2
or 3 (e.g.: 55 mph (90 km/h)).
You can then change the programmed speed
using buttons 2 and 3 :
-
b
y + or - 1 mph (km/h) = short press,
-
b
y + or - 5 mph (km/h) = long press,
-
i
n steps of + or - 5 mph (km/h) = maintained
press.
F
S
witch the speed limiter on by pressing
button 4 .
F
T
urn dial 1 to the "LIMIT" position: the
speed limiter mode is selected but is not
switched on (OFF/Pause).
You do not have to switch the speed limiter on
in order to set the speed.
8
Driving
Page 158 of 344
156
Programming
F Set the programmed speed by accelerating to the required speed, then press button 2
or 3 (e.g.: 70 mph (110 km/h)).
You can then change the programmed speed
using buttons 2 and 3 :
-
b
y + or - 1 mph (km/h) = short press,
-
b
y + or - 5 mph (km/h) = long press,
-
i
n steps of + or - 5 mph (km/h) = maintained
press. F
S witch off the cruise control by pressing
button 4: the display confirms that it has
been switched off (OFF/Pause).
F
S
witch the cruise control back on by
pressing button 4 again.
F
T
urn dial 1 to the "CRUISE" position: the
cruise control mode is selected but is not
switched on (OFF/Pause).
Driving
Page 159 of 344
157
Exceeding the programmed
speedReturn to normal driving
Operating fault
When the cruise control is switched on,
be careful if you maintain the pressure
on one of the programmed speed
changing buttons: this may result in
a very rapid change in the speed of
your
vehicle.
Do not use the cruise control on
slippery roads or in heavy traffic.
On a steep descent, the cruise control
will not be able to prevent the vehicle
from exceeding the programmed speed.
To avoid any risk of jamming of the
pedals:
-
e
nsure that the mat is positioned
c o r r e c t l y,
-
n
ever fit one mat on top of another.
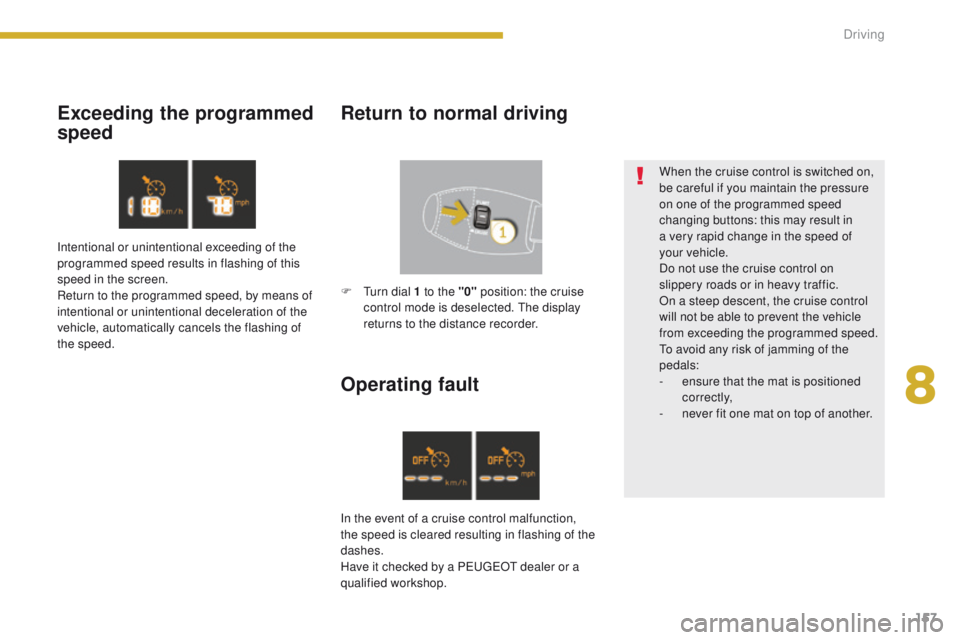
Intentional or unintentional exceeding of the
programmed speed results in flashing of this
speed in the screen.
Return to the programmed speed, by means of
intentional or unintentional deceleration of the
vehicle, automatically cancels the flashing of
the speed.
In the event of a cruise control malfunction,
the speed is cleared resulting in flashing of the
dashes.
Have it checked by a PEUGEOT dealer or a
qualified workshop. F
T
urn dial 1 to the "0" position: the cruise
control mode is deselected. The display
returns to the distance recorder.
8
Driving