Page 69 of 276

67Setting the time of the internal clock
Set the clock on the control panel before
programming the deferred switching on of
the heating.Press and hold the "set" button.
The time setting screen and
indicator come on.
Within ten seconds, press one of the two
setting buttons until the correct time is
displayed: -
">"
to increase the time,
or
-
"<"
reduce the time.
reading the time
Pr
OG
r
AMMABLE
A
dd
I
t
IO
n
AL
HEAt
I
n
G
If your vehicle is fitted with separate
programmable heating, it gradually brings
the engine up to a good temperature to
facilitate starting.
An integrated clock permits programming of
its start time. The passenger compartment
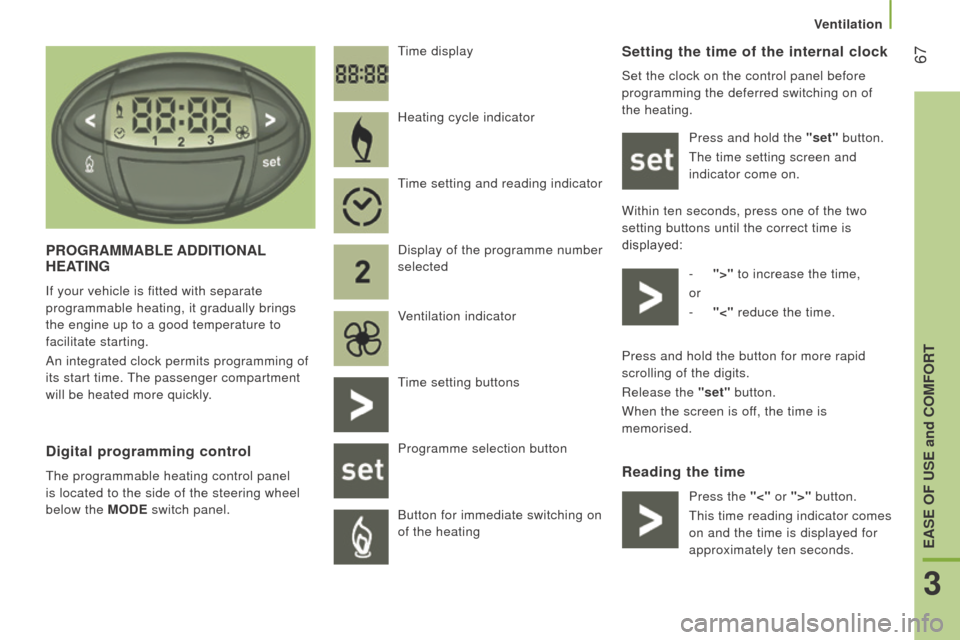
will be heated more quickly. Time display
digital programming control
The programmable heating control panel
is located to the side of the steering wheel
below the MO
d E switch panel. Heating cycle indicator
Time setting and reading indicator
Display of the programme number
selected
Ventilation indicator
Time setting buttons
Programme selection button
Button for immediate switching on
of the heating
Press and hold the button for more rapid
scrolling of the digits.
Release the "set" button.
When the screen is off, the time is
memorised.
Press the "<" or ">" button.
This time reading indicator comes
on and the time is displayed for
approximately ten seconds.
3
EASE OF uSE and cOMFOrt
Ventilation
Page 70 of 276

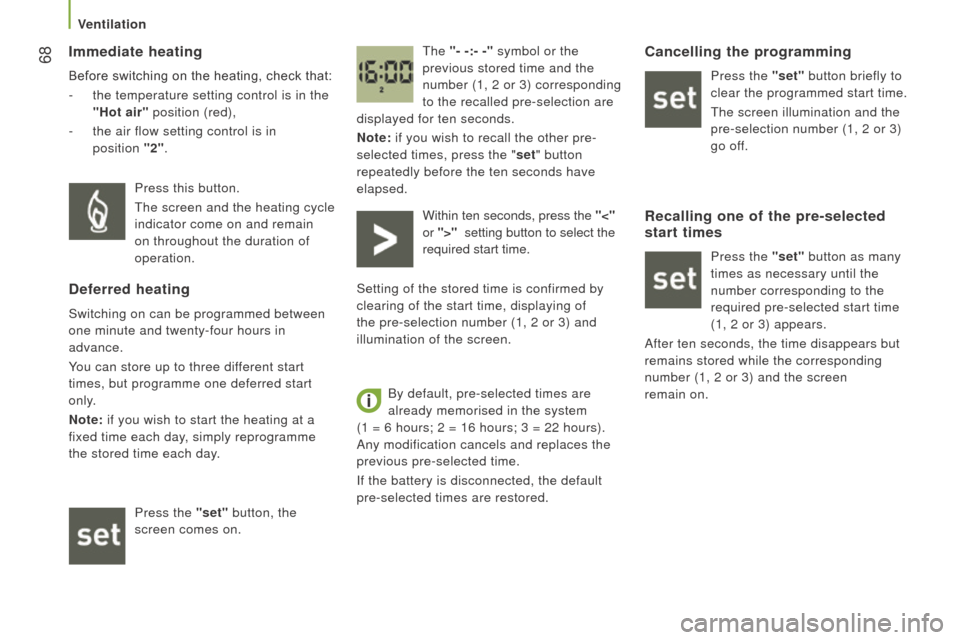
68Immediate heating
Before switching on the heating, check that:
-
the temperature setting control is in the
"Hot air" position (red),
-
the air flow setting control is in
position
"2"
. The
"- -:- -" symbol or the
previous stored time and the
number (1, 2 or 3) corresponding
to the recalled pre-selection are
displayed for ten seconds.
n
ote: if you wish to recall the other pre-
selected times, press the "set" button
repeatedly before the ten seconds have
elapsed.
Press this button.
The screen and the heating cycle
indicator come on and remain
on throughout the duration of
operation.
deferred heating
Switching on can be programmed between
one minute and twenty-four hours in
advance.
You can store up to three different start
times, but programme one deferred start
only.
n
ote: if you wish to start the heating at a
fixed time each day, simply reprogramme
the stored time each day.
Press the "set" button, the
screen comes on. Within ten seconds, press the "<"
or ">"
setting button to select the
required start time.
Setting of the stored time is confirmed by
clearing of the start time, displaying of
the pre-selection number (1, 2 or 3) and
illumination of the screen.
By default, pre-selected times are
already memorised in the system
(1
= 6 hours; 2 = 16 hours; 3 = 22 hours).
Any modification cancels and replaces the
previous pre-selected time.
If the battery is disconnected, the default
pre-selected times are restored.
cancelling the programming
Press the "set" button briefly to
clear the programmed start time.
The screen illumination and the
pre-selection number (1, 2 or 3)
go off.
recalling one of the pre-selected
start times
Press the "set" button as many
times as necessary until the
number corresponding to the
required pre-selected start time
(1, 2 or 3) appears.
After ten seconds, the time disappears but
remains stored while the corresponding
number (1, 2 or 3) and the screen
remain
on.
Ventilation
Page 71 of 276

69
Have the additional heating checked at
least once a year at the beginning of
winter. Maintenance and repairs should only
be carried out by a CITROËN dealer or a
qualified workshop.
Use only genuine replacement parts.
Switching off the heating
In the case of deferred operation, the
heating stops at the end of the programmed
period.
Good practice
To avoid any risk of poisoning or
asphyxiation, the additional heating must
not be used, even for short periods, in
an enclosed space such as a garage or
workshop which is not fitted with an exhaust
gas extraction system.
The additional heating switches off when the
battery voltage is low, so as to allow engine
starting.
The additional heating is supplied by the
vehicle's fuel tank. Ensure that the low fuel
warning lamp is not on.
Always switch off the additional heating
when filling with fuel to avoid any risk of fire
or explosion. The temperature near the heater must not
exceed 120
°C. A temperature higher than
this (for example in the case of painting in
an oven) could damage the components of
the electronic circuits.
The additional heating is fitted with
a temperature limiter which cuts off
the combustion in the event of engine
overheating due to a lack of coolant. Check
the level and if necessary top-up following
the advice given in the "Checks - Levels"
section. Then press the programme
selection button before switching the heating
on again.
Setting the operating
period
The period of operation can be set to
between 10 and 60 minutes.
Press and hold the "set" button.
At the same time press the "<"
or ">" button.
The time and the time setting
indicator come on.
Press and hold the "set" button again.
At the same time press the "<" or ">" button
again.
The programmed operating period is
displayed and the heating or ventilation
cycle indicator flashes.
Adjust the period by pressing the "<" or ">"
button.
The setting is confirmed by the period
disappearing from the screen or by pressing
the "set" button again In the case of immediate
operation, press this button again
to switch off manually.
The heating cycle indicator and
the screen go off.
3
EASE OF uSE and cOMFOrt
Ventilation
Page 72 of 276
70two additional uses
The additional heating is separate and
programmable. Before you enter the vehicle,
it gradually increases the temperature of the
engine to make starting easier. This also
facilitates passenger compartment heating,
demisting and defrosting.
Also, the additional passenger compartment
heating system supplements the standard
system. Its operation may be independent of
the engine. Switching on of the heating may
be programmable.
Ventilation
Page 150 of 276
148
Fuses in the engine
compartment
Remove the nuts and tilt the box to access
the fuses.
r
efit the cover carefully after checking or
replacing fuses. Fuses
A (amps) Allocation
1 40ABS pump supply
2 50Diesel pre-heat unit
3 30Ignition switch - Starter motor
4 40Fuel heater
5 20/50Cabin ventilation with additional programmable heating
(battery +)
6 40/60Cabin fan maximum speed (battery +)
7 40/50/60 Cabin fan minimum speed (battery +)
8 40Cabin fan assembly (ignition switch +)
9 15Rear 12 V socket (battery +)
10 15Horn
11 -Not used
14 15Front 12 V socket (battery +)
15 15Cigarette lighter (battery +)
16 -Not used
17 -Not used
18 7.5Engine management control unit (battery +)
19 7.5Air conditioning compressor
20 30Screenwash/headlamp wash pump
21 15Fuel pump supply
22 -Not used
23 30ABS electrovalves
24 7.5Auxiliary switch panel - Door mirror controls and folding
(ignition switch +)
30 15Door mirror heating
Failed fuse