2014 VOLVO S80 transmission
[x] Cancel search: transmissionPage 5 of 380

Contents
* Option/accessory, for more information, see Introduction.3
03
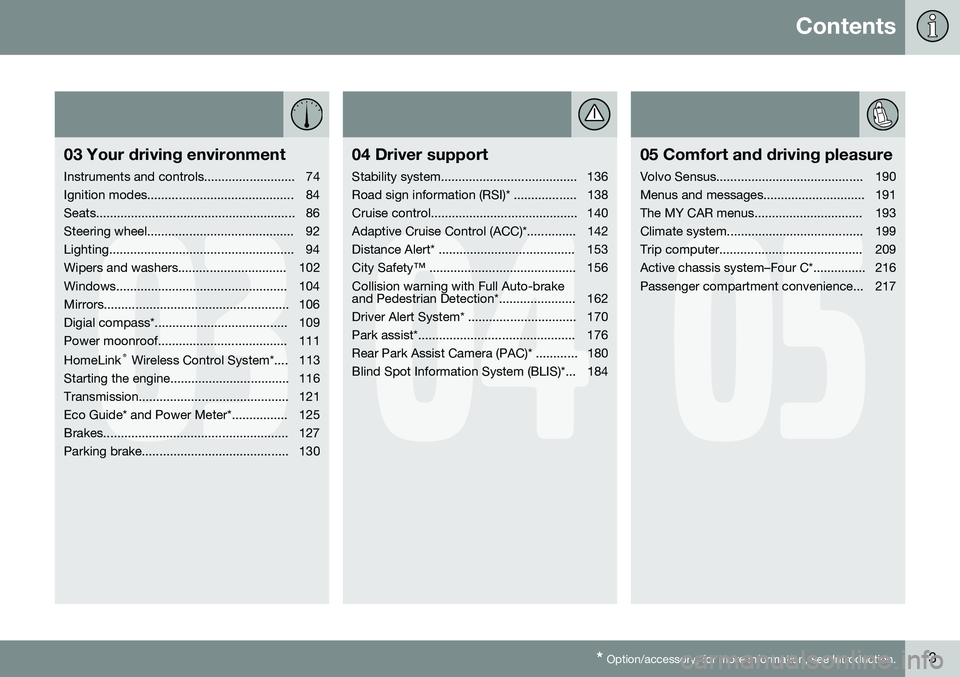
03 Your driving environment
Instruments and controls.......................... 74
Ignition modes.......................................... 84
Seats......................................................... 86
Steering wheel.......................................... 92
Lighting..................................................... 94
Wipers and washers............................... 102
Windows................................................. 104
Mirrors..................................................... 106
Digial compass*...................................... 109
Power moonroof..................................... 111 HomeLink ®
Wireless Control System*.... 113
Starting the engine.................................. 116
Transmission........................................... 121
Eco Guide* and Power Meter*................ 125
Brakes..................................................... 127
Parking brake.......................................... 130
04
04 Driver support
Stability system....................................... 136
Road sign information (RSI)* .................. 138
Cruise control.......................................... 140
Adaptive Cruise Control (ACC)*.............. 142
Distance Alert* ....................................... 153
City Safety™ .......................................... 156Collision warning with Full Auto-brake
and Pedestrian Detection*...................... 162
Driver Alert System* ............................... 170
Park assist*............................................. 176
Rear Park Assist Camera (PAC)* ............ 180
Blind Spot Information System (BLIS)*... 184
05
05 Comfort and driving pleasure
Volvo Sensus.......................................... 190
Menus and messages............................. 191
The MY CAR menus............................... 193
Climate system....................................... 199
Trip computer......................................... 209
Active chassis system–Four C*............... 216
Passenger compartment convenience... 217
Page 60 of 380

02 Locks and alarm
Remote key and key blade
02
58* Option/accessory, for more information, see Introduction.
NOTE
Any excess weight (snow, etc.) on the trunk lid may prevent it from opening.
See also page 68 for information on open- ing the trunk from the passenger compart-ment. After closing, the trunk will not automatically relock. Press Lock to relock it and rearm thealarm.
Panic alarm – This button can be used
to attract attention during emergency situa- tions. To activate the panic alarm, press and hold this button for at least 3 seconds or press ittwice within 3 seconds. The turn signals andhorn will be activated. The panic alarm willstop automatically after 2 minutes and45 seconds. To deactivate, wait approximately 5 seconds and press the button again. The Panic alarm button will not unlock the vehicle.
RangeThe remote key has a range of approximately60 ft. (20 m) from the vehicle.
NOTE
Buildings or other obstacles may interfere with the function of the remote key. Thevehicle can also be locked or unlockedwith the key blade, see page 60.
If the remote key is removed from the vehicle while the engine is running or if the ignition isin mode I or II and all of the doors are closed,
a message will appear in the instrument paneldisplay and there will be an audible signal. When the remote key is returned to the vehi- cle, the message will be erased and the audi-ble signal will stop after one of the followinghas been done: • The remote key is inserted in the ignition slot
• The vehicle's speed exceeds 20 mph(30 km/h)
• The
OK button on the left steering wheel
lever is pressed
Unique functions—PCC*
Information button
Indicator lights
Pressing the information button provides cer- tain information about the vehicle with thehelp of the indicator lights.
Using the information button1. Press the information button .
2. All of the indicator lights will flash sequentially for approximately 7 seconds to indicate that the PCC is receiving infor-mation from the vehicle. If any of the but-tons are pressed during this 7-secondperiod, transmission of information to thePCC will be interrupted.
Page 61 of 380

02 Locks and alarm
Remote key and key blade
02
59
NOTE
If none of the indicator lights flash when the information button has been pressedseveral times from different places in rela-tion to the vehicle, contact an authorizedVolvo service technician.
The indicator lights provide information according to the illustration:
Steady green light: the vehicle is correctly locked.
Steady yellow light: the vehicle is not locked.
Steady red light: the alarm has been trig- gered since the vehicle was most recentlylocked.
Both red lights flash alternatively: the alarm was triggered less than 5 minutesago.
RangeThe PCC's lock and unlock functions have arange of approximately 60 ft. (20 m) from thevehicle.
NOTE
•The approach lighting, panic alarm, and the functions controlled by theinformation button have a range ofapproximately 300 ft (100 m) from thevehicle.
• Radio waves, buildings or other obsta-cles may interfere with the function ofthe PCC.
If the vehicle does not provide confirmation when a button has been pressed, try movingcloser and pressing the button again.
Outside of the PCC´s rangeIf the PCC is more than approximately 300 ft (100 m) from the vehicle when the informationbutton is pressed, no new information will bereceived. The PCC most recently used to lock or unlock the vehicle will show the vehicle'smost recently received status. The indicatorlights will not flash when the information but-ton is pressed while the PCC is out of range. If more than one PCC is used to lock/unlock the vehicle, only the one used most recentlywill show the correct locking status.
NOTE
If none of the indicator lights illuminate when the information button is pressed,this may be because the most recenttransmission between the vehicle and thePCC was interrupted or impeded by build-ings or other objects.
Keyless driveVehicles equipped with the optional Personal Car Communicator have the keyless drivefunction, see page 64 for detailed informa-tion.
Page 62 of 380

02 Locks and alarm
Remote key and key blade
02
60* Option/accessory, for more information, see Introduction.
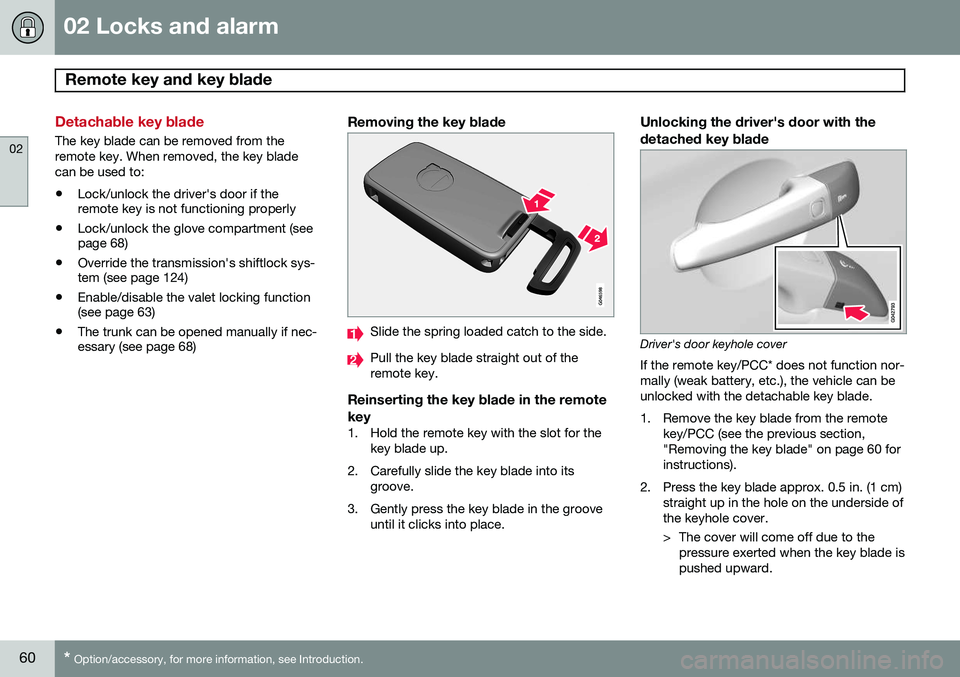
Detachable key blade
The key blade can be removed from the remote key. When removed, the key bladecan be used to:
• Lock/unlock the driver's door if the remote key is not functioning properly
• Lock/unlock the glove compartment (seepage 68)
• Override the transmission's shiftlock sys-tem (see page 124)
• Enable/disable the valet locking function(see page 63)
• The trunk can be opened manually if nec-essary (see page 68)
Removing the key blade
Slide the spring loaded catch to the side.
Pull the key blade straight out of the remote key.
Reinserting the key blade in the remote key
1. Hold the remote key with the slot for the
key blade up.
2. Carefully slide the key blade into its groove.
3. Gently press the key blade in the groove until it clicks into place.
Unlocking the driver's door with thedetached key blade
Driver's door keyhole cover If the remote key/PCC* does not function nor- mally (weak battery, etc.), the vehicle can beunlocked with the detachable key blade.
1. Remove the key blade from the remote key/PCC (see the previous section, "Removing the key blade" on page 60 forinstructions).
2. Press the key blade approx. 0.5 in. (1 cm) straight up in the hole on the underside ofthe keyhole cover.
> The cover will come off due to thepressure exerted when the key blade is pushed upward.
Page 74 of 380

72* Option/accessory, for more information, see Introduction. Instruments and controls........................................................................ 74 Ignition modes........................................................................................ 84Seats....................................................................................................... 86Steering wheel........................................................................................ 92Lighting................................................................................................... 94
Wipers and washers.............................................................................. 102Windows............................................................................................... 104Mirrors................................................................................................... 106
Digial compass*.................................................................................... 109
Power moonroof................................................................................... 111 HomeLink
®
Wireless Control System*.................................................. 113
Starting the engine................................................................................ 116 Transmission......................................................................................... 121
Eco Guide* and Power Meter*.............................................................. 125Brakes................................................................................................... 127Parking brake........................................................................................ 130
Page 80 of 380

03 Your driving environment
Instruments and controls
03
78* Option/accessory, for more information, see Introduction.
Indicator and warning symbols: digital instrument panel
Indicator symbols
Indicator and warning symbols
Warning symbols
Function checkAll indicator and warning symbols light up in ignition mode II or when the engine is started.
When the engine has started, all the symbolsshould go out except the parking brake sym-bol, which only goes out when the brake isdisengaged. If the engine does not start or if the function check is carried out in ignition mode II, all
symbols go out after 5 seconds except themalfunction indicator light, which may indi- cate a fault in the vehicle's emissions system,and the symbol for low oil pressure. Some of the symbols shown may not be available in all markets or models.
Indicator symbols
SymbolDescription
Fault in the Active Bending Light (ABL)*system
Malfunction indicator light
Anti-lock brake system (ABS)
Rear fog lights on
Stability system
The stability system's Sport mode is activated
Low fuel level
Information symbol, read the text displayed in the instrumentpanel
High beam indicator
SymbolDescription
Left turn signal indicator
Right turn signal indicator
Tire pressure monitoring sensor (TPMS)
A
A
Option in Canada
Fault in the Active Bending Light
(ABL) system
This symbol will illuminate if there is a fault in the ABL system. See page 97 for moreinformation about this system.
Malfunction Indicator Light
As you drive, a computer called On-Board Diagnostics II (OBDII) monitors your vehicle'sengine, transmission, electrical and emissionsystems. The malfunction indicator light will illuminate if the computer senses a condition that poten-tially may need correcting. When this hap-pens, please have your vehicle checked by atrained and qualified Volvo service technicianas soon as possible. A malfunction indicator light may have many causes. Sometimes, you may not notice a
Page 93 of 380

03 Your driving environment
Seats
03
91
CAUTION
To help avoid damage to the upholstery, there should be no objects on the rear seatand the seat belt should not be buckledwhen the backrest is folded down.
WARNING
•Keep vehicle doors and trunk locked and keep keys out of a child’s reach.Unsupervised children could lockthemselves in an open trunk and riskinjury. Children should be taught not toplay in vehicles.
• On hot days, the temperature in thetrunk or vehicle interior can rise veryquickly. Exposure of people to thesehigh temperatures for even a shortperiod of time can cause heat-relatedinjury or death. Small children are par-ticularly at risk.
WARNING
•When one or more sections of the backrest is returned to the uprightposition, check that it is properlylocked in place by pushing and pullingit. The red indicators should also notbe visible.
• Return the outboard head restraints tothe upright position.
• Long loads should always be securelyanchored to help avoid injury in theevent of a sudden stop.
• Always turn the engine off and applythe parking brake when loading/unloading the vehicle.
• Place the transmission in the Park (
P)
position to help prevent inadvertentmovement of the gear selector.
• On hot days, the temperature in thevehicle interior can rise very quickly.Exposure of people to these high tem-peratures for even a short period oftime can cause heat-related injury ordeath. Small children are particularly atrisk.
Page 109 of 380

03 Your driving environment
Mirrors
03
}}
* Option/accessory, for more information, see Introduction.107
Automatically tilting the door mirrors when parking
The door mirrors can tilt down automatically to help give the driver a better view along thesides of the vehicle, for example when paral-lel parking. When the transmission is nolonger in reverse, the mirrors will automati-cally return to their original position. This function can be activated/deactivated in MY CAR under
SettingsCar settings
Side mirror settingsIn reverse gear tilt
left mirror
or In reverse gear tilt right
mirror. See page 193 for information about
the MY CAR menu system.
Automatic retraction when lockingWhen the vehicle is locked/unlocked with the remote key the door mirrors are automaticallyretracted/extended. The function can be activated/deactivated in MY CAR under
SettingsCar settings
Side mirror settingsRetract side mirrors
when locking. See page 193 for a descrip-
tion of the menu system.
Resetting to neutralMirrors that have been moved out of position by an external force must be electrically resetto the neutral position for electric retracting/extending to work. •
Retract the mirrors with the
L and R but-
tons.
• Fold them out again with the
L and R but-
tons.
The mirrors are now reset in neutral position.
Home safe and approach lightingThe light on the door mirrors comes on whenapproach lighting or home safe lighting isselected, see page 100.
Heated windshield*, rear window and door mirror defrosters
Max. defroster/heated windshield (1), rear win- dow and door mirror defroster (2)
Press button (1) to defrost/de-ice the wind- shield and/or button (2) to defrost the rearwindow and door mirrors. The indicator lights in the respective buttons indicate that thefunction is active. Switch the function offwhen then windshield/rear window/mirrorshave cleared to help avoid battery drain.Theheating function will also switch off automati-cally after a certain amount of time. The rear window is then defogged/de-iced (the function will switch on and off automati-cally unitl the ignition is switched off) if theambient temperature remains below 45 °F(7 °C). Auto-defrosting for the rear window and door mirrors (if the vehicle is started when theambient temperature is below 45 °F (7 °C)can be selected in
MY CAR under
Settings
Climate settingsAutomatic rear
defroster. See page 193 for a description of
the menu system.
Interior rearview mirror
Auto-dim functionThe interior rearview mirror’s auto-dim func- tion is controlled by two sensors: one point-ing forward (located on the forward-facingside of the mirror, which monitors the amountof ambient light) and one pointing rearward(located on the side of the mirror facing thedriver at the upper edge, which senses the