2014 VOLKSWAGEN TIGUAN brake light
[x] Cancel search: brake lightPage 302 of 418

WARNING
The engine compartment of any motor vehicle is a potentially dangerous area and can cause serious personal injury.
�x Always use extreme caution when doing any work in the engine compartment. Always follow commonly accepted safety practices and use common sense. Never risk personal injury.
�x Never perform any work in the engine compartment unless you know exactly how to carry out the job and have the correct technical information and the correct tools.
�x If you are uncertain about what to do, have the work performed by an authorized Volkswagen dealer, an authorized Volkswagen Service Facility, or another qualified workshop. Serious personal injury may result from improperly performed work.
�x We strongly recommend that you always have HID - High Intensity Discharge (Xenon) lights and H7/H15 bulbs replaced by a qualified technician. Serious personal injury may result from improperly performed work.
�x Never open or close the engine hood if steam or coolant is escaping. Hot steam or coolant can cause serious burns. Always wait until you no longer see or hear steam or coolant escaping from the engine.
�x Always let the engine cool down completely before carefully opening the hood.
�x Hot parts of the engine and the exhaust system will burn skin on contact.
�x When the engine has cooled down and you are ready to open the hood:
– Firmly apply the parking brake and shift the transmission into Park (P) (automatic) or Neutral (manual only).
– Take the vehicle key out of the ignition.
– On vehicles with Keyless Access, make sure that the remote control vehicle key is out of range of the vehicle and that the vehicle cannot be started by depressing the starter button.
– Always keep children and others away from the engine compartment and never leave them unsupervised.
�x The engine coolant system is under pressure when the engine is hot. Never unscrew the coolant expansion tank cap when the engine is hot. Hot coolant can spray out and cause severe burns and other serious injuries.
– Turn the cap slowly and very carefully in a counterclockwise direction while applying light downward pressure on the top of the cap.
– Always protect your face, hands, and arms from hot escaping coolant or steam by covering the cap with a large, thick rag.
�x Never spill fluids on the engine or exhaust system when refilling. Spilling fluids onto hot parts of the engine or exhaust system can cause a fire.
Page 303 of 418
WARNING
High voltage systems in the engine compartment can cause electrical shocks or even electrocution, severe burns, other serious injuries, and even death!
�x Never short-circuit the electrical system. Be especially careful when using jumper cables. The vehicle's battery could explode!
�x To reduce the risk of electrical shock and personal injury while the engine is running or being started:
– Never touch ignition cables. Never touch other components of the high voltage electronic ignition system.
– Never touch the wiring of the HID - High Intensity Discharge (Xenon) headlights.
�x Read and heed the important information and warnings on cleaning the engine compartment
WARNING
Moving parts in the engine compartment can cause serious personal injury on contact.
�x Never reach into the area around or touch the radiator fan. Contact with the blades can cause serious personal injury. Always remember that the radiator fan is temperature-controlled and can come on suddenly even when the engine has been switched off for a while and the key has been removed from the ignition.
�x If you have to perform a check or repair when the engine is running, there are more risks from the rotating parts, such as the drive belts, alternator, radiator fan, etc., and from the high-voltage ignition system. Always use extreme care.
– Always make sure that jewelry, loose clothing and long hair do not get caught in rotating engine parts. Before starting any work remove your jewelry, take off your necktie, tie back and cover your hair, and do not wear clothing that can hang down and get caught in moving engine parts.
– Always use extreme caution if the accelerator pedal has to be depressed to perform a check. The vehicle will start to move even if the electronic parking brake is on.
�x Never leave any objects in the engine compartment, for example cleaning rags and tools. Objects left behind can cause malfunctions, engine damage, and even fires.
WARNING
Operating fluids and some materials in the engine compartment can catch fire easily, causing burns and other serious personal injuries!
�x Do not smoke.
�x Never work next to open flames or sparks.
�x Never pour or spill operating fluids or other flammable liquids on the engine. These fluids can ignite on hot engine parts and cause injuries.
�x If work on the fuel system or the electrical system is necessary:
– Always disconnect the 12 Volt vehicle battery. Make sure the vehicle is unlocked when you disconnect the battery, or the alarm will go off. Never touch the electrical wiring of the ignition system.
– Never work near heaters, water heaters, or other open flames.
�x Always have a functional, approved fire extinguisher nearby.
Page 319 of 418
Adding engine coolant
�x Always protect face, hands and arms from hot escaping coolant or steam by covering the cap with a large, thick rag.
�x Carefully unscrew the cap ⇒ .
�x Add only new engine coolant according to Volkswagen specifications (⇒ Engine coolant
specifications) ⇒ .
�x The engine coolant level must be inside the marks on the side of the reservoir . Do not fill above
the top edge of the filling range! ⇒
�x Screw the lid tightly.
�x Even in an emergency, do not use any other kind of coolant additive if engine coolant meeting
Volkswagen specifications (⇒ Engine coolant specifications) is unavailable! Instead, add distilled
water only ⇒ . As soon as possible, have the correct coolant ratio restored using engine coolant
that meets Volkswagen specifications ⇒ Engine coolant specifications.
WARNING
Hot steam and hot engine coolant can cause serious burns.
�x Never open the hood if you see steam or coolant escaping from the engine compartment. Always wait until you no longer see or hear steam or coolant escaping from the engine.
�x Always let the engine cool down completely before carefully opening the hood. Hot components will burn skin on contact.
�x When the engine has cooled down and you are ready to open the hood:
– Apply the electronic parking brake and shift the transmission into Park (P) (automatic) or Neutral (manual only).
– Take the vehicle key out of the ignition.
– On vehicles with Keyless Access, make sure that the remote control vehicle key is out of range of the vehicle and that the vehicle cannot be started by depressing the starter button
– Always keep children and others away from the engine compartment and never leave them unsupervised.
�x The engine coolant system is under pressure when the engine is hot. Never unscrew the coolant expansion tank cap when the engine is hot. Hot coolant can spray out and cause severe burns and other serious injuries.
– Turn the cap slowly and very carefully in a counterclockwise direction while applying light downward pressure on the top of the cap.
– Always protect your face, hands, and arms from hot escaping coolant or steam by covering the cap with a large, thick rag.
�x Never spill fluids on the engine or exhaust system when refilling. Spilling fluids onto hot parts of the engine or exhaust system can cause a fire. Under some conditions, the ethylene glycol in engine coolant can catch fire.
NOTICE
�x Use distilled water only when adding coolant! All other types of water contain chemical compounds that can cause extensive corrosion damage to the engine. This can even lead to engine failure. If you have added non-distilled water, take the vehicle immediately to an authorized Volkswagen dealer or an authorized Volkswagen Service Facility to have the coolant system drained, flushed, and refilled completely with the proper coolant.
Page 330 of 418
WARNING
After the vehicle has been washed, the wet brakes or, in winter, brake discs or pads coated with ice, react slower and need longer stopping distances.
�x Always dry the brakes and clean off any ice coatings with a few careful applications of the brake. Make sure not to endanger other motorists or cyclists or disobey legal requirements.
CAUTION
Sharp edges under the vehicle can cut exposed skin.
�x Always protect your hands and arms from cuts on sharp metal edges when cleaning the underbody, the inside of the wheel housings, etc.
NOTICE
�x The water temperature must not be more than +140 °F (+60 °C).
�x To help prevent damage to the paint, do not wash the vehicle in direct sunlight.
�x Do not use insect sponges, abrasive kitchen sponges or similar things to clean the vehicle. These can damage the paint finish.
�x Never clean headlights with a dry cloth or sponge. Always use a wet cloth or sponge. For best results use soapy water.
�x When washing or rinsing the vehicle in cold weather, do not let water get into the lock cylinders or point the hose at gaps around the doors, hood, or rear hatch. The water could freeze on the locks and seals and make it difficult to open the vehicle!
NOTICE
To help prevent vehicle damage in a car wash:
�x Compare the vehicle track width with the dimensions of the guide rails in the car wash to help prevent damage to wheel rims and tires!
�x Switch off the rain sensor before driving through a car wash 122.
�x Make sure there is enough clearance for the height and width of the vehicle.
�x To help prevent paint damage to the engine hood, place wiper blades against the windshield after they have dried. Do not let them snap back into place.
�x Fold the outside mirrors toward the vehicle body. Do not fold power mirrors manually!
�x Lock the rear hatch to prevent unintentional opening in the car wash.
Washing with a power washer
�
Page 331 of 418
Never use a power washer to clean the engine compartment ⇒ Cleaning the engine compartment.
WARNING
Improper use of power washers can cause serious invisible permanent damage leading to tire failure and loss of vehicle control. This can cause accidents and severe personal injury.
�x Keep sufficient distance between water jet and tires. Never wash tires with a nozzle that sprays the water out in a direct stream regardless of the distance to the tire and even for a very short time.
�x Never use “dirt blasters” to clean tires. Even spraying from a relatively long distance for a very short time can do visible or invisible damage to tires.
WARNING
After the vehicle has been washed, the wet brakes or, in winter, brake discs or pads coated with ice, react slower and need longer stopping distances.
�x Always dry the brakes and clean off any ice coatings with a few careful applications of the brake. Make sure not to endanger other motorists or cyclists or disobey legal requirements.
NOTICE
�x Water temperature should not be more than +140 °F (+60 °C).
�x To help prevent damage to the paint, do not wash the vehicle in direct sunlight.
�x When using a power washer or steam cleaner, only spray the rear assist sensors directly for a short period of time and always keep the nozzle at least 4 inches (10 cm) from the sensor.
�x Do not clean icy or snow-covered windows with a power washer.
�x When washing or rinsing the vehicle in cold weather, do not let water get into the lock cylinders or point the hose at gaps around the doors, hood, or rear hatch. The water could freeze on the locks and seals and make it difficult to open the vehicle!
Cleaning windows and outside mirrors
�
Page 336 of 418
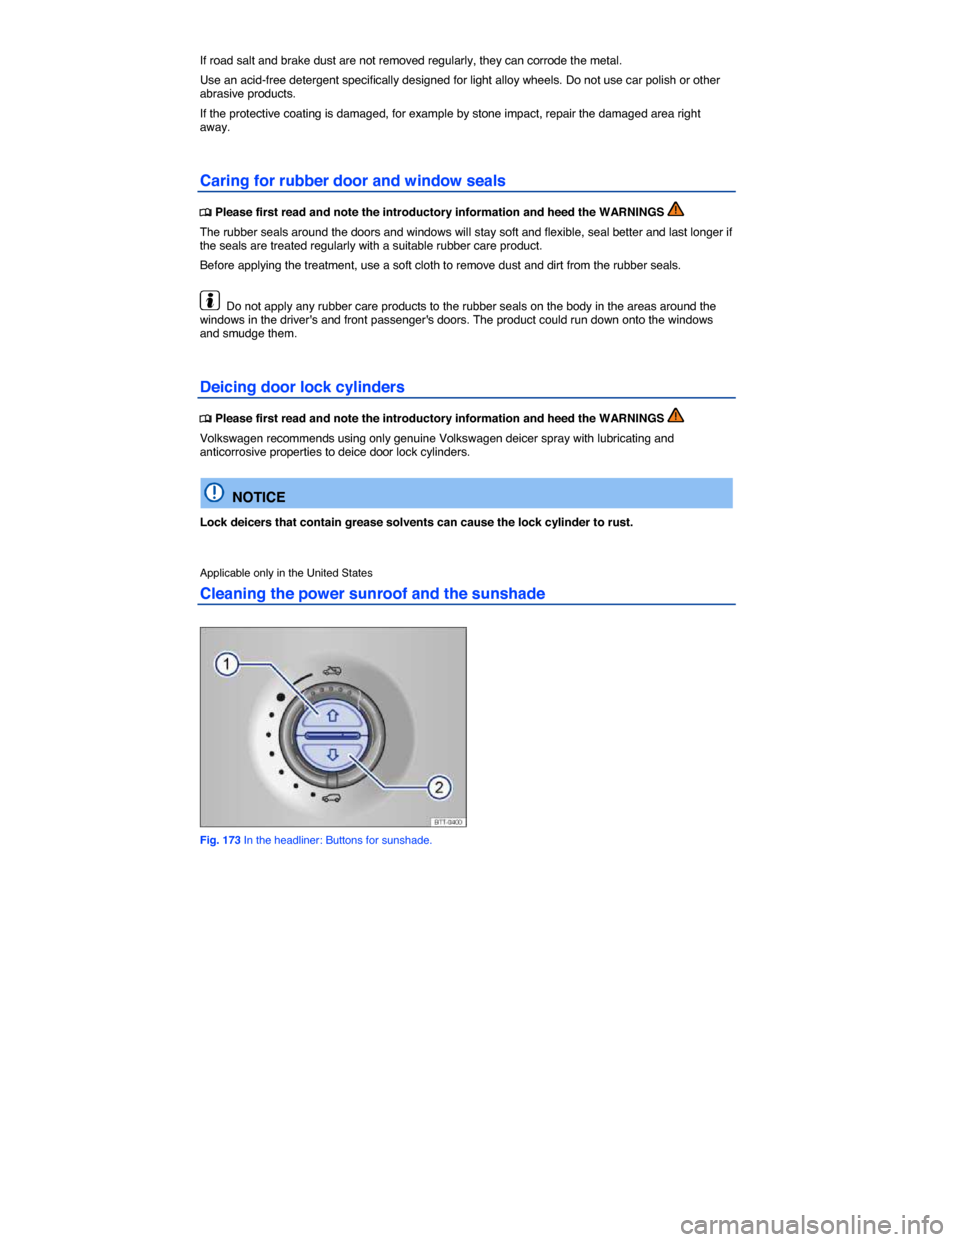
If road salt and brake dust are not removed regularly, they can corrode the metal.
Use an acid-free detergent specifically designed for light alloy wheels. Do not use car polish or other abrasive products.
If the protective coating is damaged, for example by stone impact, repair the damaged area right away.
Caring for rubber door and window seals
�
Page 362 of 418

Frequently asked questions (FAQ)
If you suspect a malfunction or vehicle damage, read and follow the following advice before contacting an authorized Volkswagen dealer or an authorized Volkswagen Service Facility. You may also find helpful information under “Characteristics” and “Checklist” in the index.
Description Possible causes among others Possible remedy
Engine does not start.
Vehicle battery dead. – Perform jump start – Charge vehicle battery
The wrong remote control vehicle key is used. Use a valid remote control vehicle key
Fuel level too low. Refuel
Vehicle cannot be locked or unlocked using remote control vehicle key.
– Battery in remote control vehicle key dead. – Too far away from vehicle.(out of range). – Buttons have been pressed too many times.
– Replace battery in the remote control key – Move closer to vehicle. – Synchronize remote control vehicle key – Lock or unlock vehicle manually
Unusual noises. Cold engine, braking support systems, electronic parking brake.
Check the “Noises” entry in the keyword index.
Odd driving behavior. Assistance systems activated. Check the “Assistance systems” entry in the index.
Driver seat and outside mirrors move when vehicle is unlocked.
Convenience settings are stored. Correct convenience settings
Memory-seat settings are stored. – Reassign seat setting – Clear memory-seat memory
Front seats cannot be adjusted with power controls.
Vehicle battery dead. Charge vehicle battery
Fuse blown. Check fuse and replace if necessary
Features do not work as described in this manual.
Settings were adjusted in the Volkswagen Information System.
Check and reset to factory settings if necessary
Headlights do not light up the road as they should.
– Headlights incorrectly adjusted. – Light bulbs burned out. – Low beams not switched on.
Have the headlight range adjusted by an authorized Volkswagen dealer or an authorized Volkswagen Service Facility. Adjust headlight range – Change light bulbs – Switch on low beams
Page 402 of 418
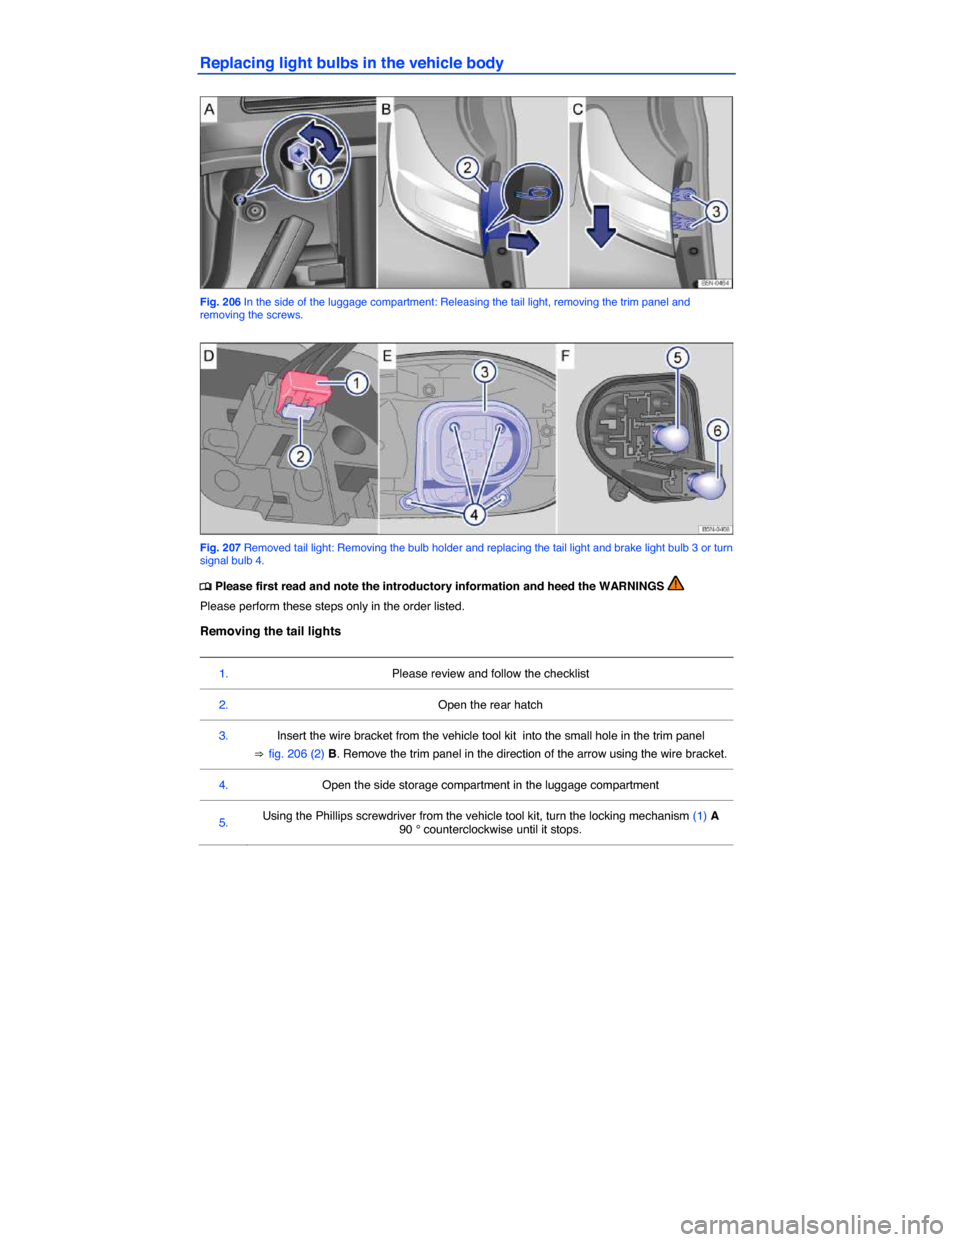
Replacing light bulbs in the vehicle body
Fig. 206 In the side of the luggage compartment: Releasing the tail light, removing the trim panel and removing the screws.
Fig. 207 Removed tail light: Removing the bulb holder and replacing the tail light and brake light bulb 3 or turn signal bulb 4.
�