Page 48 of 201

46Seats, restraints
Each airbag is triggered only once.
Have deployed airbags replaced by
a workshop. Furthermore, it may be
necessary to have the steering
wheel, the instrument panel, parts of the panelling, the door seals,
handles and the seats replaced.
Do not make any modifications to
the airbag system as this will
invalidate the vehicle type approval.
When the airbags inflate escaping hot gases may cause burns.
Control indicator v for airbag systems
3 78.
Child restraint systems on front
passenger seat with airbag
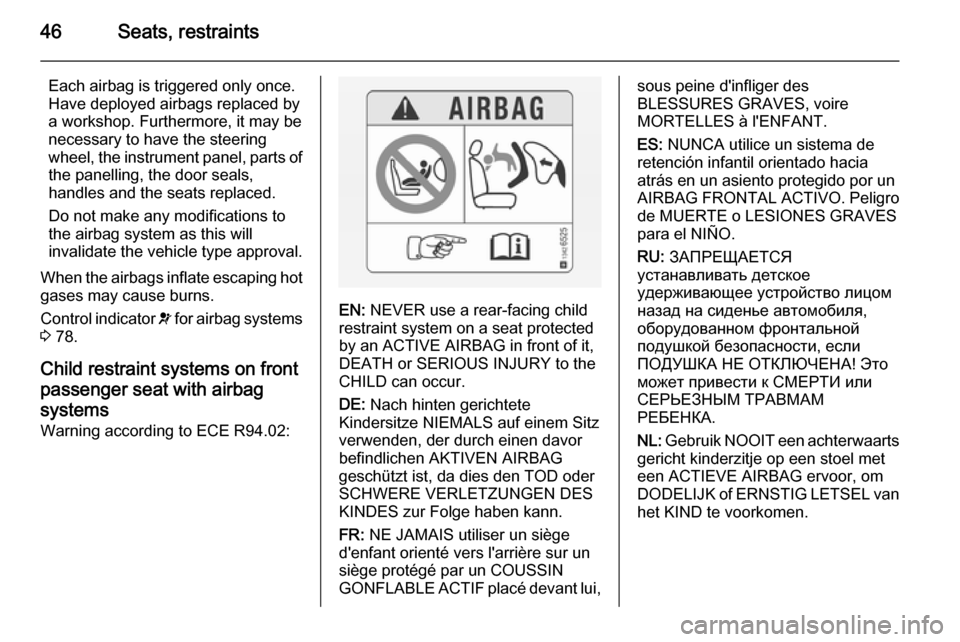
systems Warning according to ECE R94.02:
EN: NEVER use a rear-facing child
restraint system on a seat protected
by an ACTIVE AIRBAG in front of it,
DEATH or SERIOUS INJURY to the
CHILD can occur.
DE: Nach hinten gerichtete
Kindersitze NIEMALS auf einem Sitz
verwenden, der durch einen davor
befindlichen AKTIVEN AIRBAG
geschützt ist, da dies den TOD oder
SCHWERE VERLETZUNGEN DES
KINDES zur Folge haben kann.
FR: NE JAMAIS utiliser un siège
d'enfant orienté vers l'arrière sur un
siège protégé par un COUSSIN
GONFLABLE ACTIF placé devant lui,
sous peine d'infliger des
BLESSURES GRAVES, voire
MORTELLES à l'ENFANT.
ES: NUNCA utilice un sistema de
retención infantil orientado hacia
atrás en un asiento protegido por un
AIRBAG FRONTAL ACTIVO. Peligro de MUERTE o LESIONES GRAVES
para el NIÑO.
RU: ЗАПРЕЩАЕТСЯ
устанавливать детское
удерживающее устройство лицом
назад на сиденье автомобиля,
оборудованном фронтальной
подушкой безопасности, если
ПОДУШКА НЕ ОТКЛЮЧЕНА! Это
может привести к СМЕРТИ или
СЕРЬЕЗНЫМ ТРАВМАМ
РЕБЕНКА.
NL: Gebruik NOOIT een achterwaarts
gericht kinderzitje op een stoel met
een ACTIEVE AIRBAG ervoor, om
DODELIJK of ERNSTIG LETSEL van het KIND te voorkomen.
Page 51 of 201

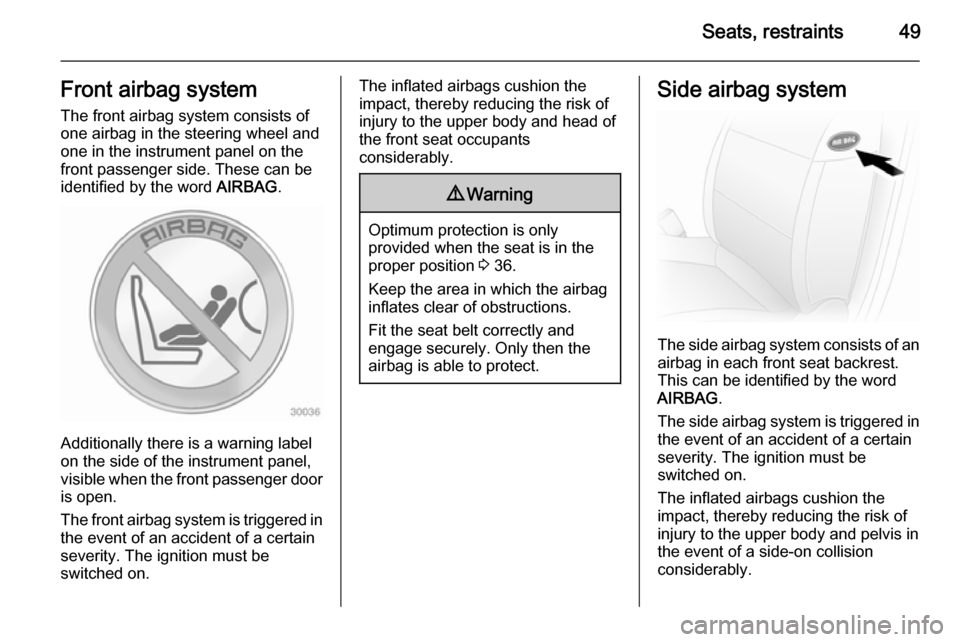
Seats, restraints49Front airbag systemThe front airbag system consists of
one airbag in the steering wheel and
one in the instrument panel on the
front passenger side. These can be
identified by the word AIRBAG.
Additionally there is a warning label
on the side of the instrument panel,
visible when the front passenger door
is open.
The front airbag system is triggered in
the event of an accident of a certain
severity. The ignition must be
switched on.
The inflated airbags cushion the
impact, thereby reducing the risk of
injury to the upper body and head of
the front seat occupants
considerably.9 Warning
Optimum protection is only
provided when the seat is in the
proper position 3 36.
Keep the area in which the airbag
inflates clear of obstructions.
Fit the seat belt correctly and
engage securely. Only then the
airbag is able to protect.
Side airbag system
The side airbag system consists of an
airbag in each front seat backrest.
This can be identified by the word
AIRBAG .
The side airbag system is triggered in the event of an accident of a certain
severity. The ignition must be
switched on.
The inflated airbags cushion the
impact, thereby reducing the risk of
injury to the upper body and pelvis in
the event of a side-on collision
considerably.
Page 70 of 201
68Instruments and controlsInstruments and
controlsControls ....................................... 68
Warning lights, gauges and indi‐
cators ........................................... 73
Information displays .....................83
Vehicle messages ........................ 83
Trip computer ............................... 85
Tachograph .................................. 86Controls
Steering wheel adjustment
Unlock lever, adjust steering wheel,
then engage lever and ensure it is fully locked.
Do not adjust steering wheel unless
vehicle is stationary and steering
wheel lock has been released.
Steering wheel controls
The cruise control and speed limiter
can be operated via the controls on
the steering wheel.
Cruise control and speed limiter
3 121.
Page 72 of 201
70Instruments and controls
Adjustable sensitivity of the rain
sensor
Turn the adjuster wheel to adjust the
sensitivity:Low
sensi‐
tivity=turn adjuster wheel
downwardsHigh
sensi‐
tivity=turn adjuster wheel
upwards
Keep the sensor free from dust, dirt
and ice.
Windscreen washer
Pull lever. Washer fluid is sprayed
onto the windscreen.
short
pull=wiper swipes oncelong pull=wiper swipes for a few
strokesOutside temperature
A drop in temperature is indicated
immediately and a rise in temperature
after a time delay.
If outside temperatures drop to 3 °C, the °C flashes in the information
display as a warning for icy road
conditions.This will continue to flash
until temperatures rise above 3 °C.
Page 83 of 201

Instruments and controls81Caution
Coolant temperature too high.
Check coolant level 3 135.
If there is sufficient coolant, consult a workshop.
Preheating
! illuminates yellow.
Preheating is activated.Only
activates when outside temperature is low.
Diesel particle filter
8
Not used.
Diesel particle filter 3 79, 3 112.
Engine oil pressure I illuminates red.
Illuminates briefly when the ignition is
switched on.
Illuminates when the engine is
runningCaution
Engine lubrication may be
interrupted. This may result in
damage to the engine and/or
locking of the drive wheels.
1. Depress clutch.
2. Select neutral gear, set selector lever to N.
3. Move out of the flow of traffic as quickly as possible without
impeding other vehicles.
4. Switch off ignition.
9 Warning
When the engine is off,
considerably more force is needed
to brake and steer.
Do not remove key until vehicle is stationary, otherwise the steeringwheel lock could engage
unexpectedly.
Check oil level before seeking
assistance of a workshop 3 134.
Low fuel
Y illuminates yellow.
Illuminates when the ignition is
switched on and extinguishes shortly
after the engine starts.
Illuminates when the engine isrunning
Fuel level in the tank is too low. Refuel immediately.
Never run the tank dry.
Refuelling 3 127.
Catalytic converter 3 112.
Bleeding the diesel fuel system
3 139.
Drain fuel filter
Q illuminates yellow.
Illuminates when the ignition is
switched on and extinguishes shortly after the engine starts.
Page 90 of 201

88LightingHigh beam
To change between low and high
beam, pull lever until a click is felt.
Headlight flash To activate the headlight flash, pull
lever.
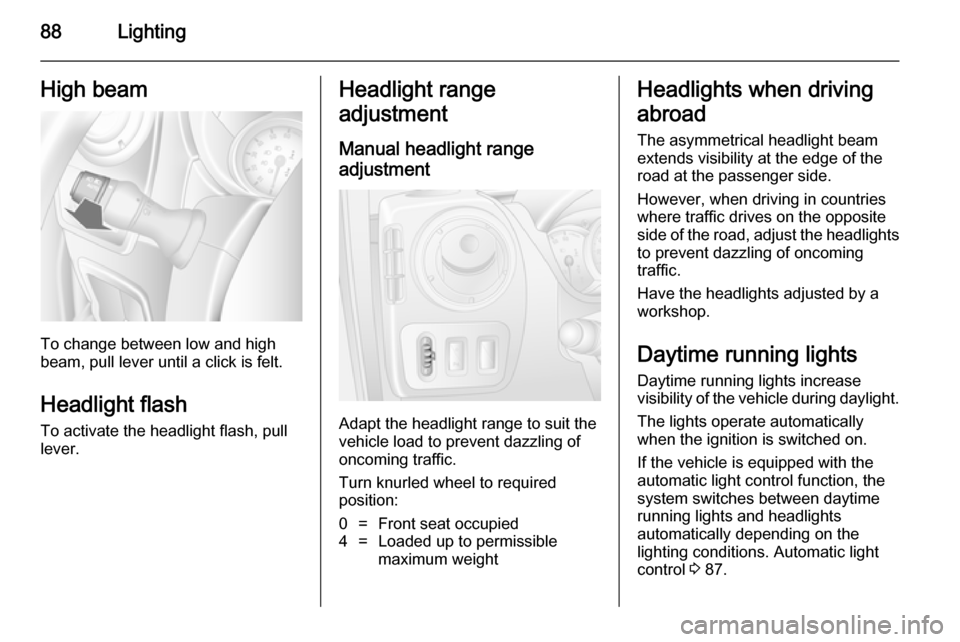
Headlight range
adjustment
Manual headlight range
adjustment
Adapt the headlight range to suit the
vehicle load to prevent dazzling of
oncoming traffic.
Turn knurled wheel to required position:
0=Front seat occupied4=Loaded up to permissible
maximum weightHeadlights when driving
abroad
The asymmetrical headlight beam
extends visibility at the edge of the
road at the passenger side.
However, when driving in countries
where traffic drives on the opposite
side of the road, adjust the headlights to prevent dazzling of oncoming
traffic.
Have the headlights adjusted by a
workshop.
Daytime running lights
Daytime running lights increase
visibility of the vehicle during daylight.
The lights operate automatically
when the ignition is switched on.
If the vehicle is equipped with the automatic light control function, the
system switches between daytime
running lights and headlights
automatically depending on the
lighting conditions. Automatic light
control 3 87.
Page 91 of 201
Lighting89Adaptive forward lightingCornering light
Depending on the steering angle,
vehicle speed and gear selected
when cornering, an additional light
will illuminate the corner of the road.
Hazard warning flashers
Operated with the ¨ button.
Turn and lane-change
signalsLever up=right turn signalLever down=left turn signal
When the steering wheel is turned
back, the lever automatically returns
to its original position and the
indicator is deactivated. This will not
happen when making a minor
steering manoeuvre such as lane
changing.
When lane changing, move lever part
way to first stop. When released,
lever will spring back.
If the lever is moved past the first stop, the indicator is switched on
constantly. Switch the indicator off
manually by moving the lever to its
original position.
Front fog lights
Turn inner switch to position > and
release.
Front fog lights will only operate when
the ignition and headlights are
switched on.
Page 94 of 201
92Lighting
Rear reading lightsBus
Operate rocker switch on the
instrument panel:
press l=on.press OFF=off.
Each reading light can then be
operated individually and directed as
required.
Lighting features
Exit lighting
Headlights come on for approx.
1 minute after the vehicle is parked
and the system is activated.
Activating 1. Switch off ignition.
2. Remove ignition key.
3. Pull turn signal lever towards steering wheel.