Page 27 of 143

Basic operation27
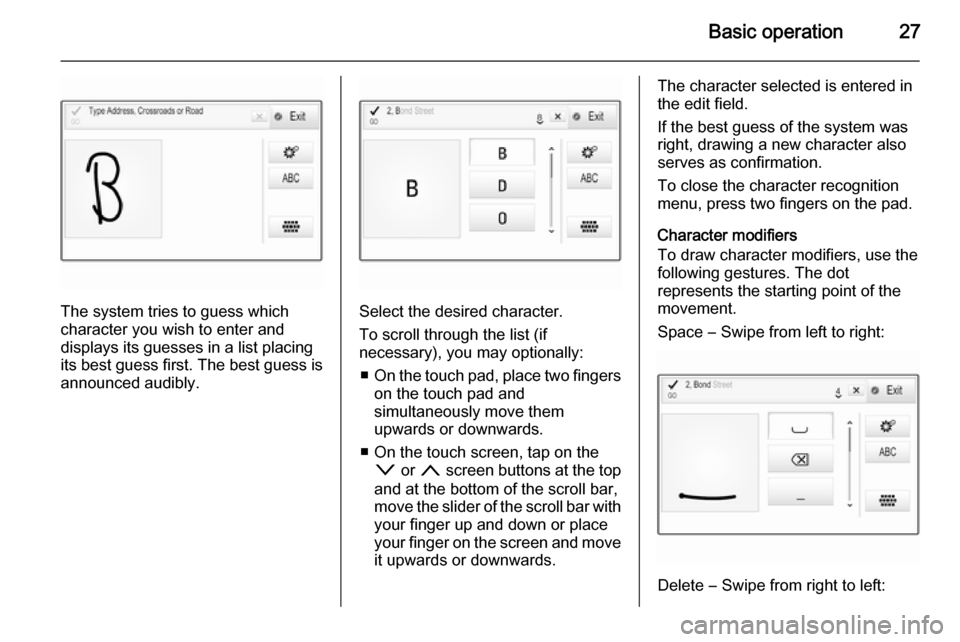
The system tries to guess which
character you wish to enter and
displays its guesses in a list placing
its best guess first. The best guess is
announced audibly.Select the desired character.
To scroll through the list (if
necessary), you may optionally:
■ On the touch pad, place two fingers
on the touch pad and
simultaneously move them
upwards or downwards.
■ On the touch screen, tap on the o or n screen buttons at the top
and at the bottom of the scroll bar,
move the slider of the scroll bar with
your finger up and down or place
your finger on the screen and move
it upwards or downwards.
The character selected is entered in
the edit field.
If the best guess of the system was
right, drawing a new character also
serves as confirmation.
To close the character recognition
menu, press two fingers on the pad.
Character modifiers
To draw character modifiers, use the
following gestures. The dot
represents the starting point of the
movement.
Space ― Swipe from left to right:
Delete ― Swipe from right to left:
Page 29 of 143

Basic operation29
To display three rows of favourites,
see below.
To display one row of favourites when an interaction selector bar is shownon the screen:
■ On the touch screen, place your finger on the interaction selector
bar and move it upwards until one
row of favourites becomes visible.
Notice
Constant pressure must be applied and the finger must be moved at
constant speed.■ On the touch pad, place three
fingers on the pad and move them
upwards until one row of favourites
becomes visible.
To display three rows of favourites,
use one or respectively three fingers
and drag the favourites list up further.
Scrolling through favouritespages
The favourites page is visible in the
one row or the three row view. To
scroll through the favourites pages,
you may optionally:
■ On the touch screen, place your finger anywhere on the favourites
page and move it left or right. The
next or previous page of favourites
is displayed.
Notice
Constant pressure must be applied and the finger must be moved at
constant speed.
■ On the touch pad, place three fingers on the touch pad and move
them left or right. The next or
previous page of favourites is
displayed.
When reaching the beginning or the end of the favourites pages, the whole list is wrapped.
Notice
At the bottom of the screen,
indication marks designate how
many favourites pages may be
accessed and which page is
currently displayed. The number of
indication marks adapts to the view
chosen (more pages in one-row
view, less pages in three-row view).
Page 37 of 143

Basic operation37Touch operation overviewThe table below contains a summary of all movements (gestures) on the touch screen and touch pad that you have to make
with one, two or three fingers to trigger specific actions in the menus.MenuActionTouch screenTouch padAll menusNavigate to a screen
element1 finger, move across the
touch padSelect/activate element1 finger, tap on the element once1 finger, press on the touch
padScrolling lists1 finger, move up or down2 fingers, move up or down1 finger, move slider on scroll bar1 finger, repeatedly tap or tap and hold the
n or o buttons at the top or bottom of the
scroll barScrolling text1 finger, move up or down2 fingers, move up or downFavouritesLifting/lowering rows of
favourites1 finger, tap onto selector bar and drag it up or down3 fingers, move up or downMoving to previous/next
page of favourites1 finger, move left or right3 fingers, move left or rightStoring favourites1 finger, tap and hold favourites button1 finger, press and hold
favourites button
Page 38 of 143
38Basic operation
MenuActionTouch screenTouch padRadio menuSending current audio
information to Driver
Information Centre1 finger, move in the direction of the Driver
Information CentreSeeking for radio stations2 fingers, move left or right
to seek up or downChanging waveband2 fingers, move up or down
to skip to previous or next
radio bandBrowsing2 fingers, press and hold
the touch pad
Page 39 of 143
Basic operation39
MenuActionTouch screenTouch padMedia menuSending current audio
information to the Driver
Information Centre1 finger, move in the direction of the Driver
Information CentreChanging track2 fingers, move left or right
to skip to previous or next
trackChanging media source2 fingers, move up or down
to skip to previous or next
media sourceBrowsing2 fingers, press and hold
the touch padActivating quick play1 finger, tap and hold
respective menu item
Page 40 of 143
40Basic operation
MenuActionTouch screenTouch padNavigation menuSending current audio
information to the Driver
Information Centre1 finger, move in the direction of the Driver
Information CentrePanning map1 finger, move across the screen2 fingers, move up, down,
left or rightCentring map1 finger, tap on a location on the map you wish it to centre aroundZoom in on the mapw screen button2 fingers, move apart
(spread)Zoom out on the map─ screen button2 fingers, move together
(pinch)Phone menuSending current audio
information to the Driver
Information Centre1 finger, move in the direction of the Driver
Information CentreCharacter
recognition
functionDraw character1 finger, move across the screen1 finger, move across the
padStart destination search2 fingers, press and hold on
the padClosing function2 fingers, press on the pad
Page 46 of 143

46Basic operation
Restore Radio Settings
Select Restore Radio Settings to
reset the following data:
■ Tone settings
■ Volume settings
■ Speech settings
■ Application tray
■ Contacts sources.
A warning message is displayed.
Select the Restore screen button.
The settings are reset.
Software Information
Press the ; button and select the
SETTINGS icon.
Scroll through the list and select the
Software Information menu item.
A list of version numbers of all items
loaded to the system is displayed.
System update
To update your system software,
contact your Opel Service Partner.
TouchPad In this menu, you may define the
scrolling direction when operating the touch pad. If you set this function to
Inverted the scrolling direction is
inverted, e.g. if you move upwards
with your fingers you are scrolling downwards on the screen.
Press the ; button and select the
SETTINGS icon.
Scroll through the list and select the
TouchPad menu item. To display the
respective submenu, select Invert
Up / Down or Invert Left / Right .
Select Default or Inverted .
Page 65 of 143

Navigation65
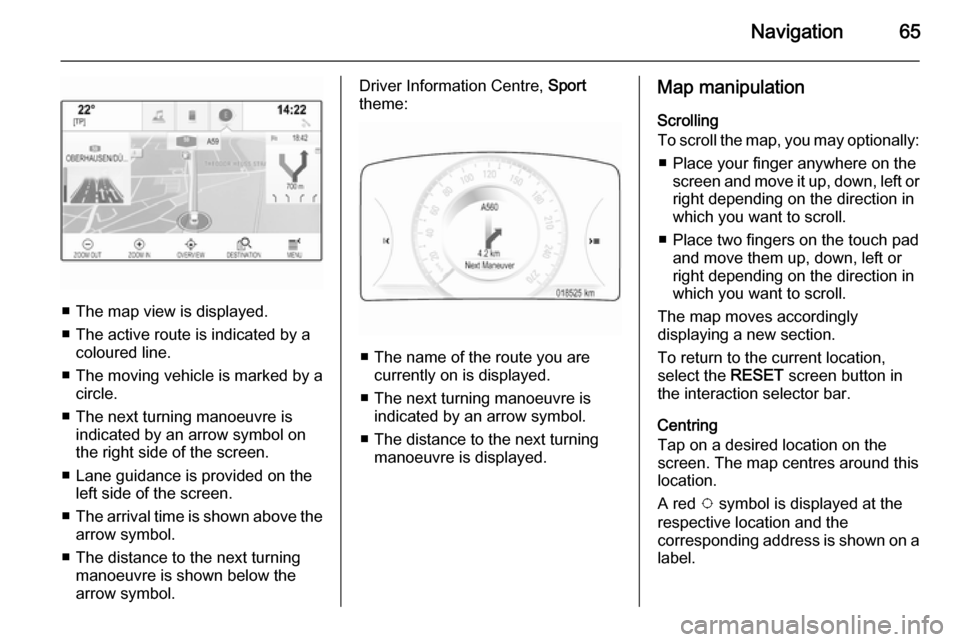
■ The map view is displayed.
■ The active route is indicated by a coloured line.
■ The moving vehicle is marked by a circle.
■ The next turning manoeuvre is indicated by an arrow symbol on
the right side of the screen.
■ Lane guidance is provided on the left side of the screen.
■ The arrival time is shown above the
arrow symbol.
■ The distance to the next turning manoeuvre is shown below the
arrow symbol.
Driver Information Centre, Sport
theme:
■ The name of the route you are currently on is displayed.
■ The next turning manoeuvre is indicated by an arrow symbol.
■ The distance to the next turning manoeuvre is displayed.
Map manipulation
Scrolling
To scroll the map, you may optionally:
■ Place your finger anywhere on the screen and move it up, down, left orright depending on the direction in
which you want to scroll.
■ Place two fingers on the touch pad and move them up, down, left or
right depending on the direction in
which you want to scroll.
The map moves accordingly
displaying a new section.
To return to the current location,
select the RESET screen button in
the interaction selector bar.
Centring
Tap on a desired location on the
screen. The map centres around this
location.
A red v symbol is displayed at the
respective location and the
corresponding address is shown on a
label.