Page 78 of 217
76Instruments and controls9Warning
The road surface may already be
icy even though the display
indicates a few degrees above 0
°C.
Clock
Date and time are shown in the
Info-Display.
Board-Info-Display 3 91.
Graphic-Info-Display,
Colour-Info-Display 3 93.
Automatic time synchronisation
Board-Info-Display
The RDS (Radio Data System) signal of most VHF transmitters
automatically sets the time, identified
by } in the display.
Some RDS transmitters do not send
a correct time signal. In such cases,
switch off automatic time
synchronisation and set the time
manually.
Page 79 of 217

Instruments and controls77
Deactivate (Clock Sync.Off ) or
activate ( Clock Sync.On ) automatic
time synchronisation with the arrow
buttons on the Infotainment system.
To set date and time manually, select
the menu item for time and date
setting from the Settings menu and
make the desired setting. The value ready for modification is marked with
arrows. Use the arrow buttons to
make the required setting. The setting
is saved when the menu item is
exited.
To correct time with the help of RDS,
select the menu item for time
synchronisation from the Settings
menu and make the desired setting.
Board-Info-Display 3 91.Graphic-Info-Display, Colour-Info-
Display
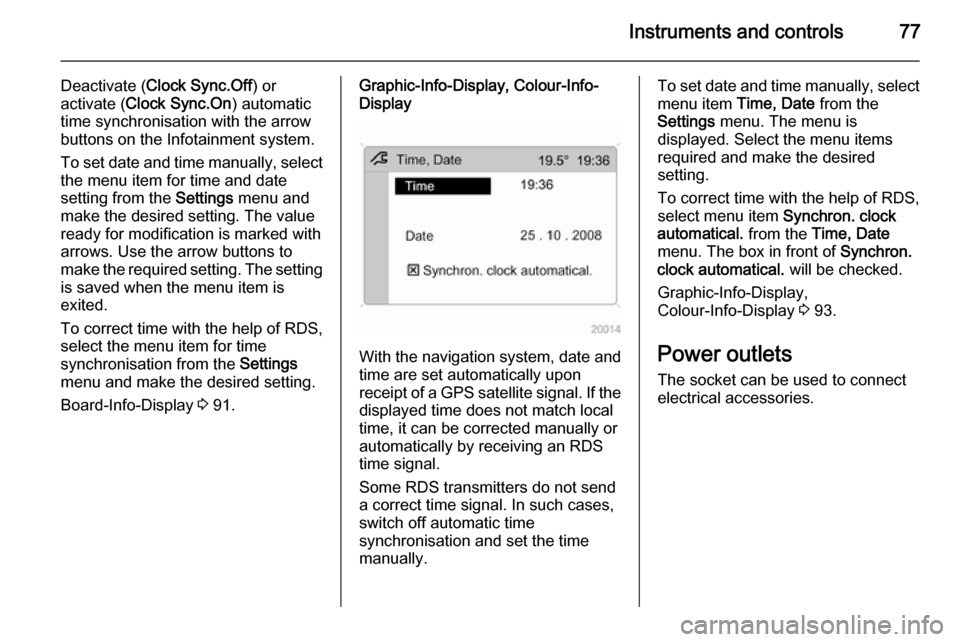
With the navigation system, date and
time are set automatically upon
receipt of a GPS satellite signal. If the
displayed time does not match local
time, it can be corrected manually or
automatically by receiving an RDS
time signal.
Some RDS transmitters do not send a correct time signal. In such cases,
switch off automatic time
synchronisation and set the time
manually.
To set date and time manually, select
menu item Time, Date from the
Settings menu. The menu is
displayed. Select the menu items
required and make the desired
setting.
To correct time with the help of RDS,
select menu item Synchron. clock
automatical. from the Time, Date
menu. The box in front of Synchron.
clock automatical. will be checked.
Graphic-Info-Display,
Colour-Info-Display 3 93.
Power outlets
The socket can be used to connect
electrical accessories.
Page 95 of 217

Instruments and controls93
Some transmitters do not send acorrect time signal. In such cases,
switch off automatic time
synchronisation and set the time
manually.
Deactivate ( Clock Sync.Off ) or
activate ( Clock Sync.On ) automatic
time synchronisation with the arrow
buttons.
Setting date and time
To set date and time manually, select
the menu item for time and date
settings and make the desired
setting.
The value ready for modification is
marked with arrows. Use the arrow
buttons to make the required setting.
The setting is saved when the menu item is exited.
Ignition logic
See Infotainment system instruction
manual.
Language selection
The display language for some
functions can be selected.
Select the required language with the
arrow buttons.
Setting units of measure
Select the required unit of
measurement with the arrow buttons.
Graphic-Info-Display,
Colour-Info-Display Depending on the vehicle
configuration the vehicle has a
Graphic-Info-Display or
Colour-Info-Display. The
Info-Display is located in the
instrument panel above the
Infotainment system.
Page 98 of 217

96Instruments and controls
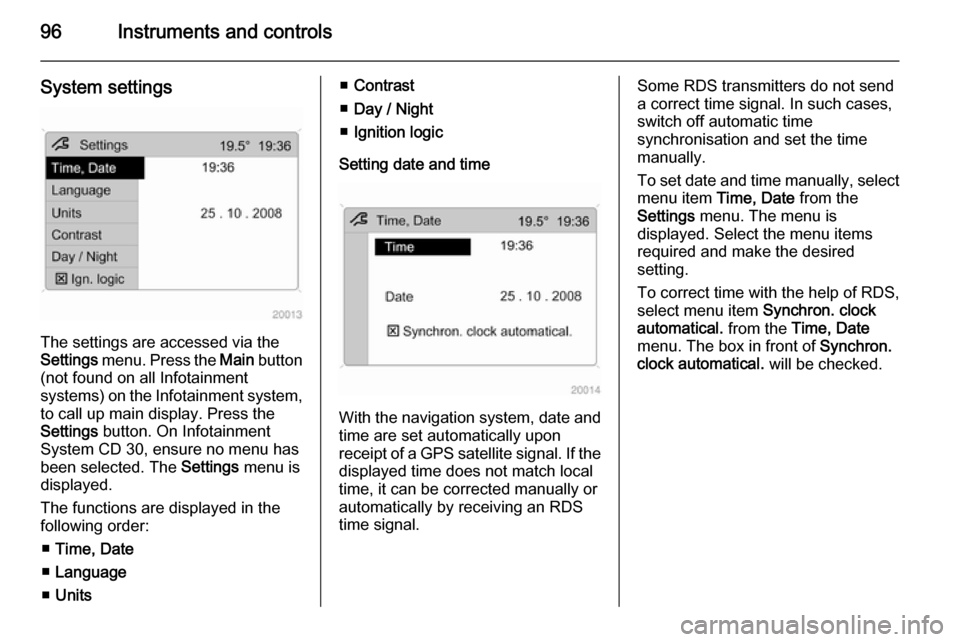
System settings
The settings are accessed via the
Settings menu. Press the Main button
(not found on all Infotainment
systems) on the Infotainment system,
to call up main display. Press the
Settings button. On Infotainment
System CD 30, ensure no menu has
been selected. The Settings menu is
displayed.
The functions are displayed in the
following order:
■ Time, Date
■ Language
■ Units
■Contrast
■ Day / Night
■ Ignition logic
Setting date and time
With the navigation system, date and
time are set automatically upon
receipt of a GPS satellite signal. If the
displayed time does not match local
time, it can be corrected manually or
automatically by receiving an RDS
time signal.
Some RDS transmitters do not send a correct time signal. In such cases,
switch off automatic time
synchronisation and set the time
manually.
To set date and time manually, select
menu item Time, Date from the
Settings menu. The menu is
displayed. Select the menu items
required and make the desired
setting.
To correct time with the help of RDS,
select menu item Synchron. clock
automatical. from the Time, Date
menu. The box in front of Synchron.
clock automatical. will be checked.
Page 186 of 217

184Vehicle care
4. Before positioning the jack, set itto the necessary height by
rotating the eye by hand.
Position jack at the jacking point
located nearest to the wheel concerned so that the jack claw
spans the vertical base. Ensure
the jack is positioned correctly.
The jack base must be on the
ground directly below the jacking
point in a manner that prevents it
from slipping.5. Attach wheel wrench to eye of threaded rod and rotate wrench
clockwise to raise vehicle.
If this is not the case, carefully
lower the vehicle immediately and
reposition the jack. Raise the
vehicle until the wheel is just clear of the ground.
6. Unscrew wheel nuts completely and wipe clean with a cloth.
Do not grease the threads. Put
wheel nuts somewhere where the threads will not be soiled.
7. Change the wheel. Notes on spare wheel 3 185.
8. Screw on the wheel nuts and
tighten slightly by hand by turning
clockwise until wheel is held
against the hub.
9. Rotate wrench anticlockwise and lower vehicle to the ground.
10. Install the wheel wrench ensuring that it locates securely and tighten
each wheel nut in a crosswise
sequence. Tightening torque is
140 Nm.
11. Stow the replaced wheel 3 185
and the vehicle tools 3 173.
12. Check the tyre pressure of the installed tyre as soon as possible.