2014 VAUXHALL ANTARA buttons
[x] Cancel search: buttonsPage 23 of 217

Keys, doors and windows21
Notice
For safety reasons, the vehicle
cannot be locked or unlocked via the remote control (and the anti-theft
systems will not be activated) if the
key is in the ignition switch.
If the driver's door is not closed
properly, the central locking system
will not work.
Unlocking the tailgate
Press button q.
The tailgate is unlocked together with the doors.
With the engine running, the tailgate
will only unlock when the electrical
parking brake is applied or automatic
transmission is in position P.
Central locking buttons Locks or unlocks all doors, the load
compartment and fuel filler flap from
the passenger compartment.
Press left part of switch m to lock.
Press right part of switch m to unlock.
When the key is in the ignition switch,
locking is only possible if all doors are closed.
Fault in radio remote control
system
Unlocking
Manually unlock the driver's door by
turning the key in the lock. Switch on
the ignition and press the left part of
central locking switch m to unlock all
doors, load compartment and fuel
filler flap.
Locking
Manually lock the driver's door by
turning the key in the lock.
Child locks
Page 43 of 217

Seats, restraints41
pretensioners. Do not make any
modifications to belt pretensioner components as this will invalidate
the vehicle type approval.
Three-point seat belt
Fastening
Withdraw the belt from the retractor,
guide it untwisted across the body
and insert the latch plate into the
buckle. Tighten the lap belt regularly
whilst driving by pulling the shoulder
belt.
Seat belt reminder X 3 83.
Loose or bulky clothing prevents the
belt from fitting snugly. Do not place
objects such as handbags or mobile
phones between the belt and your body.
9 Warning
The belt must not rest against hard
or fragile objects in the pockets of
your clothing.
Height adjustment
1. Squeeze release buttons together.
2. Slide adjuster up or down.
3. Ensure adjuster latches into position.
Page 79 of 217

Instruments and controls77
Deactivate (Clock Sync.Off ) or
activate ( Clock Sync.On ) automatic
time synchronisation with the arrow
buttons on the Infotainment system.
To set date and time manually, select
the menu item for time and date
setting from the Settings menu and
make the desired setting. The value ready for modification is marked with
arrows. Use the arrow buttons to
make the required setting. The setting
is saved when the menu item is
exited.
To correct time with the help of RDS,
select the menu item for time
synchronisation from the Settings
menu and make the desired setting.
Board-Info-Display 3 91.Graphic-Info-Display, Colour-Info-
Display
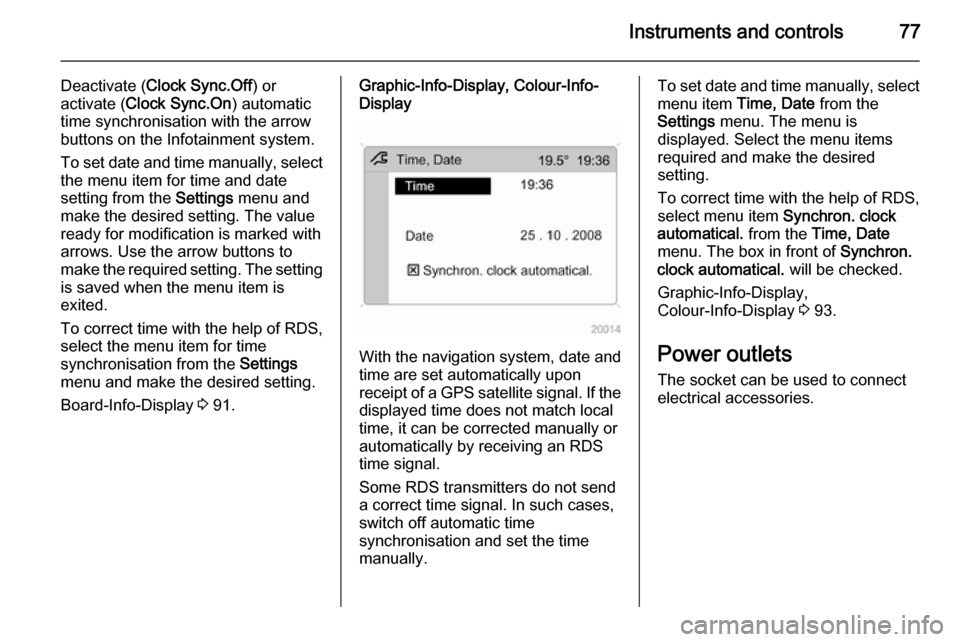
With the navigation system, date and
time are set automatically upon
receipt of a GPS satellite signal. If the
displayed time does not match local
time, it can be corrected manually or
automatically by receiving an RDS
time signal.
Some RDS transmitters do not send a correct time signal. In such cases,
switch off automatic time
synchronisation and set the time
manually.
To set date and time manually, select
menu item Time, Date from the
Settings menu. The menu is
displayed. Select the menu items
required and make the desired
setting.
To correct time with the help of RDS,
select menu item Synchron. clock
automatical. from the Time, Date
menu. The box in front of Synchron.
clock automatical. will be checked.
Graphic-Info-Display,
Colour-Info-Display 3 93.
Power outlets
The socket can be used to connect
electrical accessories.
Page 93 of 217

Instruments and controls91Information displaysBoard-Info-Display
The Info-Display is located in the
instrument panel above the
Infotainment system.
Info-Display indicates:
■ time 3 76
■ outside temperature 3 75
■ date 3 76
■ Infotainment system - see Infotainment system instruction
manual
The Info-Display is located in the
instrument panel above the
Infotainment system.
An F in the display indicates a fault.
Have the cause of the fault remedied by a workshop.
Trip computer, Board-Info-Display
3 100.
Selecting functions
Functions and settings of the
Infotainment system can be accessed via the Info-Display.
Functions are selected and executed
in the menu on the display using the
arrow buttons on the Infotainment
system or the left adjuster wheel on
the steering wheel.
If a check control warning message
appears on the Info-Display, the
display is blocked from other
functions. Acknowledge the message
by pressing the OK button or the left
adjuster wheel. If there are several
warning messages, acknowledge
them one at a time.
Check control 3 99.Select using the Infotainment system
buttons
In the Settings menu, use the OK
button to call up the required function.
Use the arrow buttons to change
settings.
In the BC menu, use the OK button to
call up the required function. Use the
OK button to operate the stop watch
or restart measurement and
calculation.
Page 95 of 217

Instruments and controls93
Some transmitters do not send acorrect time signal. In such cases,
switch off automatic time
synchronisation and set the time
manually.
Deactivate ( Clock Sync.Off ) or
activate ( Clock Sync.On ) automatic
time synchronisation with the arrow
buttons.
Setting date and time
To set date and time manually, select
the menu item for time and date
settings and make the desired
setting.
The value ready for modification is
marked with arrows. Use the arrow
buttons to make the required setting.
The setting is saved when the menu item is exited.
Ignition logic
See Infotainment system instruction
manual.
Language selection
The display language for some
functions can be selected.
Select the required language with the
arrow buttons.
Setting units of measure
Select the required unit of
measurement with the arrow buttons.
Graphic-Info-Display,
Colour-Info-Display Depending on the vehicle
configuration the vehicle has a
Graphic-Info-Display or
Colour-Info-Display. The
Info-Display is located in the
instrument panel above the
Infotainment system.
Page 96 of 217

94Instruments and controls
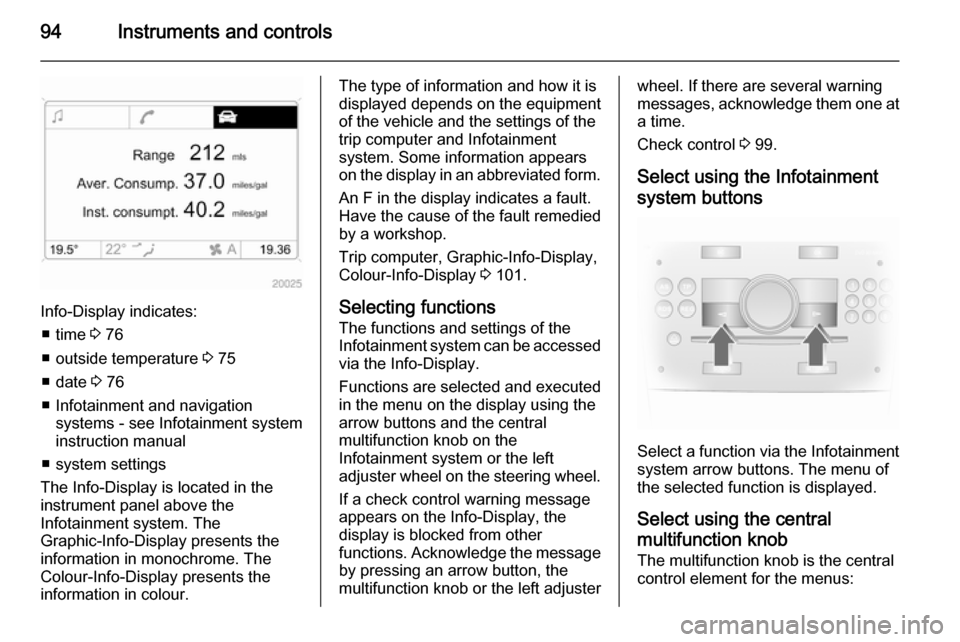
Info-Display indicates:■ time 3 76
■ outside temperature 3 75
■ date 3 76
■ Infotainment and navigation systems - see Infotainment systeminstruction manual
■ system settings
The Info-Display is located in the
instrument panel above the
Infotainment system. The
Graphic-Info-Display presents the
information in monochrome. The
Colour-Info-Display presents the
information in colour.
The type of information and how it is
displayed depends on the equipment
of the vehicle and the settings of the
trip computer and Infotainment
system. Some information appears
on the display in an abbreviated form.
An F in the display indicates a fault.
Have the cause of the fault remedied
by a workshop.
Trip computer, Graphic-Info-Display,
Colour-Info-Display 3 101.
Selecting functions
The functions and settings of the
Infotainment system can be accessed
via the Info-Display.
Functions are selected and executed
in the menu on the display using the
arrow buttons and the central
multifunction knob on the
Infotainment system or the left
adjuster wheel on the steering wheel.
If a check control warning message
appears on the Info-Display, the
display is blocked from other
functions. Acknowledge the message by pressing an arrow button, the
multifunction knob or the left adjusterwheel. If there are several warning
messages, acknowledge them one at a time.
Check control 3 99.
Select using the Infotainment system buttons
Select a function via the Infotainment
system arrow buttons. The menu of
the selected function is displayed.
Select using the central
multifunction knob The multifunction knob is the central
control element for the menus:
Page 103 of 217

Instruments and controls101
After refuelling, the range is updated
automatically after a brief delay.
If the fuel in the tank allows less than
30 miles of travel, the warning
Range appears on the display.
If the fuel in the tank allows less than
20 miles of travel, the warning
Refuel! appears on the display.
Acknowledge the menu item 3 91.
Resetting trip computer
information Select the desired trip computer
information and reset by pressing the left adjuster wheel on the steering
wheel or the OK button on the
Infotainment system.Stop watch
Using the arrow buttons:
To start, press left arrow button to
select menu item Start and press OK
button to start/stop. To reset, press left arrow button to select menu item
Reset and press OK button.
Using the left adjuster wheel on the
steering wheel:
To start, select menu item Start and
press to start/stop. To reset, select
menu item Reset and press to confirm
command.
Interruption of power supply
If the power supply has been
interrupted or if the battery voltage
has dropped too low, the values
stored in the trip computer will be lost.
Trip computer in Graphic-
Info-Display or Colour-
Info-Display
The trip computers provide
information on driving data, which is
continually recorded and evaluated electronically. The trip computer main
Page 113 of 217

Lighting111
Courtesy lights can be turned off
immediately by pressing button K.
Ignition switch illumination
Illuminates when you open a door.
Switch off immediately by pressing button K in the roof lining.
Glovebox illumination
Illuminates when the glovebox is
opened.
Load compartment lighting
Illuminates when a door or the tailgate
is opened.
Reading lights
Front reading lights
Operated with the L and M
buttons.
Avoid using front reading lights while
driving in the dark, as they can reduce driver visibility.