Page 234 of 563
233
2-5. Driving information
2
When driving
■
Tire chain installation
Observe the following precautions when installing and removing chains:
●Install and remove tire chains in a safe location.
● Install tire chains on the front tires only. Do not install tire chains on the
rear tires.
● Install tire chains on front tires as tightly as possible. Retighten chains
after driving 1/4 1/2 mile (0.5 1.0 km).
● Install tire chains following the instructions provided with the tire chains.
CAUTION
■Driving with snow tires
Observe the following precautions to reduce the risk of accidents.
Failure to do so may result in a loss of vehicle control and cause death or
serious injury.
●Use tires of the size specified.
● Maintain the recommended level of air pressure.
● Do not drive in excess of 75 mph (120 km/h), regardless of the type of
snow tires being used.
● Use snow tires on all, not just some wheels.
Page 235 of 563

234 2-5. Driving information
CAUTION
■Driving with tire chains
Observe the following precautions to reduce the risk of accidents.
Failure to do so may result in the vehicle being unable to be driven safely,
and may cause death or serious injury.
●Do not drive in excess of the speed limit specified for the tire chains being
used, or 30 mph (50 km/h), whichever is lower.
● Avoid driving on bumpy road surfaces or over potholes.
● Avoid sudden turns and braking, as use of chains may adversely affect
vehicle handling.
● Slow down sufficiently before entering a curve to ensure that vehicle con-
trol is maintained.
NOTICE
■Repairing or replacing snow tires
Request repairs or replacement of snow tires from Toyota dealers or legiti-
mate tire retailers.
This is because the removal and attachment of snow tires affects the opera-
tion of the tire pressure warning valves and transmitters.
■ Fitting tire chains
The tire pressure warning valves and transmitters may not function correctly\
when tire chains are fitted.
Page 348 of 563
Maintenance and care4
345
4-1. Maintenance and careCleaning and protecting the vehicle exterior ......... 346
Cleaning and protecting the vehicle interior .......... 349
4-2. Maintenance Maintenance requirements .................. 352
General maintenance....... 355
Emission inspection and maintenance (I/M)
programs........................ 359
4-3. Do-it-yourself maintenance
Do-it-yourself service precautions .................... 360
Hood ................................ 364
Positioning a floor jack ..... 366
Engine compartment ........ 368
12-volt battery .................. 379
Tires ................................. 384
Tire inflation pressure ...... 392
Wheels ............................. 396
Air conditioning filter......... 399
Wireless remote control/ electronic key battery ..... 401
Checking and replacing fuses .............................. 404
Light bulbs........................ 415
Page 361 of 563
358 4-2. Maintenance
Vehicle exterior
ItemsCheck points
Doors • Do the doors operate smoothly?
Engine hood • Does the engine hood lock sys-
tem work properly?
Fluid leaks • There should not be any signs of
fluid leakage after the vehicle has
been parked.
Tires • Is the tire inflation pressure cor-
rect?
• The tires should not be dam- aged or excessively worn.
• Have the tires been rotated according to the maintenance
schedule?
• The wheel nuts should not be loose.
Windshield wipers/rear window
wiper (if equipped) • The wiper blades should not
show any signs of cracking,
splitting, wear, contamination or
deformation.
• The wiper blades should clear the windshield/rear window
without streaking or skipping.
CAUTION
■ If the hybrid system is operating
Turn the hybrid system off and ensure that there is adequate ventilation
before performing maintenance checks.
Page 387 of 563
384
4-3. Do-it-yourself maintenance
Tires
Replace or rotate tires in accordance with maintenance sched-
ules and treadwear.
■Checking tires
New tread
Treadwear indicator
Worn tread
The location of treadwear
indicators is shown by the
“TWI” or “” marks, etc.,
molded on the sidewall of
each tire.
Check spare tire condition
and pressure if not rotated.
■ Tire rotation
Rotate the tires in the order
shown.
To equalize tire wear and
extend tire life, Toyota recom-
mends that tire rotation is
carried out at the same inter-
val as tire inspection.
Do not fail to initialize the tire
pressure warning system
after tire rotation.
■Tire pressure warning system
Your vehicle is equipped with a tire pressure warning system
that uses tire pressure warning valves and transmitters to detect
low tire inflation pressure before serious problems arise.
( P. 439)
Front
Page 388 of 563

385
4-3. Do-it-yourself maintenance
4
Maintenance and care
Installing tire pressure warning valves and transmitters
When replacing tires or wheels, tire pressure warning valves and
transmitters must also be installed.
When new tire pressure warning valves and transmitters are
installed, new ID codes must be registered in the tire pressure warn-
ing computer and the tire pressure warning system must be initial-
ized. Have tire pressure warning valve and transmitter ID codes
registered by your Toyota dealer. ( P. 386)
■ The tire pressure warning system must be initialized in the fol-
lowing circumstances:
●When rotating front and rear tires which have different tire infla-
tion pressures
● When changing the tire size
When the tire pressure warning system is initialized, the current
tire inflation pressure is set as the benchmark pressure.
■ How to initialize the tire pressure warning system
Park the vehicle in a safe pl ace and turn the engine switch
(vehicles without a smart key system) or the “POWER” switch
(vehicles with a smart key system) off.
Initialization cannot be performed while the vehicle is moving.
Adjust the tire inflation pressure to the specified cold tire infla-
tion pressure level. ( P. 504)
Make sure to adjust the tire pressure to the specified cold tire
inflation pressure level. The ti re pressure warning system will
operate based on this pressure level.
STEP1
STEP2
Page 389 of 563

386 4-3. Do-it-yourself maintenance
Turn the engine switch to the “ON” position (vehicles without a
smart key system) or “POWER” switch to ON mode (vehicles
with a smart key system).
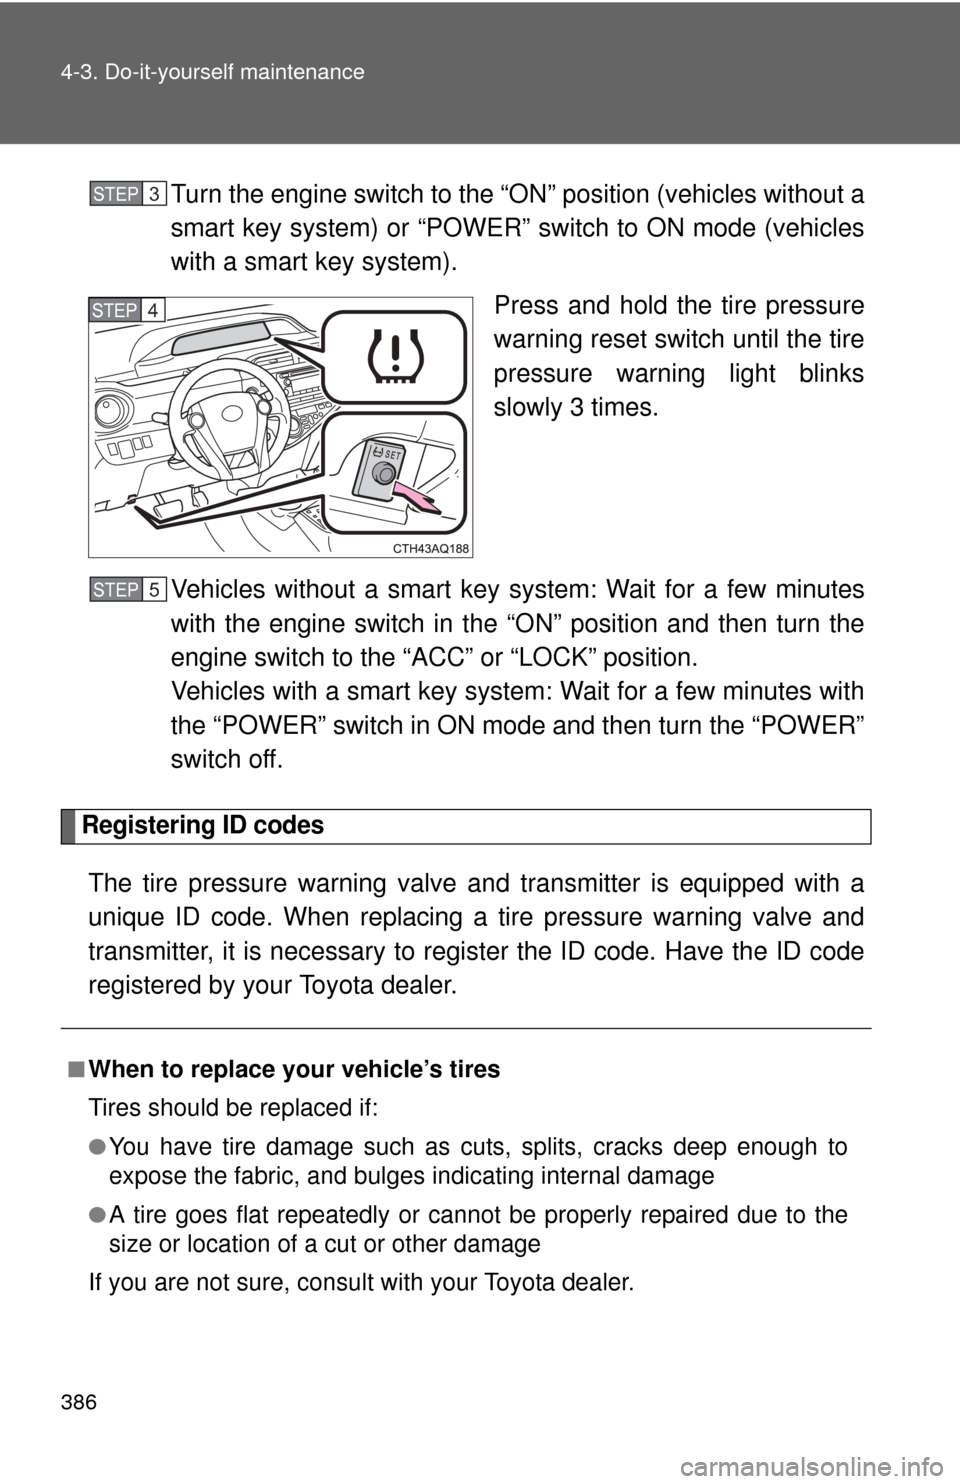
Press and hold the tire pressure
warning reset switch until the tire
pressure warning light blinks
slowly 3 times.
Vehicles without a smart key system: Wait for a few minutes
with the engine switch in the “ON” position and then turn the
engine switch to the “ACC” or “LOCK” position.
Vehicles with a smart key system: Wait for a few minutes with
the “POWER” switch in ON mode and then turn the “POWER”
switch off.
Registering ID codes
The tire pressure warning valve and transmitter is equipped with a
unique ID code. When replacing a tire pressure warning valve and
transmitter, it is necessary to regi ster the ID code. Have the ID code
registered by your Toyota dealer.
STEP3
STEP4STEP4
■When to replace your vehicle’s tires
Tires should be replaced if:
●You have tire damage such as cuts, splits, cracks deep enough to
expose the fabric, and bulges indicating internal damage
●A tire goes flat repeatedly or c annot be properly repaired due to the
size or location of a cut or other damage
If you are not sure, consult with your Toyota dealer.
STEP5
Page 390 of 563

387
4-3. Do-it-yourself maintenance
4
Maintenance and care
■Replacing tires and wheels
If the ID code of the tire pressure warning valve and transmitter is not
registered, the tire pre
ssure warning system will not work properly. After
driving for about 20 minutes, the tire pressure warning light blinks for 1
minute and stays on to indicate a system malfunction.
■Tire life
Any tire over 6 years old must be checked by a qualified technician even
if it has seldom or never been used or damage is not obvious.
■Routine tire inflation pressure checks
The tire pressure warning system doe s not replace routine tire inflation
pressure checks. Make su re to check tire inflation pressure as part of
your routine of daily vehicle checks.
■Low profile tires (vehicles with P195/50R16 tires)
Generally, low profile tire s will wear more rapidly and tire grip perfor-
mance will be reduced on snowy and/or icy roads when compared to
standard tires. Be sure to use snow tires or tire chains on snowy and/or
icy roads and drive carefully at a speed appropriate for road and weather
conditions.
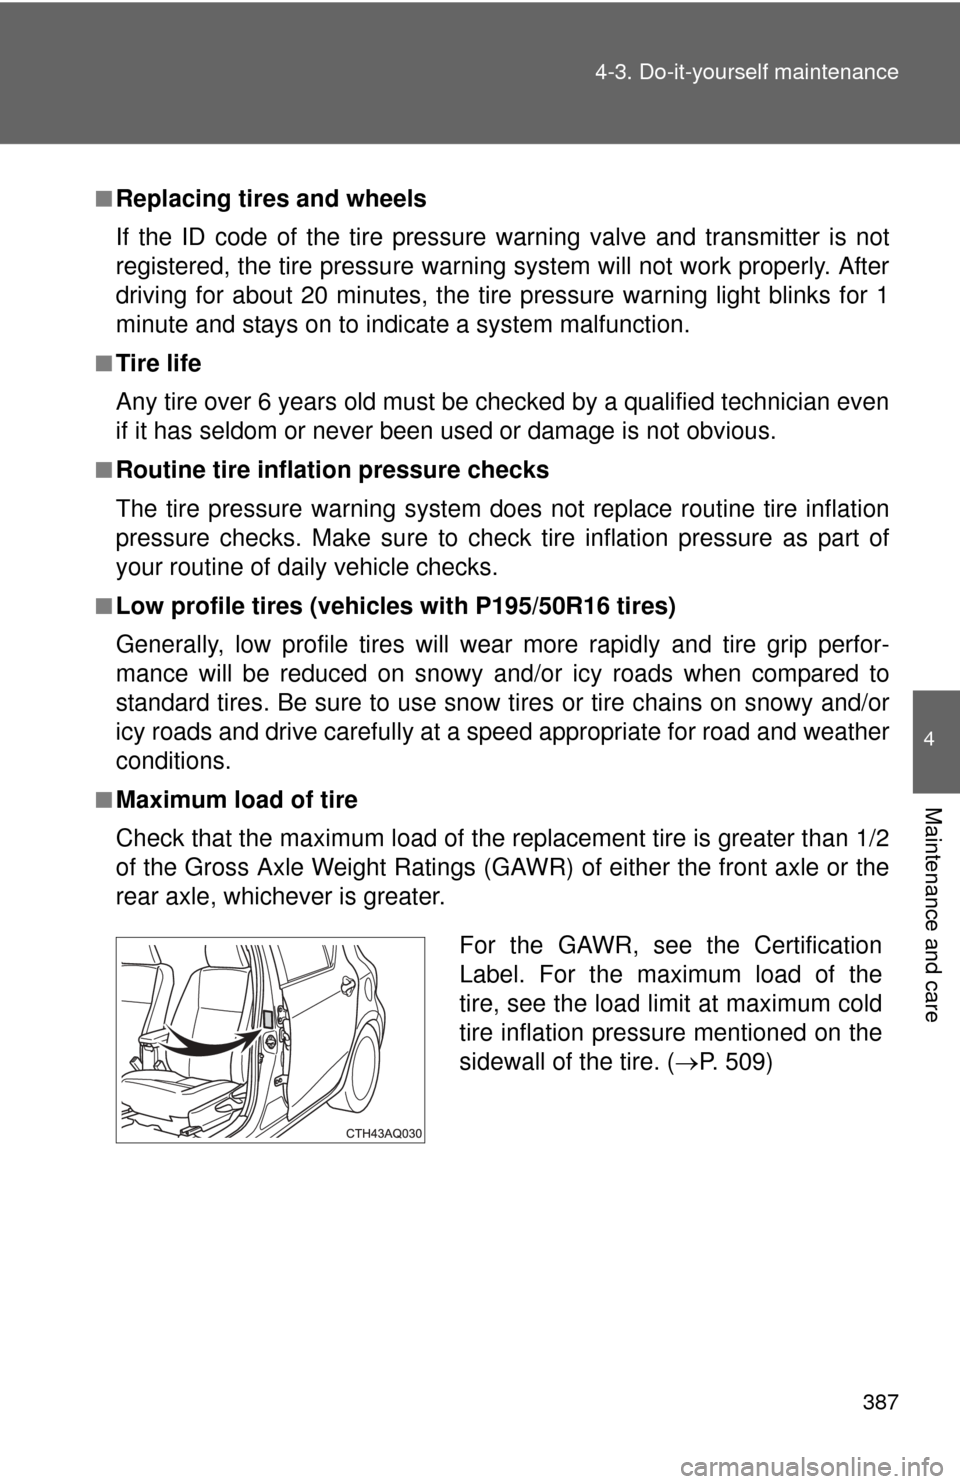
■Maximum load of tire
Check that the maximum load of the replacement tire is greater than 1/2
of the Gross Axle Weight Ratings (GAW R) of either the front axle or the
rear axle, whichever is greater.
For the GAWR, see the Certification
Label. For the maximum load of the
tire, see the load limit at maximum cold
tire inflation pressure mentioned on the
sidewall of the tire. ( P. 509)