Page 55 of 356
55
2. Bluetooth® SETTINGS
2
BASIC FUNCTION
1Select “Device Name”.
2Enter the name and select “OK”.
1Select “Connect Audio Player
From”.
2Select the desired connection method.
“Vehicle”: Select to connect the audio
system to the audio player.
“Device”: Select to connect the audio
player to the audio system.
Depending on the audio player, the “Vehi-
cle” or “Device” connection method may
be best. As such, refer to the manual that
comes with the audio player.
To reset the connection method, select
“Default”.
1Display the “Bluetooth* Setup” screen.
(P.49)
2Select “System Settings”.
3Select the desired item to be set.
*: Bluetooth is a registered trademark of
Bluetooth SIG, Inc.
CHANGING A DEVICE NAME
INFORMATION
●Even if the device name is changed, the
name registered in your Bluetooth®
device does not change.
SETTING AUDIO PLAYER
CONNECTION METHOD
“System Settings” SCREEN
The Bluetooth® settings can be con-
firmed and changed.
Page 56 of 356
56
2. Bluetooth® SETTINGS
1Select “Bluetooth* Power”.
When “Bluetooth* Power” is on:
Vehicles without a smart key system
The Bluetooth
® device is automatically
connected when the engine switch is
turned to the “ACC” or “ON” position.
Vehicles with a smart key system
The Bluetooth
® device is automatically
connected when the engine
switch is turned to ACCESSORY or IG-
NITION ON mode.
When “Bluetooth* Power” is off:
The Bluetooth
® device is disconnected,
and the system will not connect to it next
time.
1Select “Bluetooth* Name”.
2Enter a name and select “OK”.
1Select “Bluetooth* PIN”.
2Enter a PIN-code and select “OK”.
*: Bluetooth is a registered trademark of
Bluetooth SIG, Inc.
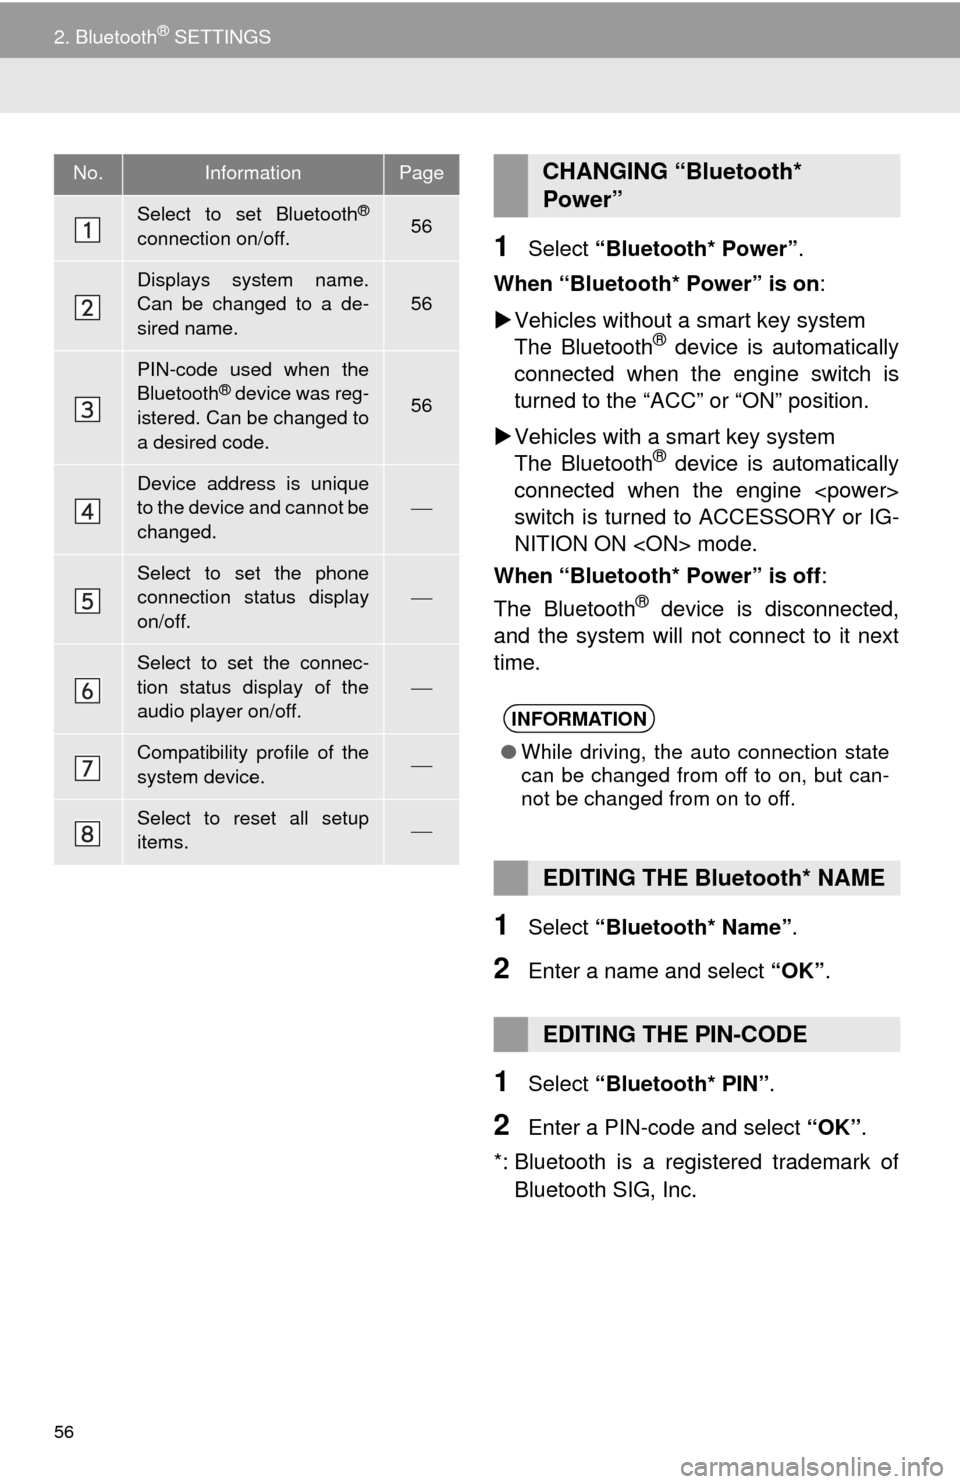
No.InformationPage
Select to set Bluetooth®
connection on/off.56
Displays system name.
Can be changed to a de-
sired name.
56
PIN-code used when the
Bluetooth® device was reg-
istered. Can be changed to
a desired code.56
Device address is unique
to the device and cannot be
changed.
Select to set the phone
connection status display
on/off.
Select to set the connec-
tion status display of the
audio player on/off.
Compatibility profile of the
system device.
Select to reset all setup
items.
CHANGING “Bluetooth*
Power”
INFORMATION
●While driving, the auto connection state
can be changed from off to on, but can-
not be changed from on to off.
EDITING THE Bluetooth* NAME
EDITING THE PIN-CODE
Page 58 of 356
58
3. OTHER SETTINGS
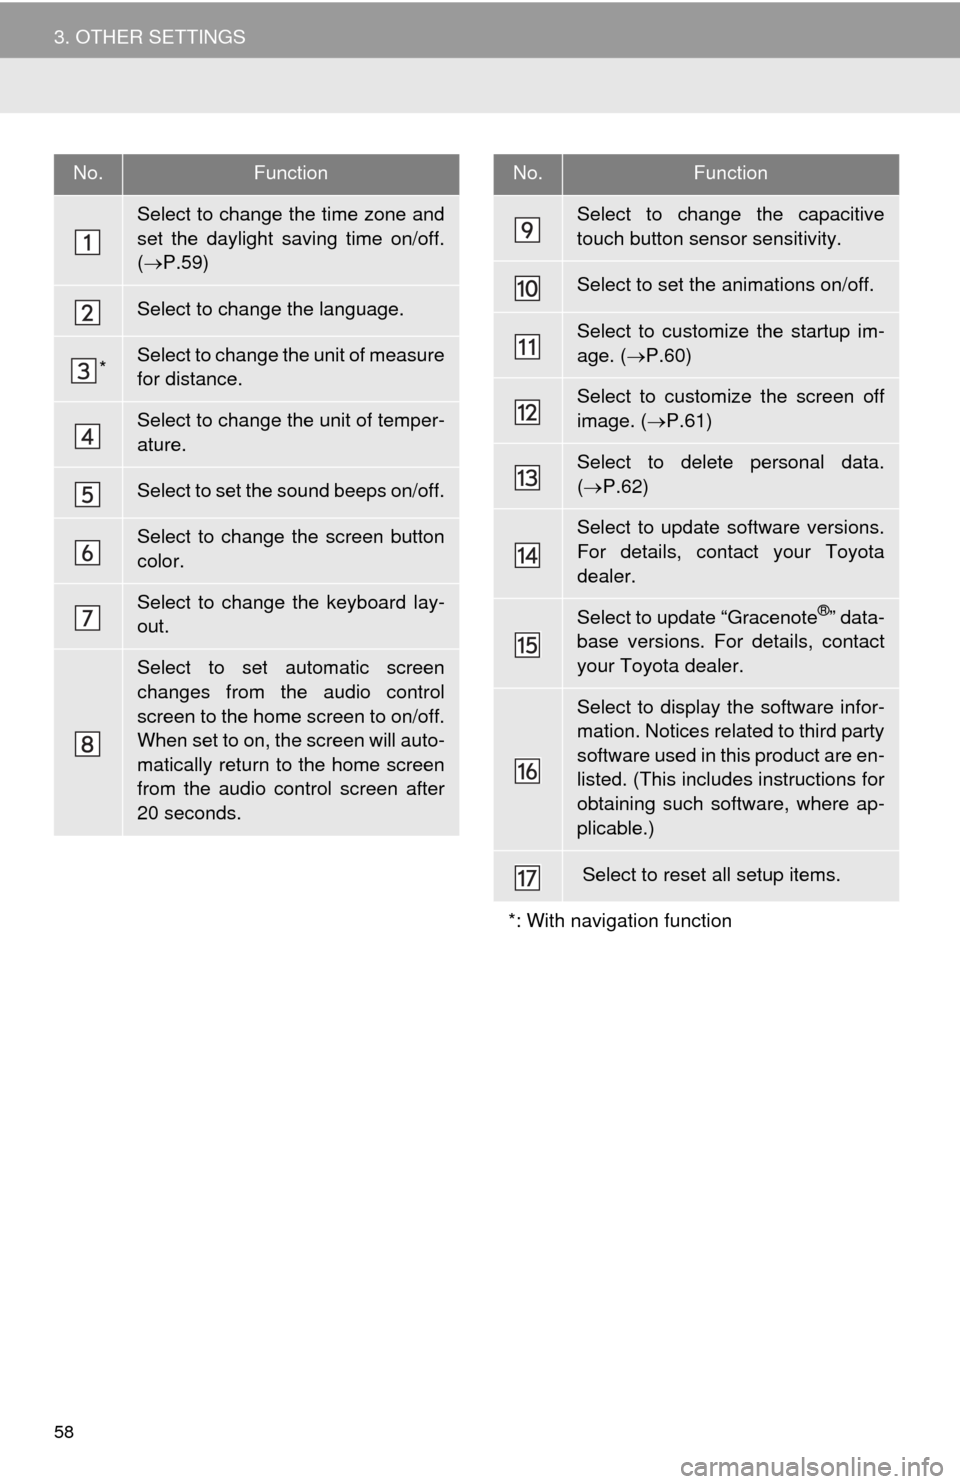
No.Function
Select to change the time zone and
set the daylight saving time on/off.
(P.59)
Select to change the language.
*Select to change the unit of measure
for distance.
Select to change the unit of temper-
ature.
Select to set the sound beeps on/off.
Select to change the screen button
color.
Select to change the keyboard lay-
out.
Select to set automatic screen
changes from the audio control
screen to the home screen to on/off.
When set to on, the screen will auto-
matically return to the home screen
from the audio control screen after
20 seconds.
Select to change the capacitive
touch button sensor sensitivity.
Select to set the animations on/off.
Select to customize the startup im-
age. (P.60)
Select to customize the screen off
image. (P.61)
Select to delete personal data.
(P.62)
Select to update software versions.
For details, contact your Toyota
dealer.
Select to update “Gracenote®” data-
base versions. For details, contact
your Toyota dealer.
Select to display the software infor-
mation. Notices related to third party
software used in this product are en-
listed. (This includes instructions for
obtaining such software, where ap-
plicable.)
Select to reset all setup items.
*: With navigation function
No.Function
Page 62 of 356
62
3. OTHER SETTINGS
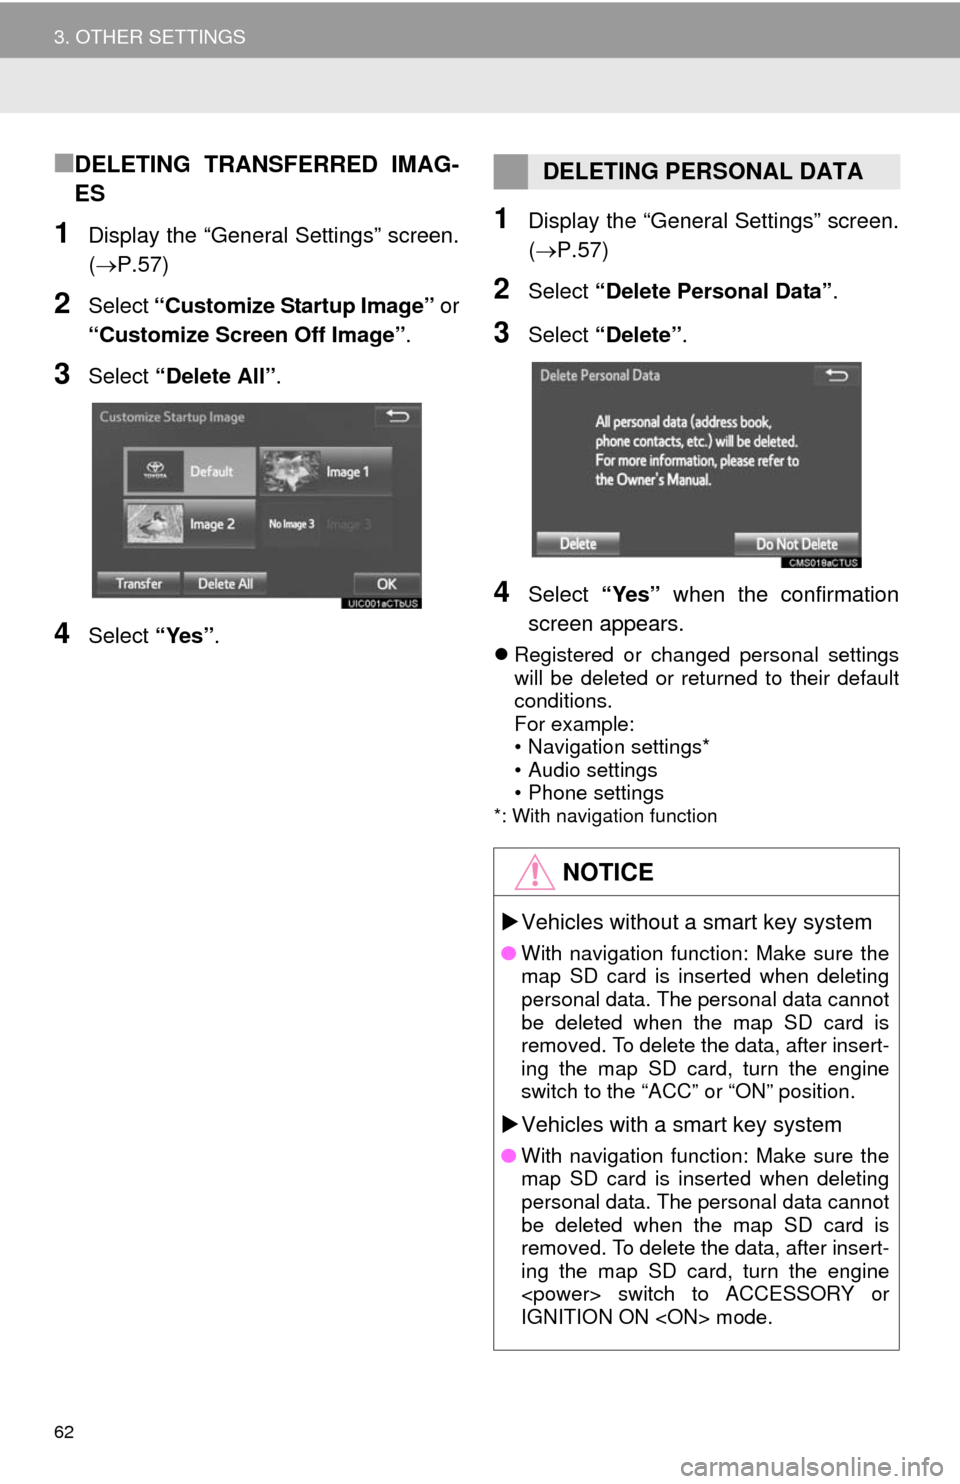
■DELETING TRANSFERRED IMAG-
ES
1Display the “General Settings” screen.
(P.57)
2Select “Customize Startup Image” or
“Customize Screen Off Image”.
3Select “Delete All”.
4Select “Yes”.
1Display the “General Settings” screen.
(P.57)
2Select “Delete Personal Data”.
3Select “Delete”.
4Select “Yes” when the confirmation
screen appears.
Registered or changed personal settings
will be deleted or returned to their default
conditions.
For example:
• Navigation settings*
• Audio settings
• Phone settings
*: With navigation function
DELETING PERSONAL DATA
NOTICE
Vehicles without a smart key system
●With navigation function: Make sure the
map SD card is inserted when deleting
personal data. The personal data cannot
be deleted when the map SD card is
removed. To delete the data, after insert-
ing the map SD card, turn the engine
switch to the “ACC” or “ON” position.
Vehicles with a smart key system
●With navigation function: Make sure the
map SD card is inserted when deleting
personal data. The personal data cannot
be deleted when the map SD card is
removed. To delete the data, after insert-
ing the map SD card, turn the engine
switch to ACCESSORY or
IGNITION ON mode.
Page 64 of 356
64
3. OTHER SETTINGS
3. DRIVER SETTINGS
1Press the “APPS” button.
2Select “Setup”.
3Select “Driver”.
4Select “Enable this Feature”.
1Display the driver settings screen.
(P.64)
2Select “Manually Select Linked Set-
tings”.
3Select the desired phone.
After a few seconds, loaded screen auto-
matically switches to the home screen.
The driver settings feature will allow
the system to link some preferences
(such as audio presets, button colors,
language, etc.) to a paired Bluetooth
®
phone.
MANUALLY SELECT LINKED
SETTINGS
Page 69 of 356
3
69
1
2
4
3
5
6
7
8
9
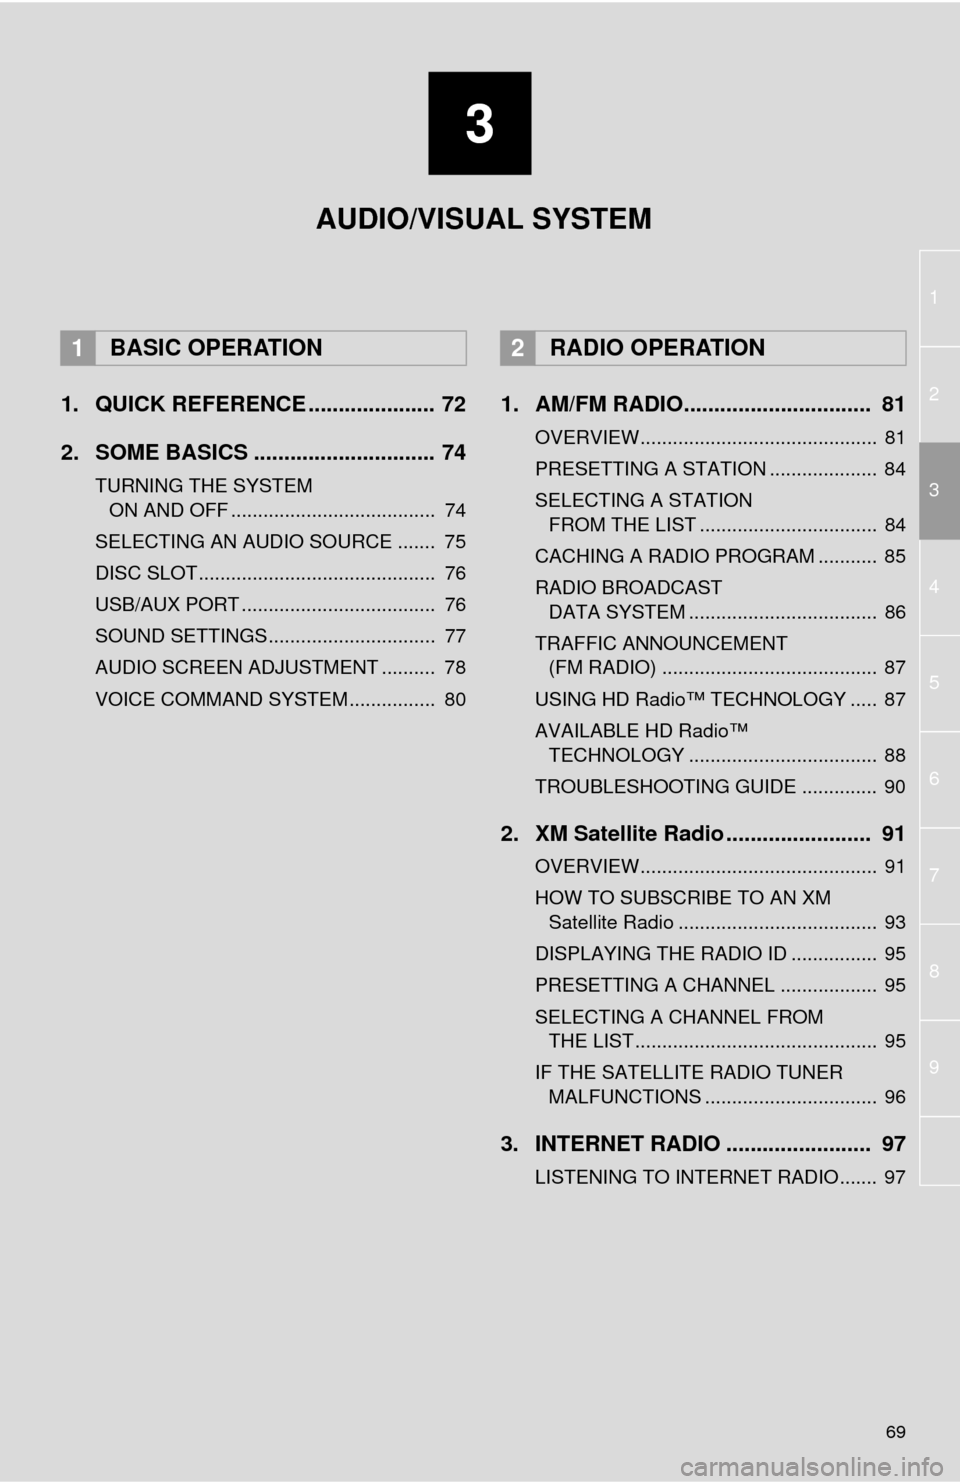
1. QUICK REFERENCE ..................... 72
2. SOME BASICS .............................. 74
TURNING THE SYSTEM
ON AND OFF ...................................... 74
SELECTING AN AUDIO SOURCE ....... 75
DISC SLOT ............................................ 76
USB/AUX PORT .................................... 76
SOUND SETTINGS............................... 77
AUDIO SCREEN ADJUSTMENT .......... 78
VOICE COMMAND SYSTEM ................ 80
1. AM/FM RADIO............................... 81
OVERVIEW............................................ 81
PRESETTING A STATION .................... 84
SELECTING A STATION
FROM THE LIST ................................. 84
CACHING A RADIO PROGRAM ........... 85
RADIO BROADCAST
DATA SYSTEM ................................... 86
TRAFFIC ANNOUNCEMENT
(FM RADIO) ........................................ 87
USING HD Radio™ TECHNOLOGY ..... 87
AVAILABLE HD Radio™
TECHNOLOGY ................................... 88
TROUBLESHOOTING GUIDE .............. 90
2. XM Satellite Radio ........................ 91
OVERVIEW............................................ 91
HOW TO SUBSCRIBE TO AN XM
Satellite Radio ..................................... 93
DISPLAYING THE RADIO ID ................ 95
PRESETTING A CHANNEL .................. 95
SELECTING A CHANNEL FROM
THE LIST ............................................. 95
IF THE SATELLITE RADIO TUNER
MALFUNCTIONS ................................ 96
3. INTERNET RADIO ........................ 97
LISTENING TO INTERNET RADIO....... 97
1BASIC OPERATION2RADIO OPERATION
AUDIO/VISUAL SYSTEM
Page 70 of 356
70
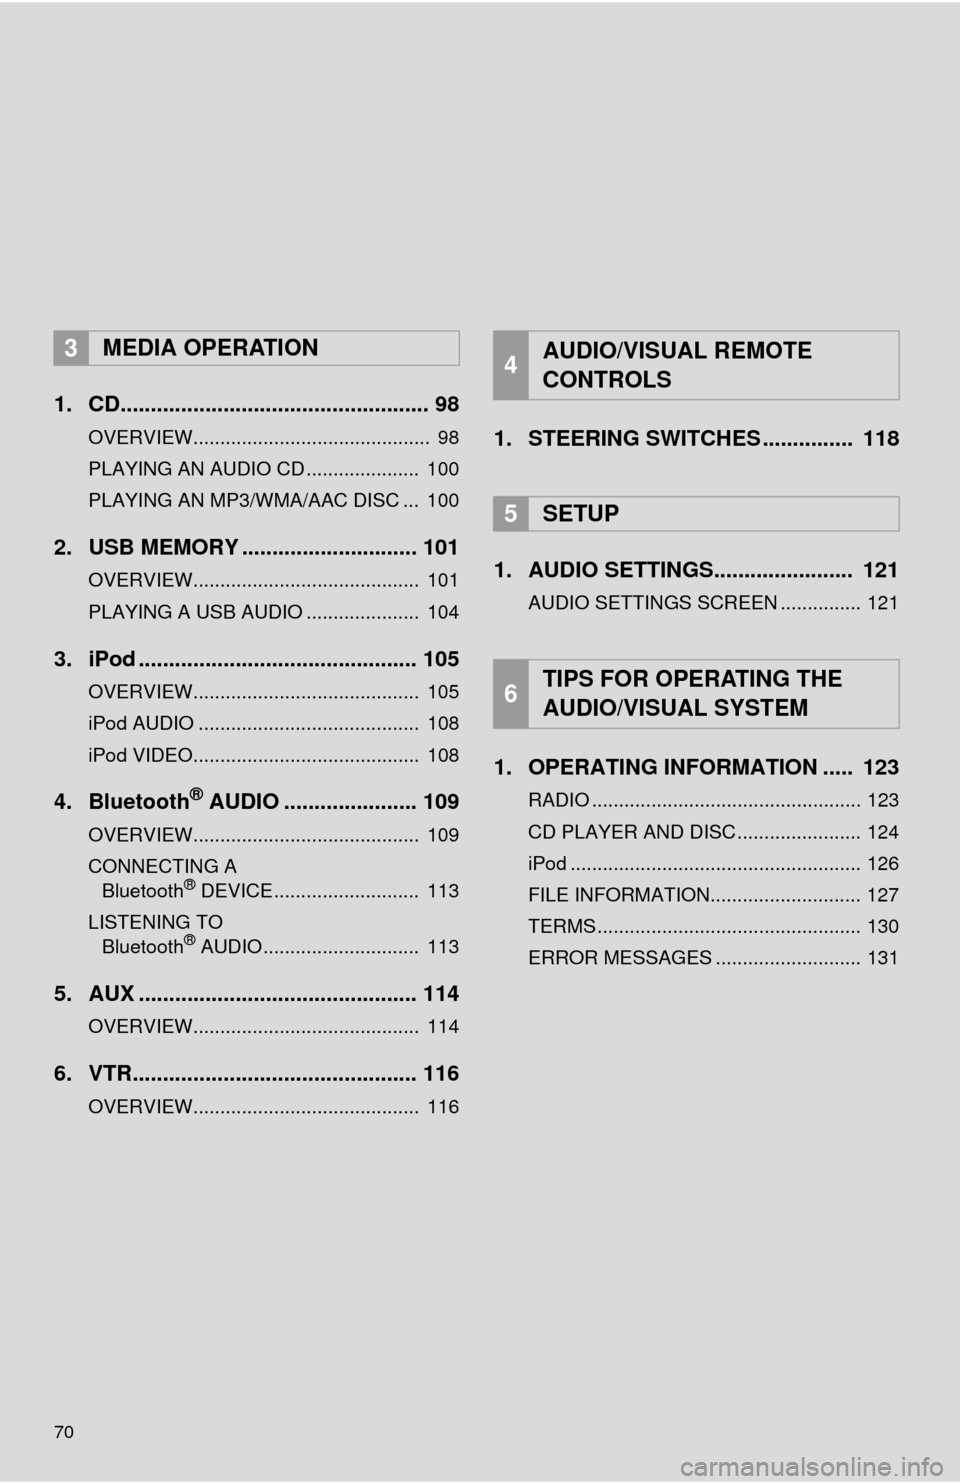
1. CD................................................... 98
OVERVIEW............................................ 98
PLAYING AN AUDIO CD ..................... 100
PLAYING AN MP3/WMA/AAC DISC ... 100
2. USB MEMORY ............................. 101
OVERVIEW.......................................... 101
PLAYING A USB AUDIO ..................... 104
3. iPod .............................................. 105
OVERVIEW.......................................... 105
iPod AUDIO ......................................... 108
iPod VIDEO.......................................... 108
4. Bluetooth® AUDIO ...................... 109
OVERVIEW.......................................... 109
CONNECTING A
Bluetooth
® DEVICE........................... 113
LISTENING TO
Bluetooth
® AUDIO............................. 113
5. AUX .............................................. 114
OVERVIEW.......................................... 114
6. VTR............................................... 116
OVERVIEW.......................................... 116
1. STEERING SWITCHES ............... 118
1. AUDIO SETTINGS....................... 121
AUDIO SETTINGS SCREEN ............... 121
1. OPERATING INFORMATION ..... 123
RADIO .................................................. 123
CD PLAYER AND DISC ....................... 124
iPod ...................................................... 126
FILE INFORMATION............................ 127
TERMS ................................................. 130
ERROR MESSAGES ........................... 131
3MEDIA OPERATION4AUDIO/VISUAL REMOTE
CONTROLS
5SETUP
6TIPS FOR OPERATING THE
AUDIO/VISUAL SYSTEM
Page 71 of 356
71
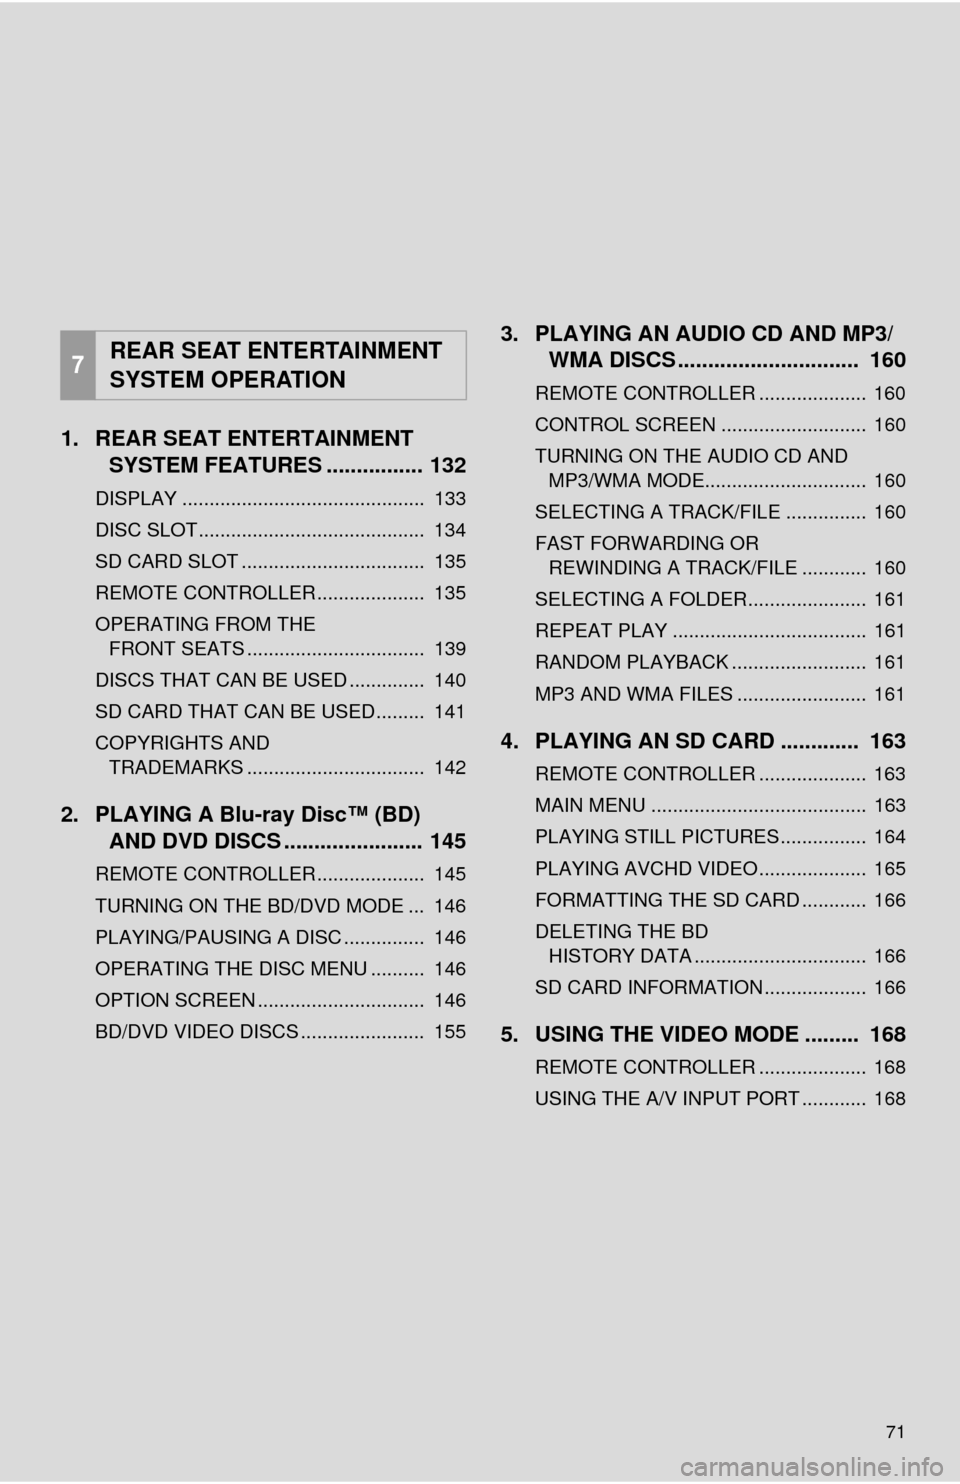
1. REAR SEAT ENTERTAINMENTSYSTEM FEATURES ................ 132
DISPLAY ............................................. 133
DISC SLOT .......................................... 134
SD CARD SLOT .................................. 135
REMOTE CONTROLLER .................... 135
OPERATING FROM THE
FRONT SEATS ................................. 139
DISCS THAT CAN BE USED .............. 140
SD CARD THAT CAN BE USED ......... 141
COPYRIGHTS AND TRADEMARKS ................................. 142
2. PLAYING A Blu-ray Disc™ (BD) AND DVD DISCS ..... .................. 145
REMOTE CONTROLLER .................... 145
TURNING ON THE BD/DVD MODE ... 146
PLAYING/PAUSING A DISC ............... 146
OPERATING THE DISC MENU .......... 146
OPTION SCREEN ............................... 146
BD/DVD VIDEO DISCS ....................... 155
3. PLAYING AN AUDIO CD AND MP3/
WMA DISCS .............................. 160
REMOTE CONTROLLER .................... 160
CONTROL SCREEN ........................... 160
TURNING ON THE AUDIO CD AND
MP3/WMA MODE.............................. 160
SELECTING A TRACK/FILE ............... 160
FAST FORWARDING OR REWINDING A TRACK/FILE ............ 160
SELECTING A FOLDER...................... 161
REPEAT PLAY .................................... 161
RANDOM PLAYBACK ......................... 161
MP3 AND WMA FILES ........................ 161
4. PLAYING AN SD CARD ............. 163
REMOTE CONTROLLER .................... 163
MAIN MENU ........................................ 163
PLAYING STILL PICTURES................ 164
PLAYING AVCHD VIDEO.................... 165
FORMATTING THE SD CARD ............ 166
DELETING THE BD HISTORY DATA ................................ 166
SD CARD INFORMATION ................... 166
5. USING THE VIDEO MODE ......... 168
REMOTE CONTROLLER .................... 168
USING THE A/V INPUT PORT ............ 168 7
REAR SEAT ENTERTAINMENT
SYSTEM OPERATION