Page 188 of 292

188
3. WHAT TO DO IF...
When using the Bluetooth® message function
In other situations
SymptomLikely causeSolution
Page
Cellular
phoneThis
system
Messages cannot be
viewed.
Message transfer is
not enabled on the
cellular phone.
Enable message
transfer on the cellu-
lar phone (approve
message transfer on
the phone).
Automatic transfer
function on this sys-
tem is set to off.Set automatic trans-
fer function on this
system to on.
182
New message notifi-
cations are not dis-
played.
Notification of SMS/
MMS/E-mail recep-
tion on this system is
set to off.Set notification of
SMS/MMS/E-mail
reception on this sys-
tem to on.
182
Automatic message
transfer function is
not enabled on the
cellular phone.Enable automatic
transfer function on
the cellular phone.
SymptomLikely causeSolution
Page
Cellular
phoneThis
system
The Bluetooth® con-
nection status is dis-
played at the top of
the screen each time
the engine switch is
in ACCESSORY or
ON
mode.
Connection confir-
mation display on
this system is set to
on.To turn off the dis-
play, set connection
confirmation display
on this system to off.
52
Page 189 of 292
189
3. WHAT TO DO IF...
7
PHONE: For details, refer to the owner’s manual that came with the cellular phone.
Even though all con-
ceivable measures
have been taken, the
symptom status does
not change.
The cellular phone is
not close enough to
this system.Bring the cellular
phone closer to this
system.
The cellular phone is
the most likely cause
of the symptom.
Turn the cellular
phone off, remove
and reinstall the bat-
tery pack, and then
restart the cellular
phone.
Enable the cellular
phone’s Bluetooth®
connection.
Stop the cellular
phone’s security soft-
ware and close all
applications.
Before using an ap-
plication installed on
the cellular phone,
carefully check its
source and how its
operation might af-
fect this system.
SymptomLikely causeSolution
Page
Cellular
phoneThis
system
Page 213 of 292
213
2. DESTINATION SEARCH
8
NAVIGATION SYSTEM
1Display the “Destination” screen.
(P.210)
2Select “Point of Interest”.
3Select the desired search method.
1Select “Name”.
2Enter a POI name and select “OK”.
3Select the desired POI.
When entering the name of a specific POI,
and there are 2 or more sites with the
same name, the list screen will be dis-
played. Select the desired POI.
SEARCHING BY POINT OF
INTEREST
There are 3 methods to search for a
destination by Points of Interest.
No.FunctionPage
Select to search by name.213
Select to search by catego-
ry.214
Select to search by phone
number.215
SEARCHING BY NAME
No.FunctionPage
Select to search for POI in
the desired city.214
Select to search for POI
from the category list.214
INFORMATION
●To search for a facility name using multi-
ple search words, put a space between
each word.
Page 215 of 292

215
2. DESTINATION SEARCH
8
NAVIGATION SYSTEM
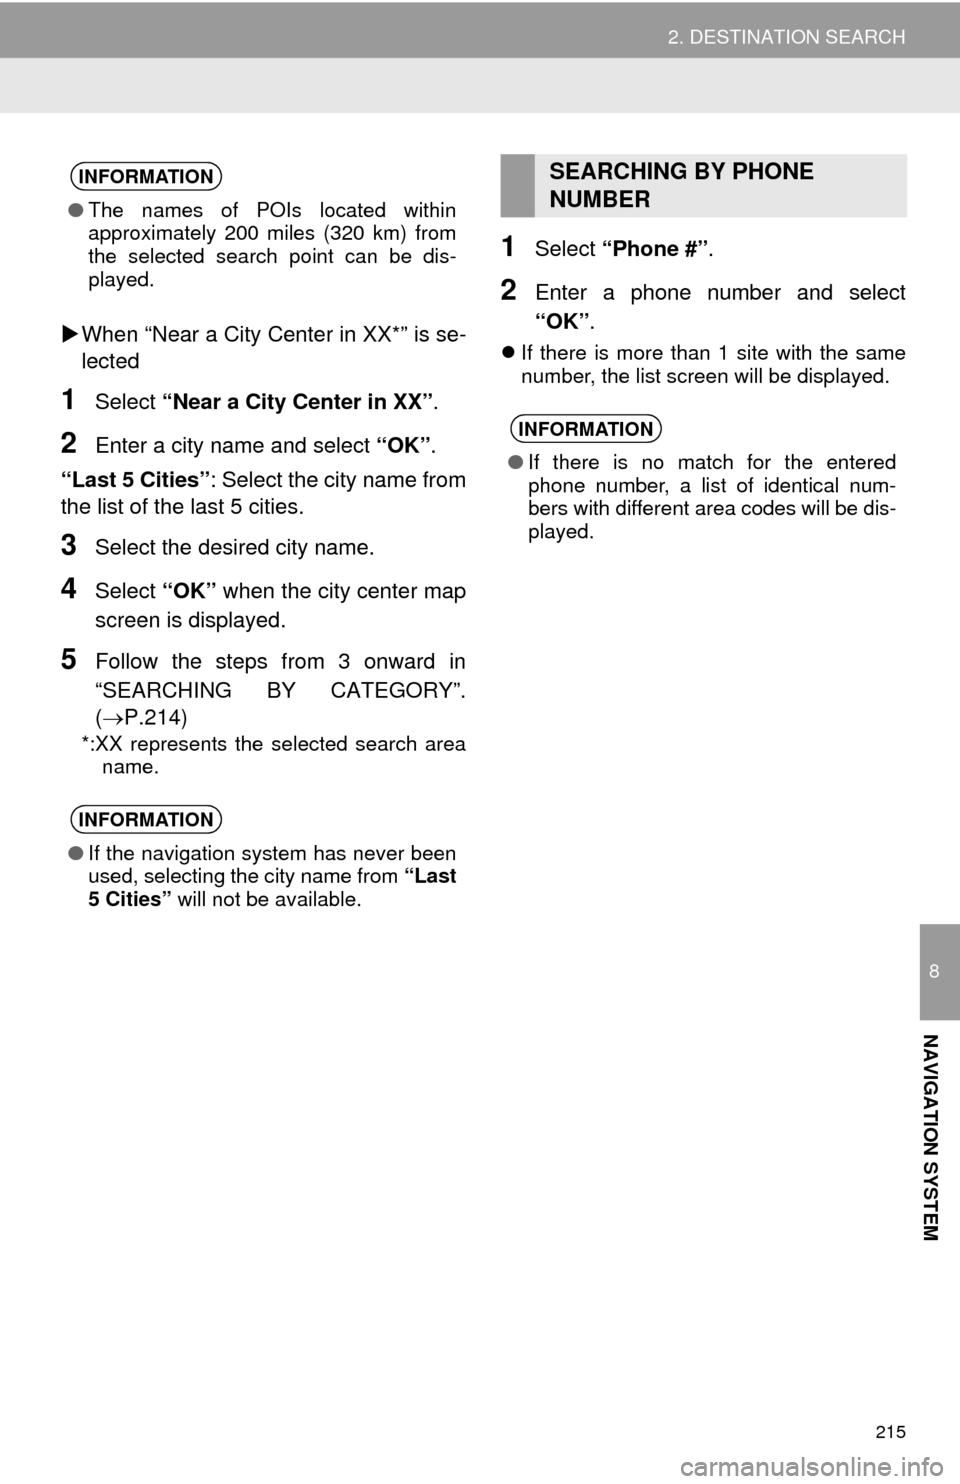
When “Near a City Center in XX*” is se-
lected
1Select “Near a City Center in XX”.
2Enter a city name and select “OK”.
“Last 5 Cities”: Select the city name from
the list of the last 5 cities.
3Select the desired city name.
4Select “OK” when the city center map
screen is displayed.
5Follow the steps from 3 onward in
“SEARCHING BY CATEGORY”.
(P.214)
*:XX represents the selected search area
name.
1Select “Phone #”.
2Enter a phone number and select
“OK”.
If there is more than 1 site with the same
number, the list screen will be displayed.
INFORMATION
●The names of POIs located within
approximately 200 miles (320 km) from
the selected search point can be dis-
played.
INFORMATION
●If the navigation system has never been
used, selecting the city name from “Last
5 Cities” will not be available.
SEARCHING BY PHONE
NUMBER
INFORMATION
●If there is no match for the entered
phone number, a list of identical num-
bers with different area codes will be dis-
played.
Page 236 of 292
236
4. MEMORY POINTS
1Display the “Navigation Settings”
screen. (P.235)
2Select “Home”.
3Select the desired item to be set.
1Select “New”.
2Select the desired item to search for
the location. (P.208)
3Select “OK” when the editing home
screen appears.
1Select “Edit”.
2Select the desired item to be edited.
3Select “OK”.
1Select “Delete”.
2Select “Yes” when the confirmation
screen appears.
SETTING UP HOME
If home has been registered, that infor-
mation can be recalled by selecting
“Go Home” on the “Destination”
screen. (P.211)
No.FunctionPage
Select to register home.236
Select to edit home.236
Select to delete home.236
REGISTERING HOME
EDITING HOME
No.FunctionPage
Select to edit the home
name.241
Select to set display of the
home name on/off.
Select to edit location infor-
mation.241
Select to edit the phone
number.241
Select to change the icon
to be displayed on the map
screen.
240
DELETING HOME
Page 238 of 292
238
4. MEMORY POINTS
1Select “Edit”.
2Select the desired preset destination.
3Select the item to be edited.
4Select “OK”.
1Select “Delete”.
2Select the preset destination to be de-
leted and select “Delete”.
3Select “Yes” when the confirmation
screen appears.
EDITING PRESET
DESTINATIONS
No.FunctionPage
Select to edit the preset
destination name.241
Select to set display of the
preset destination name
on/off.
Select to edit location infor-
mation.241
Select to edit the phone
number.241
Select to change the icon
to be displayed on the map
screen.240
DELETING PRESET
DESTINATIONS
Page 239 of 292

239
4. MEMORY POINTS
8
NAVIGATION SYSTEM
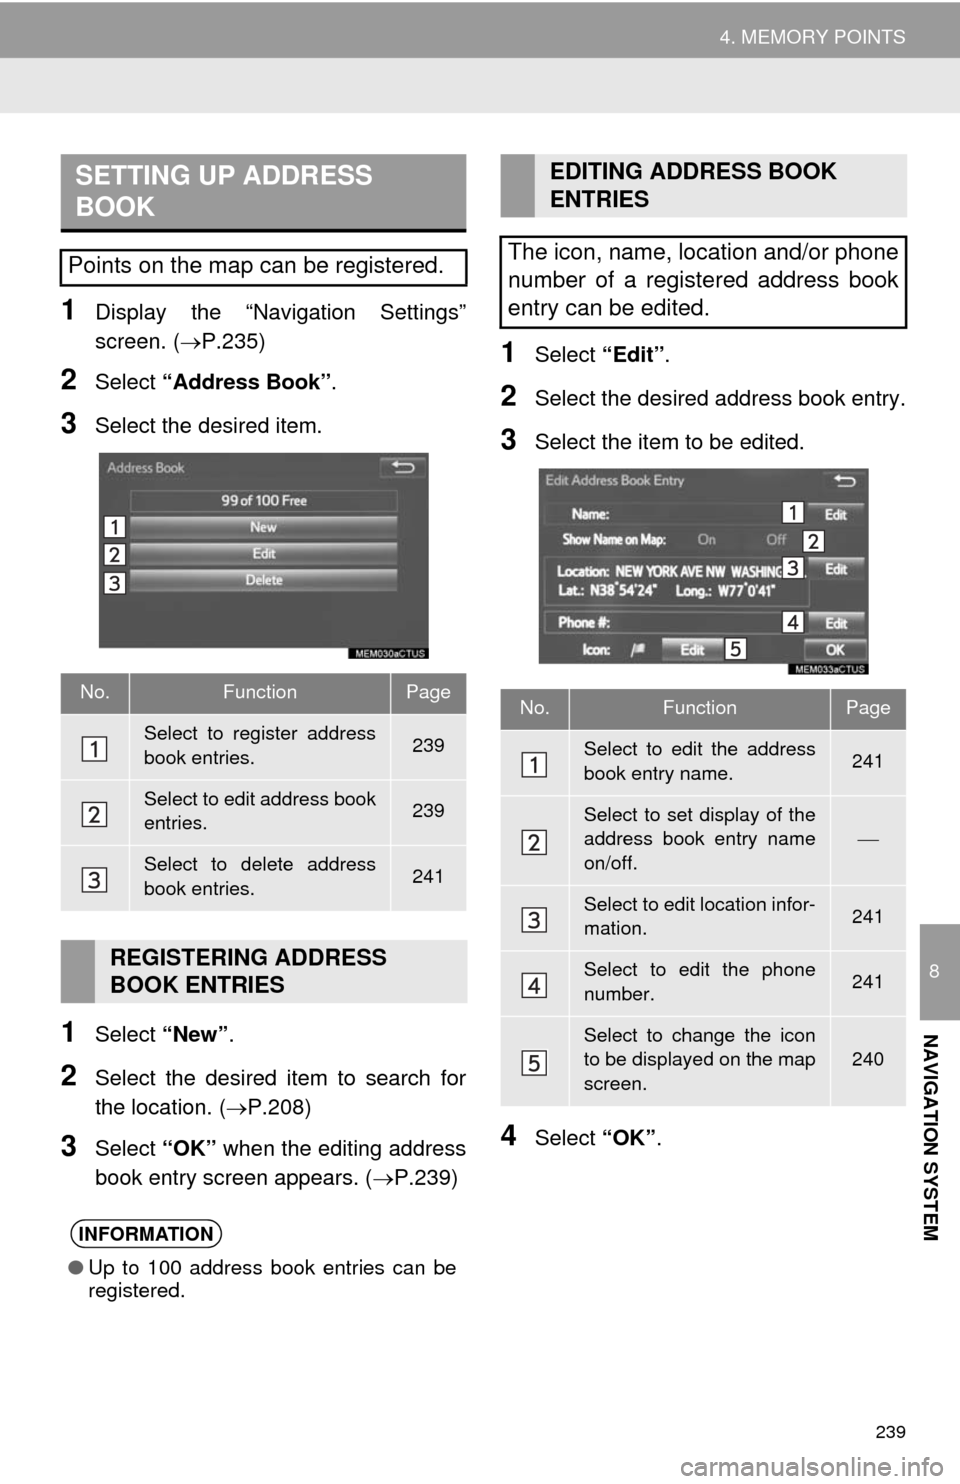
1Display the “Navigation Settings”
screen. (P.235)
2Select “Address Book”.
3Select the desired item.
1Select “New”.
2Select the desired item to search for
the location. (P.208)
3Select “OK” when the editing address
book entry screen appears. (P.239)
1Select “Edit”.
2Select the desired address book entry.
3Select the item to be edited.
4Select “OK”.
SETTING UP ADDRESS
BOOK
Points on the map can be registered.
No.FunctionPage
Select to register address
book entries.239
Select to edit address book
entries.239
Select to delete address
book entries.241
REGISTERING ADDRESS
BOOK ENTRIES
INFORMATION
●Up to 100 address book entries can be
registered.
EDITING ADDRESS BOOK
ENTRIES
The icon, name, location and/or phone
number of a registered address book
entry can be edited.
No.FunctionPage
Select to edit the address
book entry name.241
Select to set display of the
address book entry name
on/off.
Select to edit location infor-
mation.241
Select to edit the phone
number.241
Select to change the icon
to be displayed on the map
screen.240
Page 241 of 292
241
4. MEMORY POINTS
8
NAVIGATION SYSTEM
■CHANGING THE NAME
1Select “Edit” next to “Name”.
2Enter a name and select “OK”.
■CHANGING THE LOCATION
1Select “Edit” next to “Location”.
2Scroll the map to the desired point
(P.200) and select “OK”.
■CHANGING PHONE NUMBER
1Select “Edit” next to “Phone #”.
2Enter the phone number and select
“OK”.
1Select “Delete”.
2Select the item to be deleted and select
“Delete”.
3Select “Yes” when the confirmation
screen appears.
1Display the “Navigation Settings”
screen. (P.235)
2Select “Areas to Avoid”.
3Select the desired item.
DELETING ADDRESS BOOK
ENTRIES
SETTING UP AREAS TO
AVOID
Areas to be avoided because of traffic
jams, construction work or other rea-
sons can be registered as “Areas to
Avoid”.
No.FunctionPage
Select to register areas to
avoid.242
Select to edit areas to
avoid.242
Select to delete areas to
avoid.243