Page 319 of 620
319
3-2. Using the audio system
3
Interior features
■
Telephone switch ( P. 334)
■ Microphone
The vehicle’s built in microphone
is used when talking on the
phone.
The person you are speaking to
can be heard from the front
speakers.
To use the hands-free system, yo u must register your Bluetooth
®
phone in the system. (P. 306)
Status display
You can check indicators such as signal strength and battery charge
on the phone screen.
Connection status
Signal strength
Battery charge
IndicatorsConditions
Connection statusGoodNot connected
Battery chargeFull Empty
Call area“Rm”: Roaming area
Signal strengthExcellent Poor
Page 320 of 620
320
3-2. Using the audio system
Making a call
DialingDisplay the phone screen. ( P. 318)
Select the “Dial Pad” tab and enter a phone number.
To delete the input phone number, select .
For the first digit, you can enter “+” by selecting “ ” for a while.
Press the switch on the steering wheel or select .
Dialing from the contacts list
You can dial a number from the c ontact data imported from your cel-
lular phone. The system has one contact for each registered phone.
Up to 2500 contacts may be stored in each contact. ( P. 321)
Display the phone screen. ( P. 318)
Select “Contacts” tab.
Choose the desired contact to call from the list.
Choose the number and then press the switch on the
steering wheel or select .
Once a Bluetooth® phone is registered, you can make a call using
the following procedure:
STEP1
STEP2
STEP3
STEP1
STEP2
STEP3
STEP4
Page 321 of 620
321
3-2. Using the audio system
3
Interior features
When the contact is empty
You can transfer the phone numbers in a Bluetooth
® phone to the
system.
Operation methods differ between PBAP (Phone Book Access Pro-
file) compatible and PBA P incompatible Bluetooth
® phones. If the
cellular phone does not support either PBAP or OPP (Object Push
Profile) service, you ca nnot transfer contacts.
Press the switch on the steering wheel.
If the phonebook is empty, a message will be displayed.
For a PBAP compatible Bluetooth® phone and “Automatic Con-
tact/History Transfer” is off
Select the desired item.
Select to transfer new con-
tacts from a cellular phone,
select “Always” and then
enable “Automatic Contact/
History Transfer”.
Select to transfer all the con-
tacts from a connected cellular
phone only once.
Select to cancel transferring.
STEP3STEP1
STEP2
Page 322 of 620
322 3-2. Using the audio system
For PBAP incompatible but OPP compatible Bluetooth® phones
Select the desired item.
Select to transfer the contacts
from the connected cellular
phone.
Follow the steps in “Update con-
tacts from phone” from “STEP2”.
(P. 338)
Select to add a new contact
manually.
Follow the steps in “Registering a
new contact to the contacts list”
from “STEP2”. ( P. 340)
Select to cancel transferring.
Calling using favorites list
You can make a call using numbers registered in the contact. Display the phone screen. ( P. 318)
Select “Favorites” tab.
Select the desired number to make a call.
STEP2
STEP1
STEP2
STEP3
Page 329 of 620
329
3-2. Using the audio system
3
Interior features
Bluetooth® phone message function
Displaying message inbox screen
Press the “ ” button.
Select .
Receiving a message When an e-mail/SMS/MMS is received, the incoming message
screen pops up with sound and is ready to be operated on the
screen. Select to check the message.
Select to refuse the message.
Select to call the message
sender.
Received messages can be forwarded from the connected
Bluetooth
® phone, enabling checking and replying using the audio
system.
Depending on the type of Bluetooth
® phone connected, received
messages may not be transfer red to the message inbox.
If the phone does not support the message function, this function
cannot be used.
STEP1
STEP2
Page 332 of 620

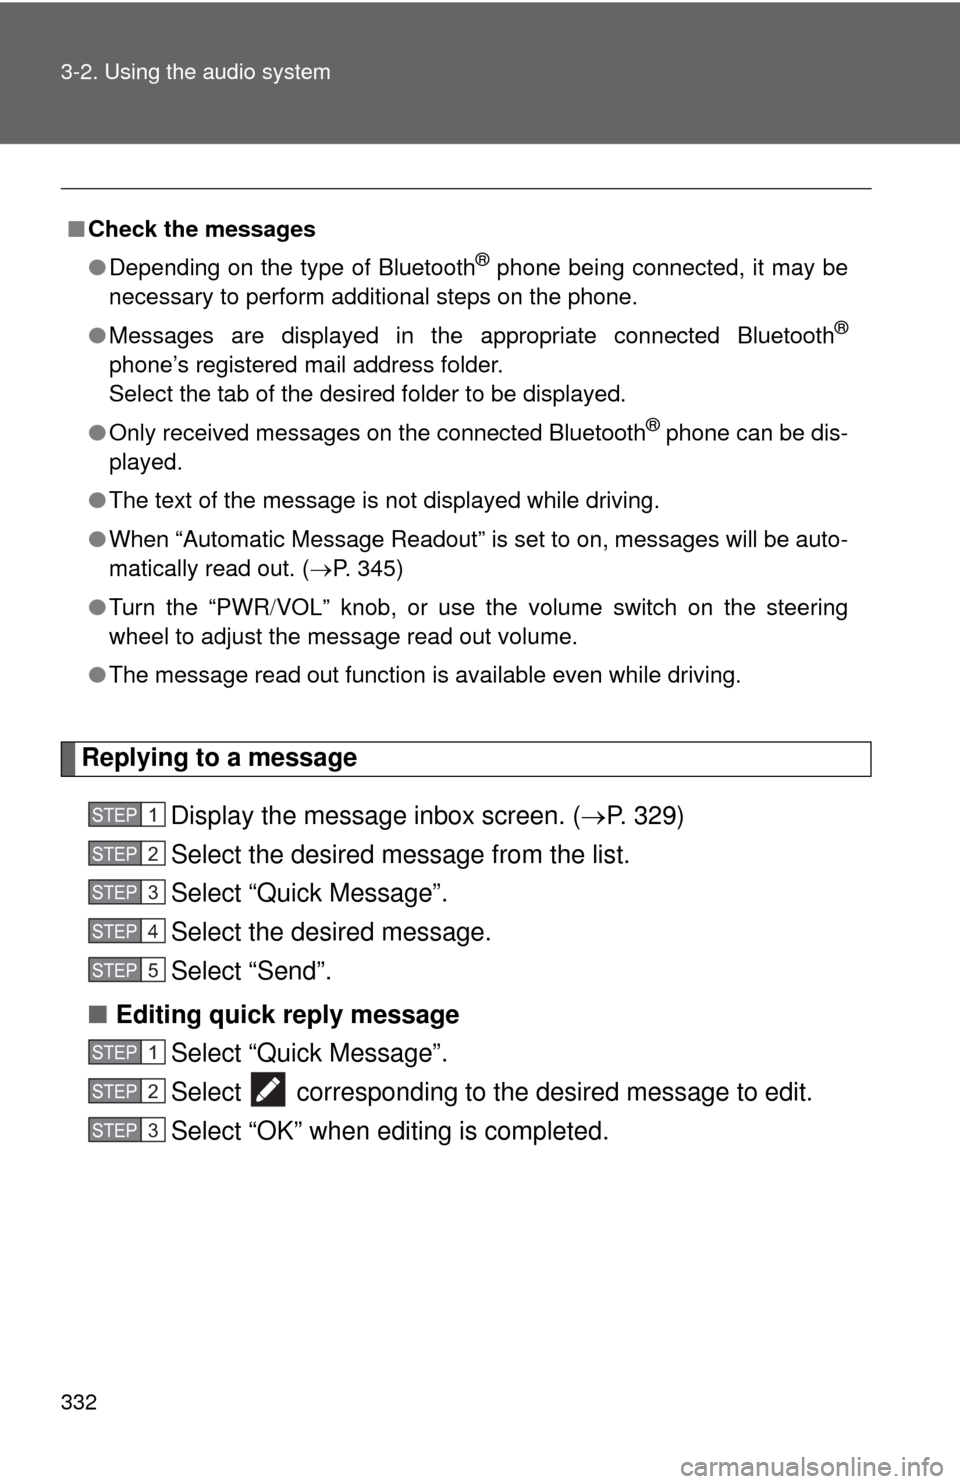
332 3-2. Using the audio system
Replying to a messageDisplay the message inbox screen. ( P. 329)
Select the desired message from the list.
Select “Quick Message”.
Select the desired message.
Select “Send”.
■ Editing quick reply message
Select “Quick Message”.
Select corresponding to the desired message to edit.
Select “OK” when editing is completed.
■Check the messages
●Depending on the type of Bluetooth
® phone being connected, it may be
necessary to perform additional steps on the phone.
● Messages are displayed in the appropriate connected Bluetooth
®
phone’s registered mail address folder.
Select the tab of the desired folder to be displayed.
● Only received messages on the connected Bluetooth
® phone can be dis-
played.
● The text of the message is not displayed while driving.
● When “Automatic Message Readout” is set to on, messages will be auto-
matically read out. ( P. 345)
● Turn the “PWR VOL” knob, or use the volume switch on the steering
wheel to adjust the message read out volume.
● The message read out function is available even while driving.
STEP1
STEP2
STEP3
STEP4
STEP5
STEP1
STEP2
STEP3
Page 335 of 620
335
3-2. Using the audio system
3
Interior features
Bluetooth® phone settings
“Phone/Message Settings” screenTo display the screen shown belo w, press the “SETUP” button, and
select “Phone” on the “Setup” screen.
Set the phone connection
( P. 306)
Setting the sound ( P. 336)
Contact/Call History Settings
( P. 337)
Set the message settings
( P. 345)
Set the phone display
( P. 347)
You can adjust the hands-free syst em to your desired settings.
Page 337 of 620

337
3-2. Using the audio system
3
Interior features
Contact/Call histor y settings
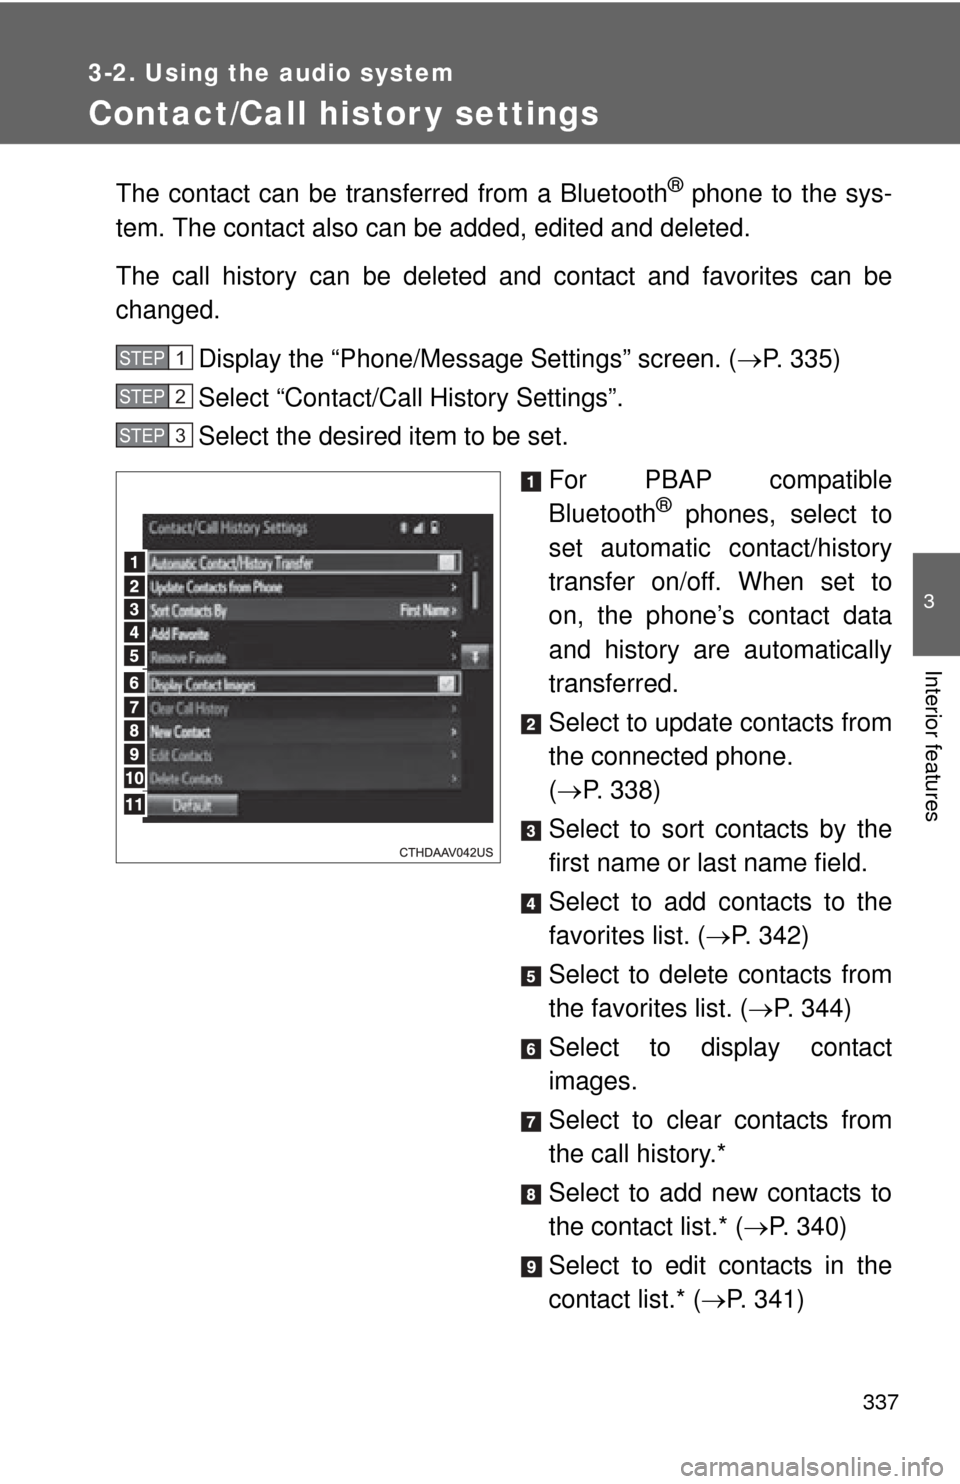
The contact can be transferred from a Bluetooth® phone to the sys-
tem. The contact also can be added, edited and deleted.
The call history can be deleted and contact and favorites can be
changed.
Display the “Phone/Message Settings” screen. ( P. 335)
Select “Contact/Ca ll History Settings”.
Select the desired item to be set.
For PBAP compatible
Bluetooth
® phones, select to
set automatic contact/history
transfer on/off. When set to
on, the phone’s contact data
and history are automatically
transferred.
Select to update contacts from
the connected phone.
( P. 338)
Select to sort contacts by the
first name or last name field.
Select to add contacts to the
favorites list. ( P. 342)
Select to delete contacts from
the favorites list. ( P. 344)
Select to display contact
images.
Select to clear contacts from
the call history.*
Select to add new contacts to
the contact list.* ( P. 340)
Select to edit contacts in the
contact list.* ( P. 341)
STEP1
STEP2
STEP3