2014 TOYOTA AVALON CD player
[x] Cancel search: CD playerPage 173 of 346
5
173
1
2
3
4
5
6
7
8
9
5. RADIO OPERATION(XM Satellite Radio
BROADCAST) ........... ................ 188
HOW TO SUBSCRIBE TO
AN XM Satellite Radio....................... 188
DISPLAYING THE RADIO ID .............. 188
LISTENING TO SATELLITE RADIO ... 189
CHANNEL CATEGORY ...................... 189
PRESETTING A CHANNEL ................ 189
SELECTING A CHANNEL ................... 190
DISPLAYING THE TITLE AND NAME ................................................ 190
IF THE SATELLITE RADIO TUNER MALFUNCTIONS .............................. 191
6. RADIO OPERATION (INTERNET RADIO
BROADCAST) ........... ................ 193
LISTENING TO INTERNET RADIO .... 193
7. DVD PLAYER OPERATION ........ 194
INSERTING A DISC ............................ 194
EJECTING A DISC .............................. 194
PLAYING A DISC ................................ 195
PLAYING AN AUDIO DISC ................. 195
PLAYING AN MP3/WMA DISC ........... 197
OPERATING A DVD DISC .................. 200
PLAYING A DVD DISC ....................... 201
DVD OPTIONS .................................... 202
IF THE PLAYER MALFUNCTIONS..... 209
DVD PLAYER AND DVD VIDEO
DISC INFORMATION ....................... 210
8. USB MEMORY OPERATION ...... 212
CONNECTING A USB MEMORY ........ 212
PLAYING A USB MEMORY ................ 213
9. iPod OPERATION ....................... 217
CONNECTING iPod............................. 217
PLAYING iPod ..................................... 218
10. Bluetooth® AUDIO
OPERATION ............................. 221
CONNECTING A Bluetooth®
AUDIO PLAYER ................................ 224
PLAYING Bluetooth
® AUDIO ............... 225
11. AUDIO/VIDEO REMOTE CONTROLS
(STEERING SWITCHES) .......... 229
12. AUDIO/VIDEO SYSTEM OPERATING HINTS.................. 230
RADIO RECEPTION............................ 230
iPod ...................................................... 231
USB MEMORY .................................... 231
CARING FOR YOUR DVD PLAYER
AND DISC ......................................... 231
MP3/WMA FILES ................................. 234
CD-R AND CD-RW DISCS .................. 235
TERMS ................................................ 236
1. AUDIO SETTINGS ...................... 239
HD Radio™ SYSTEM SETTINGS ....... 239
iPod SETTINGS ................................... 240
2SETUP
AUDIO/VIDEO SYSTEM
Page 176 of 346
176
1. AUDIO/VIDEO SYSTEM OPERATION
2. SOME BASICS
This section describes some of the ba-
sic features of the audio/video system.
Some information may not pertain to
your system.
Your audio/video system works when
the power
ACCESSORY or ON
mode.
CAUTION
●For vehicles sold in U.S.A. and Canada:
Part 15 of the FCC Rules
FCC Warning: Changes or modifications
in construction not expressly approved
by the party responsible for compliance
could void the user’s authority to operate
the equipment. Radio frequency expo-
sure. This device is approved for Mobile
Application only and, to comply with
applicable FCC radio frequency expo-
sure regulations, must be used with a
distance of at least 7.9 in. (20 cm)
between the antenna and the body of
any person at all time during use.
● Laser products
• Do not take this unit apart or attempt to
make any changes yourself. This is an
intricate unit that uses a laser pickup to
retrieve information from the surface of
compact discs. The laser is carefully
shielded so that its rays remain inside
the cabinet. Therefore, never try to dis-
assemble the player or alter any of its
parts since you may be exposed to
laser rays and dangerous voltages.
• This product utilizes a laser. Use of controls or adjustments or perfor-
mance of procedures other than those
specified herein may result in hazard-
ous radiation exposure.
NOTICE
● To prevent the 12-volt battery from being
discharged, do not leave the audio/video
system on longer than necessary when
the hybrid system is off
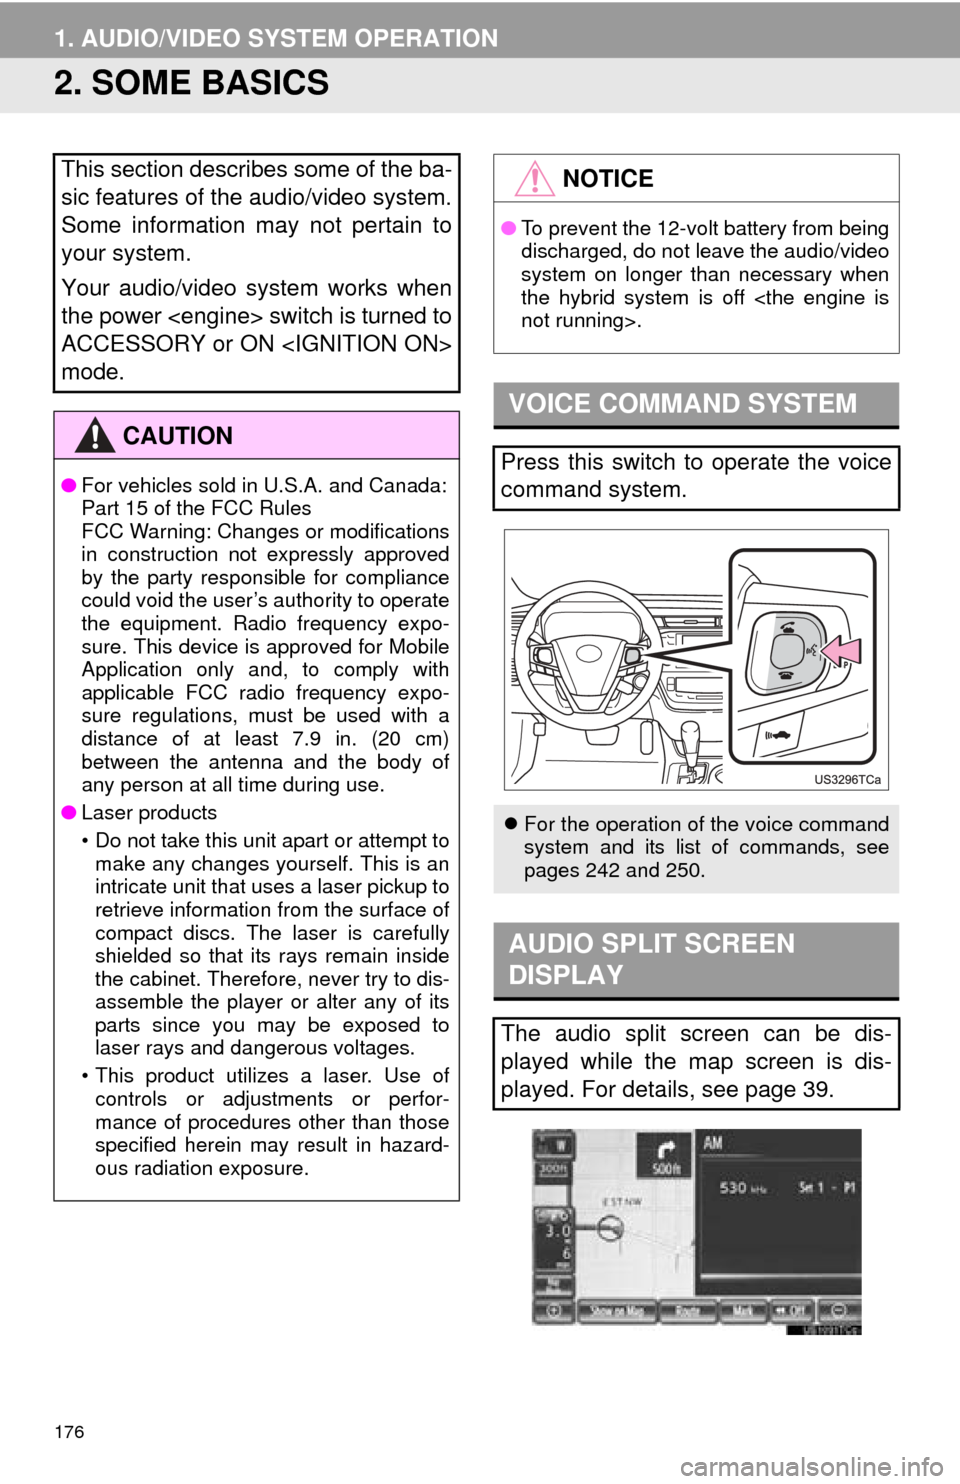
VOICE COMMAND SYSTEM
Press this switch to operate the voice
command system.
For the operation of the voice command
system and its list of commands, see
pages 242 and 250.
AUDIO SPLIT SCREEN
DISPLAY
The audio split screen can be dis-
played while the map screen is dis-
played. For details, see page 39.
Page 177 of 346
177
1. AUDIO/VIDEO SYSTEM OPERATION
5
AUDIO/VIDEO SYSTEM
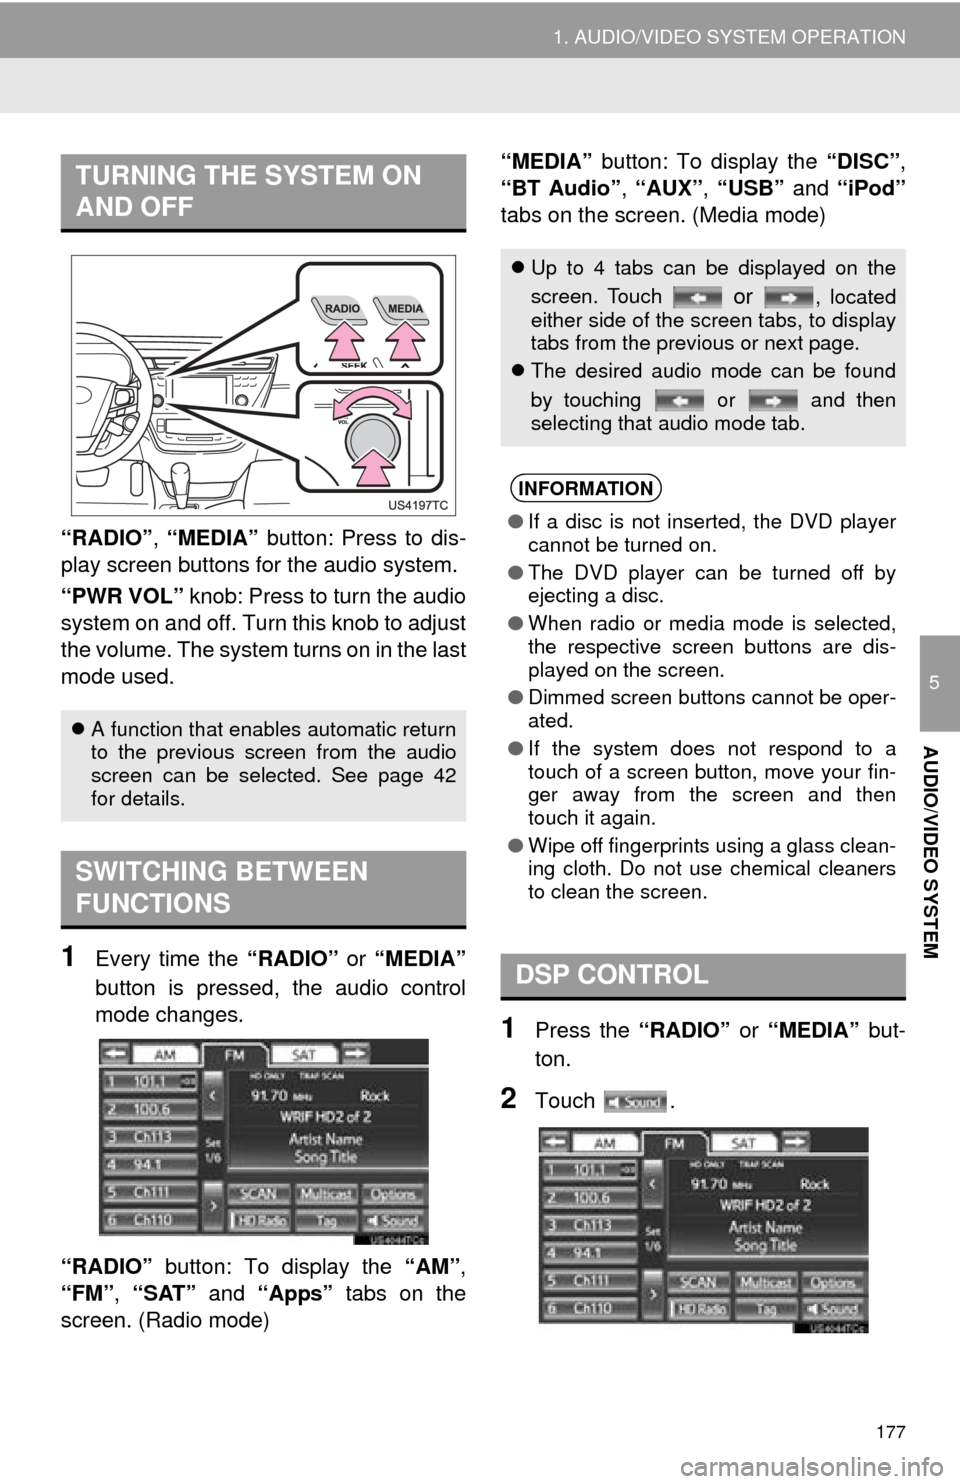
“RADIO”, “MEDIA” button: Press to dis-
play screen but tons for the audio system.
“PWR VOL” knob: Press to turn the audio
system on and off. Turn this knob to adjust
the volume. The system turns on in the last
mode used.
1Every time the “RADIO” or “MEDIA”
button is pressed, the audio control
mode changes.
“RADIO” button: To display the “AM”,
“FM”, “SAT” and “Apps” tabs on the
screen. (Radio mode) “MEDIA” button: To display the
“DISC”,
“BT Audio” , “AUX” , “USB” and “iPod”
tabs on the screen. (Media mode)
1Press the “RADIO” or “MEDIA” but-
ton.
2Touch .
TURNING THE SYSTEM ON
AND OFF
A function that enables automatic return
to the previous screen from the audio
screen can be selected. See page 42
for details.
SWITCHING BETWEEN
FUNCTIONS
Up to 4 tabs can be displayed on the
screen. Touch
or , located
either side of the screen tabs, to display
tabs from the previous or next page.
The desired audio mode can be found
by touching or and then
selecting that audio mode tab.
INFORMATION
●If a disc is not inserted, the DVD player
cannot be turned on.
● The DVD player can be turned off by
ejecting a disc.
● When radio or media mode is selected,
the respective screen buttons are dis-
played on the screen.
● Dimmed screen buttons cannot be oper-
ated.
● If the system does not respond to a
touch of a screen button, move your fin-
ger away from the screen and then
touch it again.
● Wipe off fingerprints using a glass clean-
ing cloth. Do not use chemical cleaners
to clean the screen.
DSP CONTROL
Page 179 of 346
179
1. AUDIO/VIDEO SYSTEM OPERATION
5
AUDIO/VIDEO SYSTEM
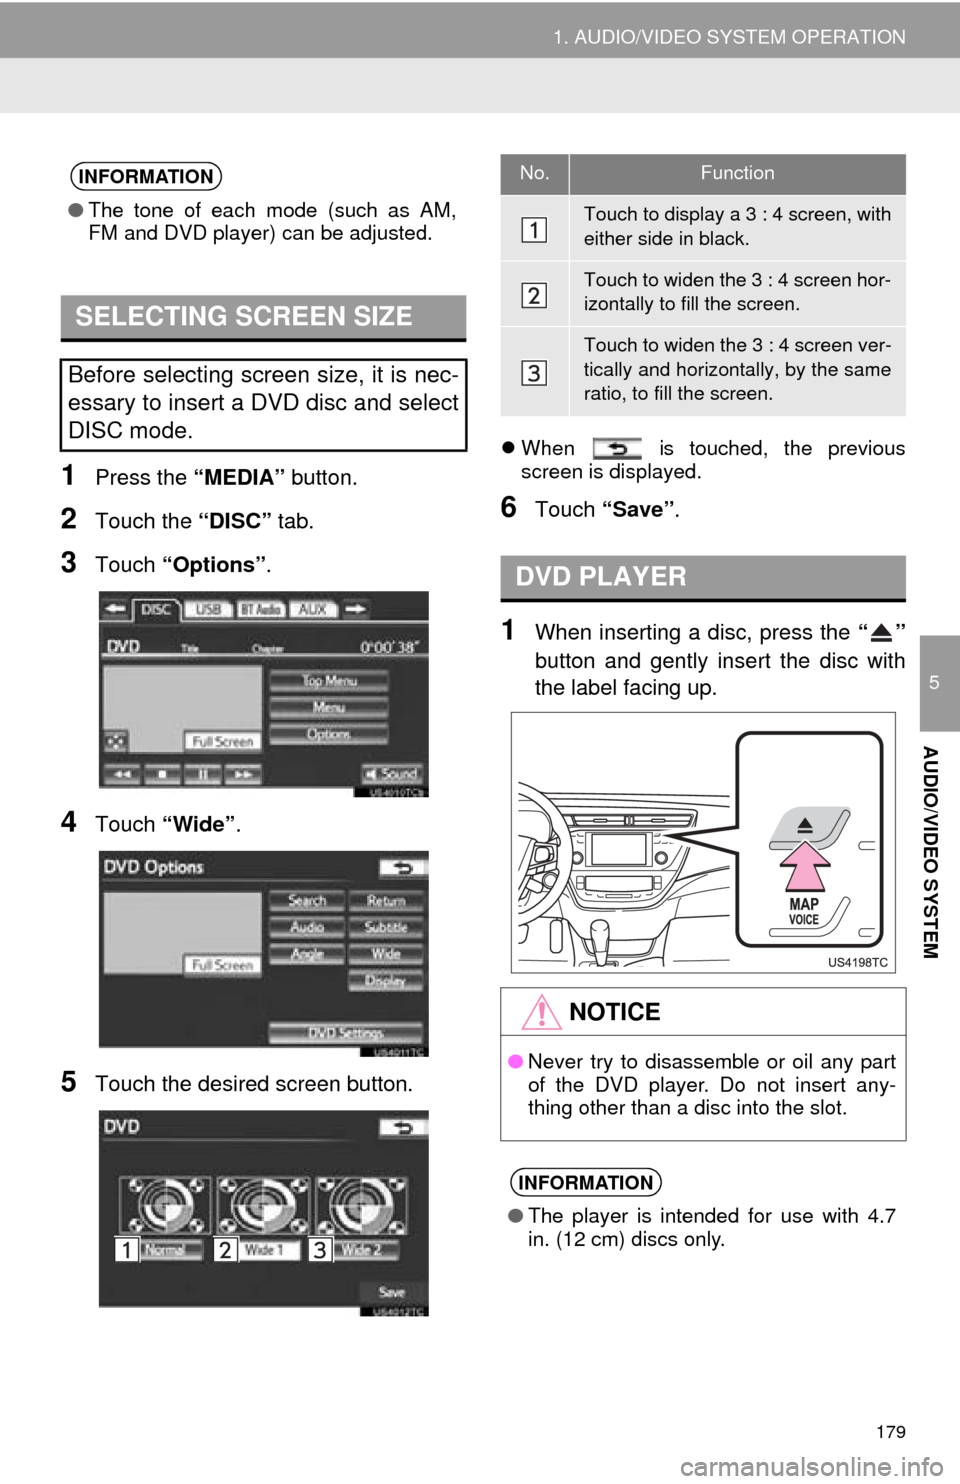
1Press the “MEDIA” button.
2Touch the “DISC” tab.
3Touch “Options”.
4Touch “Wide” .
5Touch the desired screen button.
When is touched, the previous
screen is displayed.
6Touch “Save” .
1When inserting a disc, press the “”
button and gently insert the disc with
the label facing up.
INFORMATION
● The tone of each mode (such as AM,
FM and DVD player) can be adjusted.
SELECTING SCREEN SIZE
Before selecting screen size, it is nec-
essary to insert a DVD disc and select
DISC mode.
No.Function
Touch to display a 3 : 4 screen, with
either side in black.
Touch to widen the 3 : 4 screen hor-
izontally to fill the screen.
Touch to widen the 3 : 4 screen ver-
tically and horizontally, by the same
ratio, to fill the screen.
DVD PLAYER
NOTICE
●Never try to disassemble or oil any part
of the DVD player. Do not insert any-
thing other than a disc into the slot.
INFORMATION
●The player is intended for use with 4.7
in. (12 cm) discs only.
Page 180 of 346
180
1. AUDIO/VIDEO SYSTEM OPERATION
1Press the “MEDIA” button to display
the media control screen and touch the
“AUX” tab or press the “MEDIA” but-
ton repeatedly to change to AUX
mode.
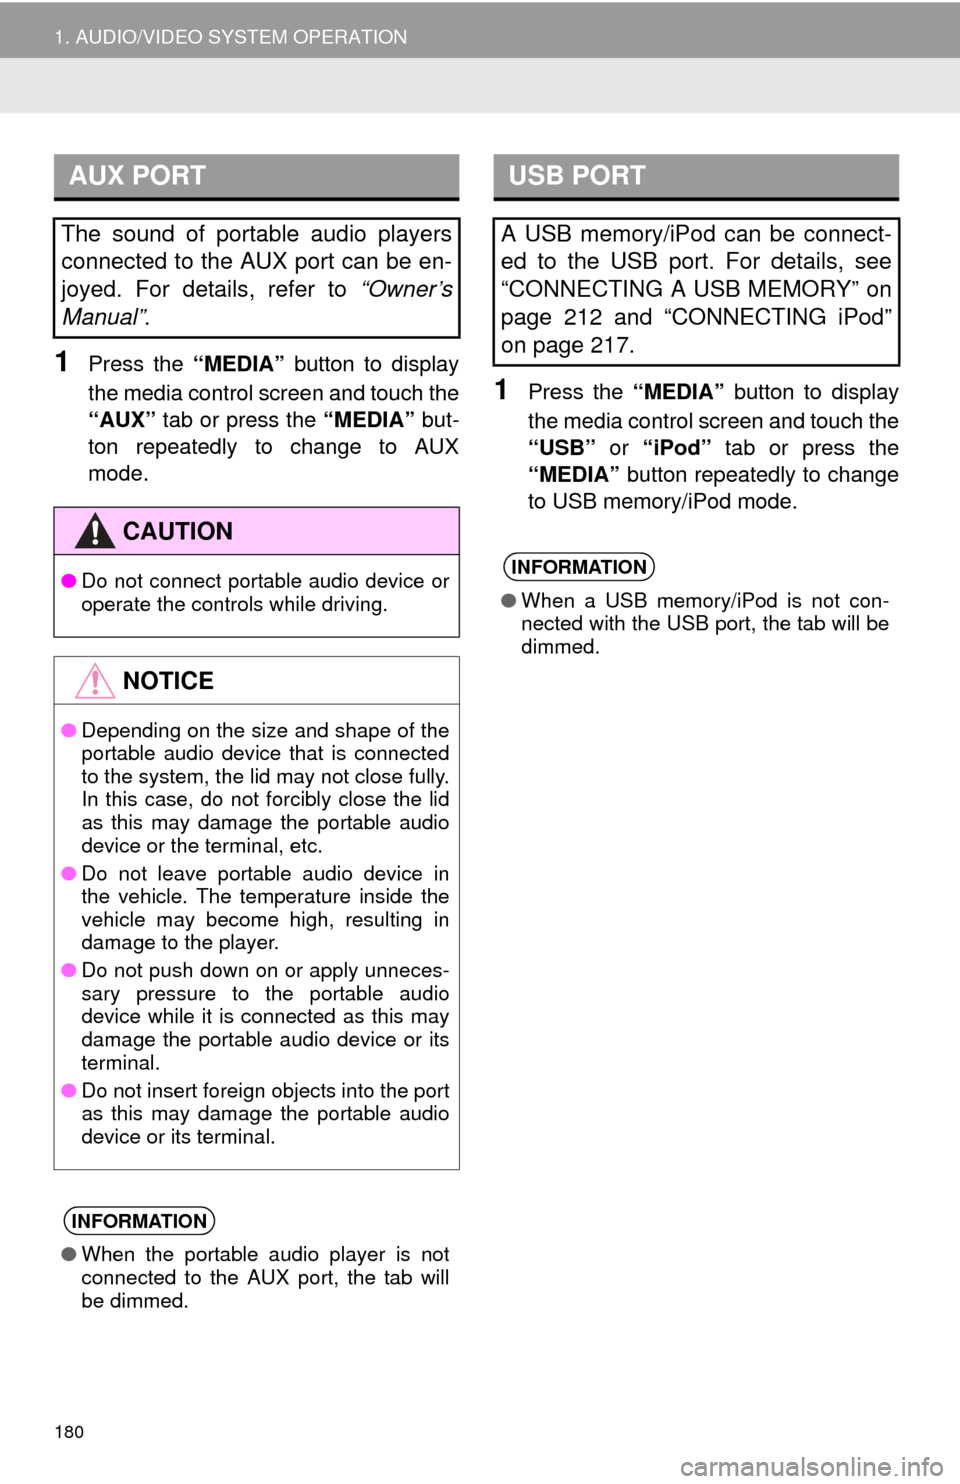
1Press the “MEDIA” button to display
the media control screen and touch the
“USB” or “iPod” tab or press the
“MEDIA” button repeatedly to change
to USB memory/iPod mode.
AUX PORT
The sound of portable audio players
connected to the AUX port can be en-
joyed. For details, refer to “Owner’s
Manual” .
CAUTION
●Do not connect portable audio device or
operate the controls while driving.
NOTICE
●Depending on the size and shape of the
portable audio device that is connected
to the system, the lid may not close fully.
In this case, do not forcibly close the lid
as this may damage the portable audio
device or the terminal, etc.
● Do not leave portable audio device in
the vehicle. The temperature inside the
vehicle may become high, resulting in
damage to the player.
● Do not push down on or apply unneces-
sary pressure to the portable audio
device while it is connected as this may
damage the portable audio device or its
terminal.
● Do not insert foreign objects into the port
as this may damage the portable audio
device or its terminal.
INFORMATION
●When the portable audio player is not
connected to the AUX port, the tab will
be dimmed.
USB PORT
A USB memory/iPod can be connect-
ed to the USB port. For details, see
“CONNECTING A USB MEMORY” on
page 212 and “CONNECTING iPod”
on page 217.
INFORMATION
●When a USB memory/iPod is not con-
nected with the USB port, the tab will be
dimmed.
Page 194 of 346

194
1. AUDIO/VIDEO SYSTEM OPERATION
7. DVD PLAYER OPERATION
1Press the “” button to slide the dis-
play down.
The display will slide down, opening the
DVD slot.
2Insert a disc into the disc slot.
After insertion, the disc is automatically
loaded.
3Press the “” button.
The display will slide up, closing the DVD
slot.
Touching “ Disc” ejects the currently
inserted disc.
1Press the “” button to slide the dis-
play down.
When the “” button is pressed, the disc
will be automatically ejected.
2Press the “” button to close the dis-
play.
For safety reasons, the DVD video
discs can only be viewed when the fol-
lowing conditions are met:
(a)The vehicle is completely stopped.
(b)The power
(c)The parking brake is applied.
While driving in DVD video mode, only
the DVD’s audio can be heard.
INSERTING A DISC
EJECTING A DISC
CAUTION
● Do not place anything on the opened
display, as such items may be thrown
about and possibly injure people in the
vehicle during sudden braking or in an
accident.
● To reduce the chance of injury in case of
an accident or sudden stop while driv-
ing, keep the display closed.
● Take care not to jam your hand while the
display is moving. Otherwise, you could
be injured.
Page 195 of 346

195
1. AUDIO/VIDEO SYSTEM OPERATION
5
AUDIO/VIDEO SYSTEM
1Press the “MEDIA” button if a disc has
already been loaded in the disc slot.
2Touch the “DISC” tab or press the
“MEDIA” button repeatedly until the
“DISC” tab is selected.
1Touch the “DISC” tab.
When CD-TEXT information exists, the
name and artist of the CD currently being
listened to will be displayed.
: Touch to pause the track.
: Touch to resume playing the track.
■ON THE AUDIO TOP SCREEN
“SEEK/TRACK” button: Press the “” or
“” button of “SEEK/TRACK” repeatedly
until the desired track number appears on
the screen. The player will start playing the
selected track from the beginning.
“TUNE
SCROLL” knob: Turn the knob
clockwise or counterclockwise to skip to
the desired track.
■ON THE TRACK LIST SCREEN
1Touch the track name screen button to
display the CD’s track list.
2Touch the desired track number. The
player will start playing the selected
track from the beginning.
NOTICE
● Do not obstruct the display while it is
moving. It could damage your audio sys-
tem.
INFORMATION
●Under extremely cold conditions, the
screen may react slowly or operation
sound may become louder.
● If a disc is inserted with the label facing
down, it cannot be played.
PLAYING A DISC
PLAYING AN AUDIO DISC
SELECTING A DESIRED
TRACK
Page 196 of 346

196
1. AUDIO/VIDEO SYSTEM OPERATION
, : Touch to move the list up or down
by 5 track groups. If either of these screen
buttons is touched when the top/bottom
page of the list is displayed, the last/first
page is displayed.
“SEEK/TRACK” button: Press the “” or
“” button of “SEEK/TRACK” to scroll
through the track list one by one.
“TUNE
SCROLL” knob: Turn the knob
clockwise or counterclockwise to quickly
scroll up or down the track list. To select
the desired track, press the knob.
, : If appears to the right of an item
name, the complete name is too long for
the screen. Touch to scroll to the end of
the name. Touch to scroll to the begin-
ning of the name.
■FAST FORWARDING OR REWIND-
ING
1Press and hold the “” or “” button
of “SEEK/TRACK” to fast forward or
rewind the disc.
When the button is released, the player
resumes playing from that position.
■REPEATING A TRACK
1Touch “RPT” while the track is play-
ing.
“RPT” appears on the screen. When the
track is finished, the player will automati-
cally play it again. To cancel this function,
touch “RPT” again.
■PLAYING THE TRACKS ON THE
DISC IN RANDOM ORDER
1Touch “RAND” while the disc is play-
ing.
Once “RAND” appears on the screen, the
system selects a track randomly from the
disc currently being listened to. To cancel
this function, touch “RAND” again.
REPEATING
The track currently being listened to
can be repeated.
RANDOM ORDER
Tracks or albums can be automatically
and randomly selected.