Page 585 of 788
5856-3. Do-it-yourself maintenance
UK_AURIS/AURIS_HV_EE (OM12G88E)
6
Maintenance and care
Headlights (vehicles with halogen headlights)
Remove the securing clip.
Pull out the washer fluid filler
opening after turning it.
(When replacing right side
bulb only.)
Remove the cover.
Turn the bulb base counter-
clockwise and remove it.
Unplug the connector while
pressing the lock release.
Replacing light bulbs
1
2
3
4
Page 586 of 788
5866-3. Do-it-yourself maintenance
UK_AURIS/AURIS_HV_EE (OM12G88E)
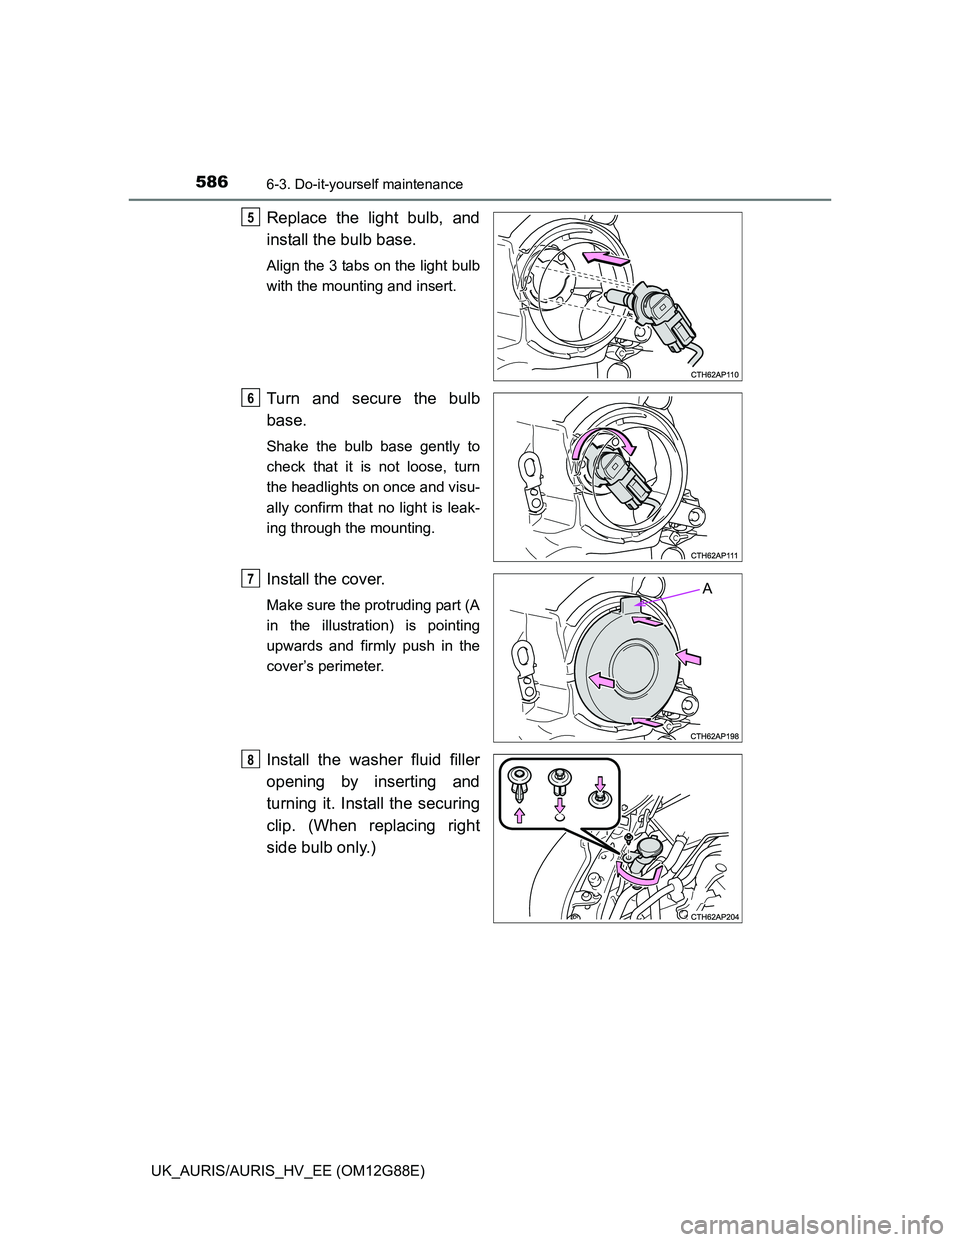
Replace the light bulb, and
install the bulb base.
Align the 3 tabs on the light bulb
with the mounting and insert.
Turn and secure the bulb
base.
Shake the bulb base gently to
check that it is not loose, turn
the headlights on once and visu-
ally confirm that no light is leak-
ing through the mounting.
Install the cover.
Make sure the protruding part (A
in the illustration) is pointing
upwards and firmly push in the
cover’s perimeter.
Install the washer fluid filler
opening by inserting and
turning it. Install the securing
clip. (When replacing right
side bulb only.)
5
6
A7
8
Page 589 of 788
5896-3. Do-it-yourself maintenance
UK_AURIS/AURIS_HV_EE (OM12G88E)
6
Maintenance and care
Front turn signal lights
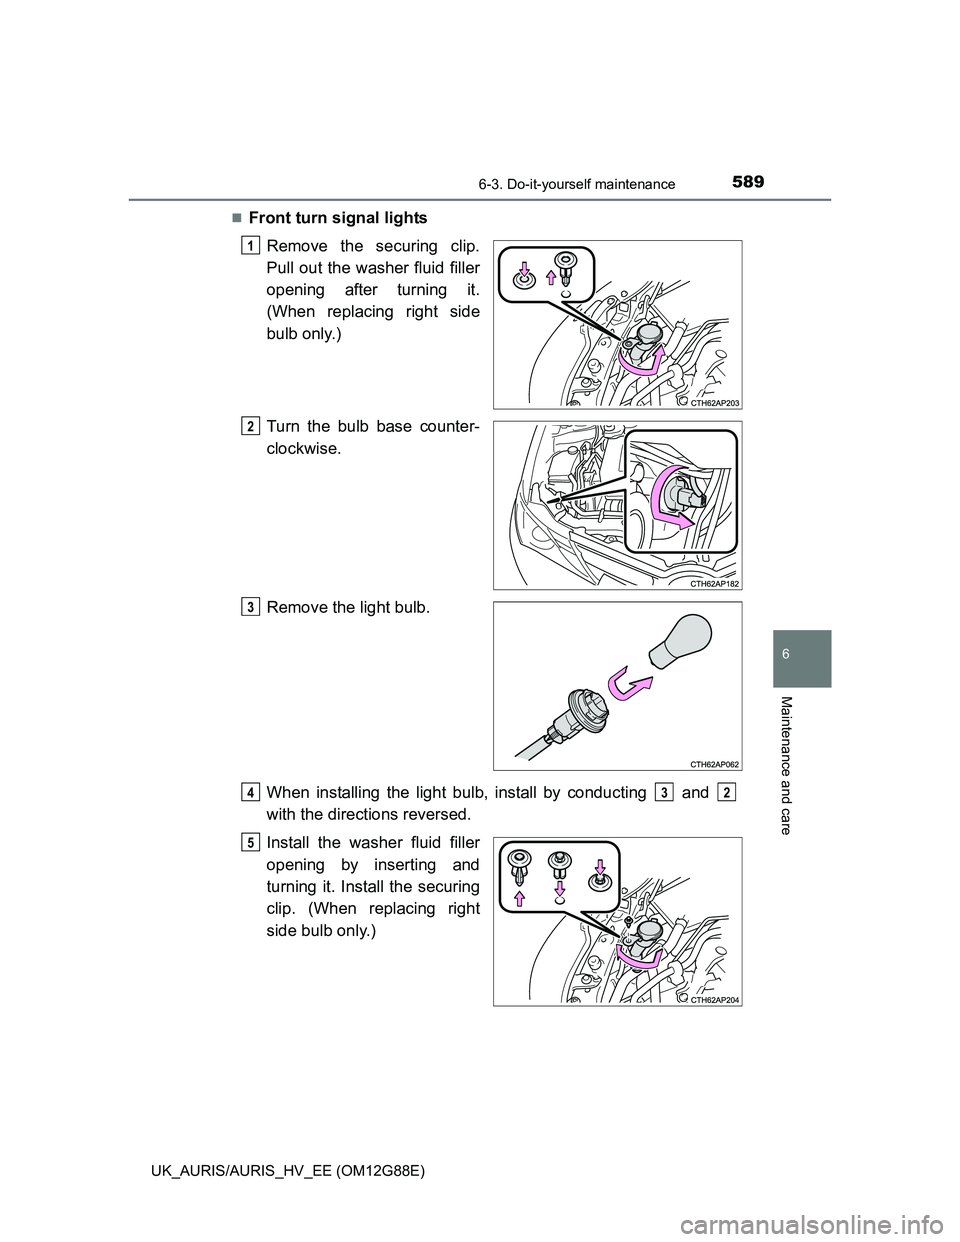
Remove the securing clip.
Pull out the washer fluid filler
opening after turning it.
(When replacing right side
bulb only.)
Turn the bulb base counter-
clockwise.
Remove the light bulb.
When installing the light bulb, install by conducting and
with the directions reversed.
Install the washer fluid filler
opening by inserting and
turning it. Install the securing
clip. (When replacing right
side bulb only.)
1
2
3
432
5
Page 649 of 788
6497-2. Steps to take in an emergency
UK_AURIS/AURIS_HV_EE (OM12G88E)
7
When trouble arises
Once
Contin-
uous
(5 sec-
onds)
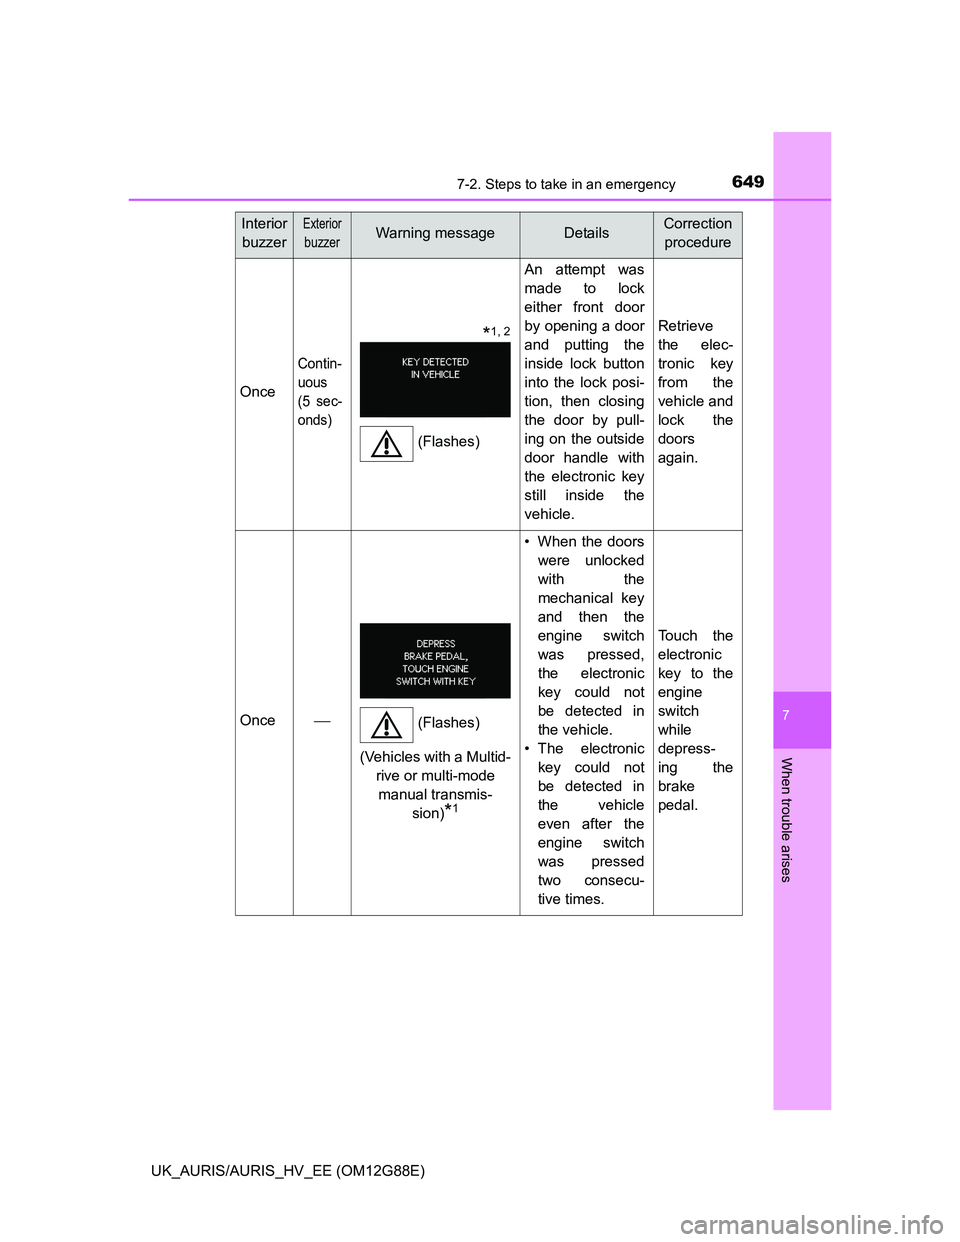
An attempt was
made to lock
either front door
by opening a door
and putting the
inside lock button
into the lock posi-
tion, then closing
the door by pull-
ing on the outside
door handle with
the electronic key
still inside the
vehicle.
Retrieve
the elec-
tronic key
from the
vehicle and
lock the
doors
again.
Once
• When the doors
were unlocked
with the
mechanical key
and then the
engine switch
was pressed,
the electronic
key could not
be detected in
the vehicle.
• The electronic
key could not
be detected in
the vehicle
even after the
engine switch
was pressed
two consecu-
tive times.
Touch the
electronic
key to the
engine
switch
while
depress-
ing the
brake
pedal.
Interior
buzzerExterior
buzzerWarning messageDetailsCorrection
procedure
(Flashes)
*1, 2
(Flashes)
(Vehicles with a Multid-
rive or multi-mode
manual transmis-
sion)
*1
Page 678 of 788
6787-2. Steps to take in an emergency
UK_AURIS/AURIS_HV_EE (OM12G88E)
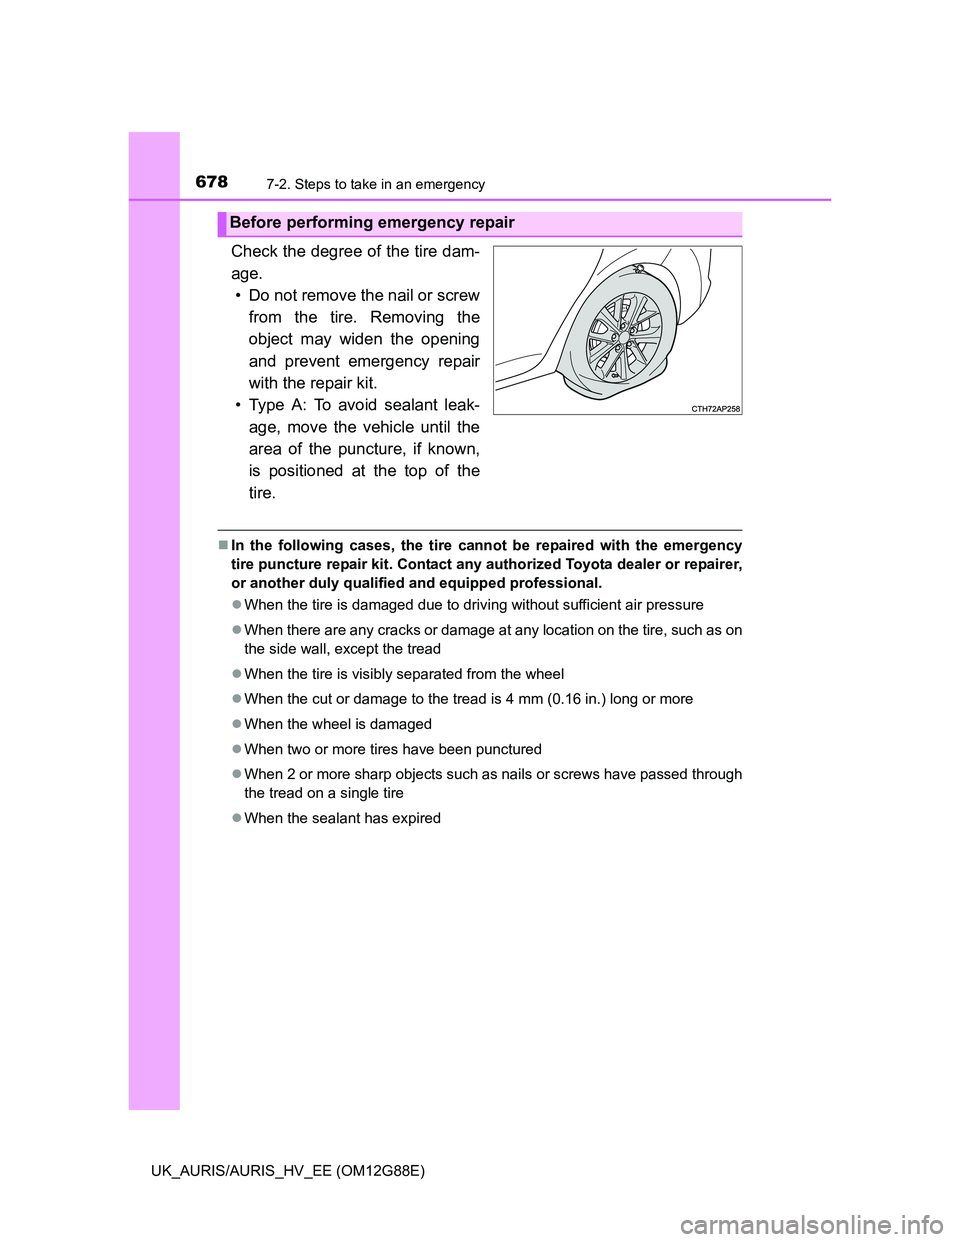
Check the degree of the tire dam-
age.
• Do not remove the nail or screw
from the tire. Removing the
object may widen the opening
and prevent emergency repair
with the repair kit.
• Type A: To avoid sealant leak-
age, move the vehicle until the
area of the puncture, if known,
is positioned at the top of the
tire.
In the following cases, the tire cannot be repaired with the emergency
tire puncture repair kit. Contact any authorized Toyota dealer or repairer,
or another duly qualified and equipped professional.
When the tire is damaged due to driving without sufficient air pressure
When there are any cracks or damage at any location on the tire, such as on
the side wall, except the tread
When the tire is visibly separated from the wheel
When the cut or damage to the tread is 4 mm (0.16 in.) long or more
When the wheel is damaged
When two or more tires have been punctured
When 2 or more sharp objects such as nails or screws have passed through
the tread on a single tire
When the sealant has expired
Before performing emergency repair
Page 697 of 788
6977-2. Steps to take in an emergency
UK_AURIS/AURIS_HV_EE (OM12G88E)
7
When trouble arises
NOTICE
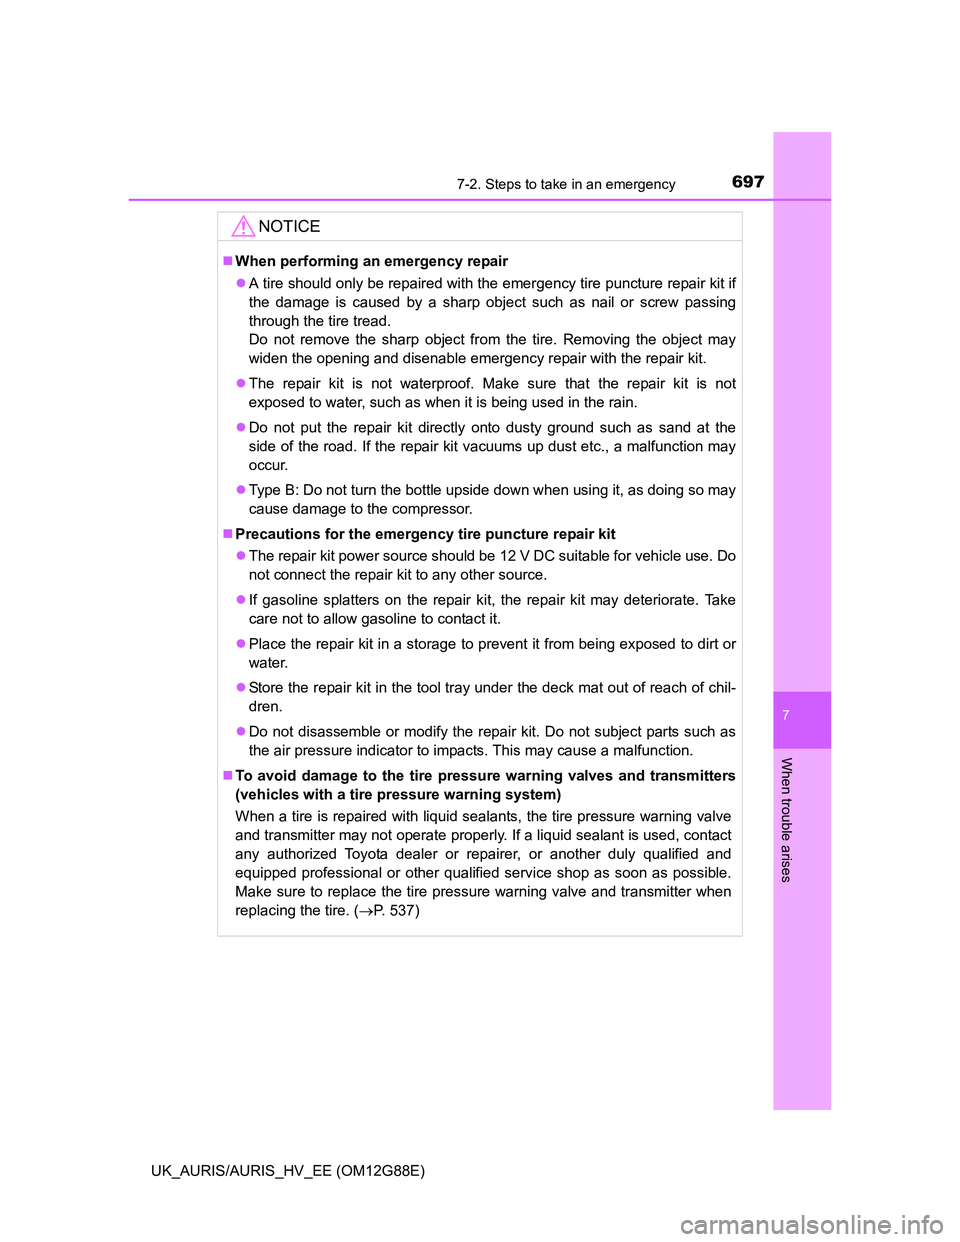
When performing an emergency repair
A tire should only be repaired with the emergency tire puncture repair kit if
the damage is caused by a sharp object such as nail or screw passing
through the tire tread.
Do not remove the sharp object from the tire. Removing the object may
widen the opening and disenable emergency repair with the repair kit.
The repair kit is not waterproof. Make sure that the repair kit is not
exposed to water, such as when it is being used in the rain.
Do not put the repair kit directly onto dusty ground such as sand at the
side of the road. If the repair kit vacuums up dust etc., a malfunction may
occur.
Type B: Do not turn the bottle upside down when using it, as doing so may
cause damage to the compressor.
Precautions for the emergency tire puncture repair kit
The repair kit power source should be 12 V DC suitable for vehicle use. Do
not connect the repair kit to any other source.
If gasoline splatters on the repair kit, the repair kit may deteriorate. Take
care not to allow gasoline to contact it.
Place the repair kit in a storage to prevent it from being exposed to dirt or
water.
Store the repair kit in the tool tray under the deck mat out of reach of chil-
dren.
Do not disassemble or modify the repair kit. Do not subject parts such as
the air pressure indicator to impacts. This may cause a malfunction.
To avoid damage to the tire pressure warning valves and transmitters
(vehicles with a tire pressure warning system)
When a tire is repaired with liquid sealants, the tire pressure warning valve
and transmitter may not operate properly. If a liquid sealant is used, contact
any authorized Toyota dealer or repairer, or another duly qualified and
equipped professional or other qualified service shop as soon as possible.
Make sure to replace the tire pressure warning valve and transmitter when
replacing the tire. (P. 537)
Page 755 of 788

7558-1. Specifications
UK_AURIS/AURIS_HV_EE (OM12G88E)
8
Vehicle specifications
Fuel tank opening for unleaded gasoline
To help prevent incorrect fueling, your vehicle has a fuel tank opening that
only accommodates the special nozzle on unleaded fuel pumps.
If you plan to drive in foreign countries
Low sulfur diesel fuel may not be available, so please check the availability
with your distributor.
If your engine knocks
Consult any authorized Toyota dealer or repairer, or another duly qualified
and equipped professional.
You may occasionally notice light knocking for a short time while accelerat-
ing or driving uphill. This is normal and there is no need for concern.
Fuel infor mation
Gasoline engine
EU area:
Your vehicle must use only unleaded gasoline conforming to
European standard EN228.
For optimum engine performance, select unleaded gasoline with
a Research Octane Number of 95 or higher.
Except EU area:
Your vehicle must use only unleaded gasoline.
For optimum engine performance, select unleaded gasoline with
a Research Octane Number of 95 or higher.
Diesel engine
EU area:
Your vehicle must use only diesel fuel conforming to European
standard EN590.
Except EU area:
Your vehicle must use only diesel fuel that contains 50 ppm or
less of sulfur and has a cetane number of 48 or higher.
Page 781 of 788
781Alphabetical index
UK_AURIS/AURIS_HV_EE (OM12G88E)
Radiator .................................... 523
Radio ......................................... 420
Rear fog light............................ 326
Replacing light bulb............... 582
Switch ................................... 326
Wattage................................. 754
Rear personal lights ................ 459
Rear seat
Folding down......................... 213
Rear turn signal lights ............. 311
Replacing light bulbs ............. 582
Turn signal lever ................... 311
Wattage................................. 754
Rear view mirror
Inside rear view mirror .......... 219
Outside rear view mirrors ...... 221
Rear view monitor system*
Rear window defogger ............ 416
Rear window wiper .................. 332
Refueling .................................. 334
Capacity ................................ 739
Fuel types ............................. 739
Opening the fuel tank cap ..... 336
Replacing
Electronic key battery............ 555
Fuses .................................... 558
Light bulbs............................. 582
Tires ...................................... 659
Wireless remote control
battery................................. 555
Reset the maintenance data ... 528
Road accident cautions ............ 88Seat belt reminder light........... 618
Seat belts.................................... 42
Adjusting the seat belt ............ 43
Child restraint system
installation ............................ 69
Cleaning and maintaining
the seat belt ........................ 495
Emergency Locking Retractor
(ELR) .................................... 43
How to wear your seat belt ..... 40
How your child should wear
the seat belt .......................... 43
Pregnant women, proper
seat belt use ......................... 44
Reminder light and buzzer .... 618
Seat belt pretensioners ........... 43
SRS warning light ................. 616
Seat heaters ............................. 481
Seats ......................................... 211
Adjustment ............................ 211
Adjustment precautions ........ 212
Child seats/child restraint
system installation ................ 68
Cleaning................................ 494
Head restraints ..................... 216
Properly sitting in the seat ...... 40
Seat heaters ......................... 481
RS
*: Refer to “Navigation and multimedia system Owner’s manual”.