Page 197 of 298
8
197
1
2
8
4
5
6
7
3
9
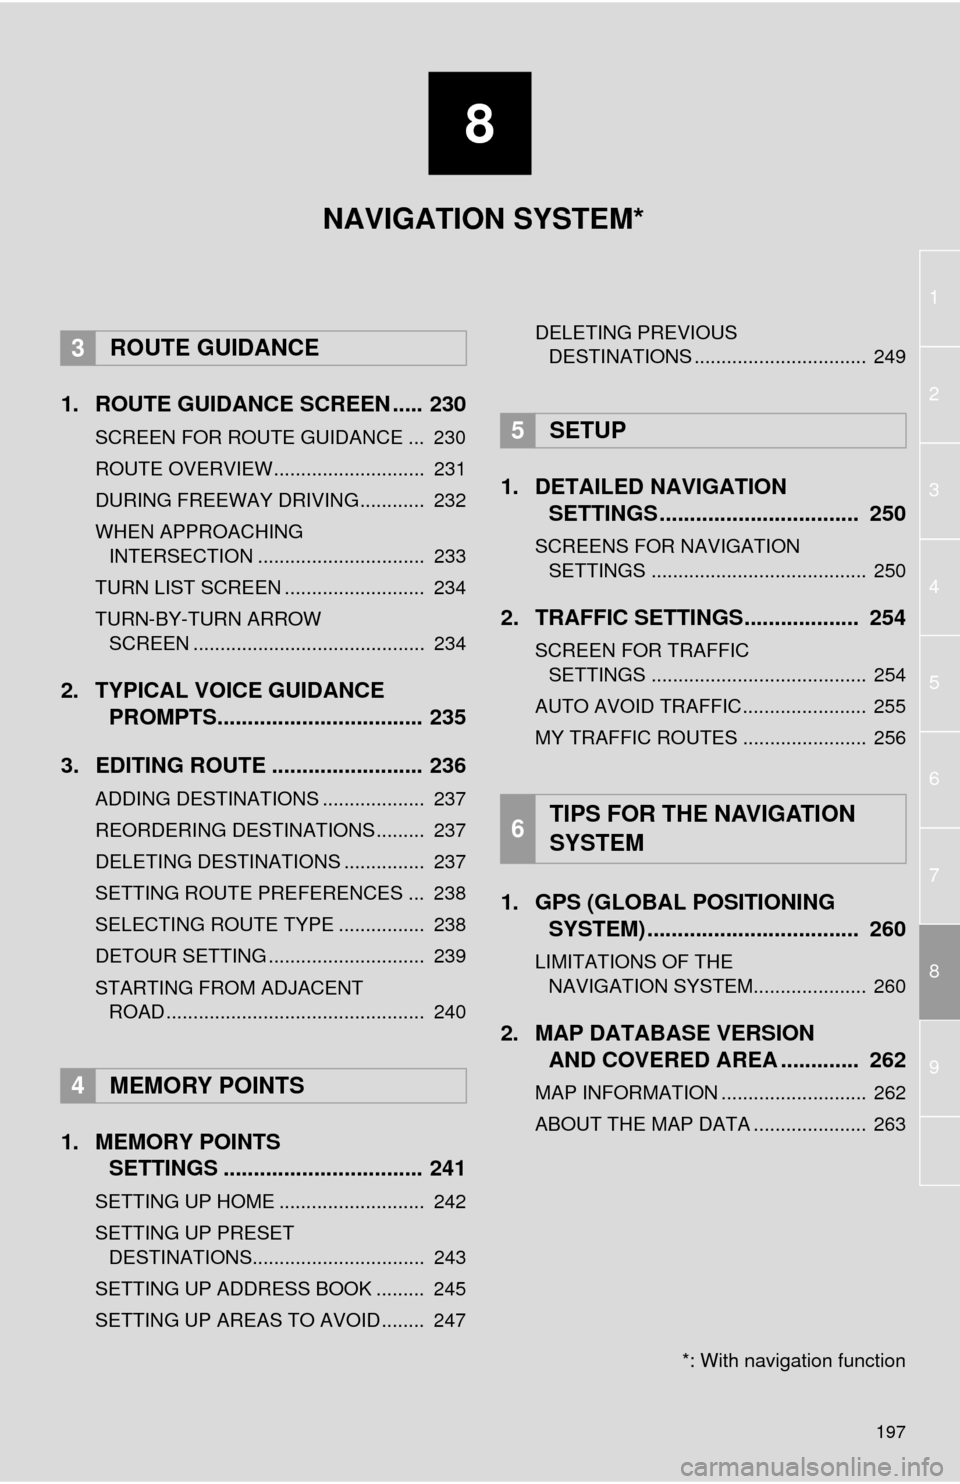
1. ROUTE GUIDANCE SCREEN ..... 230
SCREEN FOR ROUTE GUIDANCE ... 230
ROUTE OVERVIEW............................ 231
DURING FREEWAY DRIVING............ 232
WHEN APPROACHING INTERSECTION ............................... 233
TURN LIST SCREEN .......................... 234
TURN-BY-TURN ARROW SCREEN ........................................... 234
2. TYPICAL VOICE GUIDANCE PROMPTS.................................. 235
3. EDITING ROUTE ......................... 236
ADDING DESTINATIONS ................... 237
REORDERING DESTINATIONS ......... 237
DELETING DESTINATIONS ............... 237
SETTING ROUTE PREFERENCES ... 238
SELECTING ROUTE TYPE ................ 238
DETOUR SETTING ............................. 239
STARTING FROM ADJACENT ROAD ................................................ 240
1. MEMORY POINTS SETTINGS ................................. 241
SETTING UP HOME ........................... 242
SETTING UP PRESET
DESTINATIONS................................ 243
SETTING UP ADDRESS BOOK ......... 245
SETTING UP AREAS TO AVOID ........ 247 DELETING PREVIOUS
DESTINATIONS ................................ 249
1. DETAILED NAVIGATION SETTINGS ................................. 250
SCREENS FOR NAVIGATION
SETTINGS ........................................ 250
2. TRAFFIC SETTINGS................... 254
SCREEN FOR TRAFFIC SETTINGS ........................................ 254
AUTO AVOID TRAFFIC....................... 255
MY TRAFFIC ROUTES ....................... 256
1. GPS (GLOBAL POSITIONING SYSTEM) .................... ............... 260
LIMITATIONS OF THE
NAVIGATION SYSTEM..................... 260
2. MAP DATABASE VERSION AND COVERED AREA ............. 262
MAP INFORMATION ........................... 262
ABOUT THE MAP DATA ..................... 263
3ROUTE GUIDANCE
4MEMORY POINTS
5SETUP
6TIPS FOR THE NAVIGATION
SYSTEM
NAVIGATION SYSTEM*
*: With navigation function
Page 198 of 298
198
1. BASIC OPERATION
1. QUICK REFERENCE
MAP SCREEN
To display this screen, press the “APPS” button, then select “Navigation” on the
“Apps” screen.
No.NameFunctionPage
2D North-up, 2D
heading-up or 3D
heading-up sym-
bolIndicates whether the map orientation is set to
north-up or heading-up. The letter(s) beside this
symbol indicate the vehicle’s heading direction
(e.g. N for north). In 3D map, only a heading-up
view is available.
202
Options buttonSelect to display the “Navigation Options” screen.200
“GPS” mark
(Global Position-
ing System)Shows that the vehicle is receiving signals from
the GPS.260
Traffic indicator
Shows that traffic information is received. Select
to start voice guidance for traffic information.
When traffic information is received via HD, HD
mark is displayed on the right.
211
Scale indicatorThis figure indicates the map scale.201
Page 199 of 298
199
1. BASIC OPERATION
8
NAVIGATION SYSTEM
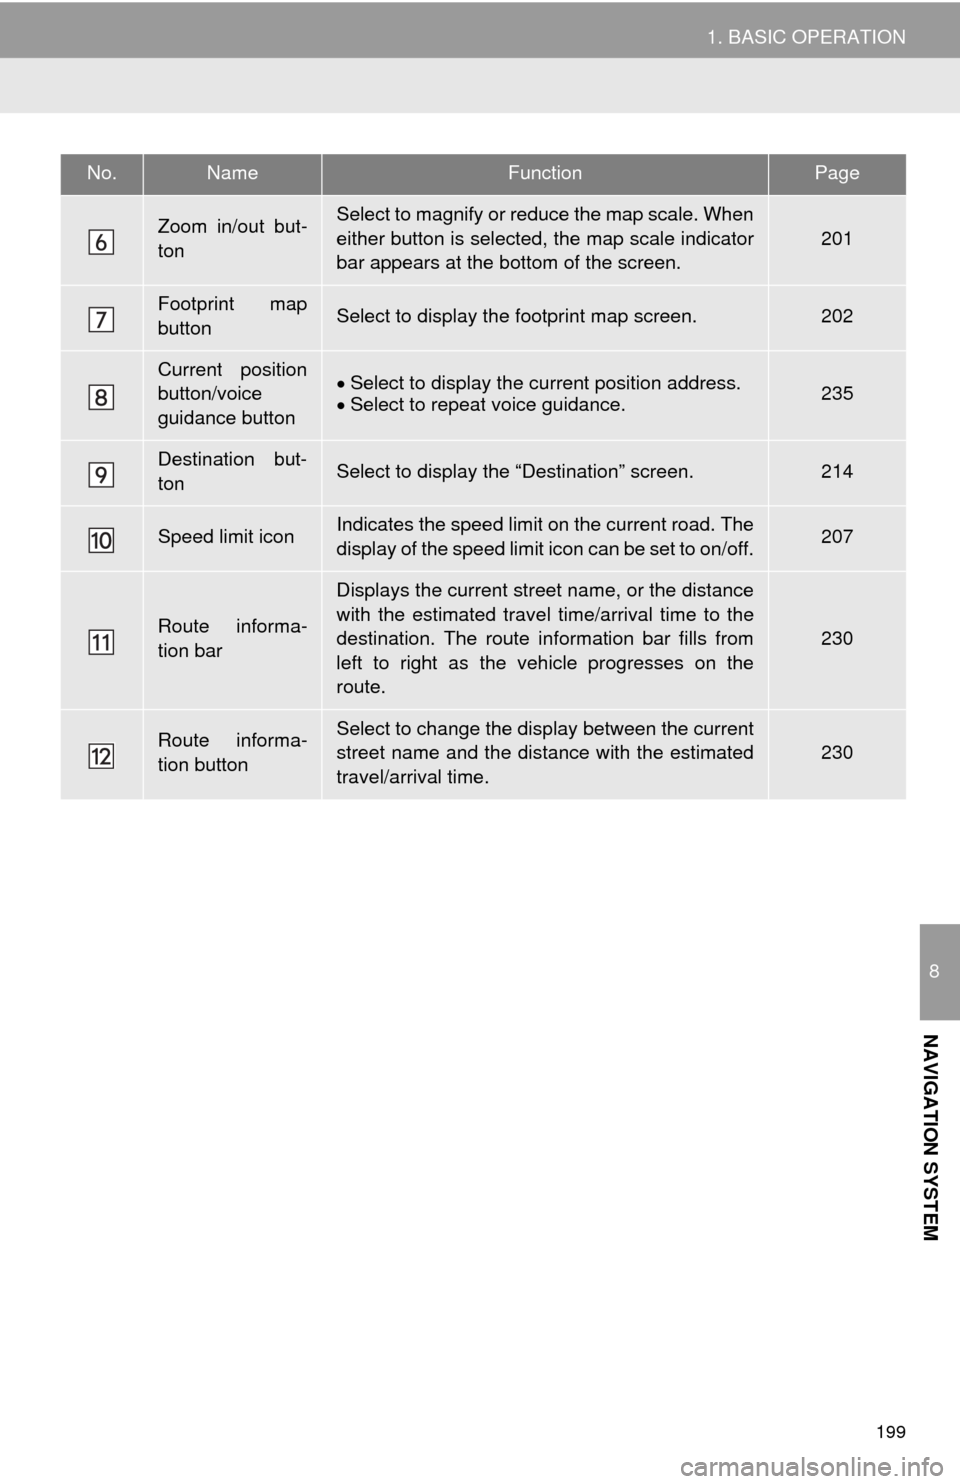
Zoom in/out but-
tonSelect to magnify or reduce the map scale. When
either button is selected, the map scale indicator
bar appears at the bottom of the screen.
201
Footprint map
buttonSelect to display the footprint map screen.202
Current position
button/voice
guidance buttonSelect to display the current position address.
Select to repeat voice guidance.235
Destination but-
tonSelect to display the “Destination” screen.214
Speed limit iconIndicates the speed limit on the current road. The
display of the speed limit icon can be set to on/off.207
Route informa-
tion bar
Displays the current street name, or the distance
with the estimated travel time/arrival time to the
destination. The route information bar fills from
left to right as the vehicle progresses on the
route.
230
Route informa-
tion buttonSelect to change the display between the current
street name and the distance with the estimated
travel/arrival time.230
No.NameFunctionPage
Page 201 of 298
201
1. BASIC OPERATION
8
NAVIGATION SYSTEM
2. MAP SCREEN OPERATION
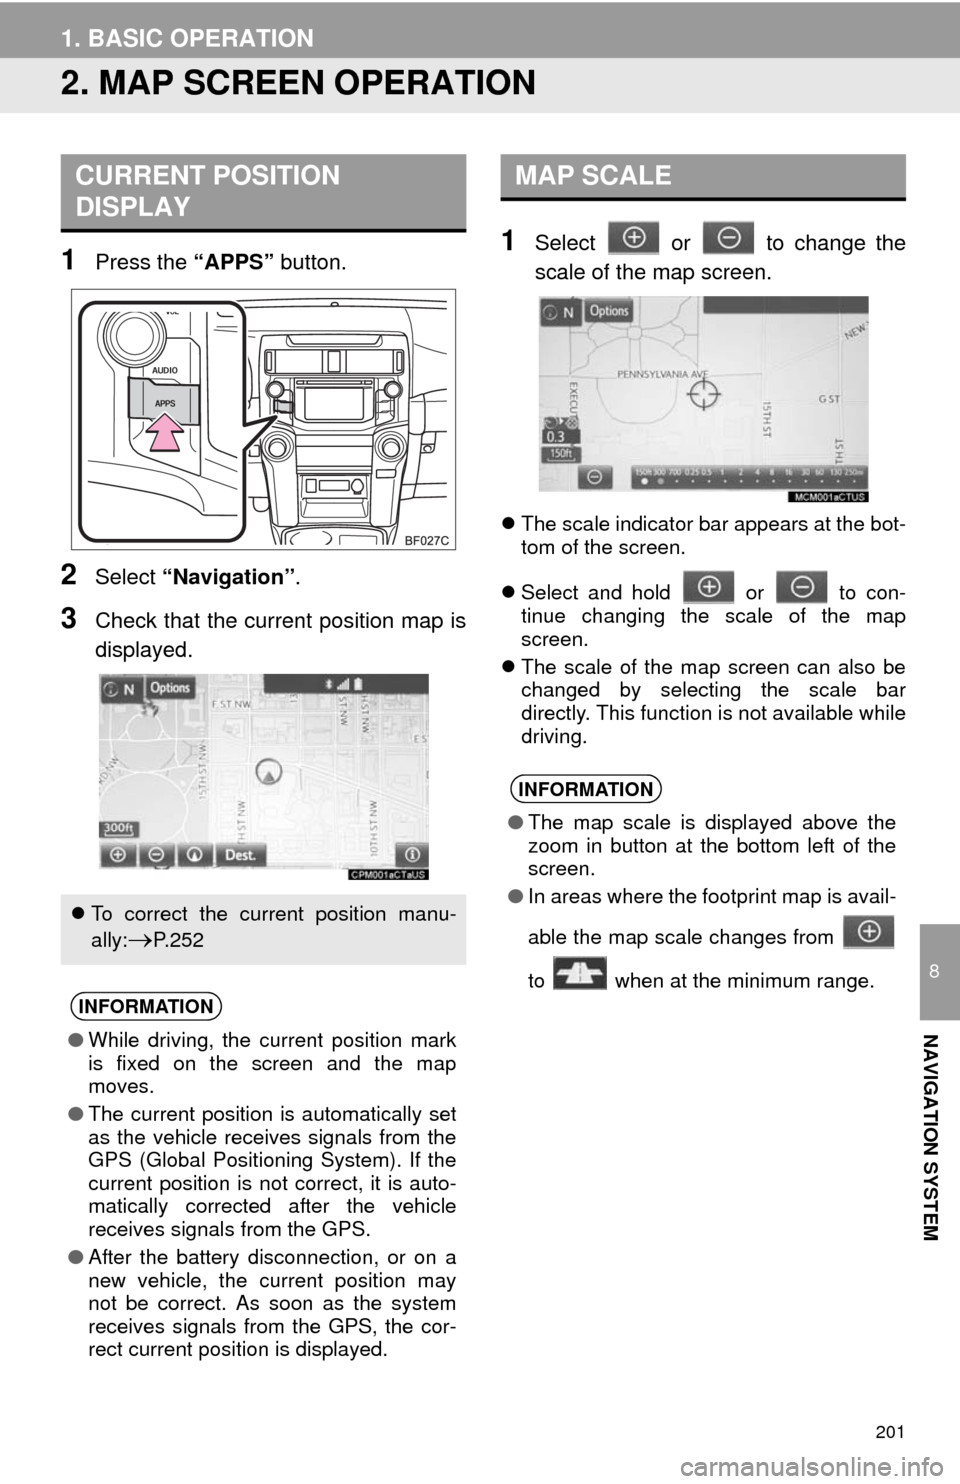
1Press the “APPS” button.
2Select “Navigation”.
3Check that the current position map is
displayed.
1Select or to change the
scale of the map screen.
The scale indicator bar appears at the bot-
tom of the screen.
Select and hold or to con-
tinue changing the scale of the map
screen.
The scale of the map screen can also be
changed by selecting the scale bar
directly. This function is not available while
driving.
CURRENT POSITION
DISPLAY
To correct the current position manu-
ally:
P. 2 5 2
INFORMATION
●While driving, the current position mark
is fixed on the screen and the map
moves.
●The current position is automatically set
as the vehicle receives signals from the
GPS (Global Positioning System). If the
current position is not correct, it is auto-
matically corrected after the vehicle
receives signals from the GPS.
●After the battery disconnection, or on a
new vehicle, the current position may
not be correct. As soon as the system
receives signals from the GPS, the cor-
rect current position is displayed.
MAP SCALE
INFORMATION
●The map scale is displayed above the
zoom in button at the bottom left of the
screen.
●In areas where the footprint map is avail-
able the map scale changes from
to when at the minimum range.
Page 203 of 298
203
1. BASIC OPERATION
8
NAVIGATION SYSTEM
3D screen
: North-up symbol
Regardless of the direction of vehicle trav-
el, north is always up.
: Heading-up symbol
The direction of vehicle travel is always up.
: 3D Heading-up symbol
The direction of vehicle travel is always up.
The letter(s) beside this symbol indicate
the vehicle’s heading direction (e.g. N for
north).
1Select “Options” on the map screen.
2Select “Map Mode”.
3Select the desired configuration but-
ton.
Depending on the conditions, certain
screen configuration buttons cannot be
selected.
SWITCHING THE MAP MODE
No.FunctionPage
Select to display the single
map screen. 204
Select to display the dual
map screen.204
Select to display the com-
pass mode screen.205
Select to display the turn list
screen.234
Select to display the free-
way exit list screen.232
Select to display the inter-
section guidance screen or
the guidance screen on the
freeway.
233
Select to display the turn-
by-turn arrow screen.234
Page 205 of 298
205
1. BASIC OPERATION
8
NAVIGATION SYSTEM
■COMPASS
To scroll over the map screen, place the
cursor mark in the desired position and
then touch and hold the map screen. The
map will continue scrolling in that direction
until the finger is released.
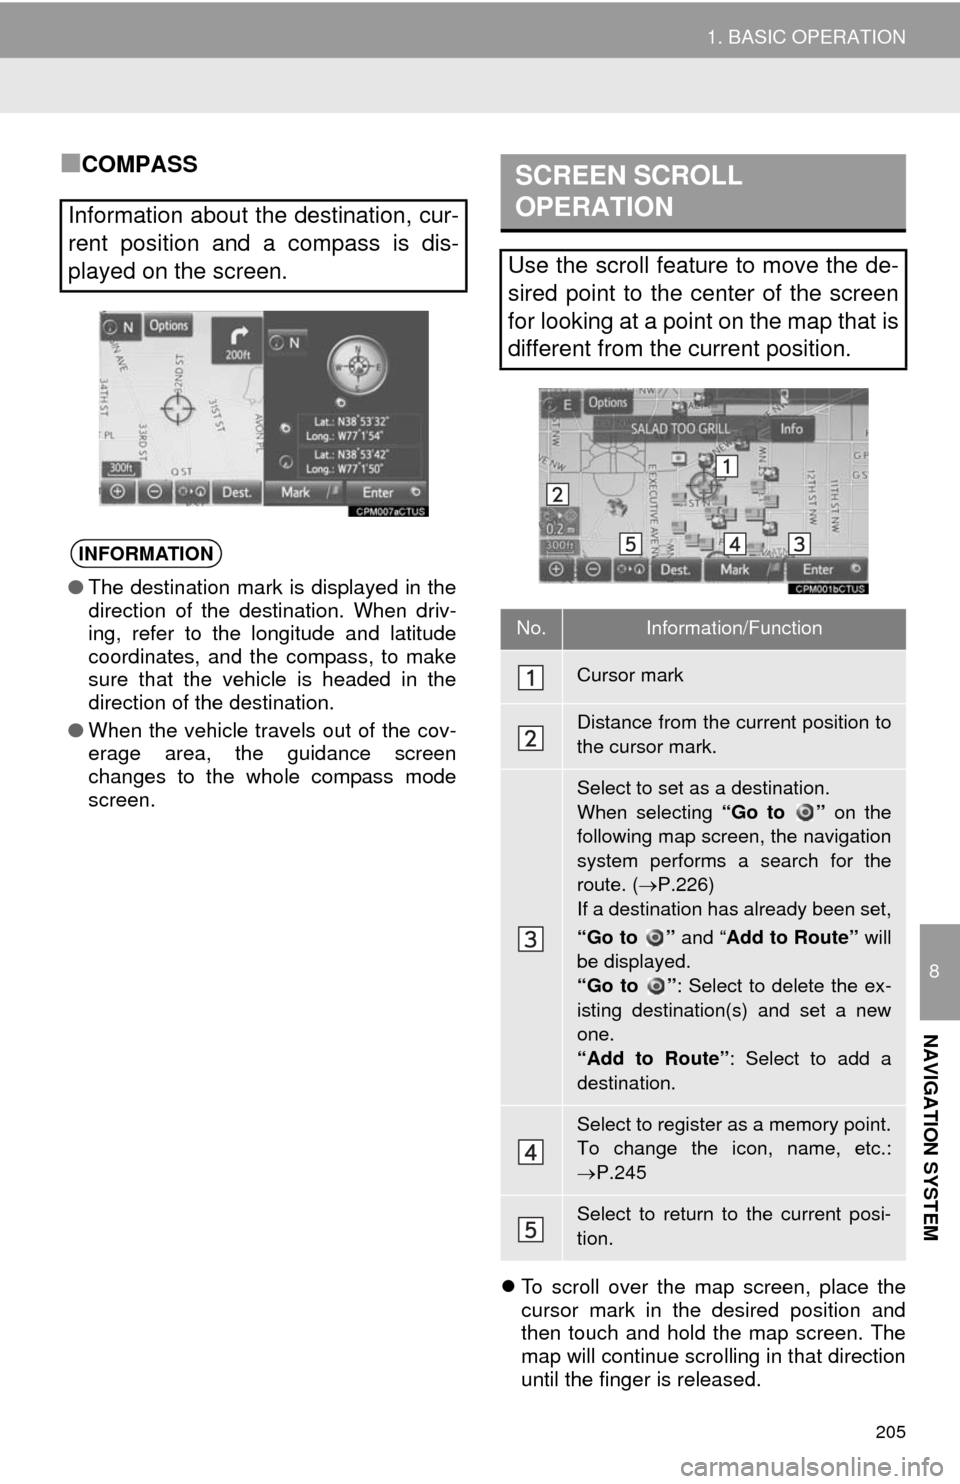
Information about the destination, cur-
rent position and a compass is dis-
played on the screen.
INFORMATION
●The destination mark is displayed in the
direction of the destination. When driv-
ing, refer to the longitude and latitude
coordinates, and the compass, to make
sure that the vehicle is headed in the
direction of the destination.
●When the vehicle travels out of the cov-
erage area, the guidance screen
changes to the whole compass mode
screen.
SCREEN SCROLL
OPERATION
Use the scroll feature to move the de-
sired point to the center of the screen
for looking at a point on the map that is
different from the current position.
No.Information/Function
Cursor mark
Distance from the current position to
the cursor mark.
Select to set as a destination.
When selecting “Go to ” on the
following map screen, the navigation
system performs a search for the
route. (P.226)
If a destination has already been set,
“Go to ” and “Add to Route” will
be displayed.
“Go to ”: Select to delete the ex-
isting destination(s) and set a new
one.
“Add to Route”: Select to add a
destination.
Select to register as a memory point.
To change the icon, name, etc.:
P.245
Select to return to the current posi-
tion.
Page 207 of 298
207
1. BASIC OPERATION
8
NAVIGATION SYSTEM
3. MAP SCREEN INFORMATION
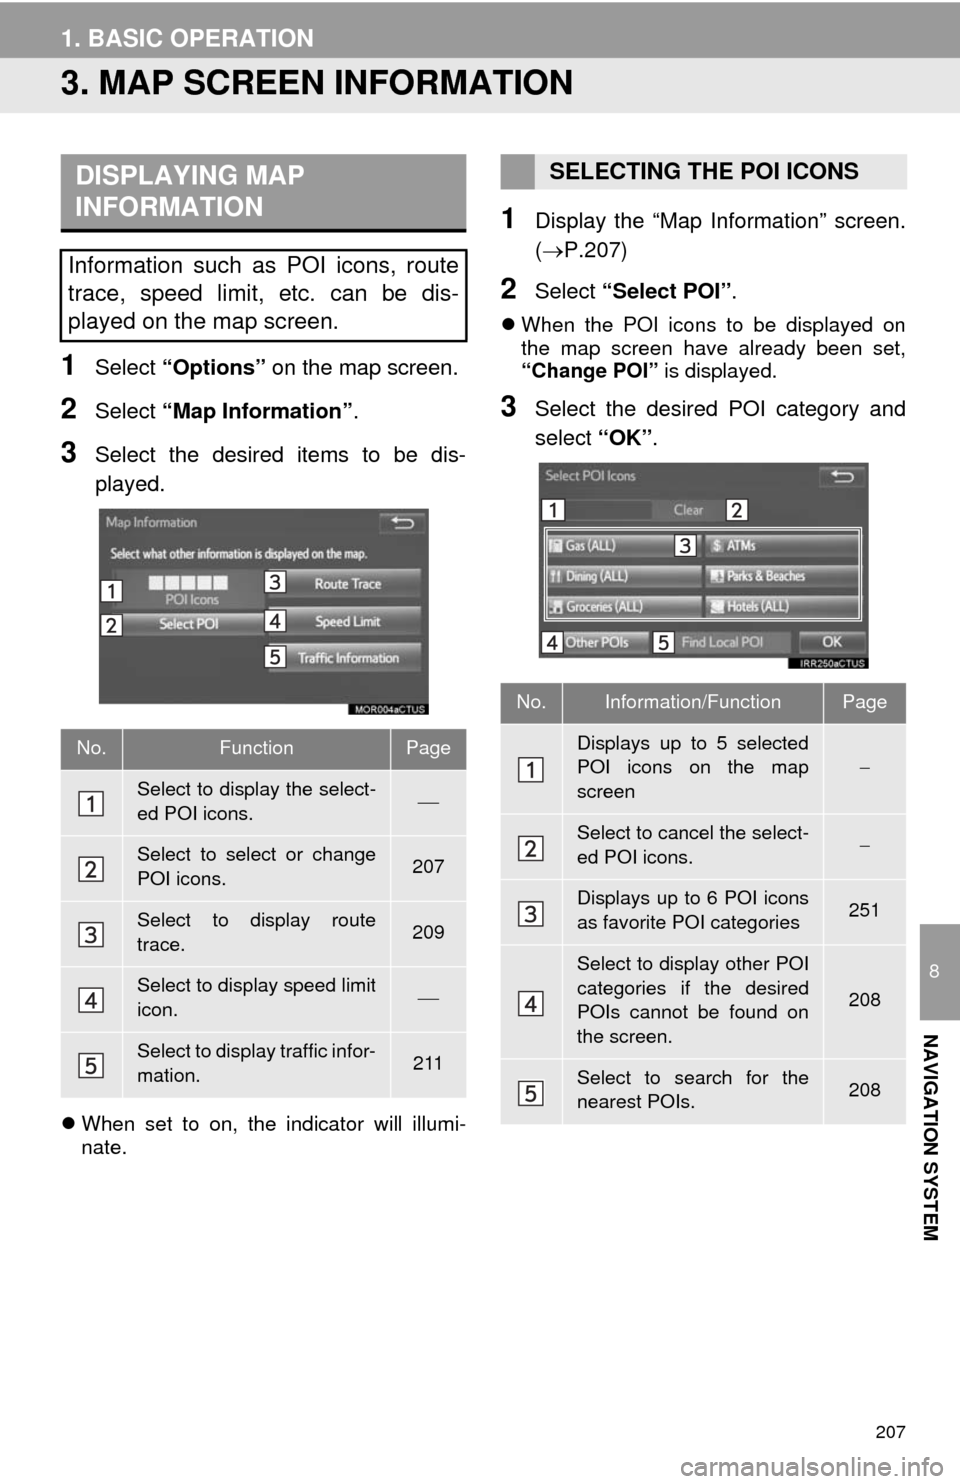
1Select “Options” on the map screen.
2Select “Map Information”.
3Select the desired items to be dis-
played.
When set to on, the indicator will illumi-
nate.
1Display the “Map Information” screen.
(P.207)
2Select “Select POI”.
When the POI icons to be displayed on
the map screen have already been set,
“Change POI” is displayed.
3Select the desired POI category and
select “OK”.
DISPLAYING MAP
INFORMATION
Information such as POI icons, route
trace, speed limit, etc. can be dis-
played on the map screen.
No.FunctionPage
Select to display the select-
ed POI icons.
Select to select or change
POI icons.207
Select to display route
trace.209
Select to display speed limit
icon.
Select to display traffic infor-
mation.211
SELECTING THE POI ICONS
No.Information/FunctionPage
Displays up to 5 selected
POI icons on the map
screen
Select to cancel the select-
ed POI icons.
Displays up to 6 POI icons
as favorite POI categories251
Select to display other POI
categories if the desired
POIs cannot be found on
the screen.
208
Select to search for the
nearest POIs.208
Page 209 of 298
209
1. BASIC OPERATION
8
NAVIGATION SYSTEM
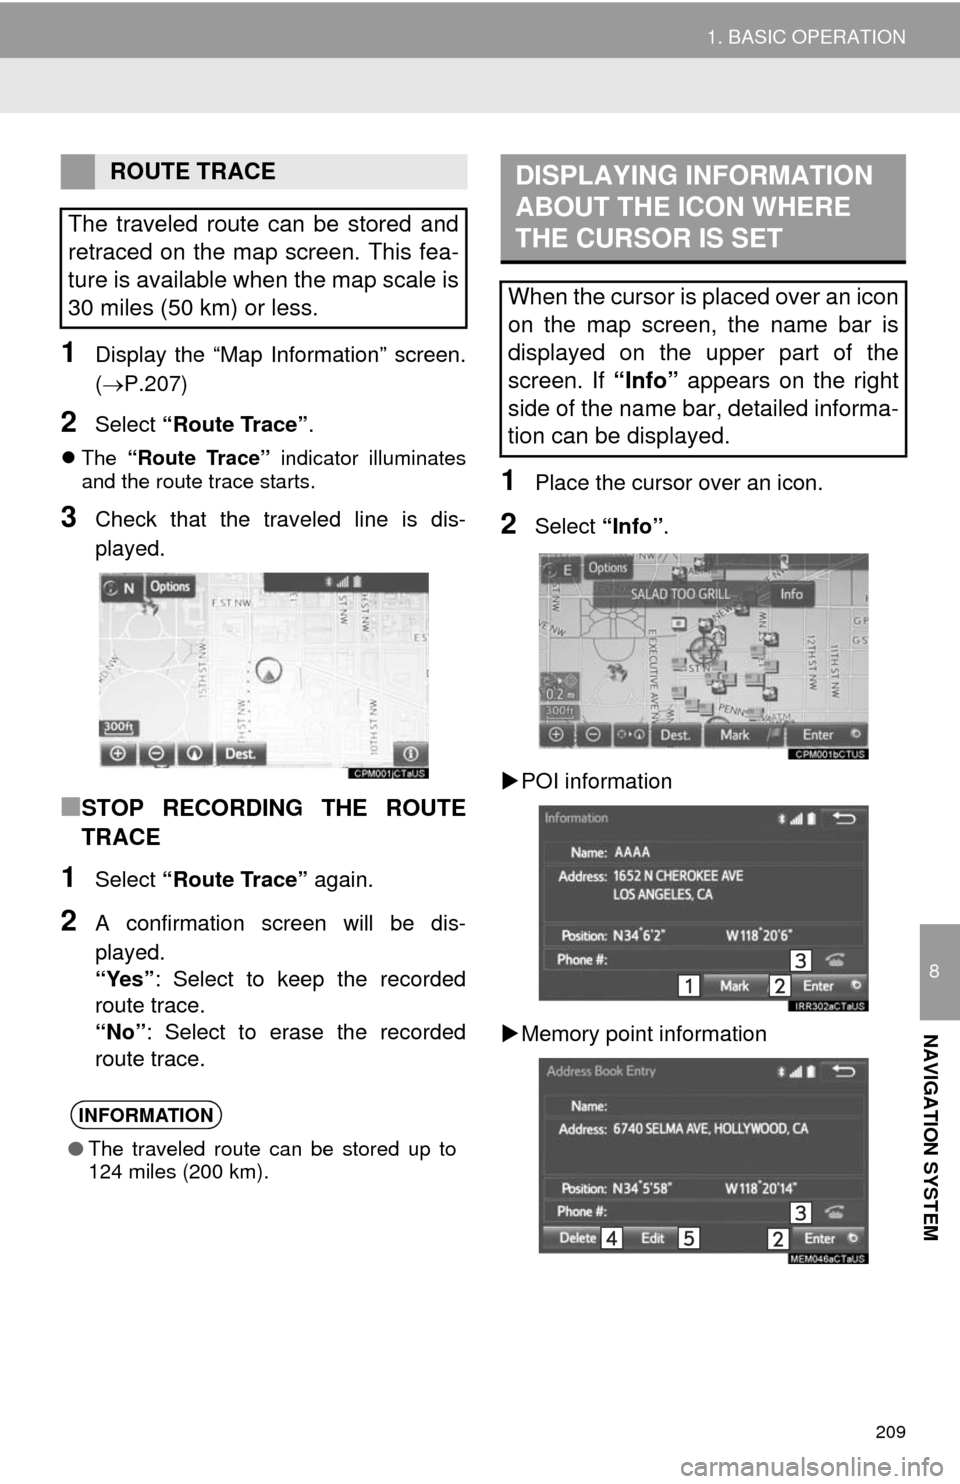
1Display the “Map Information” screen.
(P.207)
2Select “Route Trace”.
The “Route Trace” indicator illuminates
and the route trace starts.
3Check that the traveled line is dis-
played.
■STOP RECORDING THE ROUTE
TRACE
1Select “Route Trace” again.
2A confirmation screen will be dis-
played.
“Yes”: Select to keep the recorded
route trace.
“No”: Select to erase the recorded
route trace.
1Place the cursor over an icon.
2Select “Info”.
POI information
Memory point information
ROUTE TRACE
The traveled route can be stored and
retraced on the map screen. This fea-
ture is available when the map scale is
30 miles (50 km) or less.
INFORMATION
●The traveled route can be stored up to
124 miles (200 km).
DISPLAYING INFORMATION
ABOUT THE ICON WHERE
THE CURSOR IS SET
When the cursor is placed over an icon
on the map screen, the name bar is
displayed on the upper part of the
screen. If “Info” appears on the right
side of the name bar, detailed informa-
tion can be displayed.