2014 SUBARU IMPREZA WRX torque
[x] Cancel search: torquePage 131 of 414
3-16Instruments and controls/Warning and indicator lights
The CHECK ENGINE warning light may
stop blinking and illuminate steadily after
several driving trips. You should have your
vehicle checked by an authorized
SUBARU dealer immediately. &Charge warning light
If this light illuminates when the engine is
running, it may indicate that the charging
system is not working properly.
If the light illuminates while driving or does
not turn off after the engine starts, stop the
engine at the first safe opportunity and
check the alternator belt. If the belt is
loose, broken or if the belt is in good
condition but the light remains illuminated,
contact your nearest SUBARU dealer
immediately. &Oil pressure warning light
If this light illuminates when the engine is
running, it may indicate that the engine oil
pressure is low and the lubricating system
is not working properly.
If the light illuminates while driving or does
not turn off after the engine starts, stop the
engine at the first safe opportunity and
check the engine oil level. If the oil level is
low, add oil immediately. If the engine oil is
at the proper level but the light remains illuminated, contact your nearest
SUBARU dealer immediately.
For details about checking the engine oil
level or adding the engine oil, refer to“
Engine oil ”F 11-8.
CAUTION
Do not operate the engine with the
oil pressure warning light illumi-
nated. This may cause serious en-
gine damage.
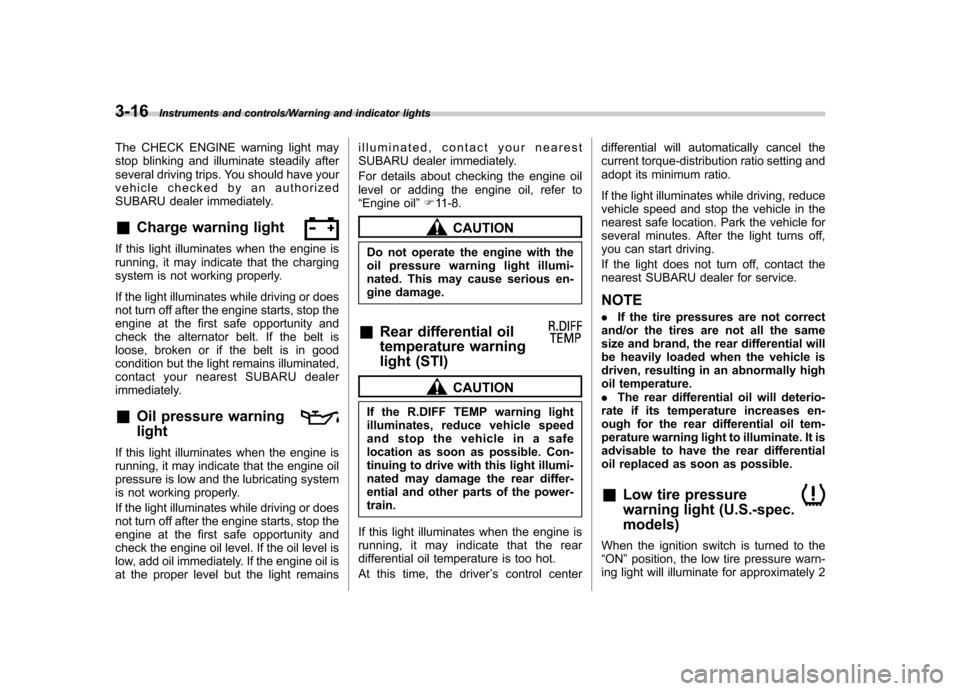
& Rear differential oil
temperature warning
light (STI)
CAUTION
If the R.DIFF TEMP warning light
illuminates, reduce vehicle speed
and stop the vehicle in a safe
location as soon as possible. Con-
tinuing to drive with this light illumi-
nated may damage the rear differ-
ential and other parts of the power-train.
If this light illuminates when the engine is
running, it may indicate that the rear
differential oil temperature is too hot.
At this time, the driver ’s control center differential will automatically cancel the
current torque-distribution ratio setting and
adopt its minimum ratio.
If the light illuminates while driving, reduce
vehicle speed and stop the vehicle in the
nearest safe location. Park the vehicle for
several minutes. After the light turns off,
you can start driving.
If the light does not turn off, contact the
nearest SUBARU dealer for service.
NOTE . If the tire pressures are not correct
and/or the tires are not all the same
size and brand, the rear differential will
be heavily loaded when the vehicle is
driven, resulting in an abnormally high
oil temperature.. The rear differential oil will deterio-
rate if its temperature increases en-
ough for the rear differential oil tem-
perature warning light to illuminate. It is
advisable to have the rear differential
oil replaced as soon as possible. & Low tire pressure
warning light (U.S.-spec. models)
When the ignition switch is turned to the “ON ”position, the low tire pressure warn-
ing light will illuminate for approximately 2
Page 140 of 414
![SUBARU IMPREZA WRX 2014 4.G Owners Manual For details, refer to“Driver ’sControl
Center Differential (DCCD) (STI) ”F 7-18.
! Driver ’s control center dif-
ferential auto [ �] indicator
light
When the AUTO [ �] mode is set, the
AUTO [ SUBARU IMPREZA WRX 2014 4.G Owners Manual For details, refer to“Driver ’sControl
Center Differential (DCCD) (STI) ”F 7-18.
! Driver ’s control center dif-
ferential auto [ �] indicator
light
When the AUTO [ �] mode is set, the
AUTO [](/manual-img/17/7263/w960_7263-139.png)
For details, refer to“Driver ’sControl
Center Differential (DCCD) (STI) ”F 7-18.
! Driver ’s control center dif-
ferential auto [ �] indicator
light
When the AUTO [ �] mode is set, the
AUTO [ �] indicator light illuminates.
For details, refer to “Driver ’sControl
Center Differential (DCCD) (STI) ”F 7-18.
& Driver ’s control center differ-
ential indicator and warning
lights (STI)
! Indicator lights
When you select the manual mode of the driver ’s control center differential, the
initial limited slip differential (LSD) torque that is currently selected for the center
differential is indicated by the illumination
of these indicator lights. !
Warning light
All the indicator lights will flash in the event
that the driver ’s control center differential
has a malfunction. Have the vehicle
inspected by your SUBARU dealer. For
details, refer to “Driver ’s Control Center
Differential (DCCD) (STI) ”F 7-18.
& REV indicator light (STI)
This indicator light illuminates when the
engine speed reaches the level that was
previously set. This indicator light also
flashes when the tachometer needle en-
ters the red zone. For details, refer to “
REV indicator light and buzzer (STI) ”F 3-
10.
Instruments and controls/Warning and indicator lights3-25
Page 261 of 414
7-18Starting and operating/Driver’s Control Center Differential (DCCD) (STI)
Driver ’s Control Center Dif-
ferential (DCCD) (STI)
WARNING
Always use the utmost care when
driving. Being overconfident be-
cause you are driving a vehicle with
a driver ’s control center differential
could easily lead to a serious acci-dent.
CAUTION
All the indicator lights will flash in
the event that the driver ’s control
center differential has a malfunc-
tion. Have the vehicle inspected by
your SUBARU dealer.
The driver ’s control center differential
allows you to freely change the degree
of limitation of the differential action
(limited slip differential (LSD) torque) of
your vehicle ’s center differential.
By using the center differential control
switch, you can set an initial LSD torque to
match the road surface conditions, driving
conditions and your driving style.
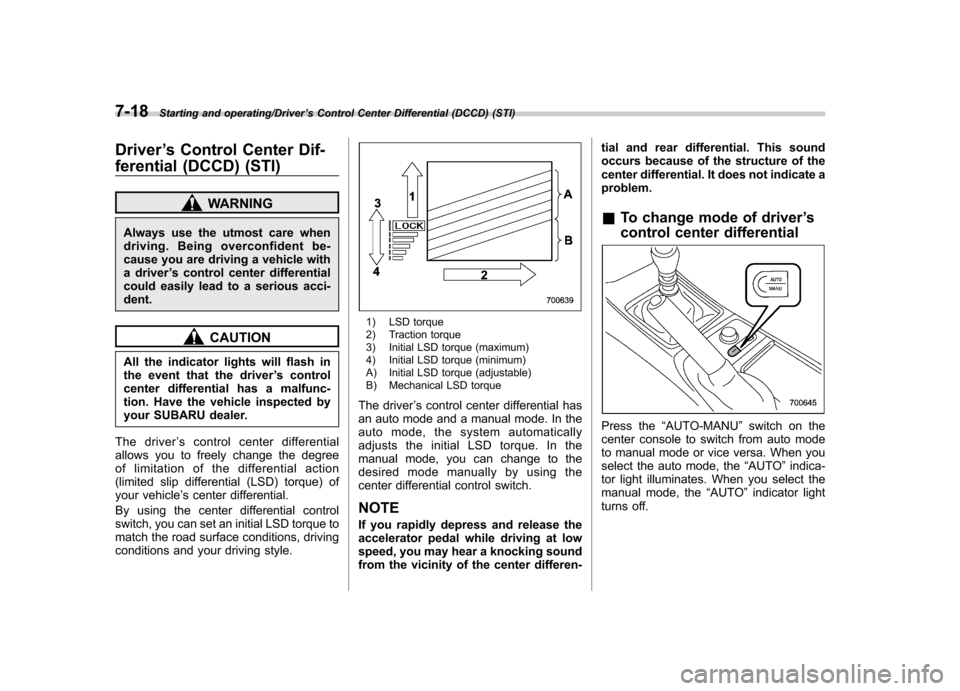
1) LSD torque
2) Traction torque
3) Initial LSD torque (maximum)
4) Initial LSD torque (minimum)
A) Initial LSD torque (adjustable)
B) Mechanical LSD torque
The driver ’s control center differential has
an auto mode and a manual mode. In the
auto mode, the system automatically
adjusts the initial LSD torque. In the
manual mode, you can change to the
desired mode manually by using the
center differential control switch.
NOTE
If you rapidly depress and release the
accelerator pedal while driving at low
speed, you may hear a knocking sound
from the vicinity of the center differen- tial and rear differential. This sound
occurs because of the structure of the
center differential. It does not indicate aproblem. &
To change mode of driver ’s
control center differential
Press the “AUTO-MANU ”switch on the
center console to switch from auto mode
to manual mode or vice versa. When you
select the auto mode, the “AUTO ”indica-
tor light illuminates. When you select the
manual mode, the “AUTO ”indicator light
turns off.
Page 262 of 414
&Auto mode
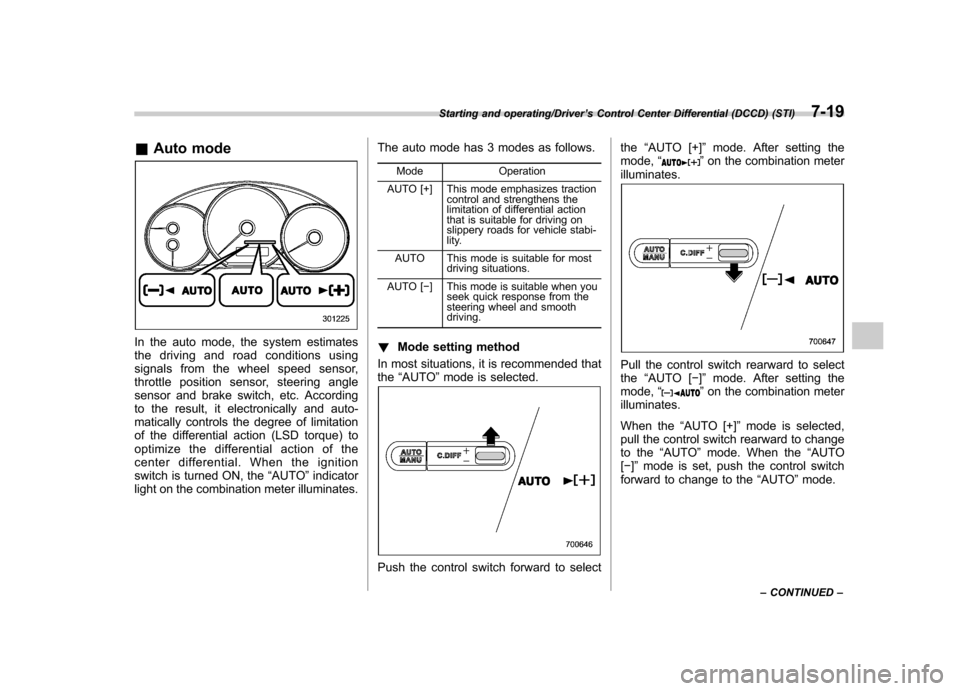
In the auto mode, the system estimates
the driving and road conditions using
signals from the wheel speed sensor,
throttle position sensor, steering angle
sensor and brake switch, etc. According
to the result, it electronically and auto-
matically controls the degree of limitation
of the differential action (LSD torque) to
optimize the differential action of the
center differential. When the ignition
switch is turned ON, the “AUTO ”indicator
light on the combination meter illuminates. The auto mode has 3 modes as follows.
Mode Operation
AUTO [+] This mode emphasizes traction control and strengthens the
limitation of differential action
that is suitable for driving on
slippery roads for vehicle stabi-
lity.
AUTO This mode is suitable for most driving situations.
AUTO [ �] This mode is suitable when you
seek quick response from the
steering wheel and smooth driving.
! Mode setting method
In most situations, it is recommended that the “AUTO ”mode is selected.
Push the control switch forward to select the
“AUTO [+] ”mode. After setting the
mode, “
”on the combination meter
illuminates.
Pull the control switch rearward to select the “AUTO [ �]” mode. After setting the
mode, “
”on the combination meter
illuminates.
When the “AUTO [+] ”mode is selected,
pull the control switch rearward to change
to the “AUTO ”mode. When the “AUTO
[ � ]” mode is set, push the control switch
forward to change to the “AUTO ”mode.
Starting and operating/Driver ’s Control Center Differential (DCCD) (STI)7-19
– CONTINUED –
Page 263 of 414
7-20Starting and operating/Driver’s Control Center Differential (DCCD) (STI)
& Manual mode
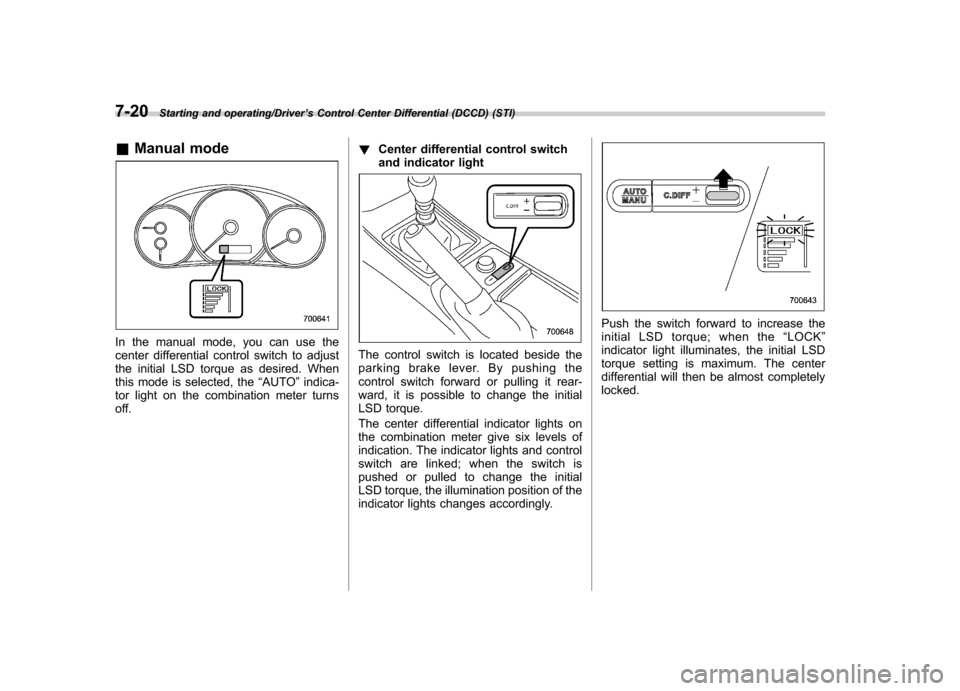
In the manual mode, you can use the
center differential control switch to adjust
the initial LSD torque as desired. When
this mode is selected, the “AUTO ”indica-
tor light on the combination meter turns
off. !
Center differential control switch
and indicator lightThe control switch is located beside the
parking brake lever. By pushing the
control switch forward or pulling it rear-
ward, it is possible to change the initial
LSD torque.
The center differential indicator lights on
the combination meter give six levels of
indication. The indicator lights and control
switch are linked; when the switch is
pushed or pulled to change the initial
LSD torque, the illumination position of the
indicator lights changes accordingly.
Push the switch forward to increase the
initial LSD torque; when the “LOCK ”
indicator light illuminates, the initial LSD
torque setting is maximum. The center
differential will then be almost completelylocked.
Page 264 of 414
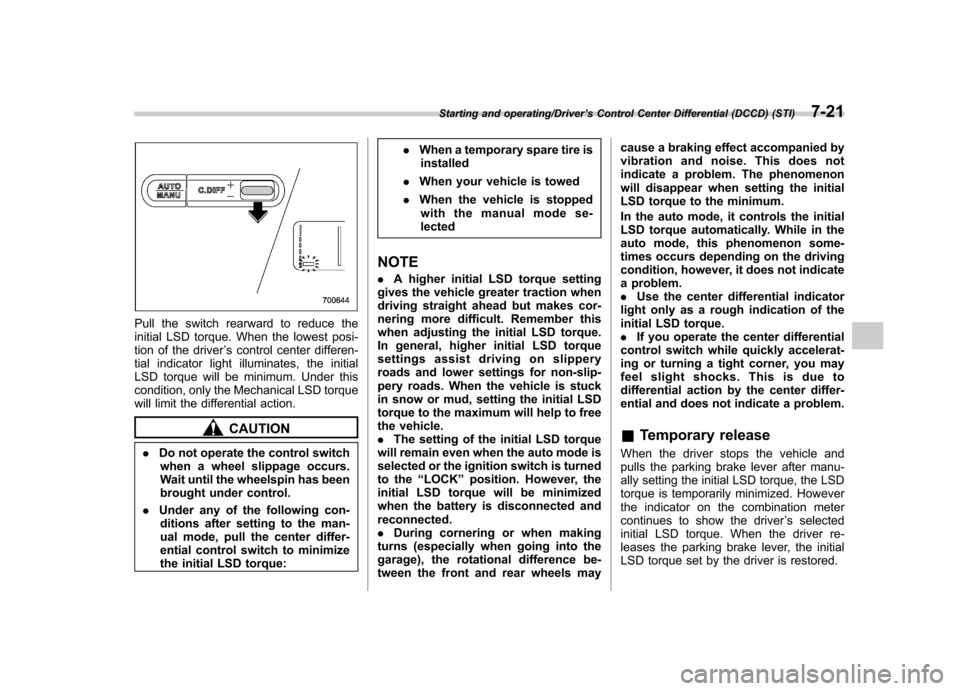
Pull the switch rearward to reduce the
initial LSD torque. When the lowest posi-
tion of the driver’s control center differen-
tial indicator light illuminates, the initial
LSD torque will be minimum. Under this
condition, only the Mechanical LSD torque
will limit the differential action.
CAUTION
. Do not operate the control switch
when a wheel slippage occurs.
Wait until the wheelspin has been
brought under control.
. Under any of the following con-
ditions after setting to the man-
ual mode, pull the center differ-
ential control switch to minimize
the initial LSD torque: .
When a temporary spare tire is
installed
. When your vehicle is towed
. When the vehicle is stopped
with the manual mode se-lected
NOTE . A higher initial LSD torque setting
gives the vehicle greater traction when
driving straight ahead but makes cor-
nering more difficult. Remember this
when adjusting the initial LSD torque.
In general, higher initial LSD torque
settings assist driving on slippery
roads and lower settings for non-slip-
pery roads. When the vehicle is stuck
in snow or mud, setting the initial LSD
torque to the maximum will help to free
the vehicle.. The setting of the initial LSD torque
will remain even when the auto mode is
selected or the ignition switch is turned
to the “LOCK ”position. However, the
initial LSD torque will be minimized
when the battery is disconnected andreconnected.. During cornering or when making
turns (especially when going into the
garage), the rotational difference be-
tween the front and rear wheels may cause a braking effect accompanied by
vibration and noise. This does not
indicate a problem. The phenomenon
will disappear when setting the initial
LSD torque to the minimum.
In the auto mode, it controls the initial
LSD torque automatically. While in the
auto mode, this phenomenon some-
times occurs depending on the driving
condition, however, it does not indicate
a problem..
Use the center differential indicator
light only as a rough indication of the
initial LSD torque.. If you operate the center differential
control switch while quickly accelerat-
ing or turning a tight corner, you may
feel slight shocks. This is due to
differential action by the center differ-
ential and does not indicate a problem. & Temporary release
When the driver stops the vehicle and
pulls the parking brake lever after manu-
ally setting the initial LSD torque, the LSD
torque is temporarily minimized. However
the indicator on the combination meter
continues to show the driver ’s selected
initial LSD torque. When the driver re-
leases the parking brake lever, the initial
LSD torque set by the driver is restored.
Starting and operating/Driver ’s Control Center Differential (DCCD) (STI)7-21
Page 273 of 414
7-30Starting and operating/Vehicle Dynamics Control system
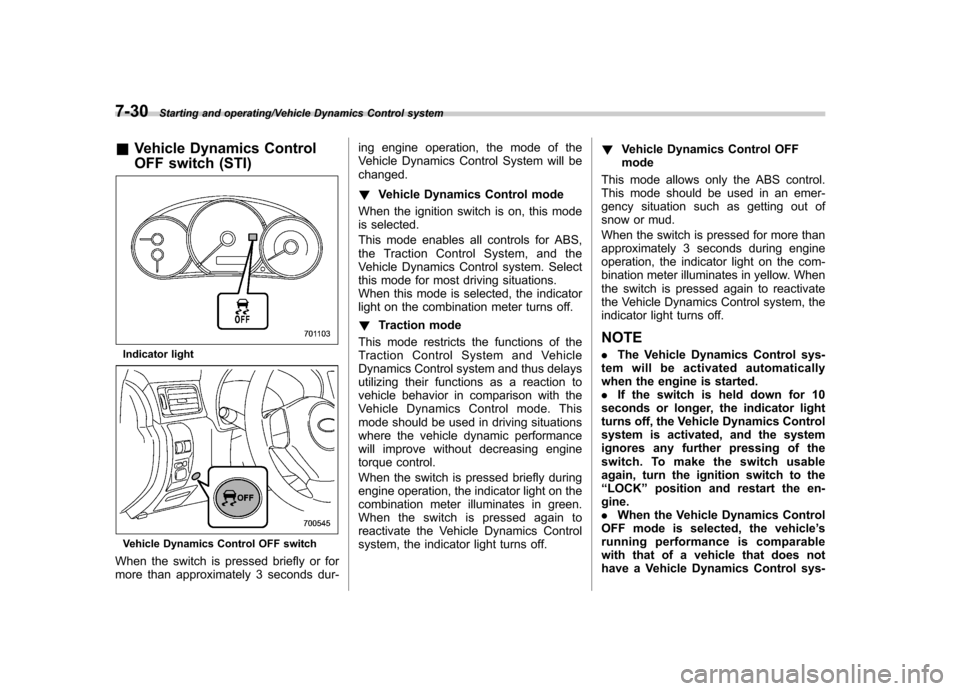
&Vehicle Dynamics Control
OFF switch (STI)
Indicator light
Vehicle Dynamics Control OFF switch
When the switch is pressed briefly or for
more than approximately 3 seconds dur- ing engine operation, the mode of the
Vehicle Dynamics Control System will bechanged. !
Vehicle Dynamics Control mode
When the ignition switch is on, this mode
is selected.
This mode enables all controls for ABS,
the Traction Control System, and the
Vehicle Dynamics Control system. Select
this mode for most driving situations.
When this mode is selected, the indicator
light on the combination meter turns off. ! Traction mode
This mode restricts the functions of the
Traction Control System and Vehicle
Dynamics Control system and thus delays
utilizing their functions as a reaction to
vehicle behavior in comparison with the
Vehicle Dynamics Control mode. This
mode should be used in driving situations
where the vehicle dynamic performance
will improve without decreasing engine
torque control.
When the switch is pressed briefly during
engine operation, the indicator light on the
combination meter illuminates in green.
When the switch is pressed again to
reactivate the Vehicle Dynamics Control
system, the indicator light turns off. !
Vehicle Dynamics Control OFFmode
This mode allows only the ABS control.
This mode should be used in an emer-
gency situation such as getting out of
snow or mud.
When the switch is pressed for more than
approximately 3 seconds during engine
operation, the indicator light on the com-
bination meter illuminates in yellow. When
the switch is pressed again to reactivate
the Vehicle Dynamics Control system, the
indicator light turns off.
NOTE . The Vehicle Dynamics Control sys-
tem will be activated automatically
when the engine is started.. If the switch is held down for 10
seconds or longer, the indicator light
turns off, the Vehicle Dynamics Control
system is activated, and the system
ignores any further pressing of the
switch. To make the switch usable
again, turn the ignition switch to the“ LOCK ”position and restart the en-
gine.. When the Vehicle Dynamics Control
OFF mode is selected, the vehicle ’s
running performance is comparable
with that of a vehicle that does not
have a Vehicle Dynamics Control sys-
Page 304 of 414
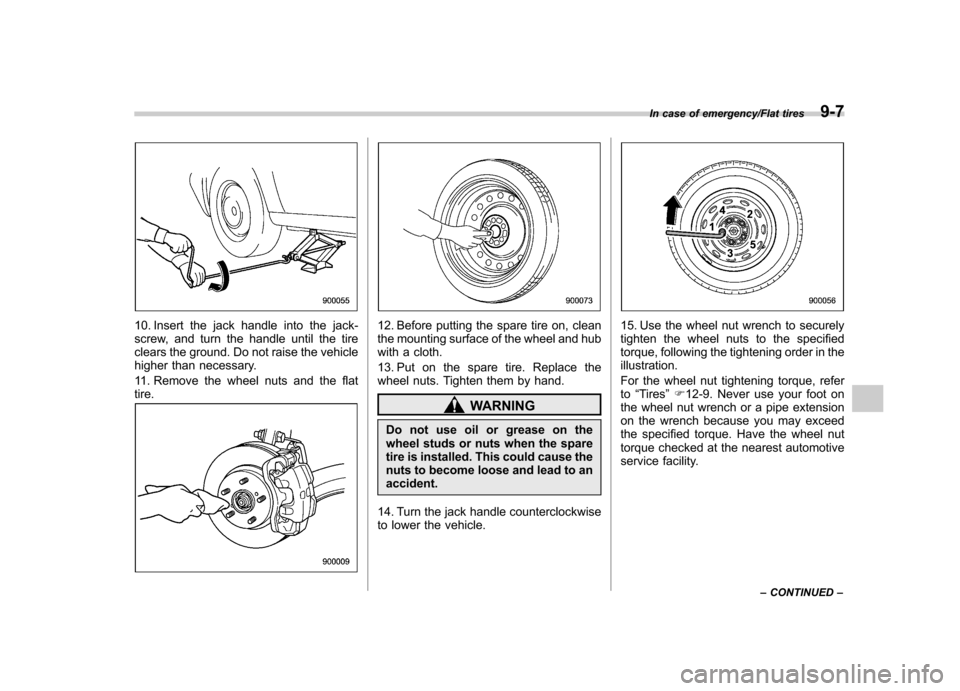
10. Insert the jack handle into the jack-
screw, and turn the handle until the tire
clears the ground. Do not raise the vehicle
higher than necessary.
11. Remove the wheel nuts and the flat tire.12. Before putting the spare tire on, clean
the mounting surface of the wheel and hub
with a cloth.
13. Put on the spare tire. Replace the
wheel nuts. Tighten them by hand.
WARNING
Do not use oil or grease on the
wheel studs or nuts when the spare
tire is installed. This could cause the
nuts to become loose and lead to anaccident.
14. Turn the jack handle counterclockwise
to lower the vehicle.
15. Use the wheel nut wrench to securely
tighten the wheel nuts to the specified
torque, following the tightening order in theillustration.
For the wheel nut tightening torque, refer to “Tires ”F 12-9. Never use your foot on
the wheel nut wrench or a pipe extension
on the wrench because you may exceed
the specified torque. Have the wheel nut
torque checked at the nearest automotive
service facility.
In case of emergency/Flat tires9-7
– CONTINUED –