2014 SUBARU IMPREZA WRX brake
[x] Cancel search: brakePage 339 of 414
11-20Maintenance and service/Brake booster
&Recommended clutch fluid
Refer to “Fluids ”F 12-7.
CAUTION
Never use different brands of clutch
fluid together. Also, avoid mixing
DOT 3 and DOT 4 brake fluids even if
they are the same brand. Brake booster
If the brake booster does not operate as
described in the following, have it checked
by your SUBARU dealer.
1. With the engine off, depress the brake
pedal several times, applying the same
pedal force each time. The distance the
pedal travels should not vary.
2. With the brake pedal depressed, start
the engine. The pedal should move
slightly down to the floor.
3. With the brake pedal depressed, stop
the engine and keep the pedal depressed
for 30 seconds. The pedal height should
not change.
4. Start the engine again and run for
approximately one minute then turn it off.
Depress the brake pedal several times to
check the brake booster. The brake
booster operates properly if the pedal
stroke decreases with each depression. NOTE
For vehicles equipped with the brake
assist system, when you depress the
brake pedal strongly or suddenly, you
might feel that lighter depression of the
brake pedal generates a greater brak-
ing force. However, even though these
occur, they do not indicate any mal- functions, and the brake assist system
is operating properly.
Brake assist is not a system that brings
more braking ability to the vehicle
beyond its breaking capability.
Page 340 of 414
Brake pedal
Check the brake pedal free play and
reserve distance according to the main-
tenance schedule in the“Warranty and
Maintenance Booklet ”.
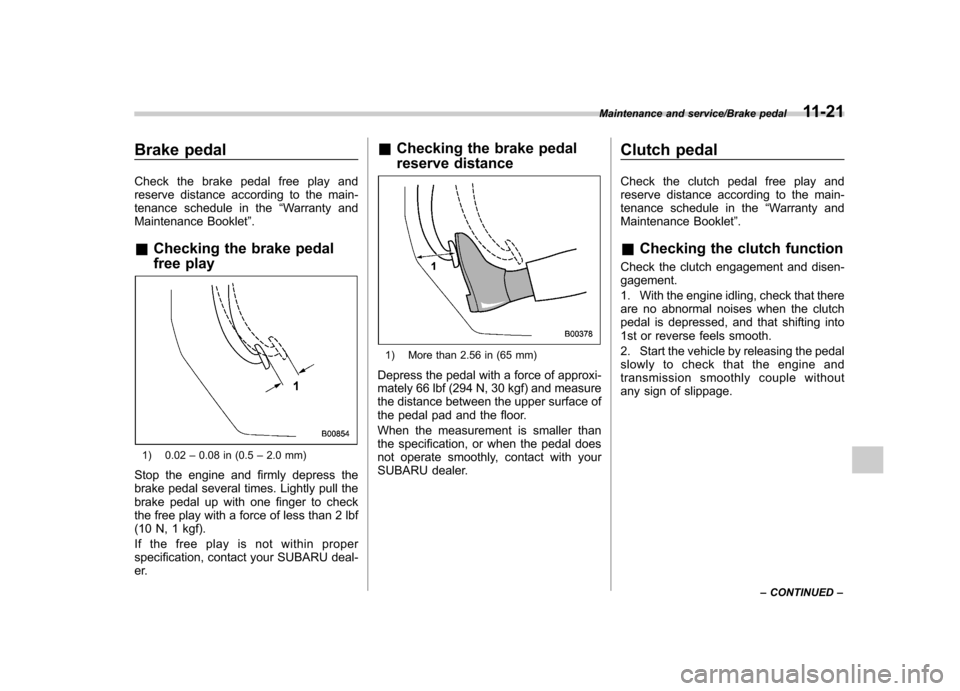
& Checking the brake pedal
free play
1) 0.02 –0.08 in (0.5 –2.0 mm)
Stop the engine and firmly depress the
brake pedal several times. Lightly pull the
brake pedal up with one finger to check
the free play with a force of less than 2 lbf
(10 N, 1 kgf).
If the free play is not within proper
specification, contact your SUBARU deal-
er. &
Checking the brake pedal
reserve distance
1) More than 2.56 in (65 mm)
Depress the pedal with a force of approxi-
mately 66 lbf (294 N, 30 kgf) and measure
the distance between the upper surface of
the pedal pad and the floor.
When the measurement is smaller than
the specification, or when the pedal does
not operate smoothly, contact with your
SUBARU dealer. Clutch pedal
Check the clutch pedal free play and
reserve distance according to the main-
tenance schedule in the
“Warranty and
Maintenance Booklet ”.
& Checking the clutch function
Check the clutch engagement and disen-gagement.
1. With the engine idling, check that there
are no abnormal noises when the clutch
pedal is depressed, and that shifting into
1st or reverse feels smooth.
2. Start the vehicle by releasing the pedal
slowly to check that the engine and
transmission smoothly couple without
any sign of slippage.
Maintenance and service/Brake pedal11-21
– CONTINUED –
Page 341 of 414
11-22Maintenance and service/Hill start assist system
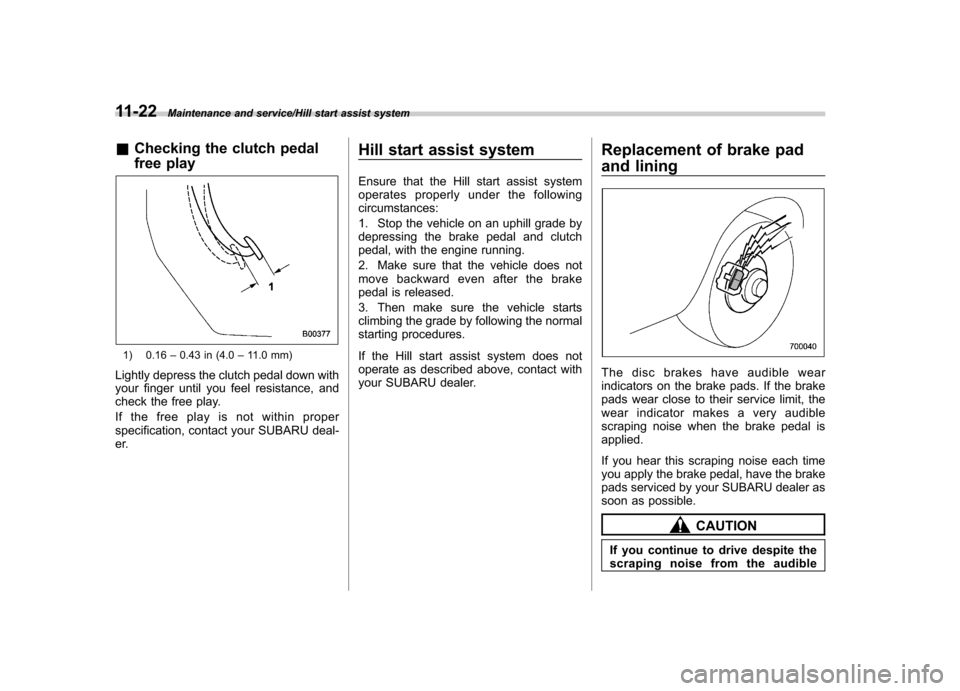
&Checking the clutch pedal
free play
1) 0.16 –0.43 in (4.0 –11.0 mm)
Lightly depress the clutch pedal down with
your finger until you feel resistance, and
check the free play.
If the free play is not within proper
specification, contact your SUBARU deal-
er. Hill start assist system
Ensure that the Hill start assist system
operates properly under the followingcircumstances:
1. Stop the vehicle on an uphill grade by
depressing the brake pedal and clutch
pedal, with the engine running.
2. Make sure that the vehicle does not
move backward even after the brake
pedal is released.
3. Then make sure the vehicle starts
climbing the grade by following the normal
starting procedures.
If the Hill start assist system does not
operate as described above, contact with
your SUBARU dealer.
Replacement of brake pad
and lining
The disc brakes have audible wear
indicators on the brake pads. If the brake
pads wear close to their service limit, the
wear indicator makes a very audible
scraping noise when the brake pedal isapplied.
If you hear this scraping noise each time
you apply the brake pedal, have the brake
pads serviced by your SUBARU dealer as
soon as possible.
CAUTION
If you continue to drive despite the
scraping noise from the audible
Page 342 of 414
brake pad wear indicator, it will
result in the need for costly brake
rotor repair or replacement.
& Breaking-in of new brake
pads and linings
When replacing the brake pad or lining,
use only genuine SUBARU parts. After
replacement, the new parts must be
broken in as follows. ! Brake pad and lining
While maintaining a speed of 30 to 40
mph (50 to 65 km/h), step on the brake
pedal lightly. Repeat this five or moretimes. ! Parking brake lining
1.Drivethevehicleataspeedof
approximately 22 mph (35 km/h).
2. With the parking brake release button
pushed in, pull the parking brake lever
SLOWLY and GENTLY (pulling with a
force of approximately 33.7 lbf [150 N,
15.3 kgf]).
3. Drive the vehicle for approximately
220 yards (200 meters) in this condition.
4. Wait 5 to 10 minutes for the parking
brake to cool down. Repeat this proce-dure.
5. Check the parking brake stroke. If the parking brake stroke is out of the specified
range, adjust it by turning the adjusting nut
located on the parking brake lever.
Parking brake stroke: 7–8 notches / 45 lbf (200 N, 20.4 kgf)
WARNING
A safe location and situation should
be selected for break-in driving.
CAUTION
Pulling the parking brake lever too
forcefully may cause the rear
wheels to lock. To avoid this, be
certain to pull the lever up slowly
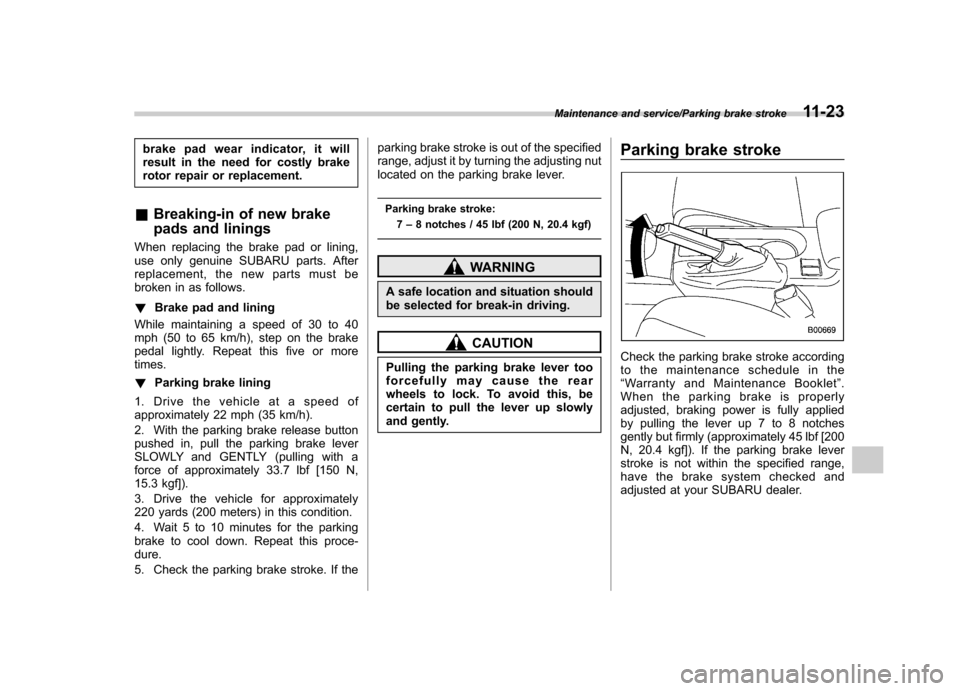
and gently. Parking brake strokeCheck the parking brake stroke according
to the maintenance schedule in the“
Warranty and Maintenance Booklet ”.
When the parking brake is properly
adjusted, braking power is fully applied
by pulling the lever up 7 to 8 notches
gently but firmly (approximately 45 lbf [200
N, 20.4 kgf]). If the parking brake lever
stroke is not within the specified range,
have the brake system checked and
adjusted at your SUBARU dealer.
Maintenance and service/Parking brake stroke11-23
Page 344 of 414
the tire pressure monitoring system may
not be functioning normally. In this event,
go to a SUBARU dealer to have the
system inspected as soon as possible.
While the vehicle is driven, friction be-
tween tires and the road surface causes
the tires to warm up. After illumination of
the low tire pressure warning light, any
increase in the tire pressures caused by
an increase in the outside air temperature
or by an increase in the temperature in the
tires can cause the low tire pressure
warning light to turn off.
System resetting is necessary when the
wheels are changed (for example, a
switch to snow tires) and new TPMS
valves are installed on the newly fitted
wheels. Have this work performed by a
SUBARU dealer following wheel replace-ment.
It may not be possible to install TPMS
valves on certain wheels that are on the
market. Therefore, if you change the
wheels (for example, a switch to snow
tires), use wheels that have the same part
number as the standard-equipment
wheels. Without four operational TPMS
valve/sensors on the wheels, the TPMS
will not fully function and the warning light
on the combination meter will illuminate
steadily after blinking for approximatelyone minute.
When a tire is replaced, adjustments are
necessary to ensure continued normal
operation of the tire pressure monitoring
system. As with wheel replacement, there-
fore, you should have the work performed
by a SUBARU dealer.
WARNING
If the low tire pressure warning light
does not illuminate briefly after the
ignition switch is turned ON or the
light illuminates steadily after blink-
ing for approximately one minute,
you should have your Tire Pressure
Monitoring System checked at a
SUBARU dealer as soon as possi-ble.
If this light illuminates while driving,
never brake suddenly and keep
driving straight ahead while gradu-
ally reducing speed. Then slowly
pull off the road to a safe place.
Otherwise an accident involving
serious vehicle damage and serious
personal injury could occur.
If this light still illuminates while
driving after adjusting the tire pres-
sure, a tire may have significant
damage and a fast leak that causes
the tire to lose air rapidly. If you have a flat tire, replace it with a spare tire
as soon as possible.
When a spare tire is mounted or a
wheel rim is replaced without the
original pressure sensor/transmitter
being transferred, the low tire pres-
sure warning light will illuminate
steadily after blinking for approxi-
mately one minute. This indicates
the TPMS is unable to monitor all
four road wheels. Contact your
SUBARU dealer as soon as possible
for tire and sensor replacement and/
or system resetting. If the light
illuminates steadily after blinking
for approximately one minute,
promptly contact a SUBARU dealer
to have the system inspected.
& Tire inspection
Check on a daily basis that the tires are
free from serious damage, nails, and
stones. At the same time, check the tires
for abnormal wear.
Contact your SUBARU dealer immedi-
ately if you find any problem. NOTE . When the wheels and tires strike
curbs or are subjected to harsh treat-
ment as when the vehicle is driven on a
Maintenance and service/Tires and wheels11-25
– CONTINUED –
Page 349 of 414
11-30Maintenance and service/Tires and wheels
Using tires of a non-specified size detracts
from controllability, ride comfort, braking
performance, speedometer accuracy and
odometer accuracy. It also creates incor-
rect body-to-tire clearances and inappro-
priately changes the vehicle’sground
clearance.
All four tires must be the same in terms of
size, circumference, speed symbol, load
index, construction, manufacturer, brand
(tread pattern), and degrees of wear. You
are advised to replace the tires with new
ones that are identical to those fitted as
standard equipment.
For safe vehicle operation, SUBARU
recommends replacing all four tires at
the same time.
WARNING
. When you replacing or installing
tire(s), all four tires must be the
same for following items.
(a) Size
(b) Circumference
(c) Speed symbol
(d) Load index
(e) Construction
(f) Manufacturer
(g) Brand (tread pattern) (h) Degrees of wear
For the items (a) to (d), you must
obey the specification that is
printed on the tire placard. The
tire placard is located on the
bottom of driver
’s door pillar.
If all of four tires are not the same
for items (a) to (h), there is a
possibility that serious mechan-
ical damage could occur to the
drive train of your car, and affect
the following. — Ride
— Handling
— Braking
— Speedometer/Odometer
calibration— Clearance between the body
and tires
It also may be dangerous and
lead to loss of vehicle control,
and it can lead to an accident.
. Use only radial tires. Do not use
radial tires together with belted
bias tires and/or bias-ply tires.
Doing so can dangerously re-
duce controllability, resulting in
an accident. &
Wheel replacement
When replacing wheels due, for example,
to damage, make sure the replacement
wheels match the specifications of the
wheels that are fitted as standard equip-
ment. Replacement wheels are available
from SUBARU dealers.
WARNING
Use only those wheels that are
specified for your vehicle. Wheels
not meeting specifications could
interfere with brake caliper opera-
tion and may cause the tires to rub
against the wheel well housing dur-
ing turns. The resulting loss of
vehicle control could lead to anaccident.
NOTE
When any of the wheels are removed
and replaced for tire rotation or to
change a flat tire, always check the
tightness of the wheel nuts after driv-
ing approximately 600 miles (1,000 km).
If any nut is loose, tighten it to the
specified torque.
Page 374 of 414

&Fluids
NOTE
Each quantity indicated here is only a guideline. The necessary quantity for replacement may differ slightly depending on the
temperature and other factors.
Fluid Fluid type Fluid capacity
Power steering fluid · SUBARU ATF ·
“Dexron III ”Type Automatic Transmission Fluid 0.7 US qt (0.7 liter, 0.6 Imp qt)
Brake fluid · Genuine SUBARU brake fluid
· FMVSS No. 116, fresh DOT 3 or DOT 4 brake fluid –
Clutch fluid –
For the checking procedures or other details, refer to “Power steering fluid ”F 11-17, “Brake fluid ”F 11-18 or “Clutch fluid ”F 11-19.
Specifications/Specifications12-7
– CONTINUED –
Page 390 of 414
crease in temperature could cause
tread separation, and failure of the
tire(s). Possible resulting loss of
vehicle control could lead to anaccident. !Measuring and adjusting air
pressure to achieve proper in-
flation
Check and, if necessary, adjust the
pressure of each tire (including the
spare) at least once a month and
before any long journey. Check the
tire pressures when the tires are
cold. Use a pressure gauge to
adjust the tire pressures to the
specific values. Driving even a
short distance warms up the tires
and increases the tire pressures.
Also, the tire pressures are affected
by the outside temperature. It is
best to check tire pressure out-
doors before driving the vehicle.
When a tire becomes warm, the air
inside it expands, causing the tire
pressure to increase. Be careful not
to mistakenly release air from a
warm tire to reduce its pressure. &
Glossary of tire terminology
. Accessory weight
The combined weight (in excess of
those standard items which may be
replaced) of automatic transmis-
sion, power steering, power brakes,
power windows, power seats, radio,
and heater, to the extent that these
items are available as factory-in-
stalled equipment (whether in-
stalled or not). . Bead
The part of the tire that is made of
steel wires, wrapped or reinforced
by ply cords and that is shaped to fit
the rim.. Bead separation
A breakdown of the bond between
components in the bead.. Bias ply tire
A pneumatic tire in which the ply
cords that extend to the beads are
laid at alternate angles substantially
less than 90 degrees to the center-
line of the tread. . Carcass
The tire structure, except tread and sidewall rubber which, when in-
flated, bears the load. .
Chunking
The breaking away of pieces of the
tread or sidewall.. Cold tire pressure
The pressure in a tire that has been
driven less than 1 mile or has been
standing for three hours or more.. Cord
The strands forming the plies in the tire. . Cord separation
The parting of cords from adjacent
rubber compounds.. Cracking
Any parting within the tread, side-
wall, or inner liner of the tire
extending to cord material. . Curb weight
The weight of a motor vehicle with
standard equipment including the
maximum capacity of fuel, oil and
coolant, and if so equipped, air
conditioning and additional weight
optional engine.
Consumer information and Reporting safety defects/Tire information13-5
– CONTINUED –