2014 SKODA YETI stop start
[x] Cancel search: stop startPage 15 of 88
Depending on equipment this can be operated using the buttons / wheels on
the multifunction steering wheel or on the operating lever.
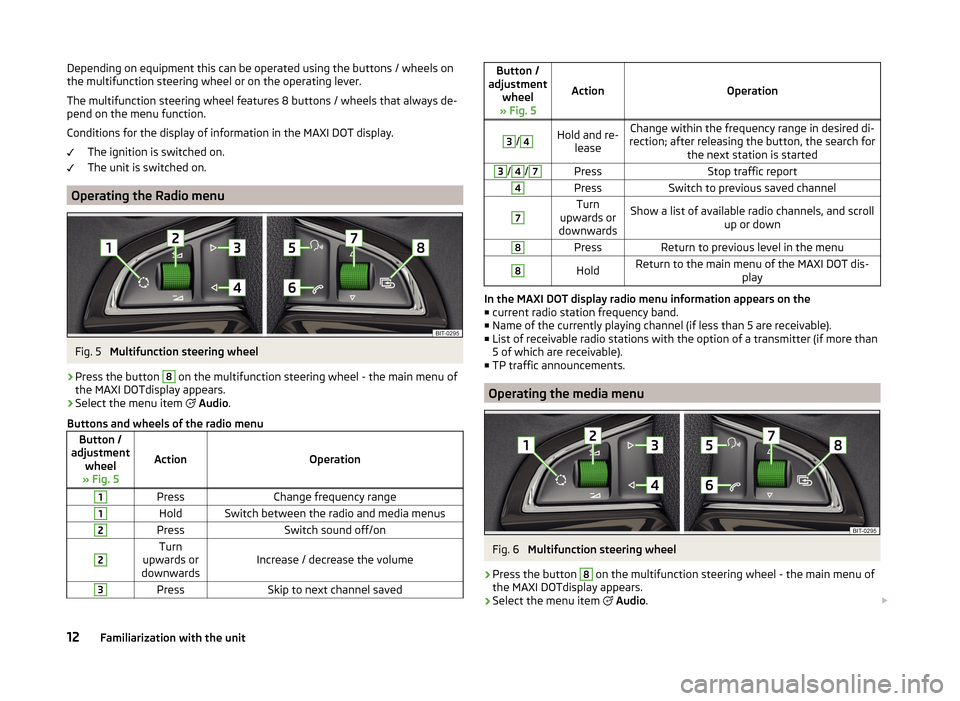
The multifunction steering wheel features 8 buttons / wheels that always de-
pend on the menu function.
Conditions for the display of information in the MAXI DOT display. The ignition is switched on.
The unit is switched on.
Operating the Radio menu
Fig. 5
Multifunction steering wheel
›
Press the button
8
on the multifunction steering wheel - the main menu of
the MAXI DOTdisplay appears.
›
Select the menu item
Audio .
Buttons and wheels of the radio menu
Button /
adjustment wheel
» Fig. 5
ActionOperation
1PressChange frequency range1HoldSwitch between the radio and media menus2PressSwitch sound off/on2Turn
upwards or
downwardsIncrease / decrease the volume
3PressSkip to next channel savedButton /
adjustment wheel
» Fig. 5
ActionOperation
3
/
4Hold and re- leaseChange within the frequency range in desired di-
rection; after releasing the button, the search for the next station is started3/4/7PressStop traffic report4PressSwitch to previous saved channel7Turn
upwards or
downwardsShow a list of available radio channels, and scroll up or down8PressReturn to previous level in the menu8HoldReturn to the main menu of the MAXI DOT dis- play
In the MAXI DOT display radio menu information appears on the■ current radio station frequency band.
■ Name of the currently playing channel (if less than 5 are receivable).
■ List of receivable radio stations with the option of a transmitter (if more than
5 of which are receivable).
■ TP traffic announcements.
Operating the media menu
Fig. 6
Multifunction steering wheel
›
Press the button
8
on the multifunction steering wheel - the main menu of
the MAXI DOTdisplay appears.
›
Select the menu item
Audio .
12Familiarization with the unit
Page 16 of 88
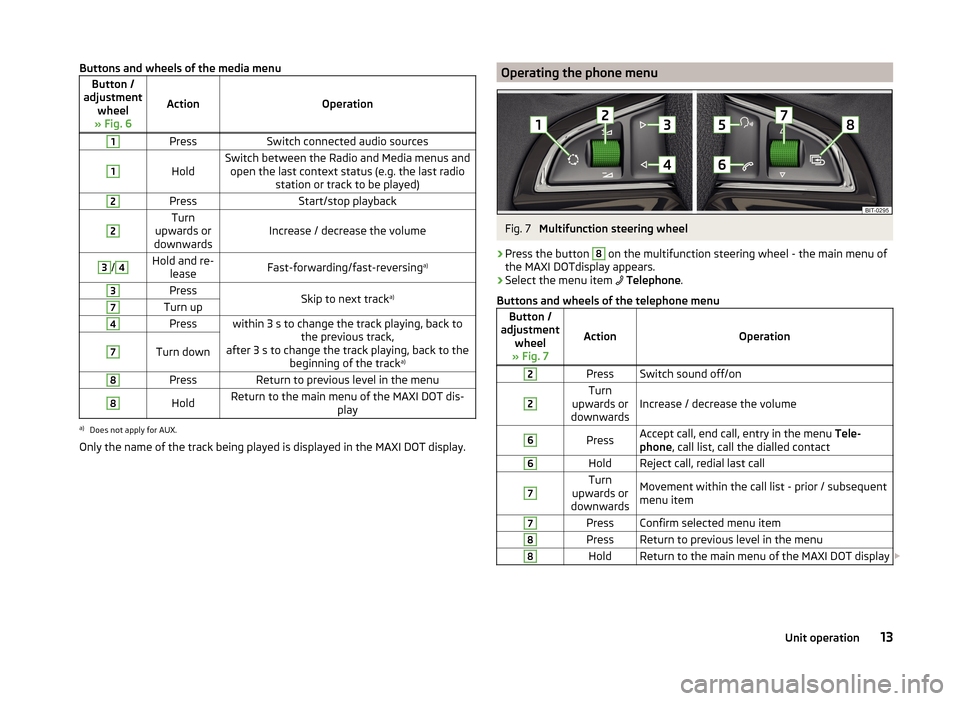
Buttons and wheels of the media menuButton /
adjustment wheel
» Fig. 6
ActionOperation
1PressSwitch connected audio sources1
HoldSwitch between the Radio and Media menus and open the last context status (e.g. the last radio station or track to be played)2PressStart/stop playback2Turn
upwards or
downwardsIncrease / decrease the volume
3/4Hold and re- leaseFast-forwarding/fast-reversing a)3PressSkip to next tracka)7Turn up4Presswithin 3 s to change the track playing, back to
the previous track,
after 3 s to change the track playing, back to the beginning of the track a)7Turn down8PressReturn to previous level in the menu8HoldReturn to the main menu of the MAXI DOT dis-
playa)
Does not apply for AUX.
Only the name of the track being played is displayed in the MAXI DOT display.
Operating the phone menuFig. 7
Multifunction steering wheel
›
Press the button
8
on the multifunction steering wheel - the main menu of
the MAXI DOTdisplay appears.
›
Select the menu item
Telephone .
Buttons and wheels of the telephone menu
Button /
adjustment wheel
» Fig. 7
ActionOperation
2PressSwitch sound off/on2Turn
upwards or
downwardsIncrease / decrease the volume
6PressAccept call, end call, entry in the menu Tele-
phone , call list, call the dialled contact6HoldReject call, redial last call7Turn
upwards or
downwardsMovement within the call list - prior / subsequent
menu item7PressConfirm selected menu item8PressReturn to previous level in the menu8HoldReturn to the main menu of the MAXI DOT display 13Unit operation
Page 20 of 88
Voice command entry was stopped » page 17, Stop/restore voice com-
mand input
A voice command is recognized
It is not necessary to wait for the end of message playback when the device is
playing a message. The message ends by pressing the button
or by press-
ing the symbol key
on the multifunction steering wheel. This cancels the
message and causes the system to wait for a new voice command.
The voice control system is affected by the setting » page 21, Voice control
settings .
not recognizing a voice command
Read and observe
on page 15 first.
If a voice command is not recognised, the device answers with Pardon? and
you can give a new command.
If the device does not recognise the second voice command, the help message
is provided again and you can give a new command.
If the device does not recognise the third voice command, the system plays
the Cancel message and the dialogue is ended.
Correction possibility of a voice command input
Read and observe
on page 15 first.
A voice command can be corrected, modified or re-entered by briefly pressing
the button on the device or the symbol key
is operated on the multi-
function steering wheel. However, this is only possible if the symbol is dis-
played.
You do not have to wait until the voice command is recognized by the device.
Stop/restore voice command input
Read and observe
on page 15 first.
Stop
In some menus, the procedure for entering voice commands can be stopped with the right control
2
» Fig. 1 on page 7 .
This allows more time to be gained for the voice command input.
The function can be used for the contact search in the phone book.
When stopped the symbol shown in the device screen or in the MAXI DOT dis-
play changes from
to
.
Restore
The procedure for voice command input can be restarted in one of the follow-
ing ways.
› by pressing the function key
.
› By pressing the
button on the device.
› By pressing the symbol key
on the multifunction steering wheel.
Voice commands not included in the help
Read and observe
on page 15 first.
This chapter discusses some voice commands, which are not included in thehelp topics.
The voice commands allow working with lists or describe the function keys
with symbols that have no screen texts.
All menus
Voice commandOperationBackReturn to the previous menu Next page
Scroll through the menu / list / direc-
tory
Previous pageFirst pageLast page
Menu Radio
Voice commandOperationNext stationNearest station in the selected fre-
quency rangePrevious stationPrevious station in the selected fre-
quency range
Start scanning
Switch on the search for available sta- tions » page 25
(The search is ended by pressing the
key
on the unit or the button
on the multifunction steering wheel)
17Unit operation
Page 28 of 88
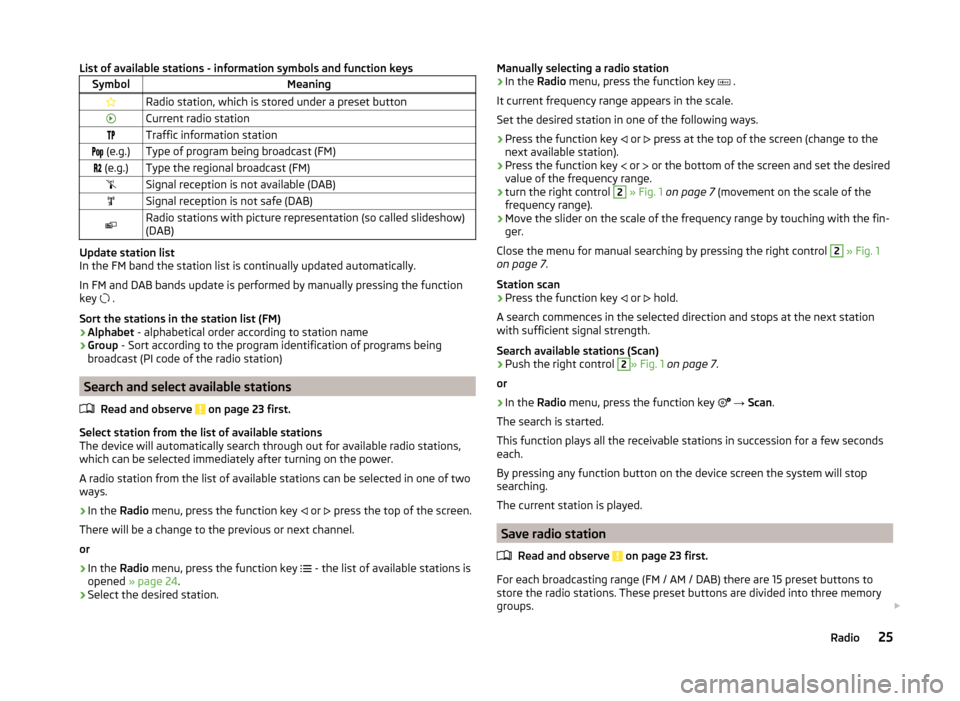
List of available stations - information symbols and function keysSymbolMeaningRadio station, which is stored under a preset buttonCurrent radio stationTraffic information station (e.g.)Type of program being broadcast (FM) (e.g.)Type the regional broadcast (FM)Signal reception is not available (DAB)Signal reception is not safe (DAB)Radio stations with picture representation (so called slideshow)
(DAB)
Update station list
In the FM band the station list is continually updated automatically.
In FM and DAB bands update is performed by manually pressing the function
key .
Sort the stations in the station list (FM) › Alphabet
- alphabetical order according to station name
› Group
- Sort according to the program identification of programs being
broadcast (PI code of the radio station)
Search and select available stations
Read and observe
on page 23 first.
Select station from the list of available stations
The device will automatically search through out for available radio stations,
which can be selected immediately after turning on the power.
A radio station from the list of available stations can be selected in one of two
ways.
›
In the Radio menu, press the function key
or
press the top of the screen.
There will be a change to the previous or next channel.
or
›
In the Radio menu, press the function key
- the list of available stations is
opened » page 24 .
›
Select the desired station.
Manually selecting a radio station›In the Radio menu, press the function key .
It current frequency range appears in the scale.
Set the desired station in one of the following ways.›
Press the function key
or
press at the top of the screen (change to the
next available station).
›
Press the function key
or
or the bottom of the screen and set the desired
value of the frequency range.
›
turn the right control
2
» Fig. 1 on page 7 (movement on the scale of the
frequency range).
›
Move the slider on the scale of the frequency range by touching with the fin-
ger.
Close the menu for manual searching by pressing the right control
2
» Fig. 1
on page 7 .
Station scan
›
Press the function key or
hold.
A search commences in the selected direction and stops at the next station with sufficient signal strength.
Search available stations (Scan)
›
Push the right control
2
» Fig. 1 on page 7 .
or
›
In the Radio menu, press the function key
→ Scan .
The search is started.
This function plays all the receivable stations in succession for a few seconds
each.
By pressing any function button on the device screen the system will stop
searching.
The current station is played.
Save radio station
Read and observe
on page 23 first.
For each broadcasting range (FM / AM / DAB) there are 15 preset buttons to
store the radio stations. These preset buttons are divided into three memory
groups.
25Radio
Page 33 of 88
OperationAction
Plays the current track from the start
Press after about 3 seconds after
the start of the title playbackFinger movement to the right of the screen area A
» Fig. 15 on
page 29 (After 3 seconds from the
start of the track playback)Fast-reverse within the titlePress and hold
Play the next title
Press Finger movement to the left of the
screen area A
» Fig. 15 on page 29Fast-forward within the titlePress and hold Switch on and off the repeat title play-
back from the current album or folderPress Switch on/off the repeat title playbackPress Switch on and off the random track
playback from the current album or folderPress
The movement within the track is possible by finger touching the timeline 1)
B
» Fig. 15
on page 29 .
By finger touching in the area
C
» Fig. 15 on page 29 displays a menu of al-
bums. Movement within the menu can be performed by moving a finger across
the screen to the right or left or by turning the controller
2
» Fig. 1 on page 7 .2)
Note
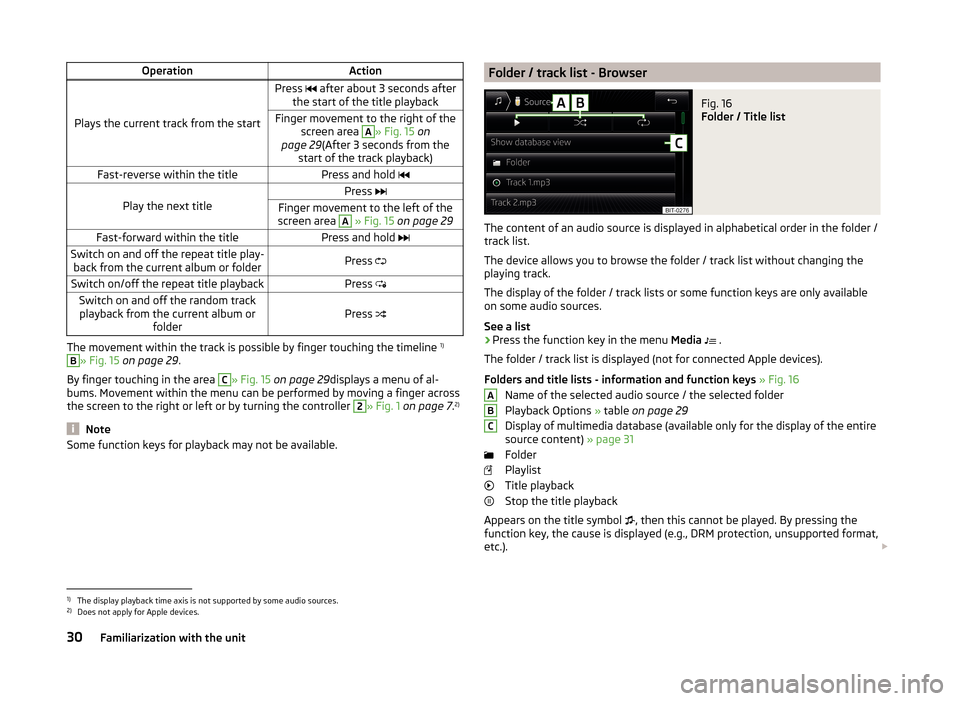
Some function keys for playback may not be available.Folder / track list - BrowserFig. 16
Folder / Title list
The content of an audio source is displayed in alphabetical order in the folder /
track list.
The device allows you to browse the folder / track list without changing the
playing track.
The display of the folder / track lists or some function keys are only available
on some audio sources.
See a list
›
Press the function key in the menu Media
.
The folder / track list is displayed (not for connected Apple devices).
Folders and title lists - information and function keys » Fig. 16
Name of the selected audio source / the selected folder
Playback Options » table on page 29
Display of multimedia database (available only for the display of the entire
source content) » page 31
Folder
Playlist
Title playback
Stop the title playback
Appears on the title symbol , then this cannot be played. By pressing the
function key, the cause is displayed (e.g., DRM protection, unsupported format,
etc.).
ABC1)
The display playback time axis is not supported by some audio sources.
2)
Does not apply for Apple devices.
30Familiarization with the unit
Page 37 of 88
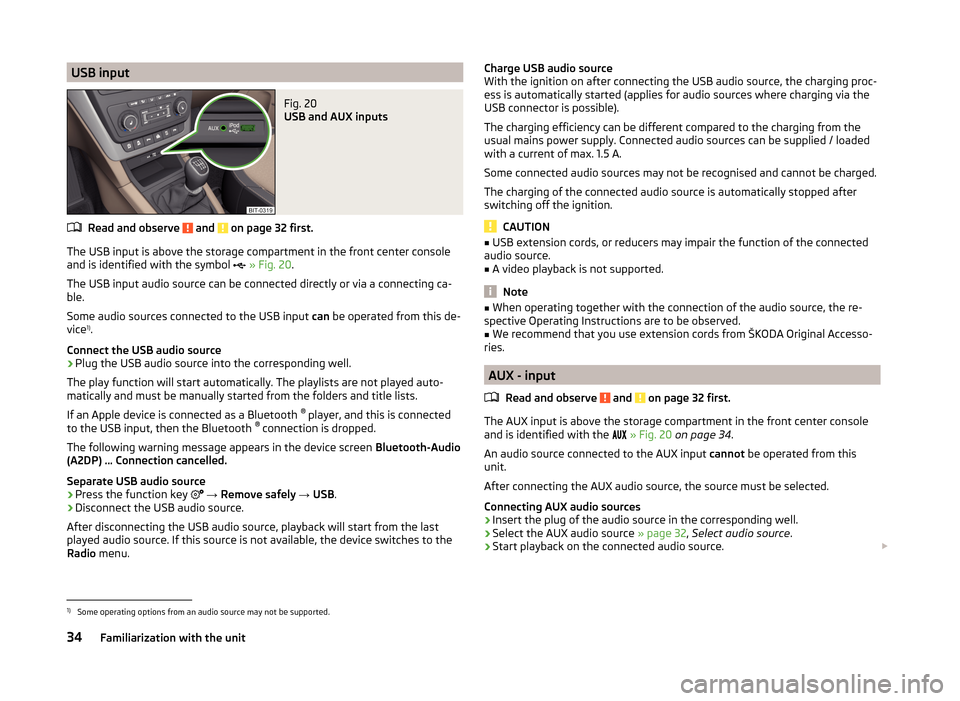
USB inputFig. 20
USB and AUX inputs
Read and observe and on page 32 first.
The USB input is above the storage compartment in the front center console
and is identified with the symbol
» Fig. 20 .
The USB input audio source can be connected directly or via a connecting ca-
ble.
Some audio sources connected to the USB input can be operated from this de-
vice 1)
.
Connect the USB audio source
›
Plug the USB audio source into the corresponding well.
The play function will start automatically. The playlists are not played auto-
matically and must be manually started from the folders and title lists.
If an Apple device is connected as a Bluetooth ®
player, and this is connected
to the USB input, then the Bluetooth ®
connection is dropped.
The following warning message appears in the device screen Bluetooth-Audio
(A2DP) … Connection cancelled.
Separate USB audio source
›
Press the function key
→ Remove safely → USB .
›
Disconnect the USB audio source.
After disconnecting the USB audio source, playback will start from the last
played audio source. If this source is not available, the device switches to the
Radio menu.
Charge USB audio source
With the ignition on after connecting the USB audio source, the charging proc-
ess is automatically started (applies for audio sources where charging via the
USB connector is possible).
The charging efficiency can be different compared to the charging from the
usual mains power supply. Connected audio sources can be supplied / loaded
with a current of max. 1.5 A.
Some connected audio sources may not be recognised and cannot be charged.
The charging of the connected audio source is automatically stopped after
switching off the ignition.
CAUTION
■ USB extension cords, or reducers may impair the function of the connected
audio source.■
A video playback is not supported.
Note
■ When operating together with the connection of the audio source, the re-
spective Operating Instructions are to be observed.■
We recommend that you use extension cords from ŠKODA Original Accesso-
ries.
AUX - input
Read and observe
and on page 32 first.
The AUX input is above the storage compartment in the front center console
and is identified with the
» Fig. 20 on page 34 .
An audio source connected to the AUX input cannot be operated from this
unit.
After connecting the AUX audio source, the source must be selected.
Connecting AUX audio sources
›
Insert the plug of the audio source in the corresponding well.
›
Select the AUX audio source » page 32, Select audio source .
›
Start playback on the connected audio source.
1)
Some operating options from an audio source may not be supported.
34Familiarization with the unit
Page 47 of 88

Coupling - two telephones connectedRead and observe
on page 42 first.
›
In the menu Telephone press the function key
B
» Fig. 22 on page 39 with
the name of the main telephone.
›
In the list of paired devices press the function key Find telephone .
A search for available devices starts. After about 30 seconds a list of found de-
vices appears, which is updated up to 1 minute after the start of the search ap-
pears.
›
If you do not want to wait for the display of the list press the function key
Results .
›
Select the telephone you want from the list of available telephones.
In the device screen the message Unable to connect …. Choose whether you
would like to replace the main telephone … or the additional telephone ….
with the following menu.
›
Cancel - Cancel the coupling
›
Main tel. - Replacement of the main telephone
›
Addition. tel. - Replacement of the additional telephone
If you have a telephone, which is connected to the device via the Bluetooth
audio ®
profile A2DP or AVRCP, which you want to replace, then the following
message appears in the device screen: 2 devices are already connected.
Please disconnect at least one of these devices first in order to connect: ….
To establish the connection, the audio Bluetooth ®
profile A2DP or AVRCP is to
be separated » page 40 or the second telephone which is not connected to
the audio profile, is to be selected and replaced.
›
Repeat the coupling process by selecting the telephone from the list of
found devices.
›
Confirm the coupling » page 45.
After pairing confirmation the telephone connects to the device.
Coupling - more options of the telephone search
Read and observe
on page 42 first.
The telephone can also be picked out as follows and then coupled.
›Press the function key
→ Bluetooth → Find telephone → Select tele-
phone → Results press and to select the desired telephone.›
Press the function key
→ Bluetooth → Find devices → Results press and
select the telephone and a Bluetooth ®
- Select a connection pro-
file » page 40 .
›
Press the function key
→ Bluetooth → Paired devices → Find (this func-
tion key is available when no telephone is connected to the device).
After the desired telephone and the Bluetooth ®
Has been searched out and
selected profile, must be chosen depending on the number of connected tele-
phones, if the telephone has to be connected as a main or additional phone.
After the coupling has to be confirmed » page 45.
Connect telephone to the device
Read and observe
on page 42 first.
When pairing from the telephone, follow the instructions in the telephone
owner's manual.
›
Have the telephone search for available Bluetooth ®
devices.
›
Select the device in the list of devices 1)
.
The device is displayed in the telephone to be connected to as SKODA BT .....
... is replaced with the last four symbols of the vehicle identification number
(VIN) of your vehicle.
You can change the name of the device » page 21.
The following message is shown in the device screen during pairing ... Would
you like to connect? and the following function keys are displayed.
›
Connect - confirmation of the coupling process.
›
Cancel - stops the coupling process.
If no telephone with the device is actively connected, the telephone connects as the main telephone » page 40.
If a telephone with the device is actively connected, the telephone connects as
an additional telephone.
If two telephones (main and additional telephone) are actively connected to
the device, then only one telephone connection takes place, but there is no
connection on the telephone with the device.
1)
For the name of the device refer to the Bluetooth ®
settings » page 21 .
44Familiarization with the unit
Page 52 of 88

›
Read out contact name - Reads the contact name using the device gener-
ated voice›
- Opens the menu for sending a text message (SMS) 1)
» page 52
›
- Start of the connection with the prefix (the symbol is displayed only with
active preset function in the settings)
›
- Opens the menu for editing the telephone number of the contact before
dialling
›
- Start the route guidance to the contact address
» page 65, Confirm des-
tination
Find contact
›
Press the function key
1
» Fig. 25 -
, the keyboard opens for the contact
search in the telephone book » page 11, Alphanumeric with keyboard .
›
Select the contact from the list of imported phone contacts.
›
Press the function key with the retrieved contact, connection starts. The
contact details appear if the telephone contact has several telephone num-
bers.
Load list
Upon first connection of the main telephone with the device, the device be-
gins to download the telephone book from the telephone and from the SIM
card 2)
into the device memory 3)
. Depending on the number of contacts, the im-
ages and the type of telephone this may take several minutes to complete.
The number of contacts imported can be checked in the menu point Import
contacts » page 41 , Settings .
During the import numbers - xxxx / yyyy - are shown representing the number
of currently imported contacts into the device memory / number of contacts in
the phone.
If the imported list of telephone contacts from the telephone contains more
than 2000 contacts, loading is stopped and the message Contacts not com-
pletely imported. appears on the screen. Only the already downloaded con-
tacts will be available.
Depending on the telephone, contact images for the first 1000 contacts are
imported at the same time.
If an error occurs while loading the list, the following message appears: Import
failed. Please try again and check whether the BT device … allows connec-
tions.
Refresh list
Each time the telephone has established a new connection with the device,
the relevant telephone contacts will be updated.
During the update, the list which was stored after the last completed update
will be available. Newly stored telephone numbers are only shown after the
updating has ended.
The update can be done manually » page 41, Settings by pressing the function
key Import contacts .
Note
The contact list is valid for the main telephone. If the incoming call is accepted
by the additional telephone and you find the telephone number in the contact
list of the main telephone, then the caller details (e.g. name, image, etc.) is dis-
played instead of the number.
Speed dialling a telephone number
You can use the speed dial function keys
D
» Fig. 22 on page 39 to dial previ-
ously assigned telephone numbers instantly.
There are 10 function keys for speed dialling available in the memory groups.
Assigning a telephone number
›
In the menu Telephone press a non-assigned function key for the speed dial
D
» Fig. 22 on page 39 .
or
›
In the menu
→ User profile → Manage favourites press a non-assigned
function key for speed dialling.
The unit displays the telephone book.
›
Tap the function button of the desired telephone contact, if necessary, tap
one of the contact numbers.
1)
The icon appears at about the MAP profile associated telephones.
2)
Some telephones do not support downloading of contacts from the SIM card.
3)
With some telephones a confirmation for importing contacts to the device is required.
49Communication