2014 SKODA OCTAVIA sat nav
[x] Cancel search: sat navPage 20 of 83

■Media Codec: ... - Media codec version
■ Update software - Manual software update (for more information see the
ŠKODA Website www.infotainment.skoda-auto.com )
■ Copyright - Information on licences and copyrights are only available in Eng-
lish
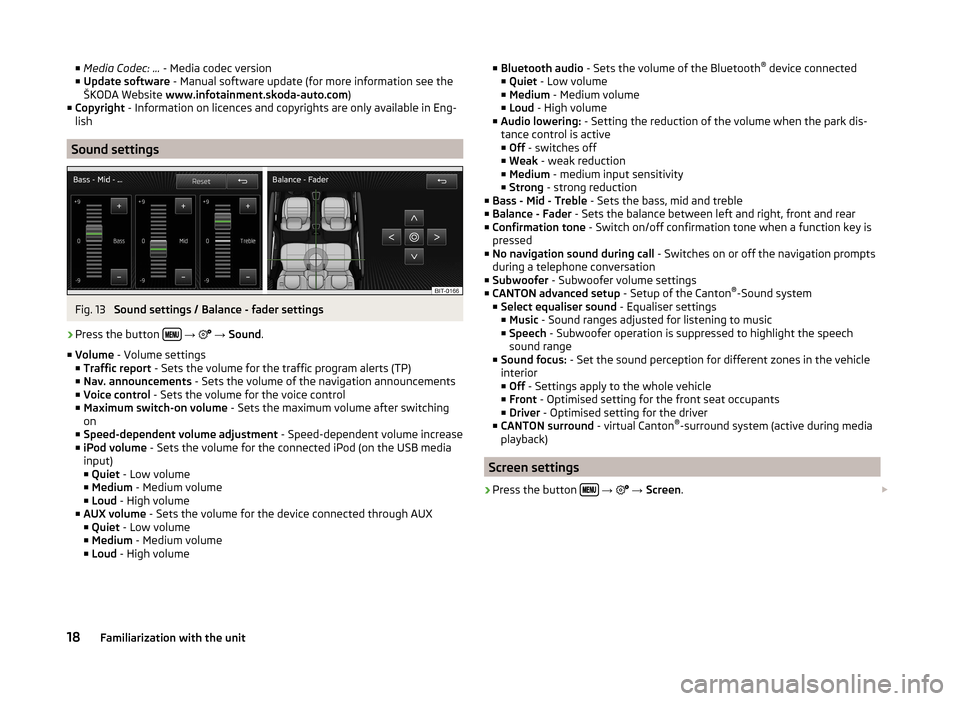
Sound settings
Fig. 13
Sound settings / Balance - fader settings
›
Press the button
→
→ Sound .
■ Volume - Volume settings
■ Traffic report - Sets the volume for the traffic program alerts (TP)
■ Nav. announcements - Sets the volume of the navigation announcements
■ Voice control - Sets the volume for the voice control
■ Maximum switch-on volume - Sets the maximum volume after switching
on
■ Speed-dependent volume adjustment - Speed-dependent volume increase
■ iPod volume - Sets the volume for the connected iPod (on the USB media
input)
■ Quiet - Low volume
■ Medium - Medium volume
■ Loud - High volume
■ AUX volume - Sets the volume for the device connected through AUX
■ Quiet - Low volume
■ Medium - Medium volume
■ Loud - High volume
■
Bluetooth audio - Sets the volume of the Bluetooth ®
device connected
■ Quiet - Low volume
■ Medium - Medium volume
■ Loud - High volume
■ Audio lowering: - Setting the reduction of the volume when the park dis-
tance control is active ■ Off - switches off
■ Weak - weak reduction
■ Medium - medium input sensitivity
■ Strong - strong reduction
■ Bass - Mid - Treble - Sets the bass, mid and treble
■ Balance - Fader - Sets the balance between left and right, front and rear
■ Confirmation tone - Switch on/off confirmation tone when a function key is
pressed
■ No navigation sound during call - Switches on or off the navigation prompts
during a telephone conversation
■ Subwoofer - Subwoofer volume settings
■ CANTON advanced setup - Setup of the Canton®
-Sound system
■ Select equaliser sound - Equaliser settings
■ Music - Sound ranges adjusted for listening to music
■ Speech - Subwoofer operation is suppressed to highlight the speech
sound range
■ Sound focus: - Set the sound perception for different zones in the vehicle
interior
■ Off - Settings apply to the whole vehicle
■ Front - Optimised setting for the front seat occupants
■ Driver - Optimised setting for the driver
■ CANTON surround - virtual Canton®
-surround system (active during media
playback)
Screen settings
›
Press the button
→
→ Screen .
18Familiarization with the unit
Page 49 of 83

Navigation
Description of the navigation system
Preface to navigation
Introduction
This chapter contains information on the following subjects:
Main menu
47
Navigation data
48
First and foremost, pay attention to the safety instructions » page 4 , Impor-
tant notes .
The unit uses the GPS (Global Positioning System) satellite system for naviga-
tion. The satellite signal allows you to determine your current vehicle position.
If the unit is outside the range of the GPS satellite signal (e.g. in dense vegeta-
tion, in tunnels, parking garages, etc.), the unit navigates only with restrictions
using on-vehicle sensors.
Navigation is done: › by graphical instructions in device display screen and in the display of the in-
strument cluster;
› by announcements.
The navigation unit can be operated:
› using the buttons on the unit
» page 47;
› using the function keys in the unit screen
» page 47;
› using voice control
» page 16.
› via the display of the instrument cluster
» page 12 .
WARNING■
E.g. information about traffic lights, stop and right of way signs, parking
and stopping restrictions as well as lane constrictions or speed restrictions
is not detected for navigation by the device.■
Always adjust the driving speed to the road, traffic and weather condi-
tions.
WARNING (Continued)■ The nav. announcements provided may vary from the actual situations,
e.g. due to road works or out-of-date navigation data.■
The volume should be adjusted to ensure that acoustic signals from out-
side, e.g. sirens from vehicles which have the right of way, such as police,
ambulance and fire brigade vehicles, can be heard at all time.
CAUTION
In some countries, some unit features can no longer be selected when the ve-
hicle is running faster than a certain speed. These limitations comply with na-
tional legal requirements.
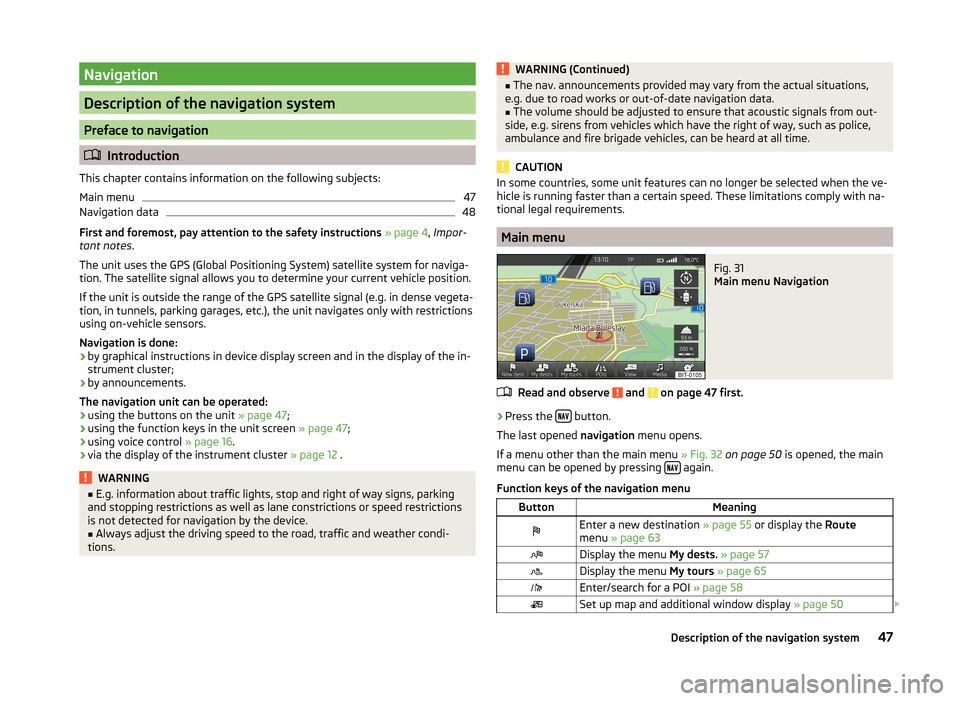
Main menu
Fig. 31
Main menu Navigation
Read and observe and on page 47 first.
›
Press the button.
The last opened navigation menu opens.
If a menu other than the main menu » Fig. 32 on page 50 is opened, the main
menu can be opened by pressing
again.
Function keys of the navigation menu
ButtonMeaningEnter a new destination » page 55 or display the Route
menu » page 63Display the menu My dests. » page 57Display the menu My tours » page 65Enter/search for a POI » page 58Set up map and additional window display » page 5047Description of the navigation system
Page 53 of 83

Map display with light or dark backgroundSwitches the split screen on/off in the map » page 52
Map operation
Moving the map
The map can be moved in any direction by touching it with your finger and
dragging it on the screen in the desired direction.
Changing the scale
› with the menu button
2
›by touching the screen with two fingers and pulling the fingers together or
apart.
Function keys and map display symbols
■ - Context-dependent change in the map orientation
■ 2D map display - the map rotates and the direction of travel arrow
C
» Fig. 32 on page 50 points to the top of screen, or the north is aligned
with the top edge of the screen, and the arrow
C
shows the direction of
travel
■ 3D map view -the direction of travel arrow
C
points to the top of the
screen (if the map scale is larger than 100 km, the map is aligned to the north).
■ - Touch to align the map to the position of the vehicle (the function key is
available when you move the map in the vehicle position display)
■ - Touch to align the map to the destination position and/or route display
(the function key is available when you move the map within the destina-
tion- or route display )
■ - The number located below the symbol indicates the elevation 1)
■ - Touch to increase the map scale for a few seconds before it resets to the
original scale (quick view)
■ - Displays the manually set map scale
■ - Displays the automatic map scale
■ - Switches the autozoom on/off during route guidance. Active autozoom is
indicated by a green symbol. If Autozoom is active, the map scale will change
automatically depending on the route travelled (motorway trip: large map
scale - city: small map scale)
Day/night
Split screenThe autozoom can be switched off by touching
→ or off by changing
the map scale. Touching again the (function key highlighted in green) turns
the autozoom on again. Autozoom can also be switched on/off in the naviga-
tion settings » page 49
Autozoom is only functional when the map is aligned with the vehicle position
(the function key
with the symbol).
Traffic signs
The system provides the option to display traffic signs
B
» Fig. 32 on page 50
in the information display and on the unit screen that are:
› stored in the navigation data of the maps;
› recognised by the camera.
The information given by traffic signs that are recognized by the front camera
always takes precedence over stored navigation data.
If the Traffic signs split screen is not switched on, only one traffic sign is dis-
played on the unit screen.
Switching on the traffic sign display function » page 49.
Home address entry
›
In the Navigation main menu, press
→ Manage memory → Define home
address .
If the home address has not been entered, an input window is displayed with
the following message:
Please select as your home address: your current position or a new address.
The following function keys are displayed:
› Current position
- Entry of the home address via the acquisition of the cur-
rent location;
› Address
- Enter the home address in writing » page 55
Description of the adjustment or deletion process of the home ad-
dress » page 49 .
1)
Display of elevation requires the reception of signals from at least five satellites. Route guidance must
not be running in demo mode.
51Description of the navigation system
Page 56 of 83

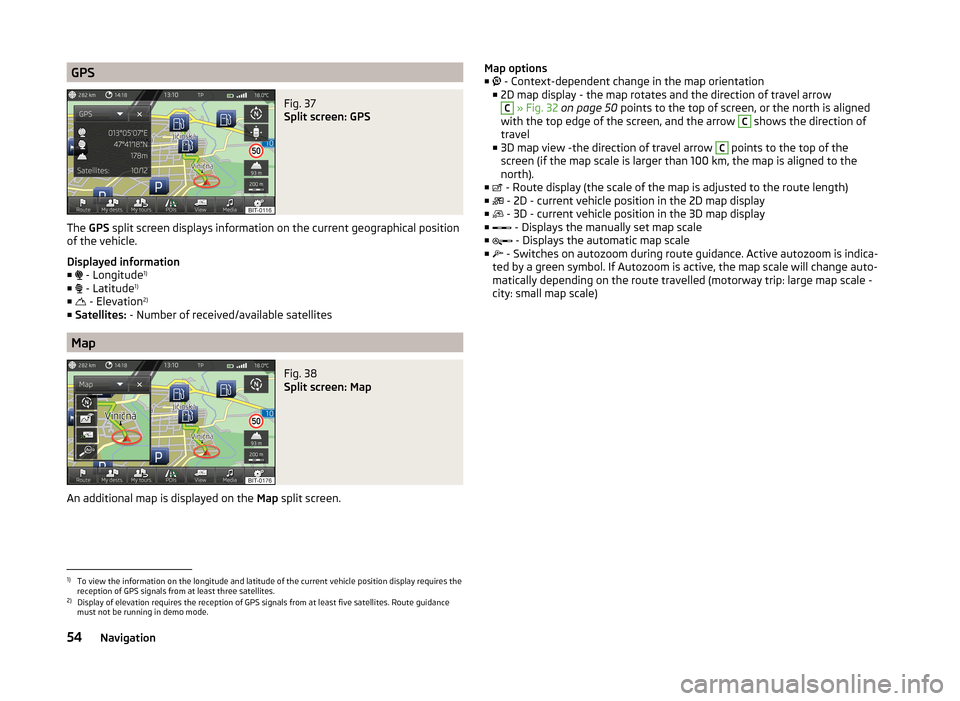
GPSFig. 37
Split screen: GPS
The GPS split screen displays information on the current geographical position
of the vehicle.
Displayed information
■ - Longitude 1)
■ - Latitude 1)
■ - Elevation 2)
■ Satellites: - Number of received/available satellites
Map
Fig. 38
Split screen: Map
An additional map is displayed on the Map split screen.
Map options
■ - Context-dependent change in the map orientation
■ 2D map display - the map rotates and the direction of travel arrowC
» Fig. 32 on page 50 points to the top of screen, or the north is aligned
with the top edge of the screen, and the arrow
C
shows the direction of
travel
■ 3D map view -the direction of travel arrow
C
points to the top of the
screen (if the map scale is larger than 100 km, the map is aligned to the north).
■ - Route display (the scale of the map is adjusted to the route length)
■ - 2D - current vehicle position in the 2D map display
■ - 3D - current vehicle position in the 3D map display
■ - Displays the manually set map scale
■ - Displays the automatic map scale
■ - Switches on autozoom during route guidance. Active autozoom is indica-
ted by a green symbol. If Autozoom is active, the map scale will change auto- matically depending on the route travelled (motorway trip: large map scale -
city: small map scale)
1)
To view the information on the longitude and latitude of the current vehicle position display requires the
reception of GPS signals from at least three satellites.
2)
Display of elevation requires the reception of GPS signals from at least five satellites. Route guidance
must not be running in demo mode.
54Navigation
Page 81 of 83

Telephone conversation45
Telephone functions43
Tilting the mirror surface - lowering in reverse72
Time19
Tiredness recognition71
TMC traffic information
63
Touch screen5
Tour memory65
TP (Traffic programme)23
Traffic63
Dynamic route64
Information64
Operation64
traffic information TMC
63
Traffic programme (TP)23
traffic reports63
Traffic reports Information
64
Operation64
Traffic sign recognition71
Traffic signs51
Travel light - travel mode72
Tyre pressure monitor69, 70
U
Unit menus
6
Unit operation7
Device screen7
Multifunction steering wheel9
Unit screen7
Unit overview5
Units19
Unit screen Keyboard
8
Operation7
USB33
V
vCard
58
Vehicle equipment Declaration of conformity
4
Vehicle identification number73
Vehicle settings68
Vehicle systems68
vehicle systems settings mirrors and wiper
72
Opening and closing72
Vehicle systems settings Climatronic
73
Light72
Multifunction display73
Seats72
Service73
Video21, 34
Media26
VIN number73
Voice control13
Function requirements14
Navigation16
not recognizing a voice command15
Operation15
Settings20
Stop/restore input/15
switching on/off14
Voice command input correction15
W
Windows comfort control
72
Wireless link to the outside antenna see Phonebox
39
79Index