2014 SKODA OCTAVIA change time
[x] Cancel search: change timePage 6 of 83

Familiarization with the unit
Introductory information
Important notes
Introduction
This chapter contains information on the following subjects:
Declaration of conformity
4
Component protection
4
These operating instructions describe all possible equipment variants without
identifying them as special equipment, model variants or market-dependent
equipment.
Consequently, this vehicle does not need to contain all of the equipment com-
ponents described in these operating instructions.
The level of equipment of your vehicle refers to your purchase contract of the
vehicle. More information is available from the ŠKODA Partner 1)
where you
bought the vehicle.
Please note that these instructions are meant only as an addendum to the in-
formation presented in the Owner's Manual of the vehicle. Therefore, they can
be used only in conjunction with the latest manual for this vehicle. For a de- tailed description of some functions listed in these instructions, see the Vehi-
cle Manual for your vehicle.
The illustrations can differ in minor details from your unit; they are only inten-
ded for general information.
WARNING■ Concentrate fully at all times on your driving! As the driver you are fully
responsible for the operation of your vehicle.■
Only use the device in a way that you are in full control of your vehicle in
every traffic situation – there is the risk of accidents!
WARNING (Continued)■ Adjust the volume to ensure that acoustic signals from outside, e.g. sirens
from vehicles which have the right of way, such as police, ambulance and
fire brigade vehicles, can be heard at all time.■
High volumes can cause hearing damage!
Declaration of conformity
Read and observe
on page 4 first.
ŠKODA AUTO a.s. hereby declares that the ŠKODA Infotainment systems meet
the basic requirements and additional provisions of Directive 1999/5/EC with
reference to radio equipment and telecommunications devices.
ŠKODA AUTO a.s. hereby declares that the “connection and the use of this
communication device is granted by the Nigerian Communications Commis-
sion.”
Component protection
Read and observe
on page 4 first.
Some electronic control units are factory-equipped with component protec-
tion.
Component protection serves as a protection mechanism for the following:
› for the impairment of factory- or garage-fitted control units after installation
in another vehicle (for example, after a theft);
› for the impairment of components operated outside of the vehicle.
› for the possibility of a legitimate installation or change of control units for re-
pairs at a ŠKODA 1)
specialist garage.
When component protection is enabled, the following message appears on the
unit display Component theft protection: the infotainment system is not fully
available at present. Please switch on the ignition.
If the component protection does not activate by switching on the ignition,
please contact a ŠKODA specialist garage.
1)
Terms used » manual , chapter Preface.
4Familiarization with the unit
Page 9 of 83

Unit operation
Concerning the device screen operation
Introduction
This chapter contains information on the following subjects:
Operation
7
Input screen with keyboard for searching
8
Input screen with keyboard for storing information
8
Input screen with numeric keypad
8
First and foremost, pay attention to the safety instructions » page 4 , Impor-
tant notes .
This chapter covers the instrument operation and the work with the touch
screen and with various types of input keyboards.
Operation
Fig. 3
Screen display
Explanation of graphic
Currently selected menu
- Return to the higher-level menu
Function with “checkbox”
Scroll bar - Shows the position in the menu; touch the scroll bar to navi-
gate the menu
Menu item with “pop-up window”
Screen areas which confirm a function or a menu are called “ function keys”.
White or green function keys are active.
ABCDEGreyed out function keys are not active.
Proximity sensors
At the bottom of the device there are proximity sensors. When approaching to
the screen using the hand, the device changes the display mode in the operat-
ing mode and the function keys are highlighted.
Status line
In the main menu of some operating modes, the upper screen area contains a status line displaying time details and the external temperature, as well as in-
formation on the currently selected operating mode.
Function keys in the main menu
The lower screen area in the main menu of some operating modes contains
function keys with symbols for functions or menus.
Selecting menu/menu item
› Drag your finger over the screen in the required direction
› Turn the menu knob 2
» Fig. 1 on page 5
If you make the selection by turning the menu knob
2
, the currently selected
menu is highlighted in green.
Confirming menu/menu item
› Touch the function key with your finger
› Press the menu knob
2
Returning to higher-level menu
Context-dependent
› By pressing
› By pressing the relevant button next to the screen
› By touching the screen outside of the pop-up window with your finger
Switching function on/off with “checkbox” Press the relevant function key
›
or
- Function is switched on
›
or
- Function is switched off
Set value › by touching the function keys with the symbols
/
,
/
, -/ +
› Touch or move your finger over the scale
Note
For some menus or menu items, the current setting is displayed, e.g.
Distance:
km or Distance: mi .7Unit operation
Page 22 of 83
■Gas consumption: - Gas consumption units
■ kg/100km - Kilograms per 100 km
■ km/kg - Kilometres per kilogram
■ m³/100km - Cubic metres per 100 kilometres
■ km/m³ - Kilometres per cubic metre
■ Pressure: - Pressure units for tyre pressure
■ kPa - Kilopascal
■ bar - bar
■ psi - Pounds per square inch
Voice control settings
›
Press the button
→
→ Voice control .
■ Dialogue style: - Setting the dialogue style
■ Long - Long dialogue (the system plays complete acoustic messages)
■ Short - Short dialogue (the system shortens some acoustic messages or
substitutes them with an acoustic signal)
■ Display available commands - Switch on/off the menus containing basic
voice commands when voice control is activated
■ Voice control session start tone - Switch on/off the audible signal that is
output when voice control is activated
■ Voice control session end tone - Switch on/off the audible signal that is out-
put when voice control is ended
■ Input tone in voice dialogue - Switch on/off the audible signal that is output
to signal that voice control is waiting for a command
Restore factory settings
›
Press the button
→
→ Factory settings .
■ Reset all settings and data
■ Restore factory settings - Reset all factory settings
■ Reset individual settings/data
■ Sound - Restore default settings for sound
■ Radio - Restore default settings for radio
■ Vehicle - Restore default settings for the vehicle systems
■ Telephone - Restore default settings for phone
■ Media - Restore default settings for media
■ Voice control - Restore default settings for voice control
■
Navigation - Restore default settings for navigation
■ System - Restore the system default settings
Bluetooth ®
settings
›
Press the button
→
→ Bluetooth .
■ Bluetooth - Switch on/off Bluetooth ®
function
■ Visibility: - Switch on/off the visibility of the Bluetooth ®
device for other de-
vices
■ Visible - Visibility is always on
■ Hidden - Visibility is off
■ At start-up - Turns on visibility for 5 minutes after switching on the ignition
or until the driving speed has exceeded 5 km/h
■ Name: - Open the input screen with keyboard - Change the device name
■ Paired devices - Display the list of paired Bluetooth ®
devices; connect or de-
lete a paired device; delete the list of paired devices ■ Delete all - Delete all paired Bluetooth ®
devices
■ - Delete the paired Bluetooth ®
device
■ Find devices - Searches for available external devices with enabled Blue-
tooth ®
functions and activated visibility » page 41
■ Bluetooth audio (A2DP/AVRCP) - Switch on/off the connection option for
Bluetooth ®
profiles A2DP and AVRCP 1)
1)
A2DP and AVRCP are Bluetooth
®
profiles that support multimedia functions.
20Familiarization with the unit
Page 28 of 83
Media
Operation
Introduction
This chapter contains information on the following subjects:
Main menu
26
Title / folder list
27
Track/folder database
27
Playback
28
Media settings
28
First and foremost, pay attention to the safety instructions » page 4 , Impor-
tant notes .
You can use the unit to play audio and video files in different for-
mats » page 29 , connect different signal source types, or store audio files in
the internal memory of the Jukebox.
When the signal source has been connected, the device starts to automatically
play audio files in alphabetical order.
Types of device operation » page 7 .
› On the device via the operating elements.
› Using the function keys on the device screen.
› Using the Maxi DOT display.
Main menu
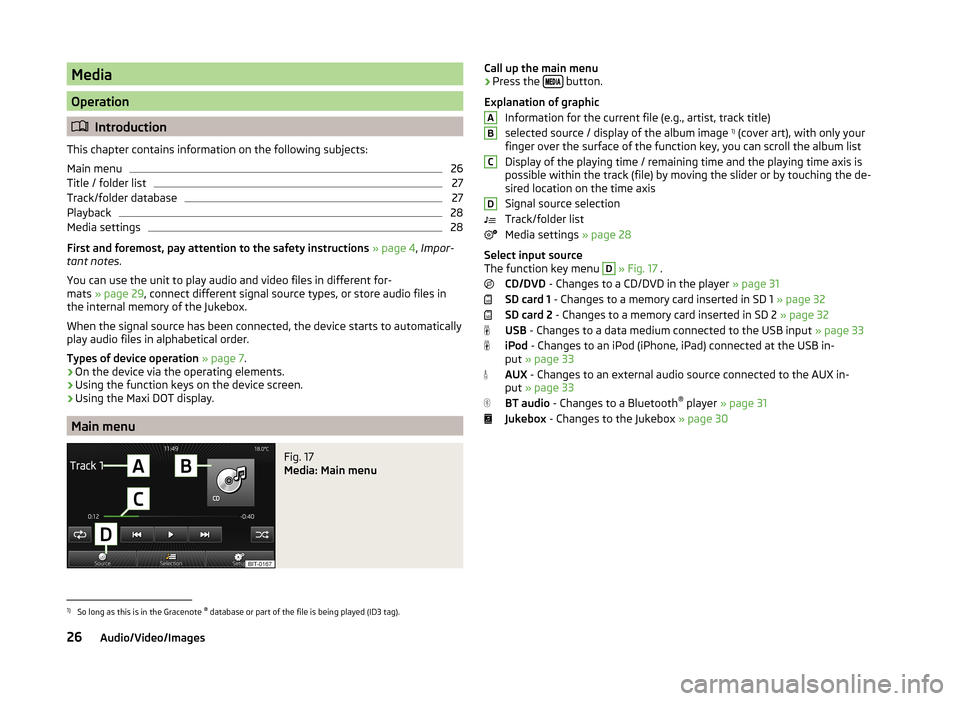
Fig. 17
Media: Main menu
Call up the main menu›Press the
button.
Explanation of graphic Information for the current file (e.g., artist, track title)
selected source / display of the album image 1)
(cover art), with only your
finger over the surface of the function key, you can scroll the album list
Display of the playing time / remaining time and the playing time axis is
possible within the track (file) by moving the slider or by touching the de-
sired location on the time axis
Signal source selection
Track/folder list
Media settings » page 28
Select input source
The function key menu D
» Fig. 17 .
CD/DVD - Changes to a CD/DVD in the player » page 31
SD card 1 - Changes to a memory card inserted in SD 1 » page 32
SD card 2 - Changes to a memory card inserted in SD 2 » page 32
USB - Changes to a data medium connected to the USB input » page 33
iPod - Changes to an iPod (iPhone, iPad) connected at the USB in-
put » page 33
AUX - Changes to an external audio source connected to the AUX in-
put » page 33
BT audio - Changes to a Bluetooth ®
player » page 31
Jukebox - Changes to the Jukebox » page 30
ABCD1)
So long as this is in the Gracenote ®
database or part of the file is being played (ID3 tag).
26Audio/Video/Images
Page 36 of 83
NoteThe operation of the external device and its connection with other devices can
be seen in the operating instructions of the respective manufacturer.
DVD video
Introduction
This chapter contains information on the following subjects:
Main menu
34
video playback
34
Operation of DVD video
34
DVD video menu
35
Settings
35
First and foremost, pay attention to the safety instructions » page 4 , Impor-
tant notes .
Main menu
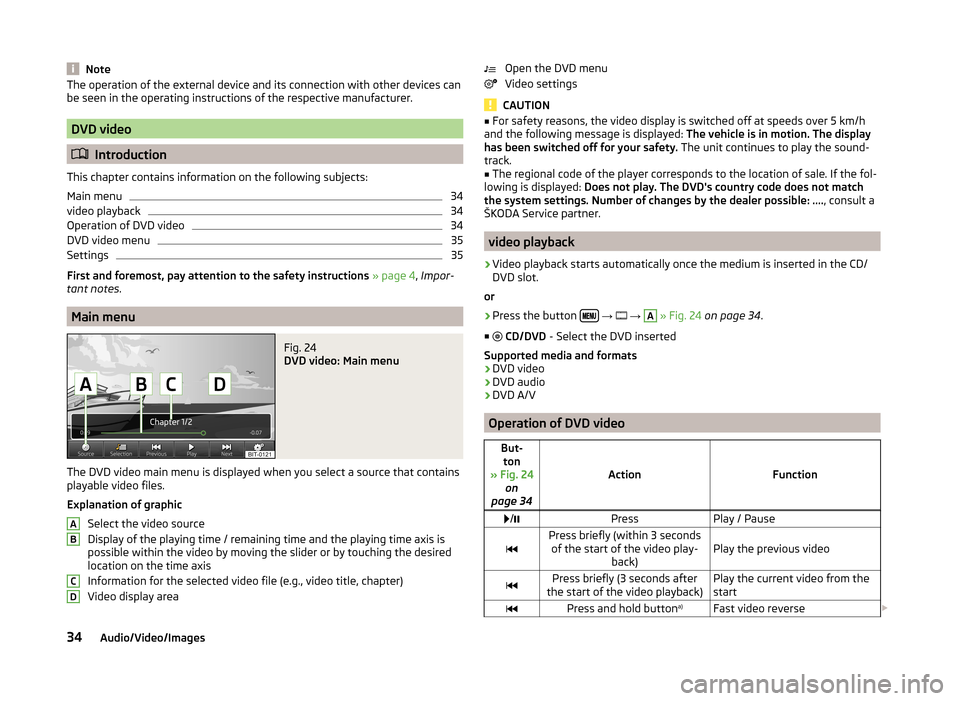
Fig. 24
DVD video: Main menu
The DVD video main menu is displayed when you select a source that contains
playable video files.
Explanation of graphic Select the video source
Display of the playing time / remaining time and the playing time axis is
possible within the video by moving the slider or by touching the desired
location on the time axis
Information for the selected video file (e.g., video title, chapter)
Video display area
ABCDOpen the DVD menu
Video settings
CAUTION
■ For safety reasons, the video display is switched off at speeds over 5 km/h
and the following message is displayed: The vehicle is in motion. The display
has been switched off for your safety. The unit continues to play the sound-
track.■
The regional code of the player corresponds to the location of sale. If the fol-
lowing is displayed: Does not play. The DVD's country code does not match
the system settings. Number of changes by the dealer possible: .... , consult a
ŠKODA Service partner.
video playback
›
Video playback starts automatically once the medium is inserted in the CD/
DVD slot.
or
›
Press the button
→
→
A
» Fig. 24 on page 34 .
■
CD/DVD - Select the DVD inserted
Supported media and formats › DVD video
› DVD audio
› DVD A/V
Operation of DVD video
But-
ton
» Fig. 24 on
page 34
ActionFunction
/PressPlay / PausePress briefly (within 3 seconds
of the start of the video play- back)Play the previous videoPress briefly (3 seconds after
the start of the video playback)Play the current video from the
startPress and hold button a)Fast video reverse
34Audio/Video/Images
Page 38 of 83
Supported file typesFile typeSupported formatsImagesjpg, jpeg, png, bmp, gif
Operation
Displaying images
But- ton
» Fig. 26
on page 35
ActionFunction
PressDisplay the previous image /PressSwitch on/off slideshow a)PressDisplay the next imagePressRotate the image 90° anticlock-
wisePressRotate the image 90° clockwisePressDisplay the maximum image size
while retaining the aspect ratioPressguidance to GPS coordinates that
are stored in the image EXIF met-
adata » page 662 » Fig. 1
on page 5Rotate the image clockwise or anticlockwiseEnlarge/reduce the size of an im-
agea)
Presentation of selected photographs shown in succession at defined intervals.
You can adjust the size of the image by touching the screen with two fingers
and pulling the fingers together or apart. You can move the image in the de-
sired direction by touching and dragging it with your finger. By finger tapping
on the screen image magnification or size reductions takes place.
Select source
›
Press the button
→
→
A
» Fig. 26 on page 35 .
■
CD/DVD - Changes to a CD/DVD in the player
■
USB - Changes to a data medium connected to the USB input
■
SD card 1 - Changes to a memory card inserted in SD 1
■
SD card 2 - Changes to a memory card inserted in SD 2
Settings›
Press the button
→
→
.
■ Image view: - Image view settings
■ Full - Display the maximum image size while retaining the aspect ratio
■ Automatic - Full screen display
■ Display time: - Set the display time for the slideshow
■ 5 sec.
■ 10 sec.
■ 15 sec.
■ 30 sec.
■ Repeat slide show - Switch on/off the slideshow repeat function. (After the
last image is displayed, the slideshow restarts from the beginning.)
36Audio/Video/Images
Page 50 of 83
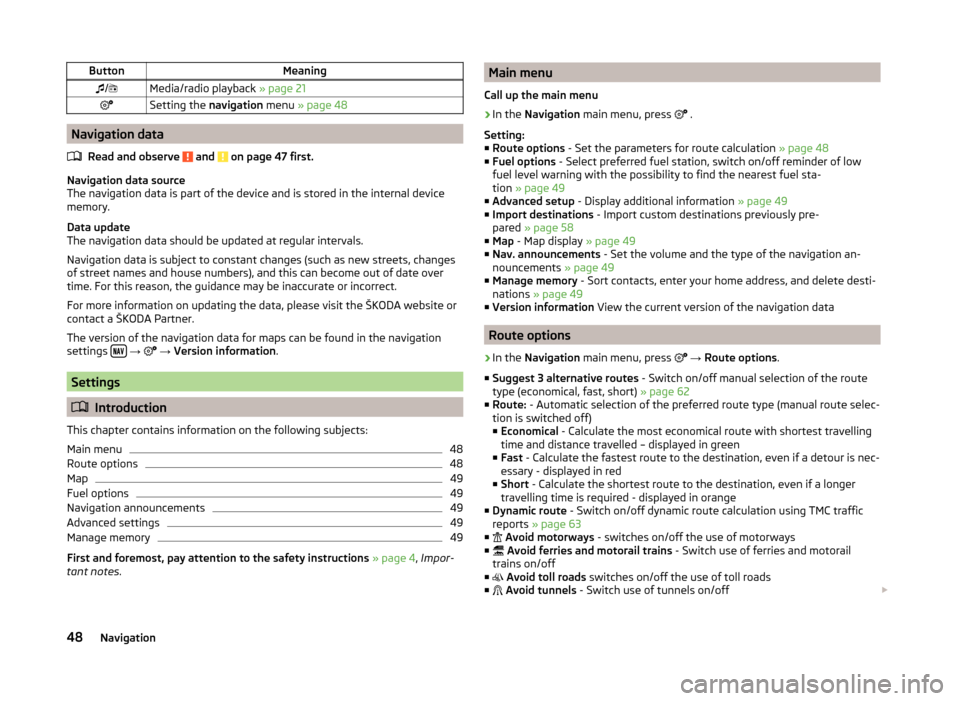
ButtonMeaning/Media/radio playback » page 21Setting the navigation menu » page 48
Navigation data
Read and observe
and on page 47 first.
Navigation data source
The navigation data is part of the device and is stored in the internal device
memory.
Data update
The navigation data should be updated at regular intervals.
Navigation data is subject to constant changes (such as new streets, changes of street names and house numbers), and this can become out of date over
time. For this reason, the guidance may be inaccurate or incorrect.
For more information on updating the data, please visit the ŠKODA website or contact a ŠKODA Partner.
The version of the navigation data for maps can be found in the navigation
settings
→
→ Version information .
Settings
Introduction
This chapter contains information on the following subjects:
Main menu
48
Route options
48
Map
49
Fuel options
49
Navigation announcements
49
Advanced settings
49
Manage memory
49
First and foremost, pay attention to the safety instructions » page 4 , Impor-
tant notes .
Main menu
Call up the main menu›
In the Navigation main menu, press
.
Setting:
■ Route options - Set the parameters for route calculation » page 48
■ Fuel options - Select preferred fuel station, switch on/off reminder of low
fuel level warning with the possibility to find the nearest fuel sta-
tion » page 49
■ Advanced setup - Display additional information » page 49
■ Import destinations - Import custom destinations previously pre-
pared » page 58
■ Map - Map display » page 49
■ Nav. announcements - Set the volume and the type of the navigation an-
nouncements » page 49
■ Manage memory - Sort contacts, enter your home address, and delete desti-
nations » page 49
■ Version information View the current version of the navigation data
Route options
›
In the Navigation main menu, press
→ Route options .
■ Suggest 3 alternative routes - Switch on/off manual selection of the route
type (economical, fast, short) » page 62
■ Route: - Automatic selection of the preferred route type (manual route selec-
tion is switched off)
■ Economical - Calculate the most economical route with shortest travelling
time and distance travelled – displayed in green
■ Fast - Calculate the fastest route to the destination, even if a detour is nec-
essary - displayed in red
■ Short - Calculate the shortest route to the destination, even if a longer
travelling time is required - displayed in orange
■ Dynamic route - Switch on/off dynamic route calculation using TMC traffic
reports » page 63
■
Avoid motorways - switches on/off the use of motorways
■
Avoid ferries and motorail trains - Switch use of ferries and motorail
trains on/off
■
Avoid toll roads switches on/off the use of toll roads
■
Avoid tunnels - Switch use of tunnels on/off
48Navigation
Page 51 of 83
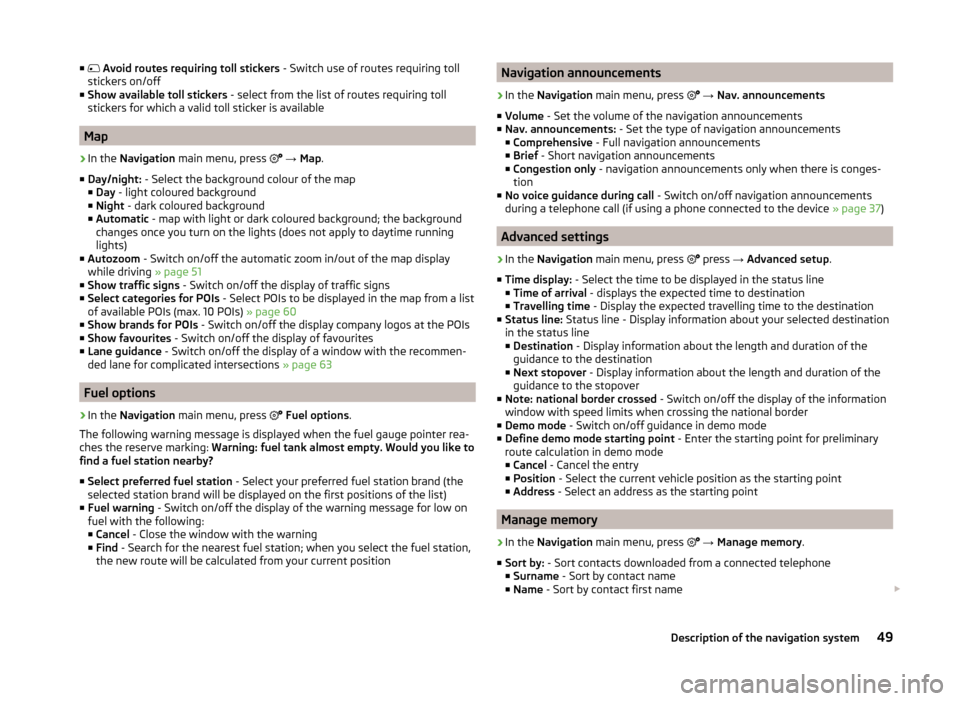
■ Avoid routes requiring toll stickers - Switch use of routes requiring toll
stickers on/off
■ Show available toll stickers - select from the list of routes requiring toll
stickers for which a valid toll sticker is available
Map
›
In the Navigation main menu, press
→ Map .
■ Day/night: - Select the background colour of the map
■ Day - light coloured background
■ Night - dark coloured background
■ Automatic - map with light or dark coloured background; the background
changes once you turn on the lights (does not apply to daytime running
lights)
■ Autozoom - Switch on/off the automatic zoom in/out of the map display
while driving » page 51
■ Show traffic signs - Switch on/off the display of traffic signs
■ Select categories for POIs - Select POIs to be displayed in the map from a list
of available POIs (max. 10 POIs) » page 60
■ Show brands for POIs - Switch on/off the display company logos at the POIs
■ Show favourites - Switch on/off the display of favourites
■ Lane guidance - Switch on/off the display of a window with the recommen-
ded lane for complicated intersections » page 63
Fuel options
›
In the Navigation main menu, press
Fuel options .
The following warning message is displayed when the fuel gauge pointer rea-
ches the reserve marking: Warning: fuel tank almost empty. Would you like to
find a fuel station nearby?
■ Select preferred fuel station - Select your preferred fuel station brand (the
selected station brand will be displayed on the first positions of the list)
■ Fuel warning - Switch on/off the display of the warning message for low on
fuel with the following: ■ Cancel - Close the window with the warning
■ Find - Search for the nearest fuel station; when you select the fuel station,
the new route will be calculated from your current position
Navigation announcements›
In the Navigation main menu, press
→ Nav. announcements
■ Volume - Set the volume of the navigation announcements
■ Nav. announcements: - Set the type of navigation announcements
■ Comprehensive - Full navigation announcements
■ Brief - Short navigation announcements
■ Congestion only - navigation announcements only when there is conges-
tion
■ No voice guidance during call - Switch on/off navigation announcements
during a telephone call (if using a phone connected to the device » page 37)
Advanced settings
›
In the Navigation main menu, press
press
→ Advanced setup .
■ Time display: - Select the time to be displayed in the status line
■ Time of arrival - displays the expected time to destination
■ Travelling time - Display the expected travelling time to the destination
■ Status line: Status line - Display information about your selected destination
in the status line ■ Destination - Display information about the length and duration of the
guidance to the destination
■ Next stopover - Display information about the length and duration of the
guidance to the stopover
■ Note: national border crossed - Switch on/off the display of the information
window with speed limits when crossing the national border
■ Demo mode - Switch on/off guidance in demo mode
■ Define demo mode starting point - Enter the starting point for preliminary
route calculation in demo mode
■ Cancel - Cancel the entry
■ Position - Select the current vehicle position as the starting point
■ Address - Select an address as the starting point
Manage memory
›
In the Navigation main menu, press
→ Manage memory .
■ Sort by: - Sort contacts downloaded from a connected telephone
■ Surname - Sort by contact name
■ Name - Sort by contact first name
49Description of the navigation system