2014 SKODA OCTAVIA ECO mode
[x] Cancel search: ECO modePage 6 of 54
Introductory information
Important notes
Introduction
This chapter contains information on the following subjects:
Declaration of conformity
4
Component protection
4
These operating instructions describe all possible equipment variants without
identifying them as special equipment, model variants or market-dependent
equipment.
Consequently, this vehicle does not need to contain all of the equipment com-
ponents described in these operating instructions.
The level of equipment of your vehicle refers to your purchase contract of the
vehicle. More information is available from the ŠKODA Partner 1)
where you
bought the vehicle.
Please note that these instructions are meant only as an addendum to the in-
formation presented in the Owner's Manual of your vehicle. Therefore, they
can be used only in conjunction with the latest manual for this vehicle. For a
detailed description of some functions listed in these instructions, see the Ve-
hicle Manual for your vehicle.
The illustrations can differ in minor details from your device; they are only in-
tended for general information.
WARNING■ Concentrate fully at all times on your driving! As the driver you are fully
responsible for the operation of your vehicle.■
Only use the device in a way that you are in full control of your vehicle in
every traffic situation – there is the risk of accidents!
■
Adjust the volume to ensure that acoustic signals from outside, e.g. sirens
from vehicles which have the right of way, such as police, ambulance and
fire brigade vehicles, can be heard at all time.
■
High volumes can cause hearing damage.
Declaration of conformity
Read and observe
on page 4 first.
ŠKODA AUTO a.s. hereby declares that the ŠKODA Infotainment systems meet
the basic requirements and additional provisions of Directive 1999/5/EC with
reference to radio equipment and telecommunications devices.
ŠKODA AUTO a.s. hereby declares that the “connection and the use of this
communication device is granted by the Nigerian Communications Commis-
sion.”
Component protection
Read and observe
on page 4 first.
Some electronic control units are factory-equipped with component protec-
tion.
The component protection was developed as a protection mechanism for:
› impairment of factory- or garage-fitted control units after installation in an-
other vehicle (for example, after a theft);
› impairment of components operated outside of the vehicle;
› the possibility of a legitimate installation or change of control units for re-
pairs at a ŠKODA 1)
specialist garage.
When component protection is enabled, the following message appears on the
display of the device Component theft protection: the infotainment system is
not fully available at present. Please switch on the ignition.
If the component protection does not activate by switching on the ignition,
please contact a ŠKODA specialist garage.
Equipment overview
Introduction
This chapter contains information on the following subjects:
Description of the device
5
Touch screen
5
Switching the unit on/off
5
1)
Terms used » manual , chapter Preface.
4Introductory information
Page 18 of 54
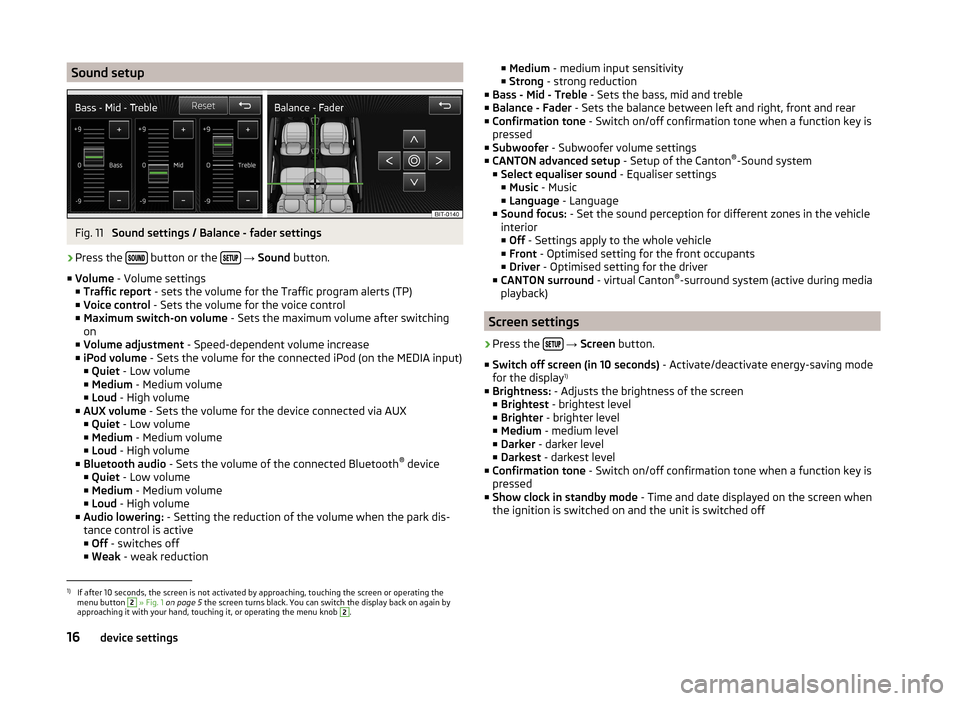
Sound setupFig. 11
Sound settings / Balance - fader settings
›
Press the button or the
→ Sound button.
■ Volume - Volume settings
■ Traffic report - sets the volume for the Traffic program alerts (TP)
■ Voice control - Sets the volume for the voice control
■ Maximum switch-on volume - Sets the maximum volume after switching
on
■ Volume adjustment - Speed-dependent volume increase
■ iPod volume - Sets the volume for the connected iPod (on the MEDIA input)
■ Quiet - Low volume
■ Medium - Medium volume
■ Loud - High volume
■ AUX volume - Sets the volume for the device connected via AUX
■ Quiet - Low volume
■ Medium - Medium volume
■ Loud - High volume
■ Bluetooth audio - Sets the volume of the connected Bluetooth ®
device
■ Quiet - Low volume
■ Medium - Medium volume
■ Loud - High volume
■ Audio lowering: - Setting the reduction of the volume when the park dis-
tance control is active ■ Off - switches off
■ Weak - weak reduction
■
Medium - medium input sensitivity
■ Strong - strong reduction
■ Bass - Mid - Treble - Sets the bass, mid and treble
■ Balance - Fader - Sets the balance between left and right, front and rear
■ Confirmation tone - Switch on/off confirmation tone when a function key is
pressed
■ Subwoofer - Subwoofer volume settings
■ CANTON advanced setup - Setup of the Canton®
-Sound system
■ Select equaliser sound - Equaliser settings
■ Music - Music
■ Language - Language
■ Sound focus: - Set the sound perception for different zones in the vehicle
interior
■ Off - Settings apply to the whole vehicle
■ Front - Optimised setting for the front occupants
■ Driver - Optimised setting for the driver
■ CANTON surround - virtual Canton®
-surround system (active during media
playback)
Screen settings
›
Press the
→ Screen button.
■ Switch off screen (in 10 seconds) - Activate/deactivate energy-saving mode
for the display 1)
■ Brightness: - Adjusts the brightness of the screen
■ Brightest - brightest level
■ Brighter - brighter level
■ Medium - medium level
■ Darker - darker level
■ Darkest - darkest level
■ Confirmation tone - Switch on/off confirmation tone when a function key is
pressed
■ Show clock in standby mode - Time and date displayed on the screen when
the ignition is switched on and the unit is switched off
1)
If after 10 seconds, the screen is not activated by approaching, touching the screen or operating the
menu button
2
» Fig. 1 on page 5 the screen turns black. You can switch the display back on again by
approaching it with your hand, touching it, or operating the menu knob
2
.
16device settings
Page 27 of 54
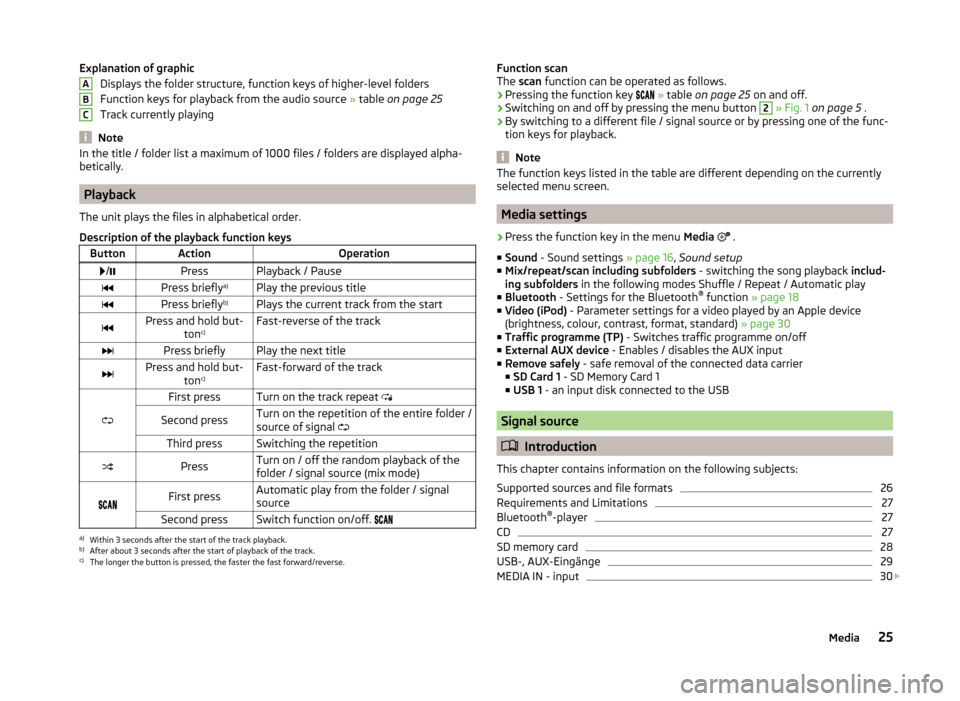
Explanation of graphicDisplays the folder structure, function keys of higher-level folders
Function keys for playback from the audio source » table on page 25
Track currently playing
Note
In the title / folder list a maximum of 1000 files / folders are displayed alpha-
betically.
Playback
The unit plays the files in alphabetical order.
Description of the playback function keys
ButtonActionOperation /PressPlayback / PausePress briefly a)Play the previous titlePress briefly b)Plays the current track from the startPress and hold but-
tonc)Fast-reverse of the trackPress brieflyPlay the next titlePress and hold but-
tonc)Fast-forward of the track
First pressTurn on the track repeat
Second pressTurn on the repetition of the entire folder /
source of signal Third pressSwitching the repetitionPressTurn on / off the random playback of the
folder / signal source (mix mode)
First pressAutomatic play from the folder / signal
sourceSecond pressSwitch function on/off. a)
Within 3 seconds after the start of the track playback.
b)
After about 3 seconds after the start of playback of the track.
c)
The longer the button is pressed, the faster the fast forward/reverse.
ABCFunction scan
The scan function can be operated as follows.
› Pressing the function key
» table on page 25 on and off.
› Switching on and off by pressing the menu button 2
» Fig. 1 on page 5 .
› By switching to a different file / signal source or by pressing one of the func-
tion keys for playback.
Note
The function keys listed in the table are different depending on the currently
selected menu screen.
Media settings
›
Press the function key in the menu Media
.
■ Sound - Sound settings » page 16, Sound setup
■ Mix/repeat/scan including subfolders - switching the song playback includ-
ing subfolders in the following modes Shuffle / Repeat / Automatic play
■ Bluetooth - Settings for the Bluetooth ®
function » page 18
■ Video (iPod) - Parameter settings for a video played by an Apple device
(brightness, colour, contrast, format, standard) » page 30
■ Traffic programme (TP) - Switches traffic programme on/off
■ External AUX device - Enables / disables the AUX input
■ Remove safely - safe removal of the connected data carrier
■ SD Card 1 - SD Memory Card 1
■ USB 1 - an input disk connected to the USB
Signal source
Introduction
This chapter contains information on the following subjects:
Supported sources and file formats
26
Requirements and Limitations
27
Bluetooth ®
-player
27
CD
27
SD memory card
28
USB-, AUX-Eingänge
29
MEDIA IN - input
30
25Media
Page 34 of 54
The reasons for this are as follows:
› no external aerial;
› incorrectly installed external aerial;
› transmission power greater than 10 watts.
Note
■
We recommend that the installation of mobile phones and two-way radio
systems in a vehicle be carried out by a specialist garage.■
The phone features are dependent on the mobile network operators, as well
as the phone being used. Further information is available from the mobile net-
work operator or to refer to the telephone manual.
■
In signal-free areas the reception can be disturbed or a call will be disconnec-
ted.
■
Most modern electronic equipment is shielded against high frequency sig-
nals. In exceptional cases, electronic equipment may not be shielded against
high frequency signals of the telephone and service may be disrupted.
Main menu
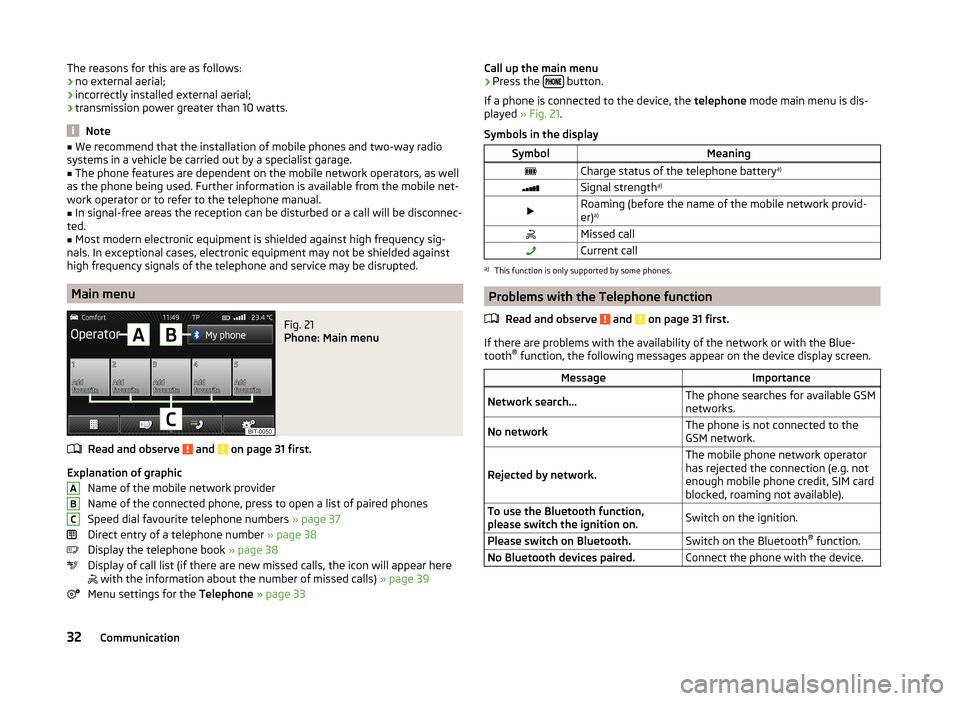
Fig. 21
Phone: Main menu
Read and observe and on page 31 first.
Explanation of graphic
Name of the mobile network provider
Name of the connected phone, press to open a list of paired phones
Speed dial favourite telephone numbers » page 37
Direct entry of a telephone number » page 38
Display the telephone book » page 38
Display of call list (if there are new missed calls, the icon will appear here
with the information about the number of missed calls) » page 39
Menu settings for the Telephone » page 33
ABCCall up the main menu›Press the button.
If a phone is connected to the device, the telephone mode main menu is dis-
played » Fig. 21 .
Symbols in the displaySymbolMeaningCharge status of the telephone battery a)Signal strengtha)Roaming (before the name of the mobile network provid-
er) a)Missed callCurrent calla)
This function is only supported by some phones.
Problems with the Telephone function
Read and observe
and on page 31 first.
If there are problems with the availability of the network or with the Blue-
tooth ®
function, the following messages appear on the device display screen.
MessageImportanceNetwork search...The phone searches for available GSM
networks.No networkThe phone is not connected to the
GSM network.
Rejected by network.
The mobile phone network operator
has rejected the connection (e.g. not
enough mobile phone credit, SIM card
blocked, roaming not available).To use the Bluetooth function,
please switch the ignition on.Switch on the ignition.Please switch on Bluetooth.Switch on the Bluetooth ®
function.No Bluetooth devices paired.Connect the phone with the device.32Communication
Page 43 of 54
Vehicle systems
Vehicle settings
Introduction
This chapter contains information on the following subjects:
Selection of travel mode (Driving Mode Selection)
41
Vehicle data
42
Auxiliary heater and ventilation
43
ESC-and ASR systems
43
Tyre
43
Assistance systems
44
Parking and manoeuvring
44
Light
45
mirrors and wiper
45
Opening and closing
45
Seats
45
Multifunction display
46
Service
46
Restore factory settings
46
Climatronic settings
46
First and foremost, pay attention to the safety instructions » page 4 , Impor-
tant notes .
Settings relating to the vehicle systems can only be made when the ignition is
switched on.
Note
■ The individual systems are described in the » Vehicle Owner's Manual .■For safety reasons, if any system functions are disabled, then some func-
tions, such as parts of the ESC system, are automatically enabled again after
switching the ignition off and on.Selection of travel mode (Driving Mode Selection)Fig. 25
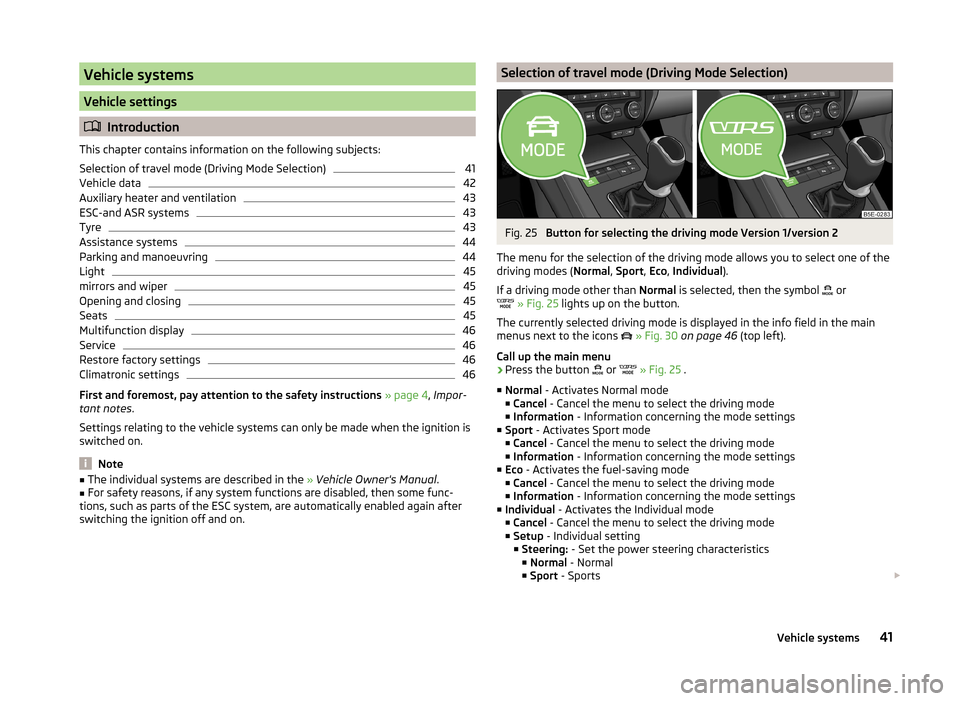
Button for selecting the driving mode Version 1/version 2
The menu for the selection of the driving mode allows you to select one of the
driving modes ( Normal, Sport , Eco , Individual ).
If a driving mode other than Normal is selected, then the symbol
or
» Fig. 25 lights up on the button.
The currently selected driving mode is displayed in the info field in the main
menus next to the icons
» Fig. 30 on page 46 (top left).
Call up the main menu
›
Press the button or
» Fig. 25 .
■ Normal - Activates Normal mode
■ Cancel - Cancel the menu to select the driving mode
■ Information - Information concerning the mode settings
■ Sport - Activates Sport mode
■ Cancel - Cancel the menu to select the driving mode
■ Information - Information concerning the mode settings
■ Eco - Activates the fuel-saving mode
■ Cancel - Cancel the menu to select the driving mode
■ Information - Information concerning the mode settings
■ Individual - Activates the Individual mode
■ Cancel - Cancel the menu to select the driving mode
■ Setup - Individual setting
■ Steering: - Set the power steering characteristics
■ Normal - Normal
■ Sport - Sports
41Vehicle systems
Page 44 of 54

■Engine: - Set the engine (drive) characteristics
■ Normal - Normal
■ Sport - Sports
■ Eco - Economical
■ ACC: - Set the vehicle acceleration when adaptive cruise control is activa-
ted
■ Normal - Normal
■ Sport - Sports
■ Eco - Economical
■ Dynamic bend light.: - Set the characteristics of the adaptive headlights
■ Normal - Normal
■ Sport - Sports
■ Eco - Economical
■ Air conditioning: - Sets the Climatronic characteristics
■ Normal - Normal
■ Eco - Economical
■ Reset mode - Setting for all menu items in the Individual mode to Normal
■ Cancel - Keep the current settings
■ Reset - Set all menu items to Normal
Note
If you do not operate the unit for longer than approx. 10 seconds in the "Select
driving mode" menu, it will switch to the last selected menu or switch itself off.
Vehicle data
Fig. 26
Travel data / vehicle status
Fig. 27
TPMS - Display example: the sys-
tem indicates a tire pressure
change on the rear right
Explanation of graphic
Distance travelled
Driving time
Average speed
Average fuel consumption
Approximate range
Range (if the estimated range is less than 300 km, the vehicle starts to ap-
proach the symbol )
Vehicle representation (the zones of the vehicle are shown in different
colours, corresponding to any warning messages that occur. The warning
messages are displayed once you touch vehicle)
Call up the main menu
›
Press the button
→
.
■ Driving data - Display travel data
You can display one of three trip memories on the screen » Fig. 26.
■ Since start - Driving data for the individual trip
■ Long-term - Long-term driving data
■ Since refuelling - Data since last refuelling
Switching between the individual driving data storage locations can be done
by using the function keys
.
ABCDEFG42Vehicle systems
Page 46 of 54
Assistance systems›
Press the button
→
→ Driver assistance .
■ ACC (adaptive cruise control) - Sets the adaptive cruise control system
■ Driving programme: - Set the vehicle acceleration when adaptive cruise
control is activated 1)
■ Normal - Normal
■ Sport - Sports
■ Eco - Economical
■ Last distance selected - Last selected distance on/off
■ Distance: - Set the distance monitoring to the vehicles ahead
■ Very close - Very small distance
■ Close - Small distance
■ Medium - Medium distance
■ Far - Large distance
■ Very far - Very large distance
■ Front Assist - Sets the assistant for monitoring the distance to the vehicles
ahead
■ Active - Activate/deactivate the assistant
■ Advance warning - Activate/deactivate advance warning
■ Display distance warning - Activate/deactivate distance warnings
■ Lane Assist - Settings for Lane Assist
■ Active - Activate/deactivate the assistant
■ Adaptive lane guidance - Activate/deactivate adaptive lane guidance
■ Driver Alert System - Activate/deactivate the driver alert system
■ Proactive passenger protection - Activate/deactivate proactive passenger
protection
Parking and manoeuvringFig. 29
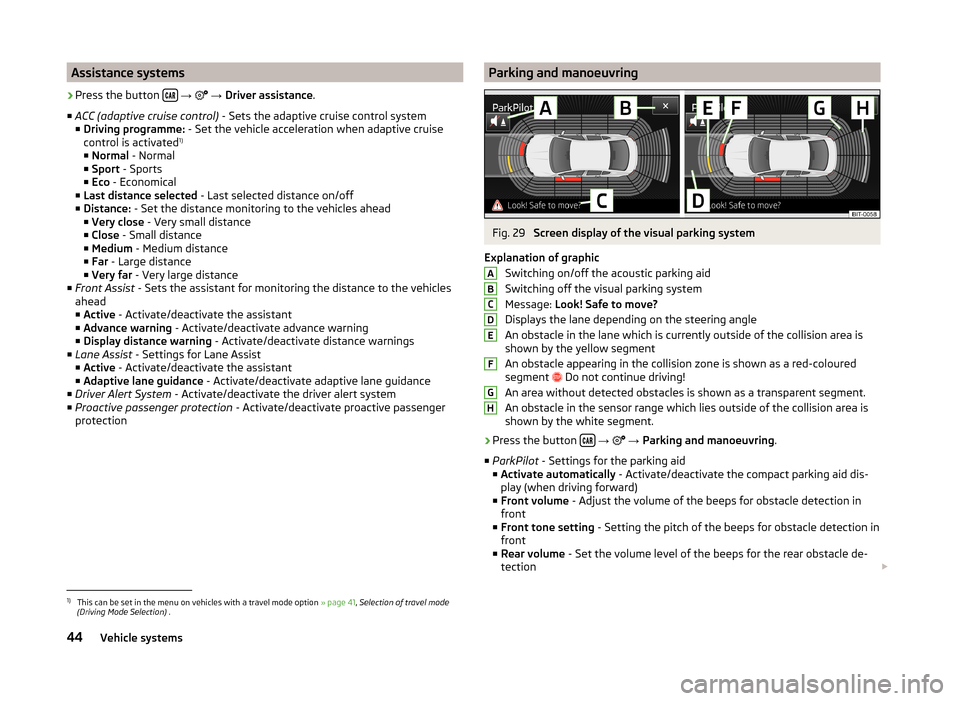
Screen display of the visual parking system
Explanation of graphic Switching on/off the acoustic parking aid
Switching off the visual parking system
Message: Look! Safe to move?
Displays the lane depending on the steering angle
An obstacle in the lane which is currently outside of the collision area is
shown by the yellow segment
An obstacle appearing in the collision zone is shown as a red-coloured
segment Do not continue driving!
An area without detected obstacles is shown as a transparent segment.
An obstacle in the sensor range which lies outside of the collision area is
shown by the white segment.
›
Press the button
→
→ Parking and manoeuvring .
■ ParkPilot - Settings for the parking aid
■ Activate automatically - Activate/deactivate the compact parking aid dis-
play (when driving forward)
■ Front volume - Adjust the volume of the beeps for obstacle detection in
front
■ Front tone setting - Setting the pitch of the beeps for obstacle detection in
front
■ Rear volume - Set the volume level of the beeps for the rear obstacle de-
tection
ABCDEFGH1)
This can be set in the menu on vehicles with a travel mode option
» page 41, Selection of travel mode
(Driving Mode Selection) .
44Vehicle systems
Page 47 of 54
■Rear tone setting - Setting the pitch of the beeps for the rear obstacle de-
tection
■ Audio lowering: - lowering the volume of the speakers (audio)
■ Off - No volume reduction of the sound from speakers
■ Weak - weak volume attenuation of sound from speakers
■ Medium - medium volume attenuation of sound from speakers
■ Strong - Strong volume attenuation of sound from speakers
Note
The compact display of the parking aid can be switched to a full screen view by
touching the screen within the display.
Light
›
Press the button
→
→ Light .
■ Light assistance - Setting of outdoor lighting
■ Dynamic Light Assist - Switch on/off the head light assist function
■ Switch-on time: - Set the sensibility of the light sensor against the change
in intensity of the ambient light ■ Early - High sensibility
■ Medium - Medium sensibility
■ Late - Low sensibility
■ Automatic headlight control in rain - Activate/deactivate automatic head-
light control in rain
■ Daytime running lights - Activate/deactivate daytime running lights
■ Lane change flash - Activate/deactivate lane change flashing
■ Travel mode: - Travel mode on/off
■ R-hand traffic - For right-hand traffic
■ L-hand traffic - For left-hand traffic
■ Interior lighting - Sets the interior lighting
■ Instrument/switch lighting - Set the brightness of the instrument/switch
lighting
■ Footwell lighting - Sets the brightness of the footwell light
■ Coming/Leaving home Fct. - Setting the COMING HOME/LEAVING HOME func-
tion
■ Coming Home function - Sets the period that the lights remain on after you
leave the vehicle (0 - 30 seconds; 0 = function deactivated)
■ Leaving Home function - Sets the period that the lights remain on after
you unlock the vehicle (0 - 30 seconds; 0 = function deactivated)
mirrors and wiper›
Press the button
→
→ Mirrors and wipers .
■ Mirrors - Adjusts the mirrors
■ Synchronous adjustment - Activate/deactivate synchronous mirror adjust-
ment
■ Lower while reversing - Activate/deactivate the lowering of the front pas-
senger mirror
■ Fold in when parked - Activate/deactivate folding the mirror via the remote
control key or by using the sensor in the handle (KESSY)
■ Wipers - Adjusts the windscreen wipers
■ Automatic wiping in rain - Activate/deactivate automatic windscreen wip-
ing in rain
■ Automatic rear wiper - Activate/deactivate automatic rear window wiping
Opening and closing
›
Press the button
→
→ Opening and closing .
■ Window operation - Window operation settings
■ Conven. opening: - Set the convenience opening feature
■ All windows - All windows
■ Driver window - Driver's window only
■ Off - Deactivates the convenience opening
■ Central locking - Settings for opening and closing of doors
■ Door unlocking: - Set the door unlocking feature
■ All doors - All doors
■ Single door - Driver's door or driver's or passenger door with KESSY sys-
tem
■ Vehicle side - Doors on the driver's side or on the driver's or passenger's
side with KESSY system
■ Automatic locking - Activate/deactivate automatic locking when starting
off
■ Acoustic confirmation - Activate/deactivate acoustic signals when locking/
unlocking the vehicle with an anti-theft alarm system
Seats
›
Press the button
→
→ Seats .
45Vehicle systems