2014 SKODA OCTAVIA stop start
[x] Cancel search: stop startPage 57 of 77

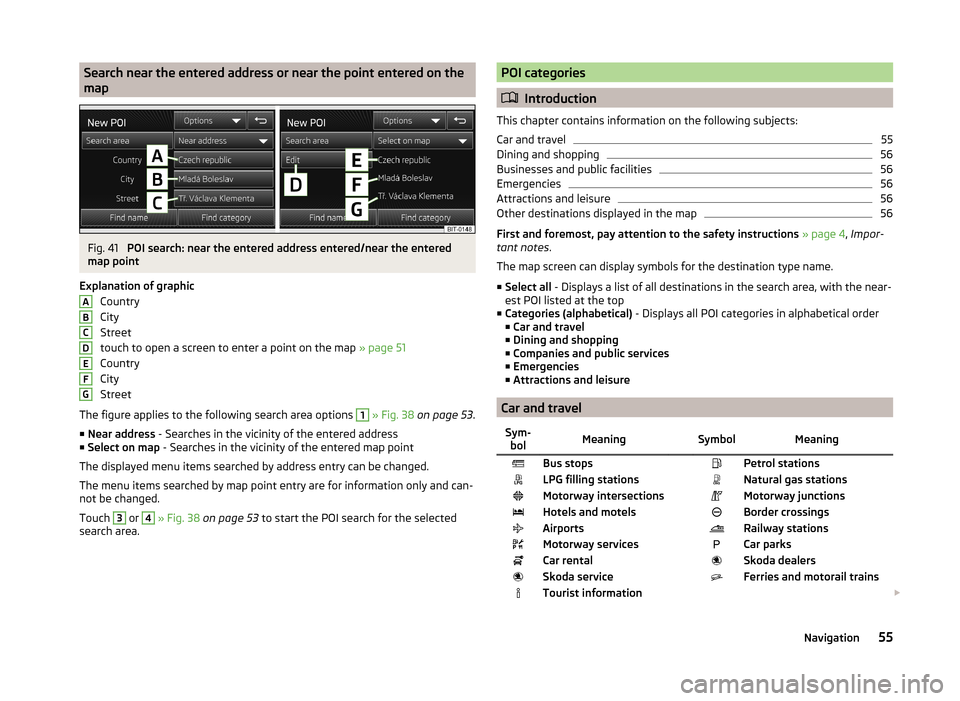
Search near the entered address or near the point entered on the
mapFig. 41
POI search: near the entered address entered/near the entered
map point
Explanation of graphic Country
City
Street
touch to open a screen to enter a point on the map » page 51
Country
City
Street
The figure applies to the following search area options
1
» Fig. 38 on page 53 .
■ Near address - Searches in the vicinity of the entered address
■ Select on map - Searches in the vicinity of the entered map point
The displayed menu items searched by address entry can be changed.
The menu items searched by map point entry are for information only and can-
not be changed.
Touch
3
or
4
» Fig. 38 on page 53 to start the POI search for the selected
search area.
ABCDEFGPOI categories
Introduction
This chapter contains information on the following subjects:
Car and travel
55
Dining and shopping
56
Businesses and public facilities
56
Emergencies
56
Attractions and leisure
56
Other destinations displayed in the map
56
First and foremost, pay attention to the safety instructions » page 4 , Impor-
tant notes .
The map screen can display symbols for the destination type name.
■ Select all - Displays a list of all destinations in the search area, with the near-
est POI listed at the top
■ Categories (alphabetical) - Displays all POI categories in alphabetical order
■ Car and travel
■ Dining and shopping
■ Companies and public services
■ Emergencies
■ Attractions and leisure
Car and travel
Sym-
bolMeaning SymbolMeaningBus stops Petrol stationsLPG filling stations Natural gas stationsMotorway intersections Motorway junctionsHotels and motels Border crossingsAirports Railway stationsMotorway services Car parksCar rental Skoda dealersSkoda service Ferries and motorail trainsTourist information 55Navigation
Page 62 of 77

■ - zoom out window with described traffic obstruction
■ - show previous traffic information
■ - show the following traffic information
■ - display list of all received traffic messages
Destination management
Introduction
This chapter contains information on the following subjects:
Stopover
60
Destination details
60
First and foremost, pay attention to the safety instructions » page 4 , Impor-
tant notes .
Stopover
It is possible to add a stopover to the route during route guidance. Route guid-
ance then occurs first to the stopover. After the stopover has been reached,
route guidance is continued.
›
In the Navigation main menu, press
→ New dest./stopover to open a
menu for entering a new destination » page 50.
If route guidance is available, after entering the stopover the system displays
the message Would you like to add a new stopover destination or start direct
route guidance? and the following items:
■ Cancel - Cancels the stopover destination input and the destination guidance
to the original destination is continued
■ Stopover - the destination entered is added to the route and guidance to
this destination is initially provided
■ Dir. r. guid. - the destination entered is added as the final destination and
the original final destination is replaced by this new destination
If destination guidance is already provided with the stopover, after a new des-
tination has been entered, the device displays the message Would you like to
replace the current stopover destination or start direct route guidance? and
the following items:
■ Cancel - Cancels the stopover destination input and destination guidance to
the original destinations is continued
■ Replace - The original stopover is replaced with the destination entered and
destination guidance is initially undertaken to this destination while the final
destination remains unchanged
■ Dir. r. guid. - The destination entered is added as the final destination and
the original destinations are replaced by this new destination
If you would like to use the stopover as the final destination and the original final destination as a stopover, then select the Dir. r. guid. input and then in-
put the original final destination again as a stopover.
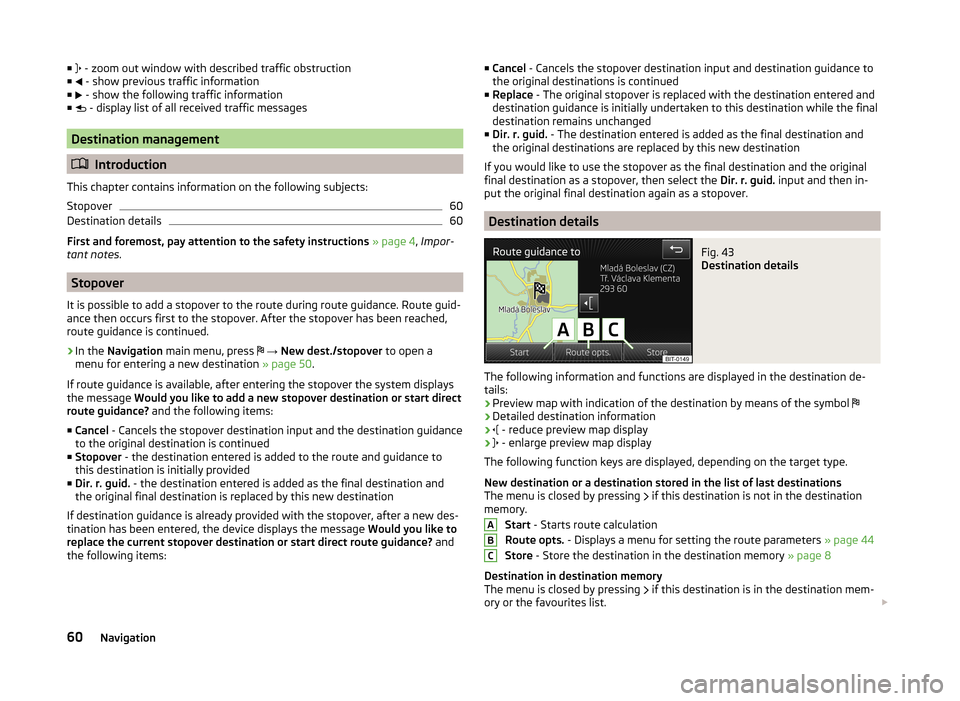
Destination details
Fig. 43
Destination details
The following information and functions are displayed in the destination de- tails:
› Preview map with indication of the destination by means of the symbol
› Detailed destination information
›
- reduce preview map display
›
- enlarge preview map display
The following function keys are displayed, depending on the target type.
New destination or a destination stored in the list of last destinations
The menu is closed by pressing if this destination is not in the destination
memory.
Start - Starts route calculation
Route opts. - Displays a menu for setting the route parameters » page 44
Store - Store the destination in the destination memory » page 8
Destination in destination memory
The menu is closed by pressing if this destination is in the destination mem-
ory or the favourites list.
ABC60Navigation
Page 66 of 77

■Convenience consumers - Displays up to three consumers which have the
largest share of fuel consumption and displays the fuel consumption to run
all convenience systems
■ Vehicle status - Displays vehicle status » Fig. 45 or tire pressure monitoring
information
■ Vehicle status - Display vehicle status information
■ - No message /
- warning messages relating to vehicle status or
number of messages (if there is only one message, one warning message
text is displayed)
■ - Display information about the status of the START-STOP system
■ TPMS - Function of the tire pressure monitor » Fig. 46
■ SET - Storage of the tire pressure values
Switching between the individual menus can be done by using the function
keys
.
Note
After pressing the button the last displayed view from the menu is shown
.
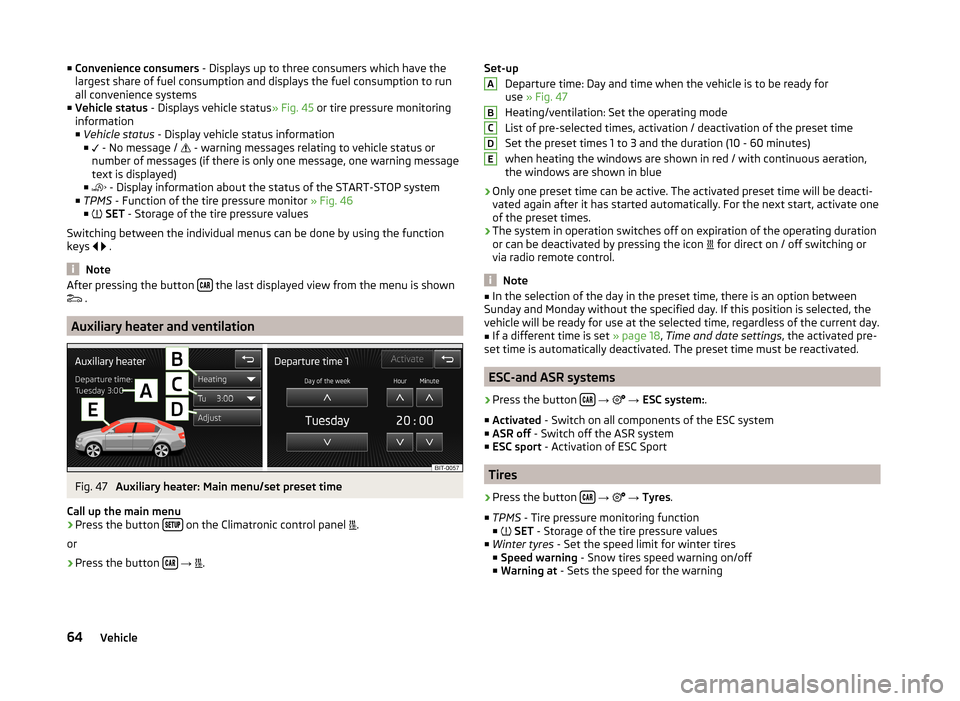
Auxiliary heater and ventilation
Fig. 47
Auxiliary heater: Main menu/set preset time
Call up the main menu
›
Press the button on the Climatronic control panel
.
or
›
Press the button
→
.
Set-up
Departure time: Day and time when the vehicle is to be ready for
use » Fig. 47
Heating/ventilation: Set the operating mode
List of pre-selected times, activation / deactivation of the preset time
Set the preset times 1 to 3 and the duration (10 - 60 minutes) when heating the windows are shown in red / with continuous aeration,the windows are shown in blue
› Only one preset time can be active. The activated preset time will be deacti-
vated again after it has started automatically. For the next start, activate one
of the preset times.
› The system in operation switches off on expiration of the operating duration
or can be deactivated by pressing the icon for direct on / off switching or
via radio remote control.
Note
■ In the selection of the day in the preset time, there is an option between
Sunday and Monday without the specified day. If this position is selected, the
vehicle will be ready for use at the selected time, regardless of the current day.■
If a different time is set » page 18, Time and date settings , the activated pre-
set time is automatically deactivated. The preset time must be reactivated.
ESC-and ASR systems
›
Press the button
→
→ ESC system: .
■ Activated - Switch on all components of the ESC system
■ ASR off - Switch off the ASR system
■ ESC sport - Activation of ESC Sport
Tires
›
Press the button
→
→ Tyres .
■ TPMS - Tire pressure monitoring function
■
SET - Storage of the tire pressure values
■ Winter tyres - Set the speed limit for winter tires
■ Speed warning - Snow tires speed warning on/off
■ Warning at - Sets the speed for the warning
ABCDE64Vehicle
Page 74 of 77

SeatsSettings66
Select frequency range See main menu
21
Selection of travel mode62
Select radio station See main menu
21
Select signal source Media
26
Semi-automatic station search22
Settings Additional keyboard languages
18
Bluetooth19
DAB25
Device16
Driving mode62
FM24
Keyboard18
Language16
Manage favourites39
Map display46
Media27
Navigation44
Radio24
Restore factory settings19
Screen18
Sound17
Telephone35
Time and date18
Units19
User profile39
Voice control19
Volume6
Setting vehicle systems Auxiliary heater and ventilation
64
Parking and manoeuvring65
Restore factory settings67
Setup16
Set vehicle systems Tires
64
Signal source27
Sound17
Speed limit for snow tires64
Split screen Geographical coordinates
49
GPS49
Manoeuvre49
Navigation announcement49
Traffic49
Traffic signs49
START-STOP63
Station See main menu
21
Status line7
Stopover60
Switching off Volume
6
Switching the unit off5
Switching the unit on5
Switch voice control on/off
14
Synchronous adjustment of both mirrors66
T
Telephone
33
Bluetooth profile36
Conference41
Dial telephone38
Disconnection39
Fast connection38
Functions39
Main menu34
Multifunction steering wheel11
On screen messages34
Pairing37
Settings35
Telephone conference41
Telephone conversation41
Telephone functions39
Tilt the mirror surface - lower in reverse66
Time18
Tire pressure monitor63, 64
TMC Traffic information
58
touch screen5
TP (traffic report)23
Traffic58
Dynamic route59
Information59
Operation59
Traffic information TMC
58
Traffic information (TP)23
Traffic reports58
Information59
Operation59
Traffic signs47, 49
Travel light - travel mode66
U
Unit menus
6
Unit operation7
In the unit screen7
Unit screen7
Units19
Unit screen Operation
7
USB30, 31
V
vCard
53
Vehicle equipment Declaration of conformity
4
Vehicle identification number67
Vehicle settings62
Vehicle systems62
72Index