Page 26 of 77

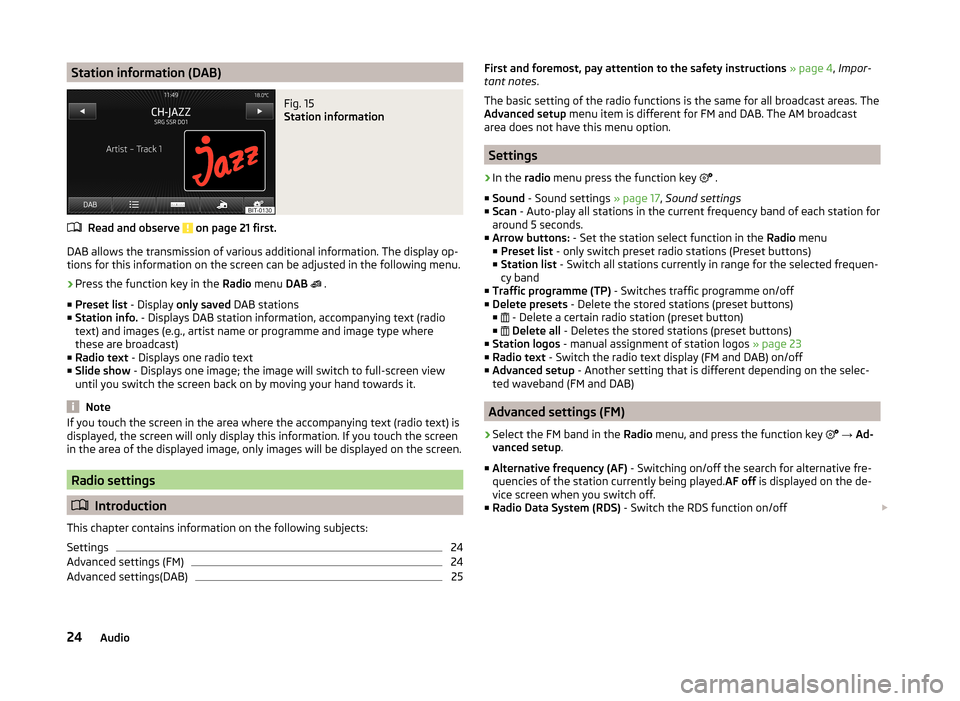
Station information (DAB)Fig. 15
Station information
Read and observe on page 21 first.
DAB allows the transmission of various additional information. The display op-
tions for this information on the screen can be adjusted in the following menu.
›
Press the function key in the Radio menu DAB
.
■ Preset list - Display only saved DAB stations
■ Station info. - Displays DAB station information, accompanying text (radio
text) and images (e.g., artist name or programme and image type where
these are broadcast)
■ Radio text - Displays one radio text
■ Slide show - Displays one image; the image will switch to full-screen view
until you switch the screen back on by moving your hand towards it.
Note
If you touch the screen in the area where the accompanying text (radio text) is
displayed, the screen will only display this information. If you touch the screen
in the area of the displayed image, only images will be displayed on the screen.
Radio settings
Introduction
This chapter contains information on the following subjects:
Settings
24
Advanced settings (FM)
24
Advanced settings(DAB)
25First and foremost, pay attention to the safety instructions » page 4 , Impor-
tant notes .
The basic setting of the radio functions is the same for all broadcast areas. The
Advanced setup menu item is different for FM and DAB. The AM broadcast
area does not have this menu option.
Settings
›
In the radio menu press the function key
.
■ Sound - Sound settings » page 17, Sound settings
■ Scan - Auto-play all stations in the current frequency band of each station for
around 5 seconds.
■ Arrow buttons: - Set the station select function in the Radio menu
■ Preset list - only switch preset radio stations (Preset buttons)
■ Station list - Switch all stations currently in range for the selected frequen-
cy band
■ Traffic programme (TP) - Switches traffic programme on/off
■ Delete presets - Delete the stored stations (preset buttons)
■ - Delete a certain radio station (preset button)
■
Delete all - Deletes the stored stations (preset buttons)
■ Station logos - manual assignment of station logos » page 23
■ Radio text - Switch the radio text display (FM and DAB) on/off
■ Advanced setup - Another setting that is different depending on the selec-
ted waveband (FM and DAB)
Advanced settings (FM)
›
Select the FM band in the Radio menu, and press the function key
→ Ad-
vanced setup .
■ Alternative frequency (AF) - Switching on/off the search for alternative fre-
quencies of the station currently being played. AF off is displayed on the de-
vice screen when you switch off.
■ Radio Data System (RDS) - Switch the RDS function on/off
24Audio
Page 37 of 77

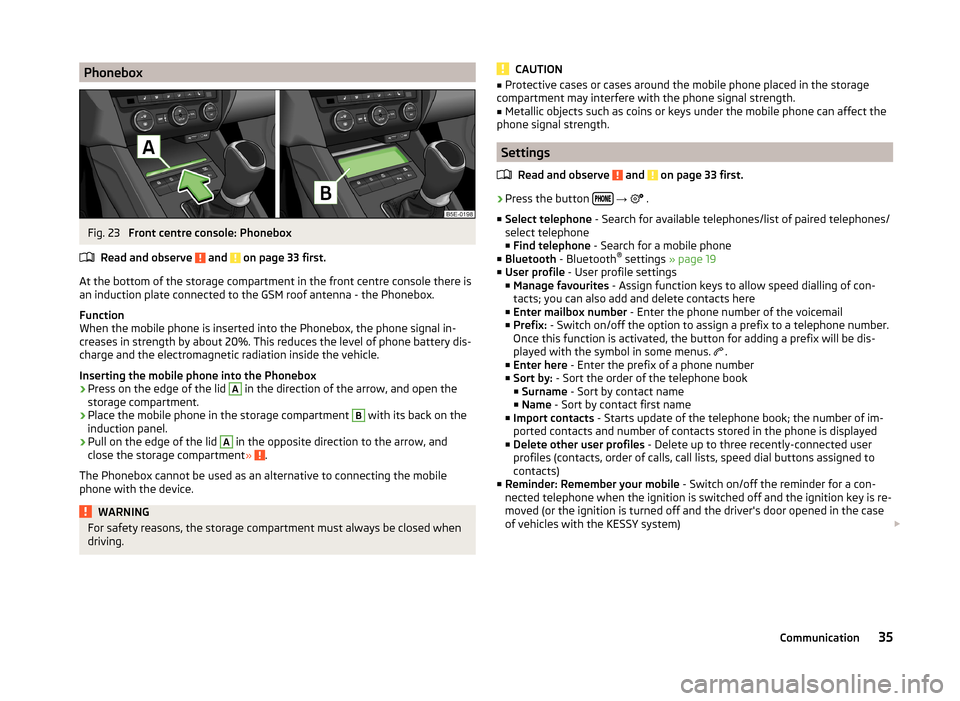
PhoneboxFig. 23
Front centre console: Phonebox
Read and observe
and on page 33 first.
At the bottom of the storage compartment in the front centre console there is
an induction plate connected to the GSM roof antenna - the Phonebox.
Function
When the mobile phone is inserted into the Phonebox, the phone signal in-
creases in strength by about 20%. This reduces the level of phone battery dis-
charge and the electromagnetic radiation inside the vehicle.
Inserting the mobile phone into the Phonebox
›
Press on the edge of the lid
A
in the direction of the arrow, and open the
storage compartment.
›
Place the mobile phone in the storage compartment
B
with its back on the
induction panel.
›
Pull on the edge of the lid
A
in the opposite direction to the arrow, and
close the storage compartment » .
The Phonebox cannot be used as an alternative to connecting the mobile
phone with the device.
WARNINGFor safety reasons, the storage compartment must always be closed when
driving.CAUTION■ Protective cases or cases around the mobile phone placed in the storage
compartment may interfere with the phone signal strength.■
Metallic objects such as coins or keys under the mobile phone can affect the
phone signal strength.
Settings
Read and observe
and on page 33 first.
›
Press the button
→
.
■ Select telephone - Search for available telephones/list of paired telephones/
select telephone ■ Find telephone - Search for a mobile phone
■ Bluetooth - Bluetooth ®
settings » page 19
■ User profile - User profile settings
■ Manage favourites - Assign function keys to allow speed dialling of con-
tacts; you can also add and delete contacts here
■ Enter mailbox number - Enter the phone number of the voicemail
■ Prefix: - Switch on/off the option to assign a prefix to a telephone number.
Once this function is activated, the button for adding a prefix will be dis-
played with the symbol in some menus. .
■ Enter here - Enter the prefix of a phone number
■ Sort by: - Sort the order of the telephone book
■ Surname - Sort by contact name
■ Name - Sort by contact first name
■ Import contacts - Starts update of the telephone book; the number of im-
ported contacts and number of contacts stored in the phone is displayed
■ Delete other user profiles - Delete up to three recently-connected user
profiles (contacts, order of calls, call lists, speed dial buttons assigned to
contacts)
■ Reminder: Remember your mobile - Switch on/off the reminder for a con-
nected telephone when the ignition is switched off and the ignition key is re-
moved (or the ignition is turned off and the driver's door opened in the case
of vehicles with the KESSY system)
35Communication
Page 45 of 77

Navigation
Description of the navigation system
Preface to navigation
Introduction
This chapter contains information on the following subjects:
Main menu
43
Navigation data
44
First and foremost, pay attention to the safety instructions » page 4 , Impor-
tant notes .
The unit uses the GPS (Global Positioning System) satellite system for naviga-
tion. The satellite signal allows you to determine your current vehicle position.
If the unit is outside the range of the GPS satellite signal (e.g. in dense vegeta-
tion, in tunnels, parking garages, etc.), the unit navigates only with restrictions
using on-vehicle sensors.
Navigation is done:
› by graphical instructions in the device screen and Maxi DOT display;
› via voice guidance.
The navigation unit can be operated: › using the buttons on the unit
» page 43;
› using the function keys in the unit screen
» page 43;
› using voice control
» page 13.
› on the MAXI DOT display
» page 12 .
WARNING■
Information about traffic lights, stop and right of way signs, parking and
stopping restrictions as well as lane constrictions and speed restrictions is
not taken into account for navigation by the unit.■
Always adjust the driving speed to the road, traffic and weather condi-
tions.
■
The navigation announcement provided may vary from current situations,
e.g. due to road works or out-of-date navigation data.
■
The volume should be adjusted to ensure that acoustic signals from out-
side, e.g. sirens from vehicles which have the right of way, such as police,
ambulance and fire brigade vehicles, can be heard at all time.
CAUTIONIn some countries, some unit features can no longer be selected when the ve-
hicle is running faster than a certain speed. This is not a malfunction, but com-
plies with the national legal regulations.
Main menu
Fig. 26
Main menu Navigation
Read and observe and on page 43 first.
›
Press .
The last opened navigation menu opens.
If a menu other than the main menu » Fig. 28 on page 46 is opened, the main
menu can be opened by pressing
again.
Function keys of the navigation menu:
ButtonMeaningenter new destination or display route informa-
tion » page 50Display the menu My dests. » page 52Enter/search for a POI » page 53Set up map and additional window display » page 46Setting the navigation menu » page 4443Description of the navigation system