2014 SKODA FABIA change time
[x] Cancel search: change timePage 6 of 60
Introductory information
Important notes
Introduction
This chapter contains information on the following subjects:
Declaration of Conformity
4
Component protection
4
Consequently, this vehicle does not need to contain all of the equipment com-
ponents described in these operating instructions.
The level of equipment of your vehicle refers to your purchase contract of the
vehicle. For more information, please contact your local ŠKODA retailer.
The illustrations in this Owner's Manual may have differences from your vehi-
cle; they are only intended for general information.
WARNING■ Concentrate fully at all times on your driving! As the driver you are fully
responsible for the operation of your vehicle.■
Only use the device in a way that ensures that you are in full control of
your vehicle in every traffic situation - there is a risk of accident!
■
Adjust the volume to ensure that acoustic signals from outside the vehi-
cle, e.g. sirens from emerging vehicles instructing you to give way to, such
as the police, ambulance and fire brigade, can be heard at all times.
■
High volumes can cause hearing damage.
Declaration of Conformity
Read and observe
on page 4 first.
ŠKODA AUTO a.s. hereby declares that the ŠKODA Infotainment systems meet
the basic requirements and additional provisions of Directive 1999/5/EC with
reference to radio equipment and telecommunications devices.
ŠKODA AUTO a.s. hereby declares that the “connection and the use of this
communication device is granted by the Nigerian Communications Commis-
sion.”
Component protection
Read and observe
on page 4 first.
Some electronic control units are factory-equipped with component protec-
tion.
Component protection serves as a protection mechanism for the following:
› for the impairment of factory- or garage-fitted control units after installation
in another vehicle (for example, after a theft);
› for the impairment of components operated outside of the vehicle.
› for the possibility of a legitimate installation or change of control units for re-
pairs at a ŠKODA 1)
specialist garage.
When component protection is enabled, the following message appears on the
unit display Component theft protection: the infotainment system is not fully
available at present. Please switch on the ignition.
If the component protection does not activate by switching on the ignition,
please contact a ŠKODA specialist garage.
Equipment overview
Introduction
This chapter contains information on the following subjects:
Description of the device
5
Touch screen
5
Switching the unit on/off
5
Unit menus
6
Adjust the volume and switch on
6
This chapter covers the device, switching it on and off, and the volume control.
1)
Terms used » manual , chapter explanations .
4Introductory information
Page 8 of 60
The device can be turned off automatically under certain circumstances due to
the protection against the vehicle battery discharged or the device protection.
The device informs of this via a text message on the device display.
› Warning: 12V battery low. Please start the engine or turn off the Infotain-
ment system. - The vehicle battery is low, start the engine or turn the unit
off.
› 12V battery almost empty. Infotainment system is being switched off.
- The
vehicle battery is discharged, the device switches itself off.
› Operating temperature not maintained. Infotainment system is being
switched off. - The device temperature is too low or too high, the device
switches itself off.
Note
When the device is switched on, the operating mode that were active before
switching off will be restored.
Unit menus
Fig. 2
Unit menus
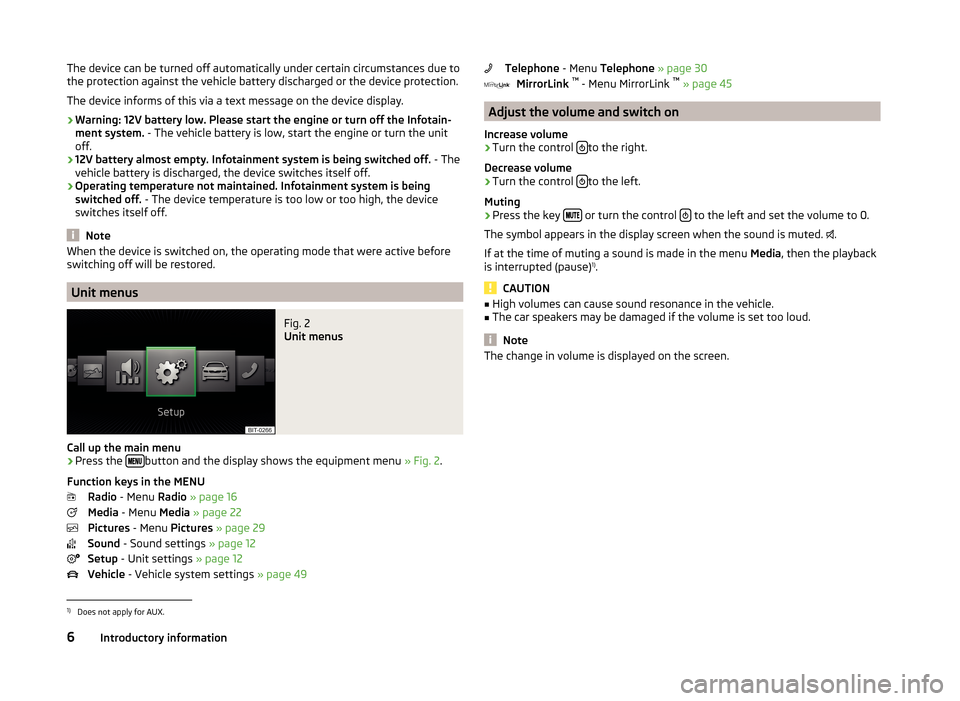
Call up the main menu
›
Press the button and the display shows the equipment menu
» Fig. 2.
Function keys in the MENU Radio - Menu Radio » page 16
Media - Menu Media » page 22
Pictures - Menu Pictures » page 29
Sound - Sound settings » page 12
Setup - Unit settings » page 12
Vehicle - Vehicle system settings » page 49
Telephone - Menu Telephone » page 30
MirrorLink ™
- Menu MirrorLink ™
» page 45
Adjust the volume and switch on
Increase volume
›
Turn the control to the right.
Decrease volume
›
Turn the control to the left.
Muting
›
Press the key or turn the control to the left and set the volume to 0.
The symbol appears in the display screen when the sound is muted. .
If at the time of muting a sound is made in the menu Media, then the playback
is interrupted (pause) 1)
.
CAUTION
■ High volumes can cause sound resonance in the vehicle.■The car speakers may be damaged if the volume is set too loud.
Note
The change in volume is displayed on the screen.1)
Does not apply for AUX.
6Introductory information
Page 17 of 60
Safe removal of the audio source›
Press the button
→ Remove safely .
■ SD card - Safe removal of the SD storage card
■ USB - Safe removal of the USB source
Restore factory settings
›
Press the button
→ Factory settings .
■ Reset all settings and data - menu to restore all settings
■ Restore factory settings - Reset all factory settings
■ Reset individual settings/data - menu for the recovery of individual settings
■ Sound - Reset default settings for sound
■ Radio - Reset default settings for radio
■ Vehicle - Reset default settings for the vehicle systems
■ Telephone - Reset default settings for phone
■ Media - Reset default settings for media
■ System - Reset the system default settings
■ MirrorLink ™
- Reset settings on the MirrorLink ™
- function
Bluetooth ®
settings
›
Press the button
→ Bluetooth .
■ Bluetooth - Switch on/off Bluetooth ®
function
■ Visibility: - Switch on/off the visibility of the Bluetooth ®
device for other de-
vices
■ Visible - Visibility is always on
■ Hidden - Visibility is off
■ Name: - Open the input screen with keyboard - Change the device name
■ Paired devices - Display the list of paired Bluetooth ®
devices; connect or de-
lete a paired device; delete the list of paired devices ■ Delete all - Delete all paired Bluetooth ®
devices
■ - Delete the paired Bluetooth ®
device
■ Find devices - Searches for available external devices with enabled Blue-
tooth ®
functions and activated visibility
■ Bluetooth audio (A2DP/AVRCP) - Switch on/off the connection option for
Bluetooth ®
profiles A2DP or AVRCP 1)
System Information›
Press the button
→ System information .
■ Device part number: ... - Part number of the unit
■ Hardware: ... - Version of the hardware used
■ Software: ... - Version of the software used
■ Media Codec: ... - Media codec version
■ Update software - the function key for the software update
The information about available software updates can be found on the ŠKODA
Internet pages www.infotainment.skoda-auto.com .
1)
A2DP or AVRCP are Bluetooth®
profiles that support multimedia functions.
15Device Settings
Page 27 of 60
NoteSee the owner's manual of the specific manufacturer for operating the exter-
nal audio source.
Select audio source
Fig. 15
Select audio source
Read and observe
and on page 24 first.
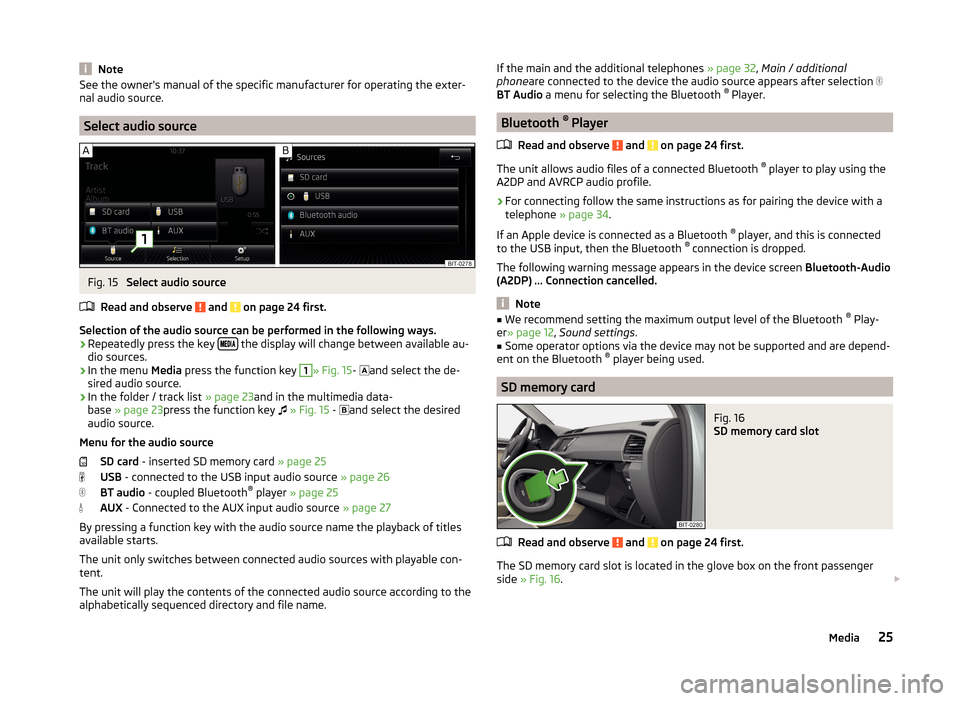
Selection of the audio source can be performed in the following ways.
› Repeatedly press the key
the display will change between available au-
dio sources.
› In the menu
Media press the function key
1
» Fig. 15 -
and select the de-
sired audio source.
› In the folder / track list
» page 23and in the multimedia data-
base » page 23 press the function key
» Fig. 15 -
and select the desired
audio source.
Menu for the audio source SD card - inserted SD memory card » page 25
USB - connected to the USB input audio source » page 26
BT audio - coupled Bluetooth ®
player » page 25
AUX - Connected to the AUX input audio source » page 27
By pressing a function key with the audio source name the playback of titles
available starts.
The unit only switches between connected audio sources with playable con-
tent.
The unit will play the contents of the connected audio source according to the
alphabetically sequenced directory and file name.
If the main and the additional telephones » page 32, Main / additional
phone are connected to the device the audio source appears after selection
BT Audio a menu for selecting the Bluetooth ®
Player.
Bluetooth ®
Player
Read and observe
and on page 24 first.
The unit allows audio files of a connected Bluetooth ®
player to play using the
A2DP and AVRCP audio profile.
›
For connecting follow the same instructions as for pairing the device with a
telephone » page 34.
If an Apple device is connected as a Bluetooth ®
player, and this is connected
to the USB input, then the Bluetooth ®
connection is dropped.
The following warning message appears in the device screen Bluetooth-Audio
(A2DP) ... Connection cancelled.
Note
■
We recommend setting the maximum output level of the Bluetooth ®
Play-
er » page 12 , Sound settings .■
Some operator options via the device may not be supported and are depend-
ent on the Bluetooth ®
player being used.
SD memory card
Fig. 16
SD memory card slot
Read and observe and on page 24 first.
The SD memory card slot is located in the glove box on the front passenger
side » Fig. 16 .
25Media
Page 34 of 60
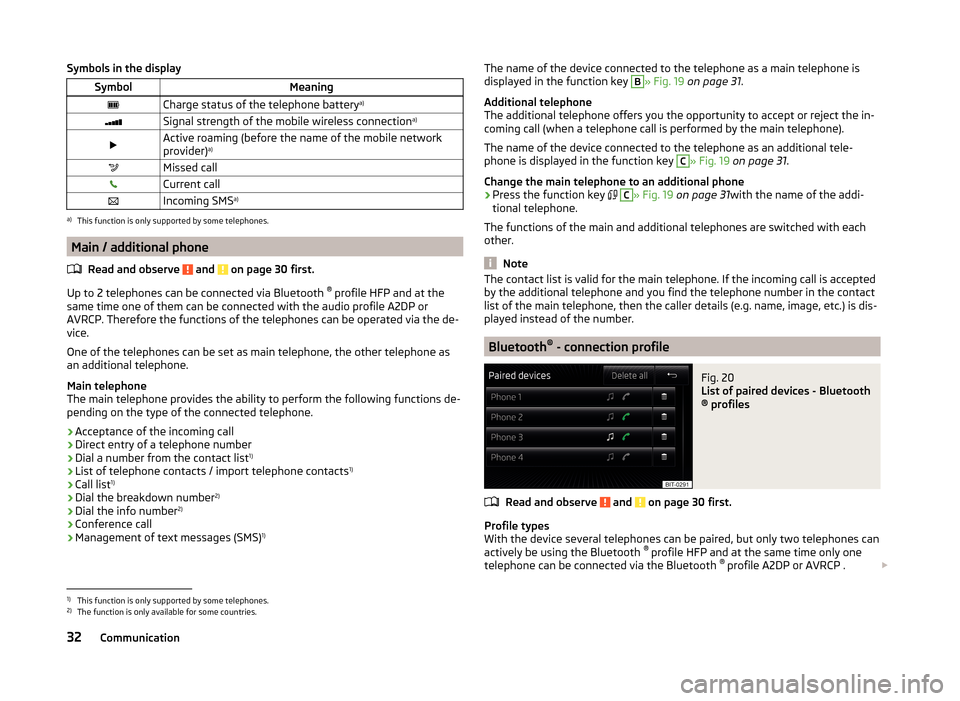
Symbols in the displaySymbolMeaningCharge status of the telephone batterya)Signal strength of the mobile wireless connection a)Active roaming (before the name of the mobile network
provider) a)Missed callCurrent callIncoming SMS
a)a)
This function is only supported by some telephones.
Main / additional phone
Read and observe
and on page 30 first.
Up to 2 telephones can be connected via Bluetooth ®
profile HFP and at the
same time one of them can be connected with the audio profile A2DP or
AVRCP. Therefore the functions of the telephones can be operated via the de-
vice.
One of the telephones can be set as main telephone, the other telephone as
an additional telephone.
Main telephone
The main telephone provides the ability to perform the following functions de-
pending on the type of the connected telephone.
› Acceptance of the incoming call
› Direct entry of a telephone number
› Dial a number from the contact list 1)
› List of telephone contacts / import telephone contacts 1)
› Call list 1)
› Dial the breakdown number 2)
› Dial the info number 2)
› Conference call
› Management of text messages (SMS) 1)
The name of the device connected to the telephone as a main telephone is
displayed in the function key B» Fig. 19 on page 31 .
Additional telephone
The additional telephone offers you the opportunity to accept or reject the in-
coming call (when a telephone call is performed by the main telephone).
The name of the device connected to the telephone as an additional tele-
phone is displayed in the function key C
» Fig. 19 on page 31 .
Change the main telephone to an additional phone › Press the function key
C
» Fig. 19 on page 31 with the name of the addi-
tional telephone.
The functions of the main and additional telephones are switched with each
other.
Note
The contact list is valid for the main telephone. If the incoming call is accepted
by the additional telephone and you find the telephone number in the contact
list of the main telephone, then the caller details (e.g. name, image, etc.) is dis-
played instead of the number.
Bluetooth ®
- connection profile
Fig. 20
List of paired devices - Bluetooth
® profiles
Read and observe and on page 30 first.
Profile types
With the device several telephones can be paired, but only two telephones can
actively be using the Bluetooth ®
profile HFP and at the same time only one
telephone can be connected via the Bluetooth ®
profile A2DP or AVRCP .
1)
This function is only supported by some telephones.
2)
The function is only available for some countries.
32Communication
Page 42 of 60
›Press the function key
, connection starts.
› Press the function key
, connection starts with the area code.
Search for a contact in the list
The input screen » Fig. 21 also functions as an alphanumeric keypad that you
can use to search for contacts in the phonebook.
For example, if you enter 32, the unit will display contacts with the letter se-
quence DA, FA, EB, etc.
On the right side next to the numerical keyboard a list of contacts found from
the directory appears according to the lettered specified. By pressing the cor-
responding function key for the respective contact, dialling is started or the
contact details are displayed if the telephone contact has several telephone
numbers.
Enter prefix
Entering the prefix into the input line can be done in one of two ways.
› Enter the characters or numbers of the prefix (e.g.
or enter 00 or similar).
› Enter the telephone number and press the function key
(the connection
with the prefix starts).
The prefix may, for example be used for international calls, telephone calls via
a virtual telephone service provider or distinguishing between business and
private calls and similar.
If the contact number contains a prefix, pressing the function key causes a
further prefix to be added before the number and the connection starts. The
telephone number contains at this time two prefixes and a telephone call is
not initiated.
Dialling breakdown and info numbers
› Press the function key
Breakdn. call , breakdown number is dialled.
A breakdown service will then be called when your vehicle breaks down.
› Press the function key
Info. call
the Info number is dialled.
An information service can be called when information regarding the products and services of the ŠKODA brand are required.
The breakdown and info numbers are free of charge. Charges are only made for a telephone call in accordance with the fare conditions of your telephone
service provider.
If no Breakdown or Info. call can be made, then a ŠKODA service partner
should be consulted.The breakdown and info numbers are set country-specific at the factory. If you
want to change the preset numbers, then consult a ŠKODA service partner.
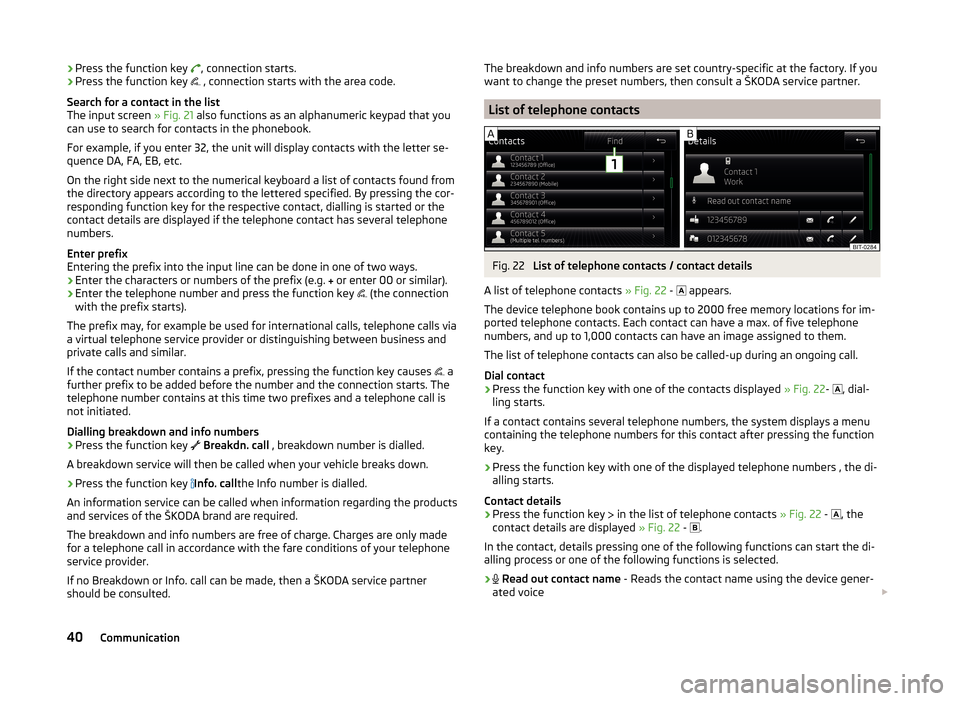
List of telephone contacts
Fig. 22
List of telephone contacts / contact details
A list of telephone contacts » Fig. 22 -
appears.
The device telephone book contains up to 2000 free memory locations for im-
ported telephone contacts. Each contact can have a max. of five telephone
numbers, and up to 1,000 contacts can have an image assigned to them.
The list of telephone contacts can also be called-up during an ongoing call.
Dial contact
›
Press the function key with one of the contacts displayed » Fig. 22-
, dial-
ling starts.
If a contact contains several telephone numbers, the system displays a menu
containing the telephone numbers for this contact after pressing the function
key.
›
Press the function key with one of the displayed telephone numbers , the di-
alling starts.
Contact details
›
Press the function key in the list of telephone contacts
» Fig. 22 -
, the
contact details are displayed » Fig. 22 -
.
In the contact, details pressing one of the following functions can start the di- alling process or one of the following functions is selected.
›
Read out contact name - Reads the contact name using the device gener-
ated voice
40Communication
Page 53 of 60

■Front volume - Adjust the volume of the beeps for obstacle detection in
front
■ Front tone setting - Setting the pitch of the beeps for obstacle detection in
front
■ Rear volume - Set the volume level of the beeps for the rear obstacle de-
tection
■ Rear tone setting - Setting the pitch of the beeps for the rear obstacle de-
tection
■ Lowering entertainment - Lowers the audio volume (e.g. radio volume)
with activated parking aid
Light
›
Press the button
→
→ Light .
■ Light assistance - Setting of outdoor lighting
■ Switch-on time: - Set the sensibility of the light sensor against the change
in intensity of the ambient light
■ Early - High sensibility
■ Medium - Medium sensibility
■ Late - Low sensibility
■ Automatic headlight control (rain) - Activate/deactivate automatic head-
light control in rain
■ Daytime running lights - Activate/deactivate daytime running lights
■ Comfort turn signal - Activate/deactivate lane change flashing
■ Background lighting - Sets the interior lighting
■ Instrument/switch lighting - Sets the brightness of the instrument/switch
lighting
■ “Coming home/Leaving home”- function - setting the COMING HOME /
LEAVING HOME-function ■ "Coming Home" function - Sets the period that the lights remain on after
you leave the vehicle (0 - 30 seconds; 0 = function deactivated)
■ "Leaving Home" function - Sets the period that the lights remain on after
you unlock the vehicle (0 - 30 seconds; 0 = function deactivated)
Windscreen wipers
›
Press the button
→
→ Mirrors and wipers .
■ Wipers - Adjusts the windscreen wipers
■ Automatic wiping in rain - Activate/deactivate automatic windscreen wip-
ing in rain
■ Automatic rear wiper - Activate/deactivate automatic rear window wiping
Opening and closing›
Press the button
→
→ Opening and closing .
■ Central locking - Settings for opening and closing of doors
■ Door unlocking: - Set the door unlocking feature
■ All doors - All doors
■ Single door - Driver's door or driver's or passenger door with KESSY sys-
tem
■ Vehicle side - Doors on the driver's side or on the driver's or passenger's
side with KESSY system
■ Automatic locking - Activate/deactivate automatic locking when starting
off
■ Acoustic confirmation - Activate/deactivate acoustic signals when locking/
unlocking the vehicle with an anti-theft alarm system
Instrument cluster (multifunction display)
›
Press the button
→
→ Instrument cluster .
In this menu it is possible to hide/show the appearance of the menu items in
the instrument cluster multifunction display and reset the trip data.
■ Current consumption - Display of current fuel consumption on/off
■ Average consumption - Display of average fuel consumption on/off
■ Travelling time - Display of travelling time on/off
■ Distance - Display of distance travelled on/off
■ Average speed - Display of average speed on/off
■ Digital speed display - Display of current speed on/off
■ Speed warning - Winter tyres warning on/off
■ Oil temperature - Oil temperature on/off
■ Reset "Since start" driving data - Reset the single-trip memory in the device
screen and in the display of the instrument cluster
■ Reset "Long-term" driving data - Reset the long-term memory in the device
screen and in the display of the instrument cluster
Time, date and unit setting
›
Press
→ Time and date .
Description of the time and date settings » page 14 .
›
Press the button
→ Units .
Description of unit settings » page 14.
51Vehicle systems
Page 59 of 60
ŠKODA AUTO a.s. pursues a policy of constant product and model develop-
ment. We trust that you will understand that changes to models in terms of
shape, equipment and engineering, may be introduced at any time. The infor-
mation about appearance, performances, dimensions, weight, standards and
functions of the vehicle is correct at the time of publication. Some equipment
might only be introduced at a later date, or might only be offered in certain
markets; information is provided by ŠKODA Partners. It is therefore not possi-
ble for legal claims to be made based on the data, illustrations and descrip-
tions contained in this Owner's Manual.Reprinting, reproduction, translation, or any other use, either in whole or in
part, is not permitted without the written consent of ŠKODA AUTO a.s..
ŠKODA AUTO a.s. expressly reserves all rights relating to copyright laws.
Subject to change.
Issued by: ŠKODA AUTO a.s.
© ŠKODA AUTO a.s. 2014