2014 Seat Leon SC buttons
[x] Cancel search: buttonsPage 17 of 62

16Audio mode
TP traffic news station function (Traffic Programme)
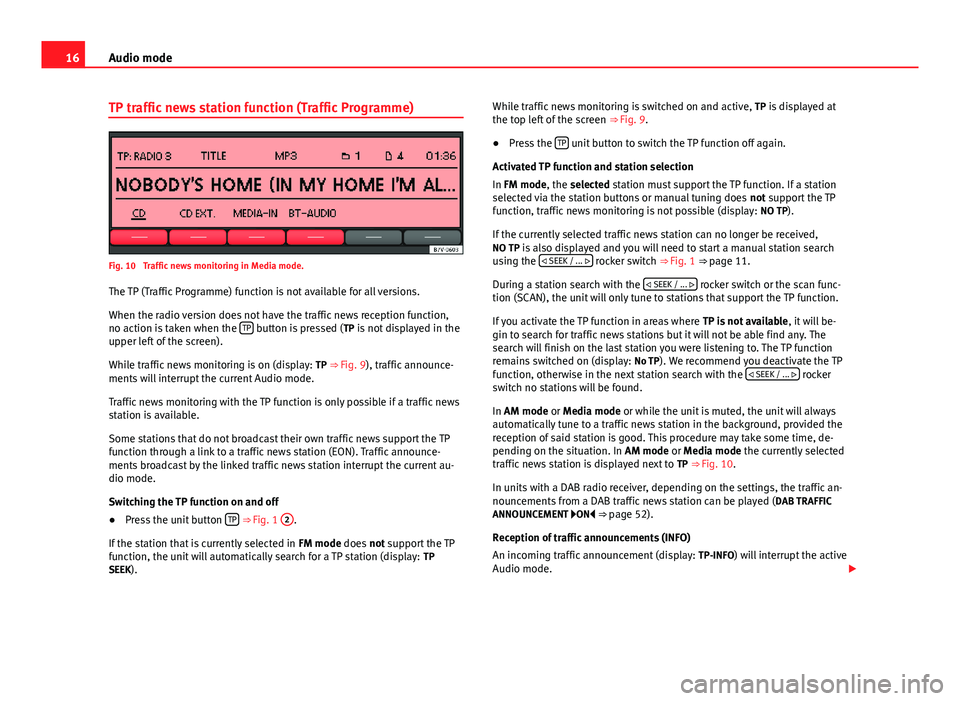
Fig. 10 Traffic news monitoring in Media mode.
The TP (Traffic Programme) function is not available for all versions.
When the radio version does not have the traffic news reception function,
no action is taken when the TP
button is pressed (
TP is not displayed in the
upper left of the screen).
While traffic news monitoring is on (display: TP ⇒ Fig. 9), traffic announce-
ments will interrupt the current Audio mode.
Traffic news monitoring with the TP function is only possible if a traffic news
station is available.
Some stations that do not broadcast their own traffic news support the TP
function through a link to a traffic news station (EON). Traffic announce-
ments broadcast by the linked traffic news station interrupt the current au-
dio mode.
Switching the TP function on and off
● Press the unit button TP
⇒ Fig. 1 2.
If the station that is currently selected in FM mode does not support the TP
function, the unit will automatically search for a TP station (display: TP
SEEK). While traffic news monitoring is switched on and active,
TP is displayed at
the top left of the screen ⇒ Fig. 9.
● Press the TP
unit button to switch the TP function off again.
Activated TP function and station selection
In FM mode, the selected station must support the TP function. If a station
selected via the station buttons or manual tuning does not support the TP
function, traffic news monitoring is not possible (display: NO TP).
If the currently selected traffic news station can no longer be received,
NO TP is also displayed and you will need to start a manual station search using the
SEEK / ...
rocker switch ⇒ Fig. 1 ⇒ page 11.
During a station search with the
SEEK / ...
rocker switch or the scan func-
tion (SCAN), the unit will only tune to stations that support the TP function.
If you activate the TP function in areas where TP is not available, it will be-
gin to search for traffic news stations but it will not be able find any. The
search will finish on the last station you were listening to. The TP function
remains switched on (display: No TP). We recommend you deactivate the TP
function, otherwise in the next station search with the
SEEK / ...
rocker
switch no stations will be found.
In AM mode or Media mode or while the unit is muted, the unit will always
automatically tune to a traffic news station in the background, provided the
reception of said station is good. This procedure may take some time, de-
pending on the situation. In AM mode or Media mode the currently selected
traffic news station is displayed next to TP ⇒ Fig. 10.
In units with a DAB radio receiver, depending on the settings, the traffic an-
nouncements from a DAB traffic news station can be played ( DAB TRAFFIC
ANNOUNCEMENT ON ⇒ page 52).
Reception of traffic announcements (INFO)
An incoming traffic announcement (display: TP-INFO) will interrupt the active
Audio mode.
Page 27 of 62

26Audio mode
Browsing tracks
Press the ... / TRACK
⇒ Fig. 1 rocker switch to the left or right.
ActioneffectBriefly pressing to the
left.Goes to the start of the current track.Briefly pressing to the right.Next track.Briefly pressing twice in quick suc-
cession to the left.Goes to the start of the previous track.
Pressing and holding to the left.Fast reverse.Pressing and holding to the right.Fast forward.
You can also change track by turning the setting knob ⇒ Fig. 1 8.
Changing folder in audio data CD mode
● Press the
FOLDER
or
... / FLDR ⇒ Fig. 1 9 rocker switch to the right
or left to switch to the first track of the next or previous folder respectively.
After changing folder or track, the storage location corresponding to the
playing order of the audio data CD is briefly displayed (in Fig. 18: folder 1
and track number 5). After roughly 5 seconds, the selected track informa-
tion is displayed again.
Playing playlists
Playlists on data media do not play automatically.
● Press the PLAYLIST
function button to start playing the playlists on data
media.
● Press the
FOLDER
or
... / FLDR rocker switch to the right or left to
switch to the first track of the next or previous playlist respectively.
The scan function (SCAN) and random playback (MIX) are only available for
the playlist you are listening to ⇒ page 26.
● Press the PLAYLIST
function button again to stop playing the playlists.
Note
● Selecting tracks and CDs from an external CD changer ⇒ page 34.
● Selecting tracks and CDs via MEDIA-IN multimedia interface
⇒ page 30.
Changing playback mode (SCAN, MIX, REPEAT)
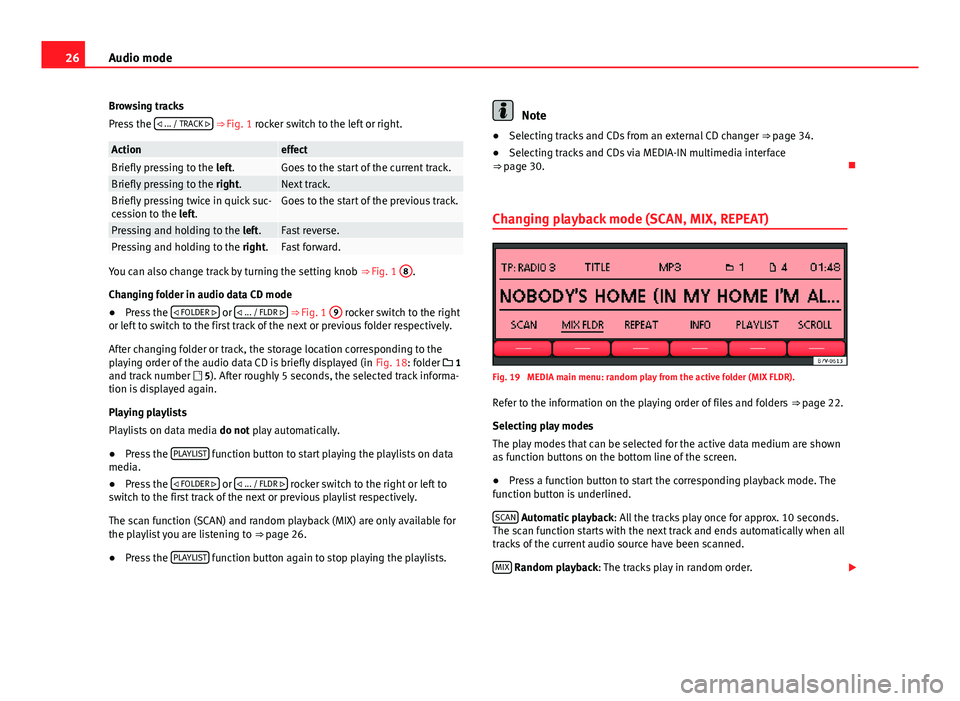
Fig. 19 MEDIA main menu: random play from the active folder (MIX FLDR).
Refer to the information on the playing order of files and folders ⇒ page 22.
Selecting play modes
The play modes that can be selected for the active data medium are shown
as function buttons on the bottom line of the screen.
● Press a function button to start the corresponding playback mode. The
function button is underlined.
SCAN
Automatic playback : All the tracks play once for approx. 10 seconds.
The scan function starts with the next track and ends automatically when all
tracks of the current audio source have been scanned.
MIX
Random playback: The tracks play in random order.
Page 28 of 62

27
Audio mode
REPEAT
Repeat function : Playback is repeated once all the tracks have been
played once. In data media with compressed audio files (MP3 and WMA),
only folders can be repeated, not the full content of the media.
The repeat (Repeat) and random playback (Mix) functions remain active for
the corresponding media source until they are closed for that source.
● Press the SCAN
, MIX or RPT ... function button again to stop the current
playback mode at the track currently playing.
The scan function can also be started and stopped by pressing the setting
button ⇒ Fig. 1 8
.
Limiting the playback mode to the folders, playlists or tracks
Depending on the audio source that is being played, playback can be limi-
ted to the files, folders or playlists by pressing the playback mode function
button several times. The display of the function button changes according-
ly (for example in Fig. 19: MIX FLDR
).
Display on the function button: effect... CD or ... ALL: All the tracks on the active data medium are played in the
selected playback mode.
... FLD: Only the tracks in the active folder are played in the selected play-
back mode.
... PLS: Only the tracks of the active playlists are played in the selected
playback mode. Playing playlists ⇒ page 26.
... TRACK: Repeats the track (title) that is playing (only with REPEAT).
Displays on the function buttons may vary with equipment model.
Compatibility with all encoding/recording software, recording devices and
recording media cannot be guaranteed. Incompatible USB devices can
make noise, interrupt playback or not playback at all.
Page 33 of 62

32Audio mode
Connection and use
Fig. 20 MEDIA-IN mode: MDI is displayed in the top line of the screen.
Fig. 21 MEDIA-IN mode: searching the folder structure of an MDI source.
Before connecting or playing an external data medium, turn down the base
volume on the radio system ⇒ page 9.
Connecting and disconnecting an external data medium
● According to the MEDIA-IN connection type, connect an adapter suitable
for the MEDIA-IN multimedia interface ⇒ page 30.
● Connect the external data medium to the MEDIA-IN multimedia inter-
face.
● If necessary, switch on the external data medium or select the appropri-
ate data mode. Even though the display may indicate otherwise, the external data medium
may be disconnected from the MEDIA-IN multimedia interface at any time
without data loss.
If the selected media source is disconnected from the MEDIA-IN multimedia
interface while being played, the radio system will remain in MDI mode. An-
other audio source must be selected manually.
Operation via the radio system
An external data medium that is correctly connected to the MEDIA-IN multi-
media interface can be operated from the radio system.
The radio system does not automatically switch to playback from an exter-
nal data medium when a data medium is connected to the MEDIA-IN multi-
media interface or when a connected data medium is switched on.
● Display the Media selection menu and select the MEDIA-IN
function but-
ton ⇒ page 24.
● Playback from the external data medium will start ⇒ Fig. 20.
● When you press the BROWSE
function button, the function buttons for
searching the folder structure appear on the screen ⇒ Fig. 21.
● You can browse folders or playlists with the function buttons TOP
(high-
est level), UP (one higher) and OPEN (open folder). The selected folder level
is displayed in the top line of the screen ⇒ Fig. 21.
● You can switch between folders and playlists on the same level using
the
FOLDER
or
... / FLDR ⇒ Fig. 1 9 rocker switch.
● To browse through the tracks within a folder or a playlist, turn the setting
knob and to play the displayed track press the function button PLAY
⇒ Fig. 1
8.
● To change track directly within a folder or playlist press the
... / TRACK
⇒ Fig. 1 rocker switch to the left or right.
The different play modes ( SCAN, MIX, REPEAT) are activated and function as
described for Media mode ⇒ page 21.
Page 35 of 62

34Audio mode
External CD changer*
Introduction
Depending on the vehicle model, the external CD changer will be in the pas-
senger side glove compartment or in the front centre armrest.
The CD changer can hold six 12 cm standard audio CDs. You do not have to
load all the slots in the CD changer.
The CD inserted can be selected and played through the radio system.
Additional information and warnings:
● Safety notes ⇒ page 4
● Unit overview ⇒ page 6
● Media mode ⇒ page 21
Note
● Audio data CDs and audio DVDs cannot be played in the external CD
changer.
● You might not be able to play CDs with copy protection or CD-Rs and CD-
RWs, or playback might be restricted.
● CD text cannot be displayed for CDs played from an external CD changer. Overview
Fig. 22 External CD changer in the front passenger side storage compartment or in the
front centre armrest.
Inserting a CD
● Press the LOAD
unit button. The LED
⇒ Fig. 22 2 above the button of
the next free CD slot flashes slowly.
● To manually select a free CD slot press one of the unit buttons 1
to 6.
Otherwise the next free slot is automatically made available.
● When the LED flashes quickly, insert an audio CD with the unprinted
side facing towards the unit buttons into the CD slot 3
until it is automati-
cally drawn in ⇒ .
For quick loading press and hold the LOAD
unit button for longer than 3 sec-
onds. The free slots in the CD changer will be prepared for loading one after
the other.
Page 36 of 62

35
Audio mode
Ejecting CDs
● When a CD is being played from the CD changer, pressing the EJECT
unit
button ejects that CD.
● When no CD in the CD changer is being played, press the EJECT
unit but-
ton followed by one of the unit buttons 1 to 6 to select the CD slot.
● A CD will be drawn back in if it is not removed from the eject position
within 15 seconds ⇒
.
To eject all CDs, press and hold the EJECT
unit button for longer than 3 sec-
onds. The CDs will be ejected one after the other.
Status display by the LEDs 2
StatusdisplayCD slot emptyLED is off.CD slot loadedLED is lit up.CD slot availableLED flashes slowly.CD slot readyThe LED blinks quickly.
You can insert a CD.
CAUTION
Before closing the storage compartment on the front passenger side or the
front centre armrest, check that the CD has been properly inserted or re-
moved. The CD changer or the CD might otherwise be damaged. Operation via the radio system
Fig. 23 MEDIA main menu: CD selection menu, CD 2 selected.
Insert the CDs in the external CD changer ⇒ page 34.
Starting playback from the CD changer
● Open the Media selection menu and select the CDC
or CD EXT function
button ⇒ page 24.
The first occupied CD slot of the CD changer starts playing the first track. If
the CD changer was already selected, playback of the last CD to be played is
resumed at the last track to be played.
Changing CD
About 5 seconds after having switched to the CD changer, the bottom line of
the screen displays the CD slots occupied and selectable with the corre-
sponding slot number (in Fig. 23: CD1
, CD2 and CD4).
Empty CD slots are displayed by
(slot 3).
The slot of the CD currently being played is underlined on the display (slot
2).
● Press the function button for another selectable CD slot to start playing
that CD.
If the CD is changed, the first track on that CD will always start playing.
Page 42 of 62

41
Phone mode
these messages should be accepted in order for the hands free system to
access the information contained on the mobile and in order to carry out the
complete functions of the system.
● The pairing is complete.
Note
● The visibility of the Bluetooth system in the vehicle is activated for 3 mi-
nutes when the ignition is turned on with the key. After 3 minutes, if you
want to reactivate the visibility you can do so by using the menus on the in-
strument panel ⇒ page 48 or via voice control ⇒ page 43.
● If for any reason you take more than 3 minutes to perform these steps or
more than 30 seconds to enter the PIN, you will have to start the process
over again.
Automatic pairing
When the telephone has been connected and the corresponding user pro-
file created, your telephone will automatically link up with the SEAT tele-
phone system under the following conditions:
● The mobile phone is switched on and the Bluetooth function and visibili-
ty are activated. The mobile phone must be close to the vehicle.
● The vehicle system has Bluetooth visibility switched on (during the 3 mi-
nutes following activation of the contact or after pressing the button “PTT”).
● The automatic connection was accepted during the questions of the first
connection. Operation using the steering wheel buttons
Applies to the model: ALTEA / ALHAMBRA Multi-function steering wheel
Fig. 25 Multifunction steering wheel: buttons on the left and right hand side.
Buttoneffect
Button “Push to talk” or “PTT” button.
Short press: start or cancel the speech control system, in-
terrupt message in process in order to talk promptly, turn
on Bluetooth visible for 3 minutes.
Short press: Confirm telephone menu selection.
/
Short press: Select number/letter. Select an element from
the telephone menu.
/
Short press: Change menu.
/
Short press: Adjust volume of telephone function.
Page 43 of 62

42Phone mode
Buttoneffect
Short press: Answer, Start, End a call.
Long press: Reject a call. During a call, switch between
normal mode and “private” mode
Short press: Returning to the last-opened menu
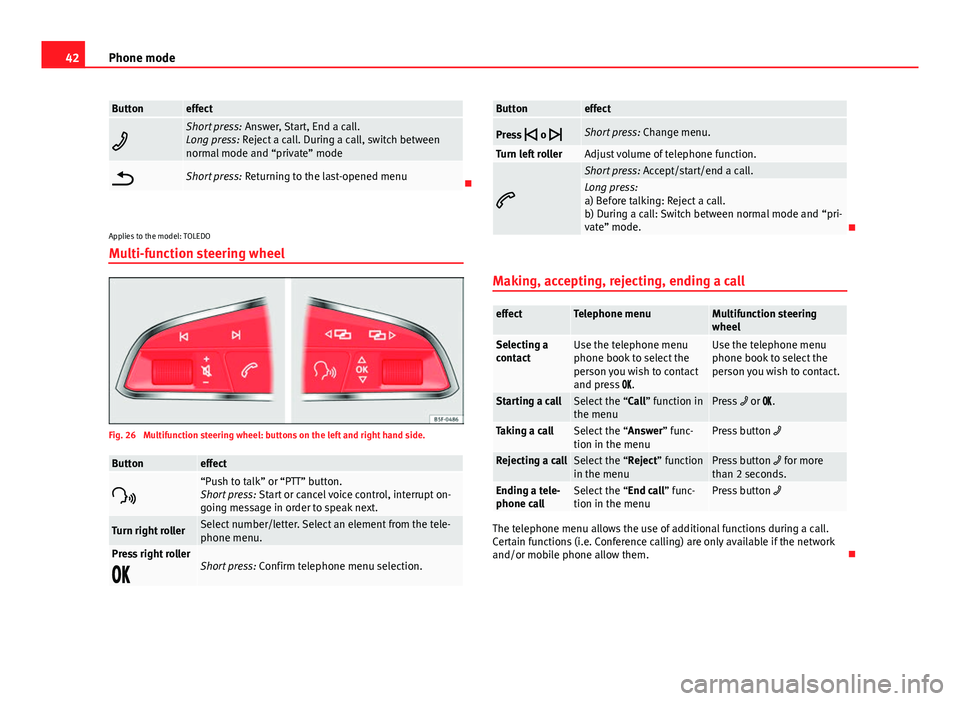
Applies to the model: TOLEDO
Multi-function steering wheel
Fig. 26 Multifunction steering wheel: buttons on the left and right hand side.
Buttoneffect
“Push to talk” or “PTT” button.
Short press: Start or cancel voice control, interrupt on-
going message in order to speak next.
Turn right rollerSelect number/letter. Select an element from the tele-
phone menu.
Press right roller
Short press: Confirm telephone menu selection.
Buttoneffect
Press
o
Short press: Change menu.
Turn left rollerAdjust volume of telephone function.
Short press: Accept/start/end a call.Long press:
a) Before talking: Reject a call.
b) During a call: Switch between normal mode and “pri-
vate” mode.
Making, accepting, rejecting, ending a call
effectTelephone menuMultifunction steering
wheel
Selecting a
contactUse the telephone menu
phone book to select the
person you wish to contact
and press .Use the telephone menu
phone book to select the
person you wish to contact.
Starting a callSelect the “Call” function in
the menuPress or .
Taking a callSelect the “Answer” func-
tion in the menuPress button
Rejecting a callSelect the “Reject” function
in the menuPress button for more
than 2 seconds.
Ending a tele-
phone callSelect the “End call” func-
tion in the menuPress button
The telephone menu allows the use of additional functions during a call.
Certain functions (i.e. Conference calling) are only available if the network
and/or mobile phone allow them.