2014 Seat Leon 5D key
[x] Cancel search: keyPage 9 of 64
Introduction
The infotainment buttons are operated by
pressing them or holding them down
.
Sw it
ching on and off To switch the unit on or off manually, briefly
press the rotary knob
››› Fig. 1 1 .
When you connect the system it will play at
the volume at which it was last set, provided
it does not exceed the maximum permitted
volume ››› page 54.
The u nit
will switch off automatically when
the vehicle key is removed. If you turn the
unit back on after the engine has been
switched off, it will turn off automatically af-
ter approximately 30 minutes (delayed
switch-off). Note
● The unit is linked to the vehicle. It cannot
be used in any other vehicle.
● When the vehicle battery is disconnected,
you must turn ignition on before switching
the unit on again. Adjusting the base volume
FunctionAction
Increase
the vol-
ume.Turn the volume control clockwise or
turn the right thumbwheel roller upwards
on the multifunction steering wheel
››› Booklet Instructions manual .
Lower the
volume.Turn the volume control anticlockwise
or turn the right thumbwheel downwards
on the multifunction steering wheel. The volume modification is shown on the
screen with a bar. During this time the unit
cannot be operated.
It is possible to preset certain volume set-
tings and adjustments
›››
page 54.
Silence the unit
● Turn the volume control anticlockwise
until you see .
● ALTERNATIVELY: Press the MUTE infotain-
ment button. Note
If the basic playback volume of an audio
source has been increased substantially, low-
er the volume before changing to another au-
dio source. Operating the function buttons on-
screen
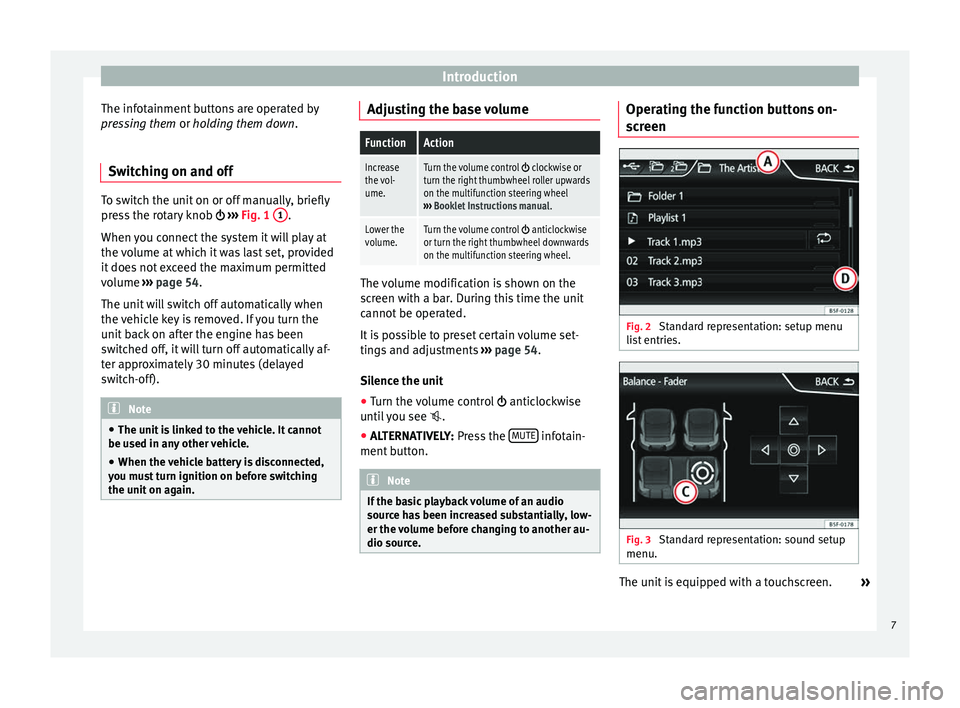
Fig. 2
Standard representation: setup menu
list entries. Fig. 3
Standard representation: sound setup
menu. The unit is equipped with a touchscreen.
»
7
Page 14 of 64
Audio mode
by pressing on the station name for 3 sec-
onds (a dot will appear to the left and right of
the station name).
Digital radio mode (DAB, DAB+ and
DMB audio)*
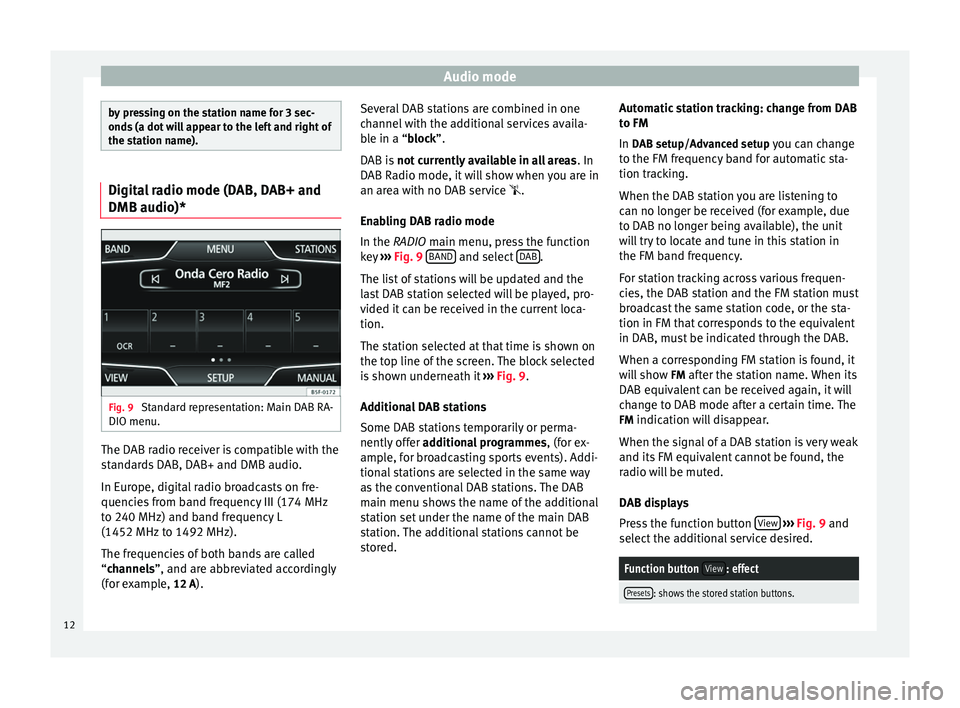
Fig. 9
Standard representation: Main DAB RA-
DIO menu. The DAB radio receiver is compatible with the
standards DAB, DAB+ and DMB audio.
In Europe, digital radio broadcasts on fre-
quencies from band frequency III (174 MHz
to 240 MHz) and band frequency L
(1452 MHz to 1492 MHz).
The frequencies of both bands are called
“
channels
”, and are abbreviated accordingly
(f
or example, 12 A). Several DAB stations are combined in one
channel with the additional services availa-
ble in a “block”.
D
AB is not currently available in all areas . In
DAB Radio mode, it will show when you are in
an area with no DAB service .
Enabling DAB radio mode
In the
RADIO main menu, press the function
key ››› Fig. 9 BAND and select
DAB .
The list of stations will be updated and the
last DAB station selected will be played, pro-
vided it can be received in the current loca-
tion.
The station selected at that time is shown on
the top line of the screen. The block selected
is shown underneath it ››› Fig. 9 .
Ad dition
al DAB stations
Some DAB stations temporarily or perma-
nently offer additional programmes , (for ex-
ample, for broadcasting sports events). Addi-
tional stations are selected in the same way
as the conventional DAB stations. The DAB
main menu shows the name of the additional
station set under the name of the main DAB
station. The additional stations cannot be
stored. Automatic station tracking: change from DAB
to FM
In DAB setup/Advanced setup you can change
to the FM fr
equency band for automatic sta-
tion tracking.
When the DAB station you are listening to
can no longer be received (for example, due
to DAB no longer being available), the unit
will try to locate and tune in this station in
the FM band frequency.
For station tracking across various frequen-
cies, the DAB station and the FM station must
broadcast the same station code, or the sta-
tion in FM that corresponds to the equivalent
in DAB, must be indicated through the DAB.
When a corresponding FM station is found, it
will show FM after the station name. When its
DAB equivalent can be received again, it will
change to DAB mode after a certain time. The
FM indication will disappear.
When the signal of a DAB station is very weak
and its FM equivalent cannot be found, the
radio will be muted.
DAB displays
Press the function button View
››› Fig. 9 and
sel ect
the additional service desired.
Function button View: effect
Presets: shows the stored station buttons.12
Page 16 of 64
Audio mode
A saved station is automatically assigned a
logo if it is available from the radio’s data-
base.
If 2 or more logos are available from the data-
base, there is the option to manually choose
the right one ››› Fig. 11. Note
Not all stations are stored in the database, so
logos cannot always be assigned automati-
cally. Selecting, adjusting and storing a
station
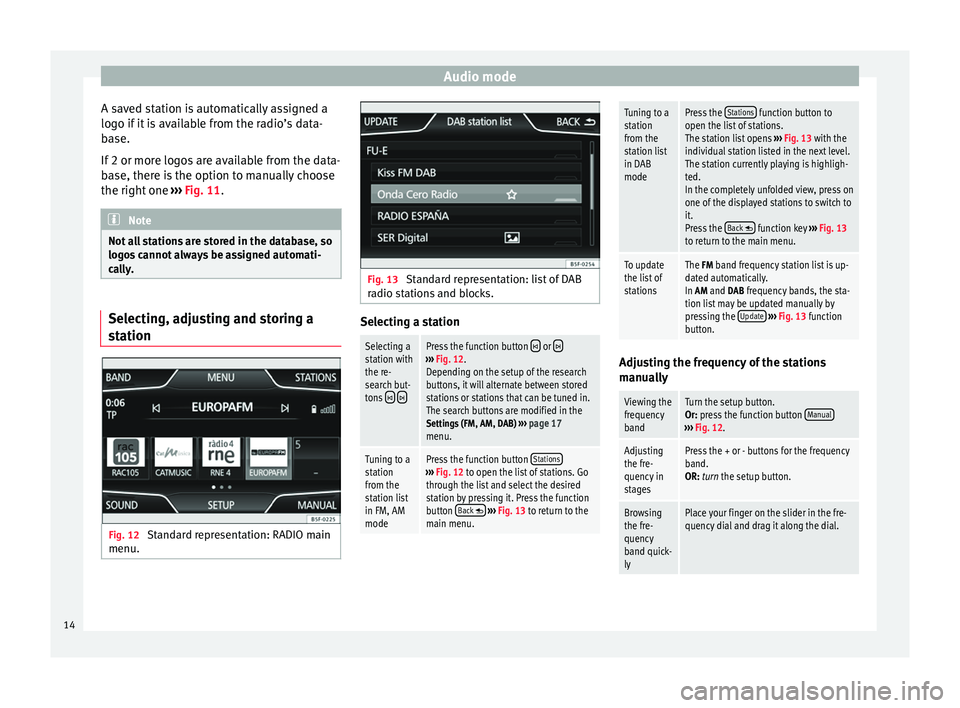
Fig. 12
Standard representation: RADIO main
menu. Fig. 13
Standard representation: list of DAB
radio stations and blocks. Selecting a stationSelecting a
station with
the re-
search but-
tons
Press the function button or ›››
Fig. 12.
Depending on the setup of the research
buttons, it will alternate between stored
stations or stations that can be tuned in.
The search buttons are modified in the
Settings (FM, AM, DAB) ››› page 17
menu.
Tuning to a
station
from the
station list
in FM, AM
modePress the function button Stations›››
Fig. 12 to open the list of stations. Go
through the list and select the desired
station by pressing it. Press the function
button Back
››› Fig. 13 to return to the
main menu.
Tuning to a
station
from the
station list
in DAB
modePress the Stations function button to
open the list of stations.
The station list opens ››› Fig. 13 with the
individual station listed in the next level.
The station currently playing is highligh-
ted.
In the completely unfolded view, press on
one of the displayed stations to switch to
it.
Press the Back
function key
››› Fig. 13
to return to the main menu.
To update
the list of
stationsThe FM band frequency station list is up-
dated automatically.
In AM and DAB frequency bands, the sta-
tion list may be updated manually by
pressing the Update
››› Fig. 13 function
button. Adjusting the frequency of the stations
manually
Viewing the
frequency
bandTurn the setup button.
Or: press the function button
Manual
›››
Fig. 12.
Adjusting
the fre-
quency in
stagesPress the + or - buttons for the frequency
band.
OR: turn the setup button.
Browsing
the fre-
quency
band quick-
lyPlace your finger on the slider in the fre-
quency dial and drag it along the dial. 14
Page 29 of 64
Audio mode
Media players with the AVRCP Bluetooth pro-
file, the playback of the Bluetooth audio
source can be started and stopped automati-
cally when changing to Bluetooth audio
mode, or to another audio source. In addi-
tion, it is possible to view or change the track
via the infotainment system. Note
Due to the large number of different Blue-
tooth audio sources available, it is not possi-
ble to guarantee fault-free operation of all
functions described here. Note
● Deactivate the service and warning sounds
of a connected Bluetooth audio source (for
example, the key tones of the mobile phone)
to avoid interference noise and anomalies in
the operation.
● Depending on the external player connec-
ted, the response time of the system can
vary.
● To ensure your BT player works correctly,
check the compatibility lists first. Changing tracks in the main menu
MEDIA
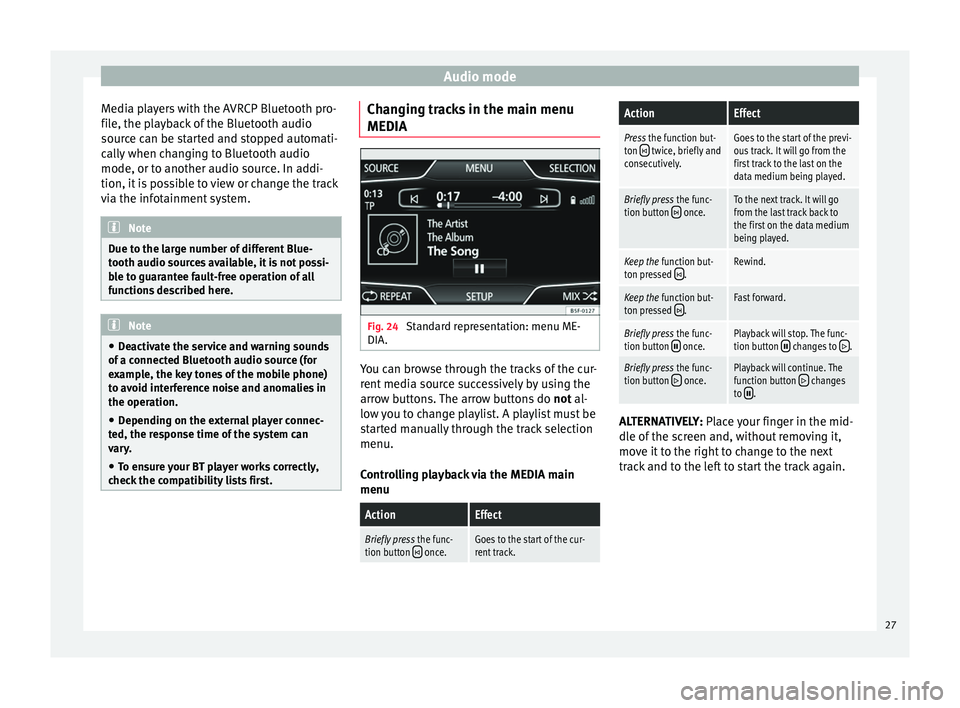
Fig. 24
Standard representation: menu ME-
DIA. You can browse through the tracks of the cur-
rent media source successively by using the
arrow buttons. The arrow buttons do
not al-
lo w
you to change playlist. A playlist must be
started manually through the track selection
menu.
Controlling playback via the MEDIA main
menu
ActionEffect
Briefly press the func-
tion button once.Goes to the start of the cur-
rent track.
ActionEffect
Press the function but-
ton twice, briefly and
consecutively.Goes to the start of the previ-
ous track. It will go from the
first track to the last on the
data medium being played.
Briefly press the func-
tion button once.To the next track. It will go
from the last track back to
the first on the data medium
being played.
Keep the function but-
ton pressed .Rewind.
Keep the function but-
ton pressed .Fast forward.
Briefly press the func-
tion button once.Playback will stop. The func-
tion button changes to .
Briefly press the func-
tion button once.Playback will continue. The
function button changes
to . ALTERNATIVELY:
Place your finger in the mid-
dl e of
the screen and, without removing it,
move it to the right to change to the next
track and to the left to start the track again.
27
Page 44 of 64
Telephone management (PHONE)
Note
In areas with special requirements and where
the use of mobile phones is prohibited, you
must keep the mobile phone and its prein-
stallation switched off at all times. The radia-
tion emitted by mobile phones when switch-
ed on can cause interference in sensitive
technical and medical equipment, which
could damage this equipment or cause it to
stop working properly. Linking and connecting your mobile
phone to the infotainment system
To operate a mobile phone through the info-
tainment system, you need to link both devi-
ces
one time only .
F or
your safety, we recommend you make the
link when the vehicle is stationary. In some
countries you cannot
make the link with the
vehicle running.
You must guarantee the following setup in
the mobile phone and the infotainment sys-
tem:
● The
Bluetooth ®
function must be active
and visible on the mobile phone and info-
tainment system, respectively.
● The keypad lock of the mobile phone must
be disconnected.
● The
notification and key tones of your mo-
bile phone must be disconnected. In some countries, after switching the igni-
tion on, the
Bluetooth
®
function of the info-
tainment system should be activated or re-
main visible for around 3 minutes.
During the linking process you must enter da-
ta using your mobile phone's keypad. To do
so, you must have your mobile phone to
hand.
Once the link has been made, the schedule
and call lists stored in your mobile phone will
be loaded. The duration of the loading proc-
ess depends on the amount of data stored on
your mobile phone. When the loading proc-
ess is complete, the data will be available to
the infotainment system.
Starting the link from the system
● Make sure the mobile device is active and
visible.
● Press the PHONE unit button.
● Press the Find phone function button.
ALTERNATIVELY:
● Press the PHONE unit button.
● Press the Setup function button.
● Press the function button Select phone and
then Find phone .
ALTERNATIVELY:
● Press the PHONE unit button.
● Press the Setup function button.●
Press the Bluetooth setup function button.
● Press the Find devices function button.
ALTERNATIVELY:
● Make the connection from the mobile de-
vice itself (ensure that the visibility of the in-
fotainment system in the menu Phone setup >
BT setup is active).
The search process can take up to 1 minute.
On the screen the system will dynamically
update the names of the bluetooth devices
found.
● Select the infotainment system or the mo-
bile phone to which you want to connect from
the list of Bluetooth devices found.
The infotainment system and the mobile
phone will now be connected to each other.
In certain circumstances, it is possible that to
finish the connection between the two devi-
ces, you must enter additional data in the
mobile phone and infotainment system.
● If necessary, confirm the link to the mobile
phone.
● Use your mobile phone to enter and con-
firm your PIN code, as indicated in the dis-
play of the infotainment system.
● ALTERNATIVELY: Compare the PIN code
sho wn in the di
splay of the infotainment sys-
tem with the PIN code that appears on the
42
Page 49 of 64
Telephone management (PHONE)
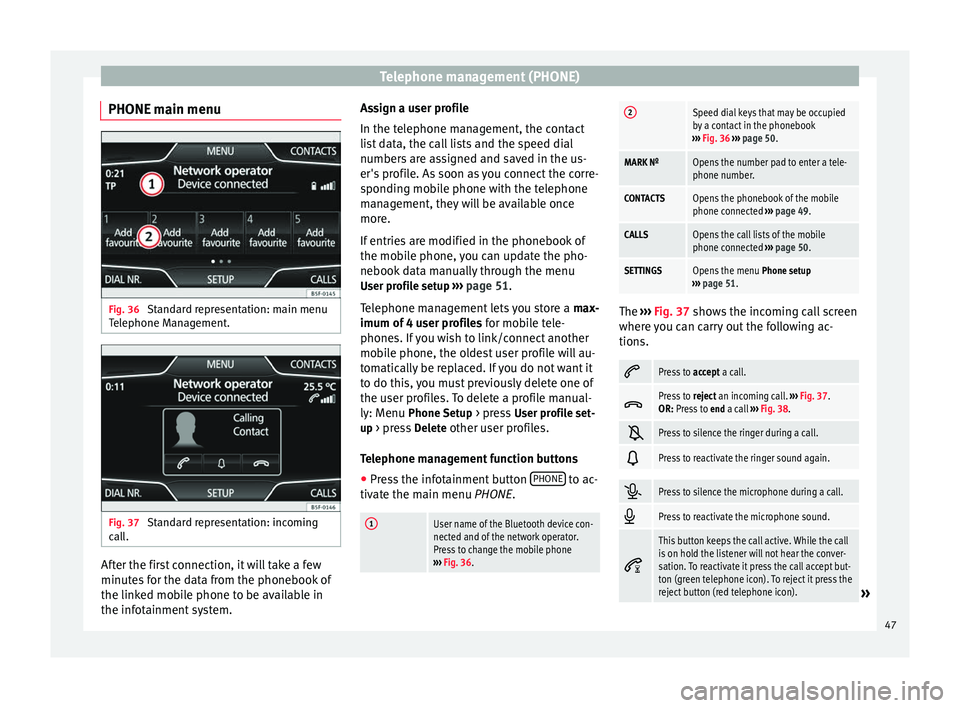
PHONE main menu Fig. 36
Standard representation: main menu
Telephone Management. Fig. 37
Standard representation: incoming
call. After the first connection, it will take a few
minutes for the data from the phonebook of
the linked mobile phone to be available in
the infotainment system. Assign a user profile
In the telephone management, the contact
list data, the call lists and the speed dial
numbers are assigned and saved in the us-
er's profile. As soon as you connect the corre-
sponding mobile phone with the telephone
management, they will be available once
more.
If entries are modified in the phonebook of
the mobile phone, you can update the pho-
nebook data manually through the menu
User profile setup ››› page 51 .
T el
ephone management lets you store a max-
imum of 4 user profiles for mobile tele-
phones. If you wish to link/connect another
mobile phone, the oldest user profile will au-
tomatically be replaced. If you do not want it
to do this, you must previously delete one of
the user profiles. To delete a profile manual-
ly: Menu Phone Setup > press User profile set-
up > press Delete other user profiles.
Telephone management function buttons
● Press the infotainment button PHONE to ac-
tivate the main menu PHONE.
1User name of the Bluetooth device con-
nected and of the network operator.
Press to change the mobile phone
››› Fig. 36.
2Speed dial keys that may be occupied
by a contact in the phonebook
››› Fig. 36 ››› page 50.
MARK NºOpens the number pad to enter a tele-
phone number.
CONTACTSOpens the phonebook of the mobile
phone connected ››› page 49.
CALLSOpens the call lists of the mobile
phone connected ››› page 50.
SETTINGSOpens the menu Phone setup
››› page 51. The
››› Fig. 37 shows the incoming call screen
wher e
you can carry out the following ac-
tions.
Press to
accept a call.
Press to
reject an incoming call. ››› Fig. 37.
OR: Press to end a call ››› Fig. 38.
Press to silence the ringer during a call.
Press to reactivate the ringer sound again.
Press to silence the microphone during a call.
Press to reactivate the microphone sound.
This button keeps the call active. While the call
is on hold the listener will not hear the conver-
sation. To reactivate it press the call accept but-
ton (green telephone icon). To reject it press the
reject button (red telephone icon).
»
47
Page 50 of 64
Telephone management (PHONE)
Battery level of the mobile phone connected.
Signal strength of the mobile phone coverage.
Private mode: To activate private mode, go to
the Menu
Setup and deactivate the check-
box: Hands-free (during an active call). With
the private mode activated the active audio
and microphone become that of the mobile
phone connected to the hands-free. When it
is deactivated, the audio reverts to the car-kit
of the vehicle. This configuration is only ap-
plicable to the active call, so for subsequent
calls, the audio will revert by default to the
car-kit of the vehicle.
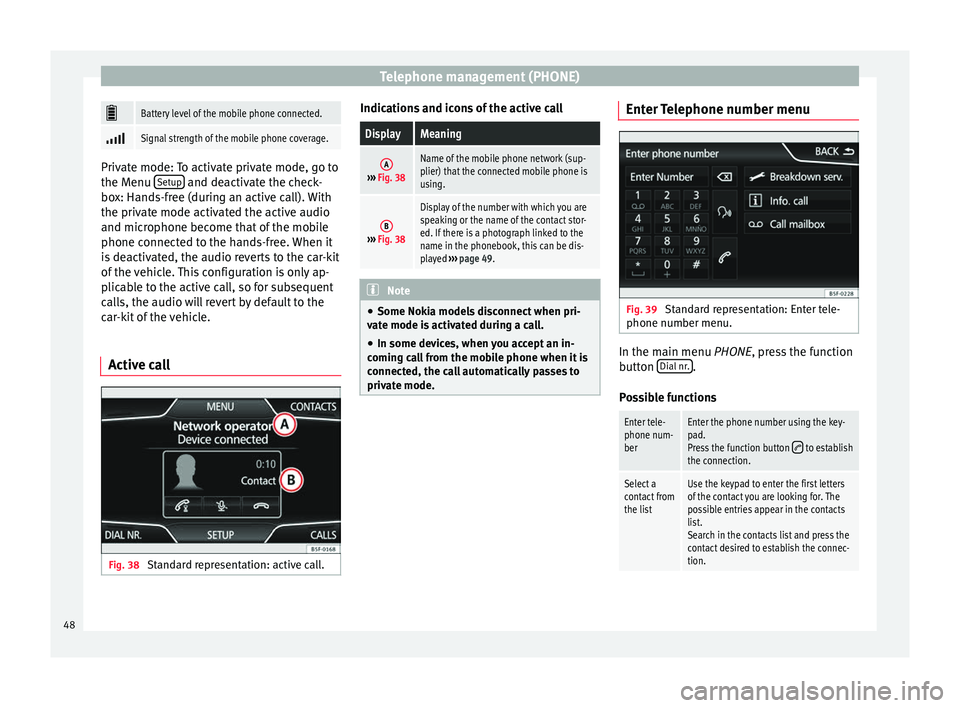
Active call Fig. 38
Standard representation: active call. Indications and icons of the active callDisplayMeaning
A›››
Fig. 38
Name of the mobile phone network (sup-
plier) that the connected mobile phone is
using.
B››› Fig. 38
Display of the number with which you are
speaking or the name of the contact stor-
ed. If there is a photograph linked to the
name in the phonebook, this can be dis-
played ››› page 49. Note
● Some Nokia models disconnect when pri-
vate mode is activated during a call.
● In some devices, when you accept an in-
coming call from the mobile phone when it is
connected, the call automatically passes to
private mode. Enter Telephone number menu
Fig. 39
Standard representation: Enter tele-
phone number menu. In the main menu
PHONE
, press the function
b
utton Dial nr. .
Possible functions
Enter tele-
phone num-
berEnter the phone number using the key-
pad.
Press the function button
to establish
the connection.
Select a
contact from
the listUse the keypad to enter the first letters
of the contact you are looking for. The
possible entries appear in the contacts
list.
Search in the contacts list and press the
contact desired to establish the connec-
tion. 48
Page 52 of 64
Telephone management (PHONE)
Note
If you edit the number before calling, this will
only be used for the call and will not be stor-
ed in the phonebook. Call lists menu
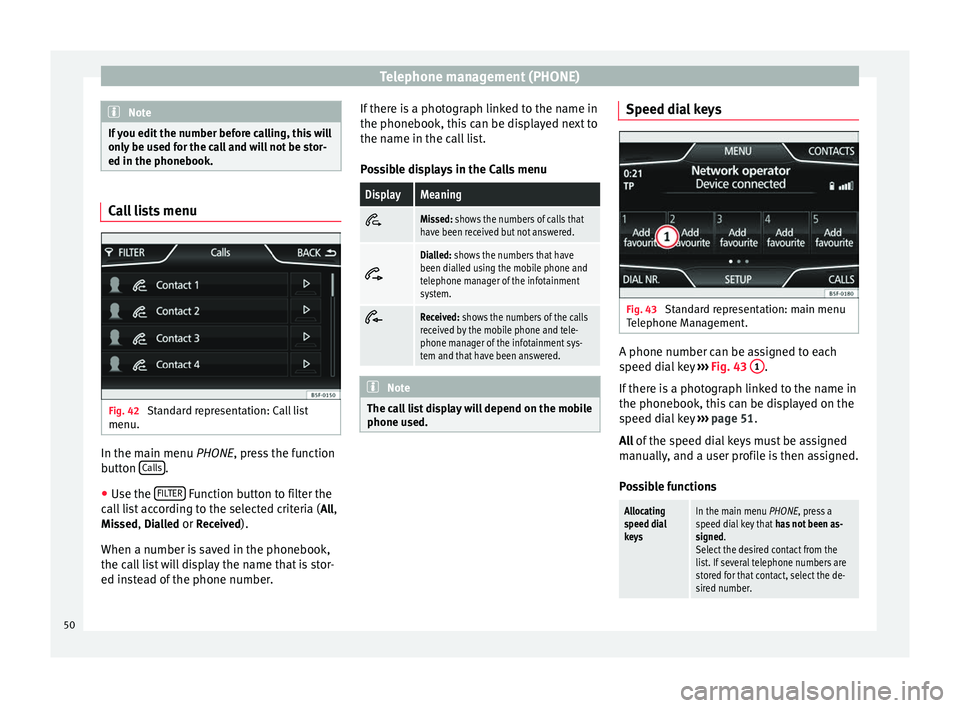
Fig. 42
Standard representation: Call list
menu. In the main menu
PHONE
, press the function
b
utton Calls .
● Use the FILTER Function button to filter the
call list according to the selected criteria ( All
,
Missed , Dialled
or Received
).
When a number is saved in the phonebook,
the call list will display the name that is stor-
ed instead of the phone number. If there is a photograph linked to the name in
the phonebook, this can be displayed next to
the name in the call list.
Possible displays in the Calls menu
DisplayMeaningMissed: shows the numbers of calls that
have been received but not answered.
Dialled: shows the numbers that have
been dialled using the mobile phone and
telephone manager of the infotainment
system.
Received: shows the numbers of the calls
received by the mobile phone and tele-
phone manager of the infotainment sys-
tem and that have been answered.
Note
The call list display will depend on the mobile
phone used. Speed dial keys
Fig. 43
Standard representation: main menu
Telephone Management. A phone number can be assigned to each
speed dial key
›››
Fig. 43 1 .
If there is a photograph linked to the name in
the phonebook, this can be displayed on the
speed dial key ›››
page 51.
All of the speed dial keys must be assigned
m anual
ly, and a user profile is then assigned.
Possible functions
Allocating
speed dial
keysIn the main menu PHONE, press a
speed dial key that has not been as-
signed.
Select the desired contact from the
list. If several telephone numbers are
stored for that contact, select the de-
sired number. 50